How to start a travel blog in 2026: A step-by-step guide for beginners
Mar 11, 2026
/
Simon L. & Marco C.
/
14 min Read
A travel blog is a website where you share trip experiences, destination guides, and travel tips with an online audience.
It can be anything from a personal journal documenting your backpacking adventures to a polished resource helping readers plan their dream vacations.
Starting a travel blog requires choosing a niche, registering a memorable domain name, and selecting a platform like WordPress or Hostinger Website Builder with reliable web hosting.
Key steps include designing a user-friendly layout with consistent branding, creating high-quality content optimized for search engines, and promoting your posts on social media to build an audience.
From there, tracking your performance with analytics tools and monetizing through affiliate links, display ads, and sponsored content will help you turn your blog into a profitable business.
1. Research your niche
Like any successful online project, the first step when you start a blog is narrowing down your focus.
With so many travel blogs out there, choosing a clear niche gives your site a distinct identity, helps it stand out, and makes it easier to monetize your travel experience. A niche also makes it easier to connect with a specific audience who shares your interests.
Here are some popular travel blogging niches to consider:
- Budget traveling. Write about affordable destinations, cheap flights, hostel reviews, and money-saving hacks for travelers on a tight budget.
- Luxury traveling. Review high-end resorts, exclusive experiences, and premium travel gear for readers who want the finer things.
- Family-friendly traveling. Recommend kid-friendly itineraries, family resorts, and tips for stress-free travel with little ones.
- Solo traveling. Share safety advice, tips for meeting people on the road, and destination guides tailored to independent explorers.
- Adventure traveling. Cover hiking trails, extreme sports, outdoor gear, and off-the-beaten-path destinations.
After choosing a niche, research your target audience to understand their pain points and goals. This way, you can create content that attracts visitors with a common interest and build a loyal reader base.
If you’re struggling to narrow things down, learning how to choose a blog niche that matches your interests and market demand can make the decision much easier.
Expert Tip
If you aren’t familiar with the topic, research first and become an expert. Since Google follows the Experience, Expertise, Authoritativeness, and Trustworthiness (EEAT) guideline, expert content is more likely to do better. This is because experts are less likely to produce false information.
Neil Patel
Digital Marketing Expert and Entrepreneur
To find content ideas that appeal to your niche audience, follow these tips:
- Browse social media. Observe what travel brands the audience follows and which posts receive the most engagement.
- Conduct competitive research. Learn from other professional travel bloggers within the same niche. Read their articles and analyze the areas you can improve.
- Read comments. Comments on top travel blogs usually include community feedback, which is great for generating ideas.
- Look up statistics. Fact-driven data help travel bloggers find relevant topics, support claims, and boost content authority.
- Follow industry trends. Keep up with the latest travel news to generate fresh content ideas.
2. Come up with a memorable blog name
When someone visits a brand-new blog, one of the first things they notice is the name. A strong blog name establishes a positive first impression, sparks curiosity, and tells visitors what your site is about.
For example, if the blog’s name is Visit Maldives, people will immediately expect travel tips and recommendations about the exotic island.
Here are some tips for choosing a great name:
- Brainstorm relevant words. List words related to your travel blogging niche. For instance, family-friendly travel blogs might use terms like “kids,” “babies,” “parents,” and “fun.”
- Think about the target audience. Consider the language and style that suit the target audience. For example, if the blog’s tone is more professional than casual, choose a name that reflects that.
- Get creative. Experiment with unique word combinations and styles. Casual blogs are likely to inject more personality and wit into their name.
- Make it simple and memorable. Avoid complicated words, phrases, characters, and numbers. Instead, come up with a catchy blog name that people can easily remember.
- Ask for second opinions. Pitch several travel blog name options to your target audience and ask them to choose their favorite.
When brainstorming your blog title, think about the domain name at the same time. While blog names can be anything, domain addresses are unique.
There can only be one awesomesolotrips.com, so run a quick domain name search to check if your preferred name is still available.
Domain Name Checker
Instantly check domain name availability.
After finding a suitable domain, register it through an ICANN-accredited registrar like Hostinger. Domain prices vary depending on the extension, but expect to pay around $10–20/year on average.
You can save money by choosing newer extensions like .blog, which starts at just $4.59 for the first year.
Even better, many Hostinger hosting plans include a free domain name and WHOIS privacy protection for the first year.

3. Pick a blogging platform
Now that you have your niche and domain sorted, it’s time to pick the right platform to build on.
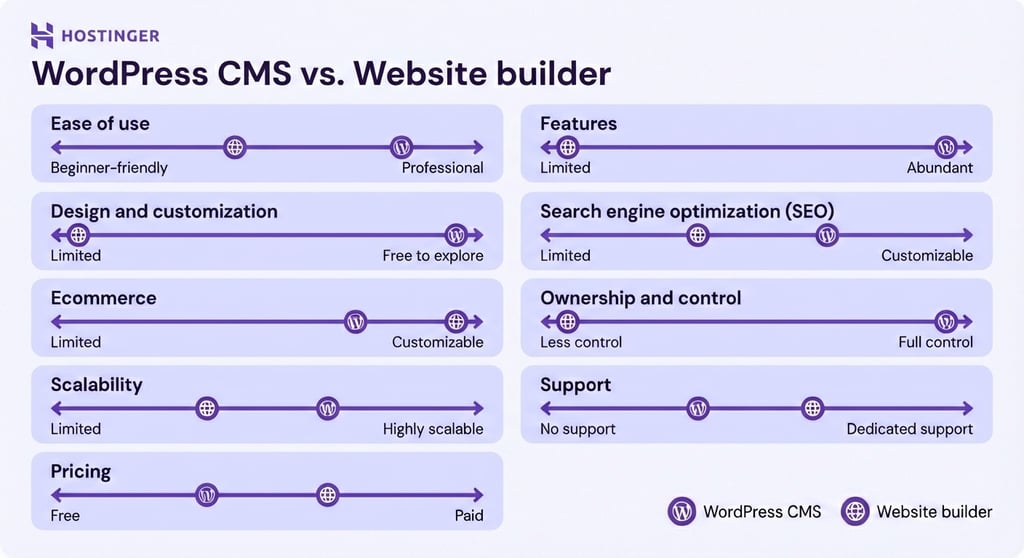
There are two main categories: content management systems (CMS) and website builders. Both let you create a site without coding, but they differ in flexibility, learning curve, and features.
Comparing the best blogging platforms side by side is the fastest way to figure out which type suits you.
WordPress
WordPress is an open-source platform with a massive ecosystem of themes, plugins, and community resources, which means you can customize your blog in practically any way you want.
There are over 60,000 free plugins in the official directory, covering everything from SEO and security to social sharing and performance optimization.
You also get access to thousands of free and premium themes, so finding a look that fits your travel brand is easy. And because WordPress is self-hosted, you own your content and can migrate your site between hosting providers whenever you like.
The trade-off is that WordPress has a steeper learning curve compared to a website builder. You’ll need to manage your own hosting, keep plugins updated, and handle security.
The platform itself is free to install, but you’ll need to purchase web hosting, a domain name, and an SSL certificate separately. Premium themes and plugins can add to the cost if you need advanced features.

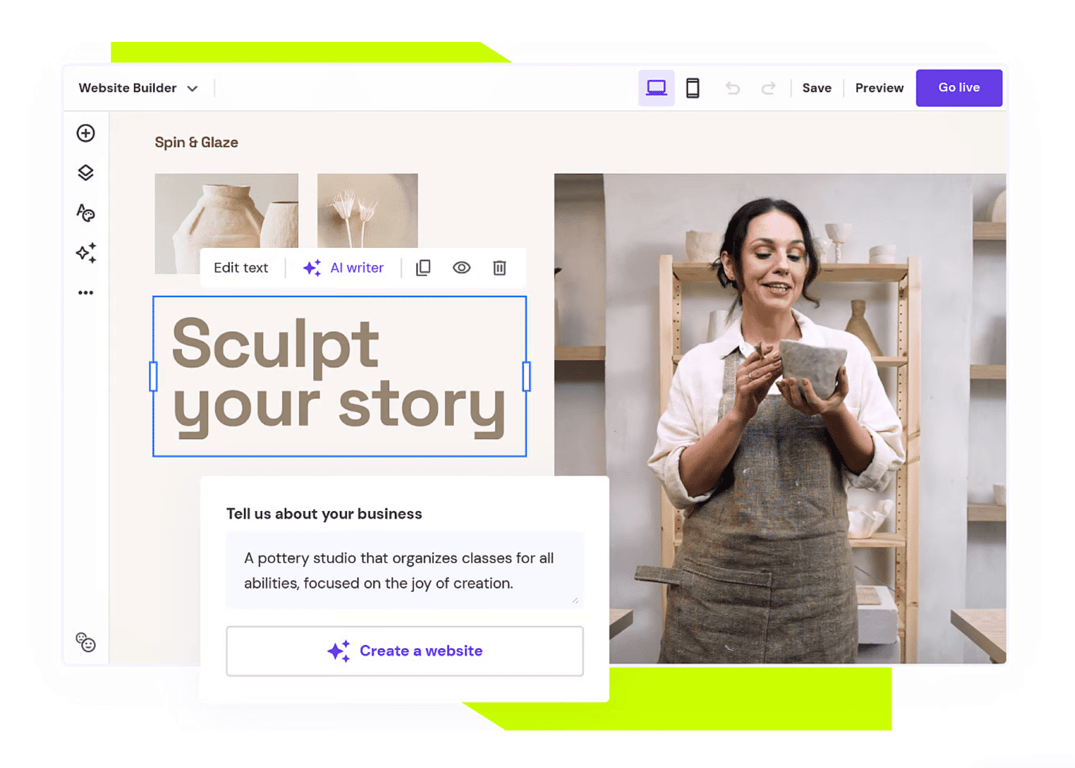
Hostinger Website Builder
If you want a more streamlined experience, Hostinger Website Builder is worth a look. It comes with an intuitive drag-and-drop editor and AI-powered tools that let you generate your blog’s initial design in minutes. You can then customize every element to match your brand.
A standout feature is the built-in AI Writer, which helps you draft and publish content faster. The platform also includes a pre-installed SEO toolkit, performance analytics, social media integration, and built-in ecommerce features for higher-tier plans.
Web hosting is included with every plan, so you don’t need to purchase it separately. You can start with a basic plan and upgrade to a higher-tier builder plan with more features and hosting resources as your traffic grows.

In short, both platforms are great options. If you want hands-on control and maximum flexibility, go with WordPress. If you prefer a faster, more user-friendly setup with AI tools to help you along, choose Hostinger Website Builder.
4. Customize your travel blog
An attractive and easy-to-navigate blog makes a strong first impression and keeps visitors reading. That’s why you need to establish your visual identity, pick the right theme, create a logo, and extend your site’s functionality.
Establish your branding
Before diving into design, take time to build a brand for your blog. Start by understanding your target audience.
If your niche is budget travel, for example, your readers are likely aspiring backpackers looking for affordable tips. Define your blog’s goals and values based on that audience, then make sure every element on your site reflects those values, from color schemes and fonts to your writing tone and imagery.
Use compelling narratives so your brand resonates with readers. Tell stories about why you started the blog, the obstacles you’ve overcome, and the adventures that shaped your perspective.
Be authentic and offer travel tips based on personal experience rather than rehashing what everyone else is saying.
Pick a theme for your travel blog
Your theme controls the overall look and layout of your blog. WordPress offers thousands of options through its official theme library and third-party marketplaces.
When choosing a theme, look for responsive design, regular security updates, compatibility with the WordPress block editor, high-quality code for fast loading, and customization options so you can make the design your own.
Free themes work well for most new blogs, but premium themes often offer more features, frequent updates, and dedicated support. You can browse our recommended best WordPress blog themes to find one that matches your travel niche.
To install a theme, open the WordPress dashboard and go to Appearance → Themes. Select Add New and browse the library. Once you find one you like, click Install and Activate.
You can further customize it using the Gutenberg block editor or page builders like WPBakery and SiteOrigin.
Hostinger Website Builder users can choose from over 100 fully customizable, mobile-responsive templates. Or, you can just describe the website you want, and AI will generate a custom layout for you, which you can then tweak using the drag-and-drop editor.
Create a logo
A logo is the visual representation of your travel blog. It communicates your brand’s personality and makes your site more recognizable. Before creating one, think about what message it should convey and how it ties into your overall branding.
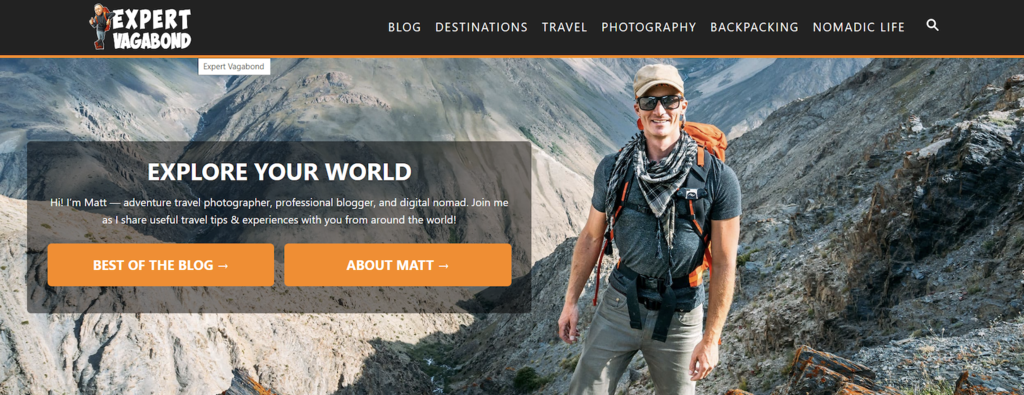
For inspiration, look at successful travel blogs. Expert Vagabond uses a personal illustration, Hand Luggage Only has a simple handwritten wordmark, and Adventurous Kate combines a script-style font with an elegant all-caps one for a fun yet bold feel.
If you’re comfortable with graphic design, create sketches and then digitize your favorite using software like Photoshop. For a quicker option, Hostinger’s AI logo maker can generate a unique logo in minutes.
You could also hire a professional designer through platforms like Upwork or 99designs if you want something fully custom.
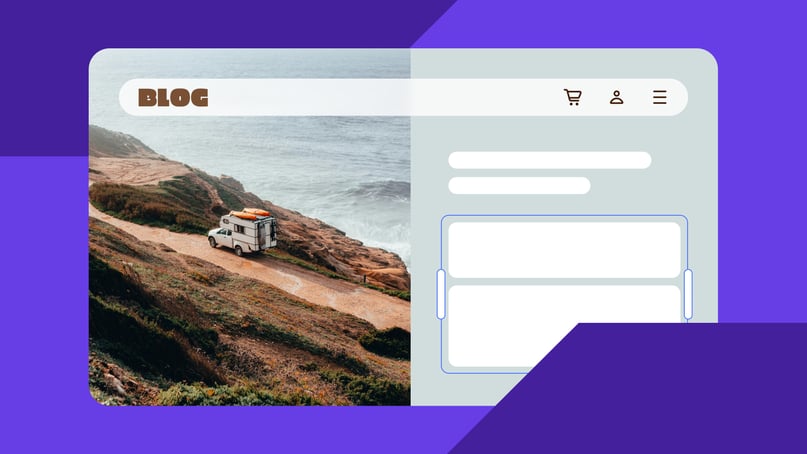
Design your travel blog
A unique reading experience goes a long way. While great content matters most, design shapes how people engage with it.
Make sure your travel blog’s design aligns with the branding you’ve established: playful blogs might use bright colors and sans serif fonts, while luxury travel sites lean toward muted palettes and elegant typography.
Pay special attention to navigation. Websites with confusing menus frustrate visitors and make it harder for them to explore your content. Planning your page structure with a sitemap before you start building helps ensure a smooth user flow from day one.
For inspiration, check out some well-designed travel blogs:
- 12hrs. Executes its concept with intuitive navigation and a unique layout. The “12hrs” series uses full-page photos, large headings, and slideshows to create an immersive reading experience.
- Salt in our Hair. A great example of putting user-friendliness first, with destinations categorized by continent and a dynamic look that uses muted colors and playful fonts.
- Anywhere We Roam. Simple yet effective, with large striking headers and plenty of white space that elevates the text and images.
Install the necessary plugins
Plugins let you add extra features to your WordPress blog without any coding. With over 60,000 plugins in the official library, there’s one for practically every need.
To install a plugin, go to Plugins → Add New in your WordPress dashboard and search for what you need.
For a travel blog, you’ll want to choose the best WordPress plugins to cover a few key areas. For SEO, a plugin like Yoast SEO helps you optimize your content with keyword analysis, meta descriptions, and readability scoring.
For analytics, a Google Analytics integration plugin brings visitor data right into your dashboard. Security is important too, so consider a plugin that provides firewall protection, malware scanning, and two-factor authentication.
Since travel blogs tend to be image-heavy, an image optimization plugin will compress and lazy-load your photos to keep your site fast. You might also want a social media scheduling plugin to automatically share your posts across platforms, and a spam filter for your comments section.
Keep in mind that installing too many plugins can slow down your site, so choose carefully and only keep the ones you truly need.
Hostinger Website Builder users don’t need plugins. The platform comes with built-in SEO tools, performance analytics, social media integration, and security features right out of the box.
5. Set up the pages
Every travel blog needs a few core pages to give visitors a clear picture of who you are and what you’re about:
- Homepage. This is your blog’s front door. It should immediately tell visitors what your niche is and invite them to explore.
- About page. Describe the blog’s mission, share your story, and show your personality. Adding a photo of yourself helps build a personal connection with readers.
- Contact page. Make it easy for brands, tourism boards, and fellow travelers to reach out for partnerships and collaborations.
- Blog page. This is where your travel guides, reviews, and tips live. Set it up with a query loop or feed so new posts appear automatically.
Many travel blogs also add custom category pages to help readers navigate. For example, Expert Vagabond has sections like “Destinations,” “Travel,” and “Nomadic Life” that link to other articles within the same category.
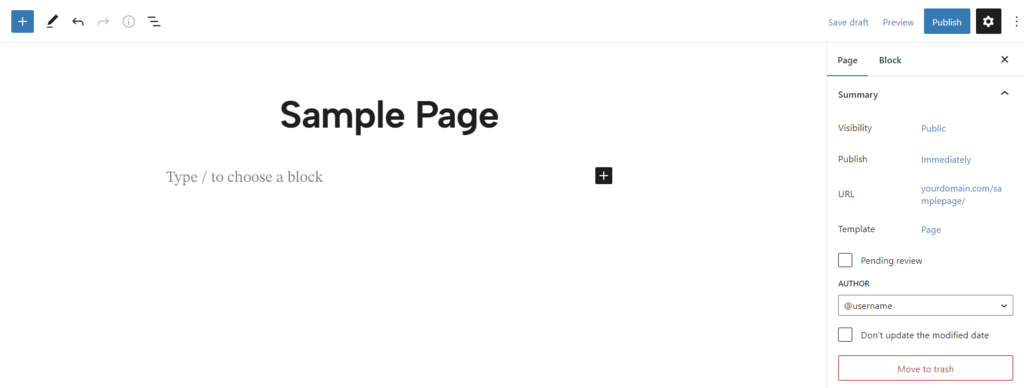
To create a page in WordPress, go to Pages → Add New in the dashboard. Add your title and content using the block editor, set the URL slug, and hit Publish.
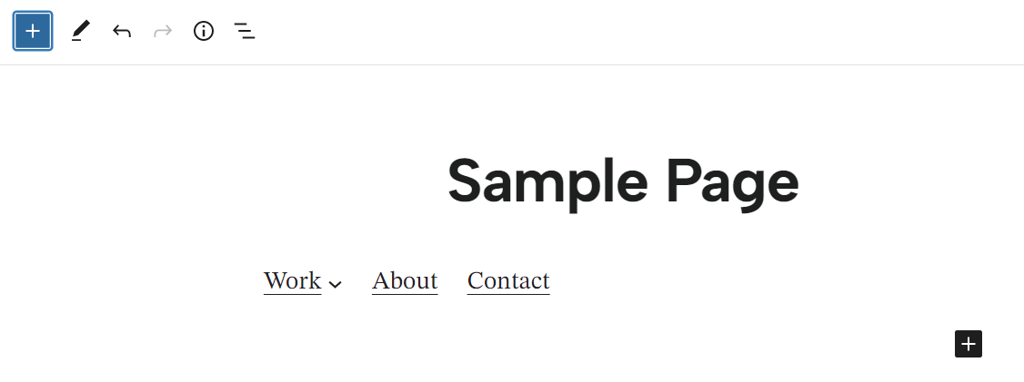
To add pages to your navigation menu, go to Appearance → Editor and use the Navigation Block.
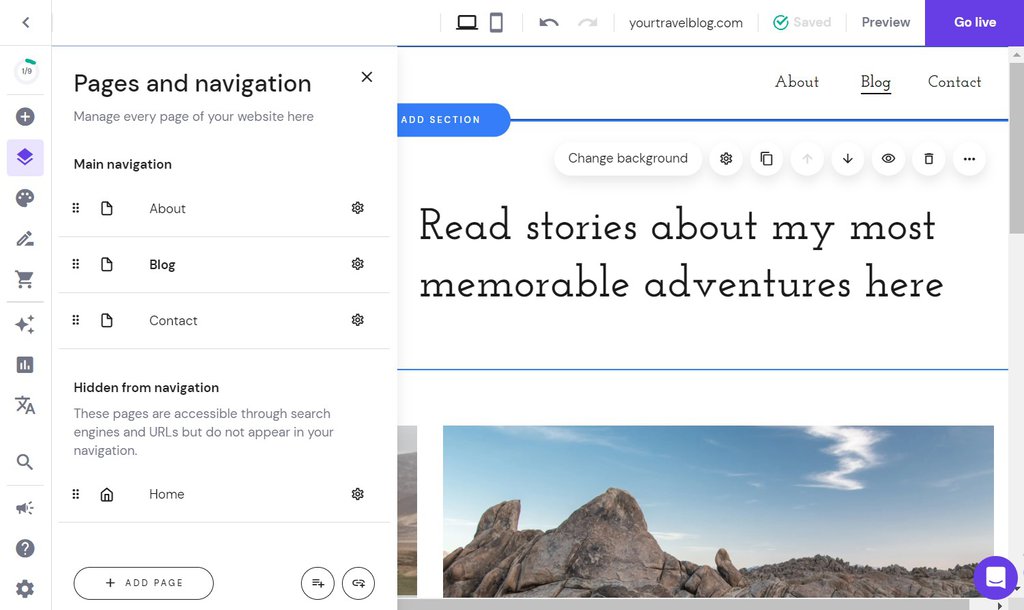
Adding new pages with Hostinger Website Builder is even simpler. From the editing interface, head to Pages and navigation → Add Page, choose a pre-made template, and customize it to your liking. Pages automatically appear in your site’s navigation menu.
6. Write your first blog posts
With your site set up, it’s time to start creating the content that will attract readers. Let’s walk through choosing topics, writing quality posts, and setting up a publishing schedule.
Determine the blog topic
Before writing, select topics that are relevant to your target audience. A good starting point is keyword research using tools like Ahrefs, Answer The Public, or Keyword Surfer.
Enter your travel niche into the tool, and you’ll get a list of what people are actively searching for.
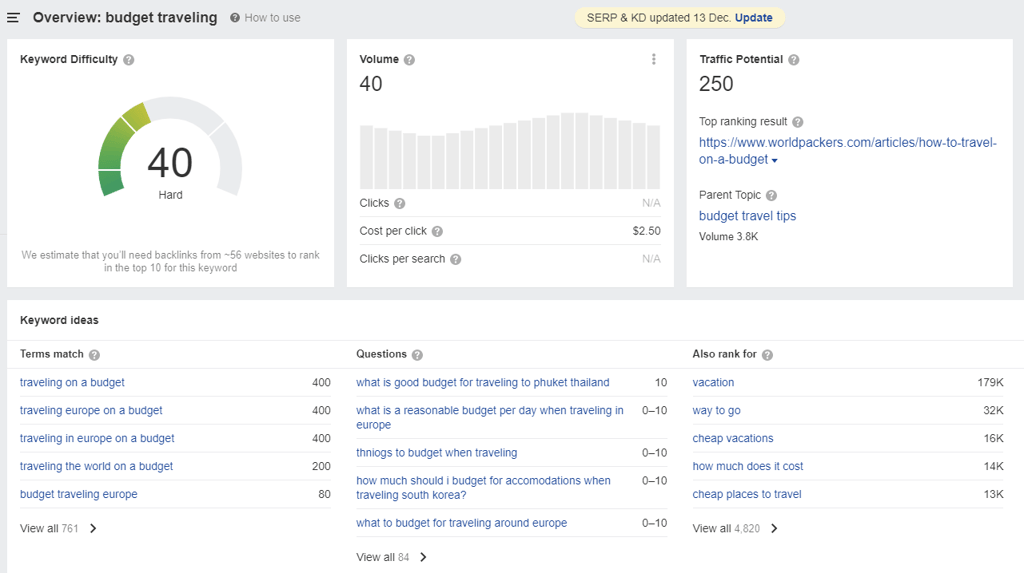
When starting out, targeting keywords with lower competition gives your new blog a much better chance of ranking.
It’s easier to show up on page one for “best budget hotels in Hawaii” than just “best hotels.” These specific phrases also tend to attract more qualified readers who are looking for exactly what you’re offering.
Write high-quality content
There are several types of content that work well for travel blogs: destination guides with practical tips, recommendation lists (best restaurants, accommodation, gear), in-depth reviews of places you’ve visited, and monetization tips for other aspiring travel bloggers.
To write a blog post that stands out, start with a clear outline to organize your structure, then optimize for search engines by answering the reader’s search intent and including relevant keywords.
Applying solid WordPress SEO best practices from the start will save you from having to retrofit your content later. Use visual elements like photos and videos to break up the text, and always review and edit your article before publishing.
If you’re on a Hostinger Business or Cloud hosting plan with WordPress, you can use the AI content creator to generate travel blog post drafts.
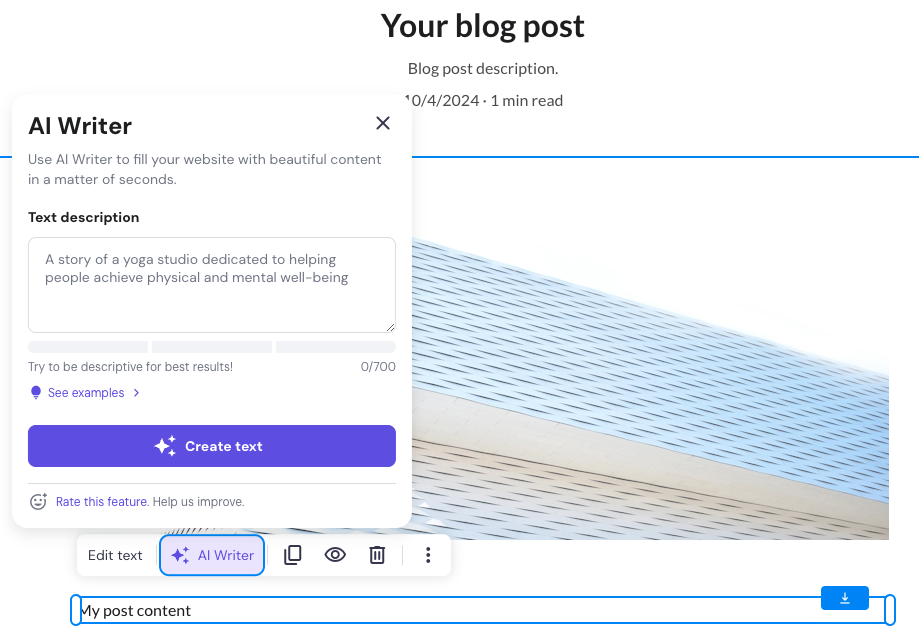
Hostinger Website Builder also has a built-in AI Writer accessible from the blog post editor.
When starting a travel blog, don’t stress too much about perfection. The most important thing is to publish consistently. Your writing, expertise, and style will improve naturally with every post you put out.
Expert Tip
Let’s say you’re starting off in a space and you’re not an expert. You can talk about your journey, what you feel, what you like and don’t like, and people can follow you on your journey. As they’re following you, there’s that emotional connection, which is great. But on top of that, you’re learning, and you’re getting better yourself. And eventually, you will become an expert.
Neil Patel
Digital Marketing Expert and Entrepreneur
Set up scheduled post publishing
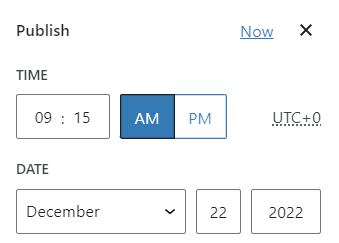
Consistency is key for building an audience. WordPress lets you schedule posts directly from the block editor: click the gear icon, go to the Post tab, and set your preferred time and date next to Publish.
For more advanced scheduling (like bulk scheduling or missed-post protection), plugins like SchedulePress are worth looking into.
Hostinger Website Builder users can schedule posts by opening the target blog page, clicking Change post title to access Post settings, and toggling on Schedule post under General.
7. Promote your travel blog
Publishing great content is just the beginning. You also need to actively drive traffic to your site. Here are some of the most effective ways to grow your readership:
- SEO. Optimizing your posts for Google is one of the best free promotion strategies. Use an SEO plugin to target specific keywords and improve your on-page optimization.
- Social media marketing. Share blog posts on Instagram, Pinterest, X, and Facebook. Instagram and Pinterest work especially well for travel content because they’re so visual.
- Email marketing. Build a subscriber list by offering exclusive content, such as ebooks or packing checklists. Personalized email campaigns keep readers coming back.
- Guest posting. Writing articles for other blogs in the travel space helps you get backlinks and build credibility with search engines.
- Travel communities. Join travel forums and online communities to connect with other bloggers and industry leaders. Just follow each community’s rules about self-promotion.
- Paid advertising. Platforms like Google Ads, Facebook Ads, and Instagram Ads can give you a quick traffic boost. Hostinger Website Builder users can run campaigns through the integrated Google Ads feature.
You don’t need to do everything at once. Pick two or three channels that make sense for your niche, do them well, and expand from there. There are plenty more ways to increase traffic to your blog beyond what’s listed here, so experiment and see what sticks.
Expert Tip
You have to look at all the marketing channels as an omnichannel approach. Use social media and SEO to collect more emails and continuously promote to your audience via emails to drive conversions. Pick the marketing channel that would be the easiest for you, and eventually, add other channels. Next thing you know, you have four or five channels that you’re going after.
Neil Patel
Digital Marketing Expert and Entrepreneur
8. Analyze your travel blog data
Without data, you’re essentially guessing about what content resonates, where your traffic comes from, and what’s driving (or hurting) your results. Analytics tools help you spot trends, double down on what’s working, and fix what isn’t.
Google Analytics 4 (GA4) is the go-to tool for most bloggers. It shows you detailed traffic metrics, audience demographics, user behavior patterns, and conversion data.
You can see which blog posts are bringing in the most readers, how long people stay on your pages, and where your traffic originates (search, social media, email).
Google Search Console shows you how your blog appears in search results and which keywords are driving clicks. Ahrefs offers deeper SEO analytics, including backlink profiles, keyword rankings, and competitive analysis.
If you use social media heavily, platform-specific analytics on Instagram, Pinterest, and X help you understand what posts generate the most engagement.
To connect your WordPress blog with GA4, create a GA4 account, set up a data stream for your website, and install a plugin like MonsterInsights to access the data directly from your dashboard.
We’ve got detailed walkthroughs for both adding Google Analytics to WordPress and getting started with the Google Analytics 4 dashboard if you want the full step-by-step.
Hostinger Website Builder users can connect Google Analytics from Analytics → Integrations in the editing interface. Just click Connect next to Google Analytics and enter your account ID.
9. Make money with your travel blog
Once your travel blog starts getting consistent traffic, you’ll have many options to turn it into a revenue stream. Here are the most common ways you can monetize your website:
- Display advertising. Sign up for ad networks like Google AdSense, Mediavine, or Raptive (formerly AdThrive). Travel blogs with strong traffic perform well with display ads because readers tend to browse multiple pages per session.
- Affiliate marketing. Promote travel-related products and services (booking platforms, travel insurance, gear, eSIM cards) and earn a commission on each sale. For example, Saily is a great option for travel bloggers looking to recommend eSIM solutions to their audience. Popular affiliate networks include ShareASale, Travelpayouts, and the Amazon Associates program.
- Sponsored posts. As your blog grows, hotels, tourism boards, and travel brands may pay you to write about their destinations or products. You can also pitch brands directly or join influencer networks.
- Paid press trips. Tourism boards and PR firms often invite established travel bloggers on all-expenses-paid trips in exchange for coverage. This is one of the perks of building real authority in the travel space.
- Selling your own products. Create and sell digital products like travel ebooks, destination planning guides, Lightroom presets, or online courses based on your expertise.
Most bloggers need at least a year (and sometimes longer) before earning meaningful income, so be patient and keep creating valuable content. The revenue will follow.
Expert Tip
The biggest thing is to create quality content, give it time, keep tweaking and adjusting continually, and promote your content. As you do those things with multiple audiences, eventually, you’ll be able to generate revenue.
Neil Patel
Digital Marketing Expert and Entrepreneur
10. Take blogging courses to scale your site even further
Investing in your education is one of the smartest things you can do as a blogger. Online courses let you learn proven strategies from people who’ve already figured things out, saving you months (or years) of trial and error. Here are some solid options:
- Superstar Blogging by Nomadic Matt. A 10-week course from one of the most recognized names in travel blogging. It covers everything from choosing a niche and creating content to SEO, networking, and monetization. At $99, it’s a solid investment for beginners.
- Blogging Masterclass by Brad Merrill (Udemy). A highly rated, comprehensive program covering blogging fundamentals through advanced strategies, from finding a niche to building an email list and earning revenue. Udemy pricing varies (often available for $15–20 during sales).
- Complete SEO Course for Beginners by Ahrefs. A free YouTube course that covers keyword research, link building, technical SEO, and content optimization. An excellent resource for learning how to get your blog ranking on Google.
What are some other popular blog types?
Other popular blog types include personal finance, lifestyle, fitness and wellness, and photography blogs.
The biggest difference between them lies in niche research and content strategy, but the technical setup is largely the same.
Travel blogging is just one corner of a huge blogging world.
Food blogs are also a natural fit for travelers who love documenting local cuisines and restaurant experiences. You can focus on recipes, restaurant reviews, or a specific cuisine.
Learning how to start a food blog is a great next step since the setup process is very similar to what we’ve covered here.
Book blogs are another great option, especially if you enjoy reading on the road. You can review travel memoirs, create themed reading lists, or build a community around literary discussion.
The process of starting a book blog follows the same fundamental steps, just with a different content angle.
All of the tutorial content on this website is subject to Hostinger's rigorous editorial standards and values.

Simon is a dynamic Content Writer who loves helping people transform their creative ideas into thriving businesses. With extensive marketing experience, he constantly strives to connect the right message with the right audience. In his spare time, Simon enjoys long runs, nurturing his chilli plants, and hiking through forests. Follow him on LinkedIn.

Marco Chiesi is the Head of WordPress at Hostinger, with over 20 years of experience as a software engineer in the web industry. He specializes in open-source technologies and the WordPress ecosystem, where he has contributed in different areas: Plugin Developer (with over 10 million downloads), WordCamp speaker and organizer, Meetup organizer, Translator, and Core Contributor. He is passionate about leading his team to create innovative solutions for Hostinger's web hosting product, which hosts over 5 million WordPress installations. Follow him on LinkedIn.