How to install a WordPress theme using the dashboard, manual upload, and WP-CLI
Sep 22, 2025
/
Jordana A. & Domantas G.
/
6 min Read
One of the benefits of building your website with WordPress is that you have a ton of themes to choose from. Each theme has a set of templates, stylesheets, and scripts that determine your site’s appearance. Instead of creating a design from scratch, you can install a theme that fits your brand and needs.
In this article, we’ll show you different ways to install a WordPress theme and offer tips on choosing a suitable theme for your site. Let’s start with what you need to do before setting up a new theme.
Download all-in-one WordPress cheat sheet
What you need to do before installing a WordPress theme
Before installing a new WordPress theme, take these precautionary measures to protect your content and settings:
- Back up the WordPress site. If anything goes wrong, you can restore your site to its previous state without losing any data.
- Test the new theme on a staging website. As a copy of your live site, the staging environment lets you experiment without affecting user experience or functionality.
- Save current code customizations and the tracking code. Doing this before changing themes simplifies the process of reapplying them to the new theme, ensuring your site’s functionality and analytics remain intact.
- Update WordPress and plugins. Make sure you’re using their latest versions to avoid compatibility issues with the new theme.
5 Ways to install a WordPress theme
After completing all the necessary preparations, you’re ready to change your site’s theme. We’ll guide you through five installation methods, starting with the simplest.
1. Using the WordPress theme directory in the dashboard
This method works for installing free themes in the official WordPress theme directory. Here’s how:
- Head to Appearance → Themes from your WordPress dashboard, then select Add New Theme.

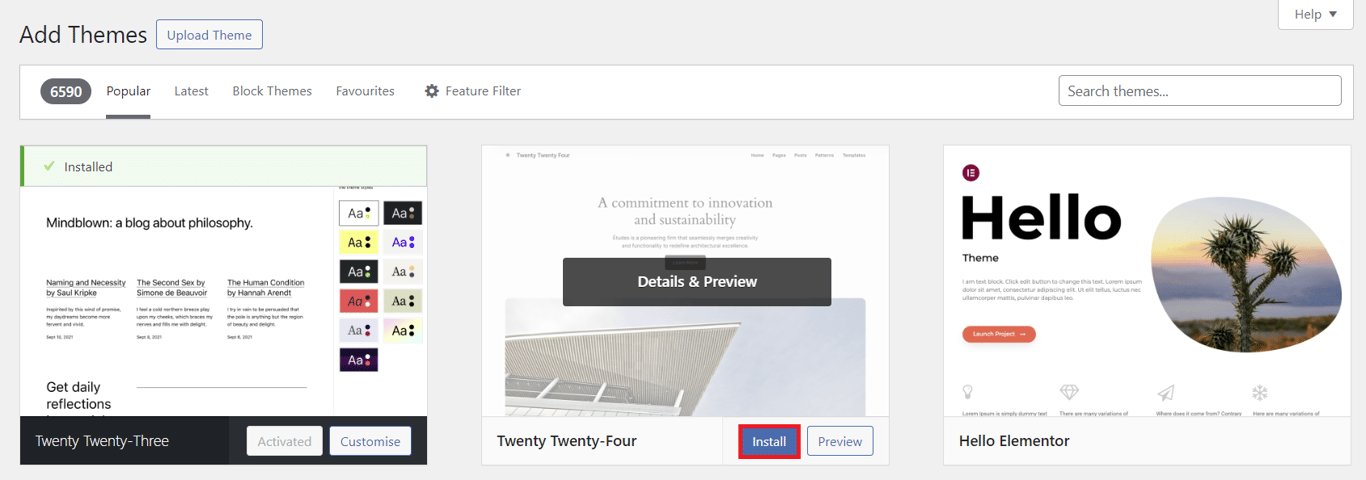
- Use the filter function and search bar to narrow down your options. Hover over a theme and hit Preview to see its designs. Once you find your desired theme, click Install.
- After the installation is complete, the Activate button will appear. Click on it to start using your new theme. Repeat this step to switch to another installed theme.

2. Uploading a theme to WordPress
If you want to use a WordPress theme from a third-party platform, you need to upload it to the website manually. This method also applies to premium themes that require you to download assets after purchasing.
The installation process is just as straightforward as the first method. Here’s how:
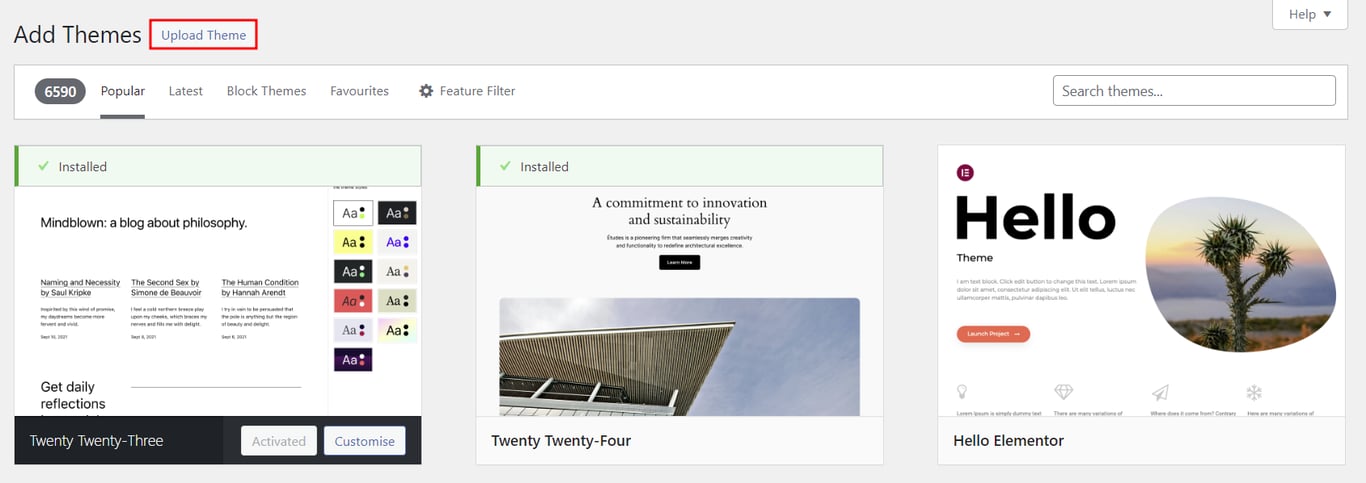
- Go to Appearance → Themes → Add New Theme from the WordPress dashboard, then hit the Upload Theme button.
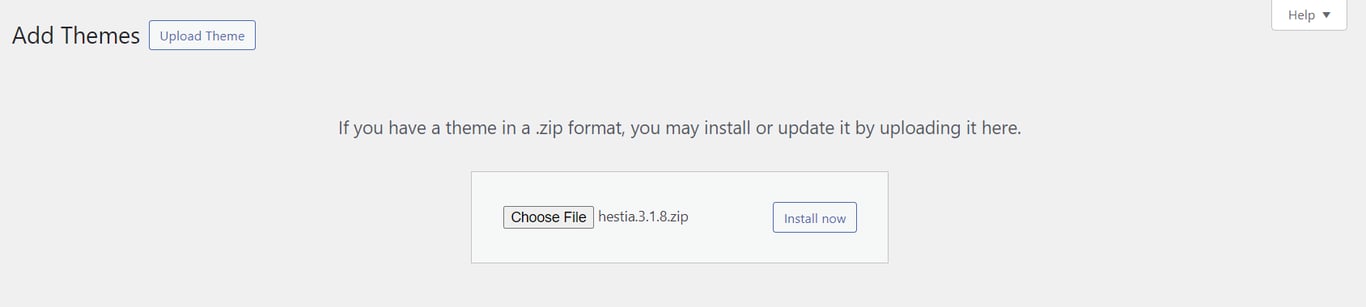
- Upload the theme’s ZIP file you downloaded from the third-party platform and hit Install now.
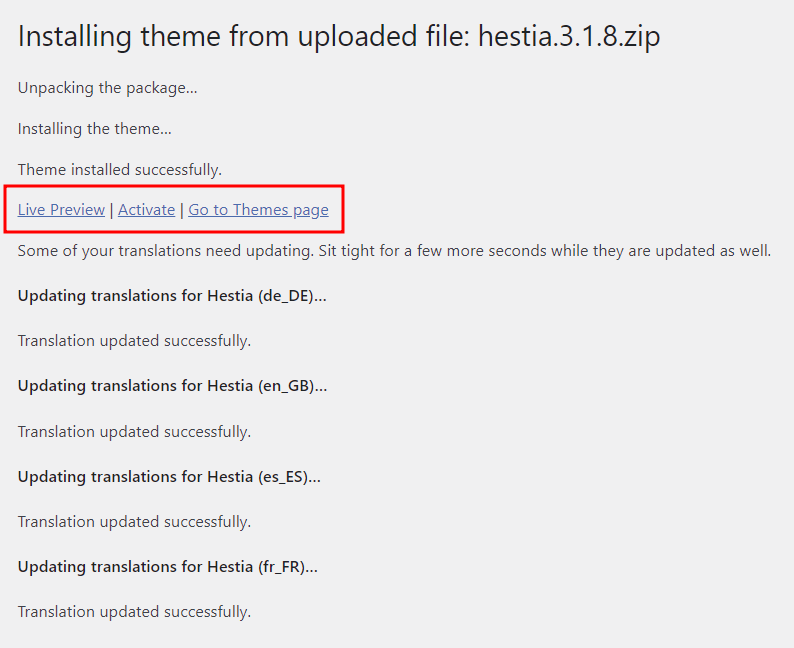
- After installing the theme, you’ll see the option to Preview or Activate it. Click the latter to start using the new theme.
3. Installing a WordPress theme via hPanel
Hostinger simplifies the theme installation process by making it part of the onboarding flow. Users on our WordPress and WooCommerce hosting plans get to choose a theme for their new website, and we install it for them.
After purchasing Hostinger’s hosting plan, you immediately start the onboarding process. Follow the steps until the setup wizard prompts you to choose between a pre-built website or a theme.
- Pre-built websites – you get page layouts populated with content tailored to your preferred website type. This option streamlines the process of creating your site’s content, allowing you to set up and launch the WordPress website quickly.
- Themes – this works the same way as installing a theme from the WordPress directory, but it is simplified to a single click of a button.

As a WordPress.org recommended hosting provider, we also streamline plugin installation, content creation, and site pre-launch tasks with in-house AI-powered plugins. We make it easy for users of all skill levels to set up their websites with WordPress.
Starting at $2.99/month, our WordPress web hosting plans include a free domain, SSL certificate, content delivery network (CDN) for faster website speed, and a WordPress staging tool for testing.
If you want to create an eCommerce website, our WooCommerce hosting service can accommodate various business needs starting at $3.99/month. All plans include multi-payment solutions, local and global shipping, and access to expert eCommerce tech support.

4. Adding a WordPress theme to the installation folder
This method is helpful for installing large themes that might exceed the upload size limit. Additionally, if the theme upload process the dashboard fails, the direct method ensures a clean and complete upload process.
You can upload files to your WordPress host server using a File Manager or a File Transfer Protocol (FTP) client like FileZilla. Here’s how to do it using Hostinger’s File Manager:
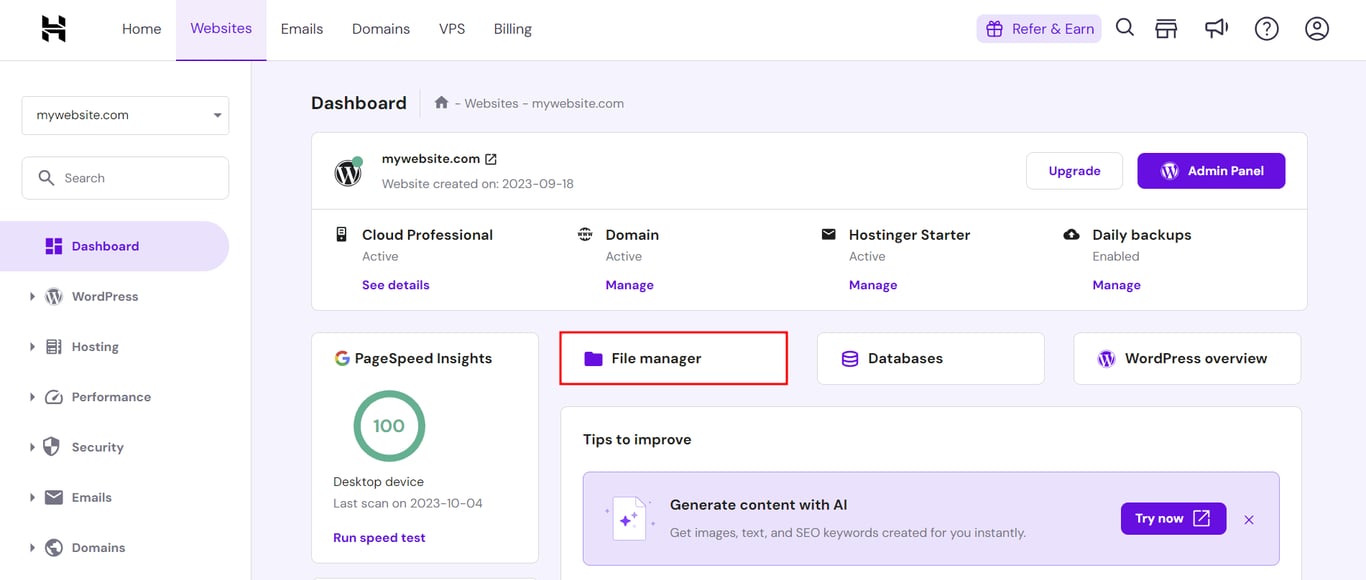
- Open File manager in the hPanel dashboard.
- Access wp-content → themes within the root directory (public_html). The themes folder contains all installed WordPress themes.
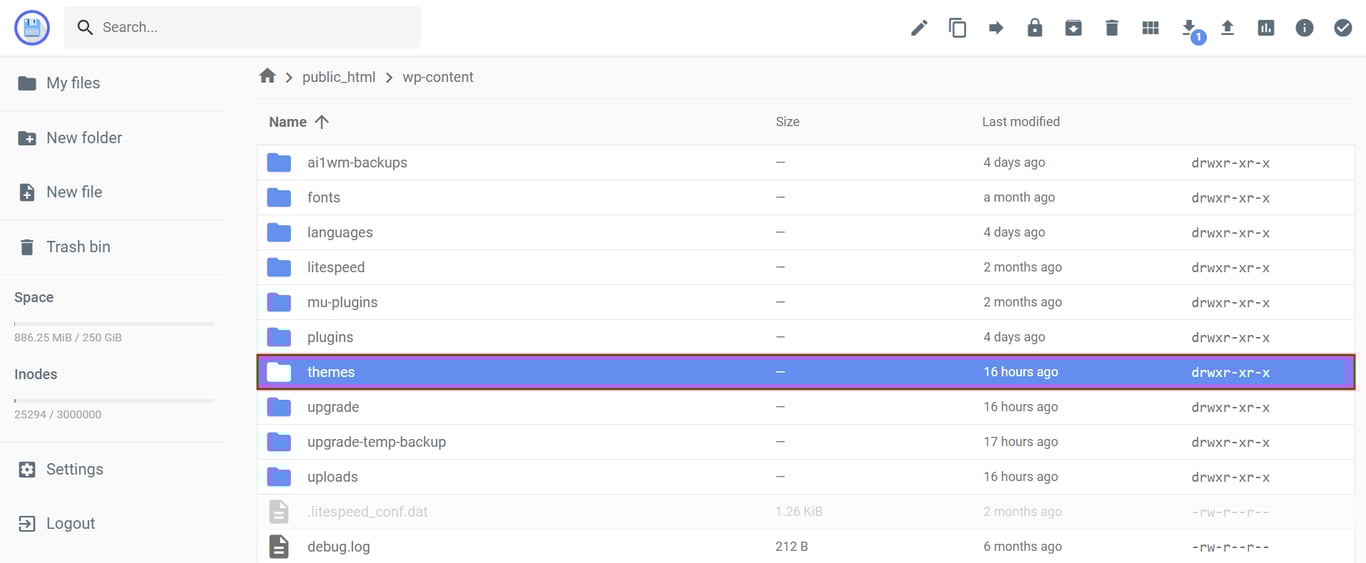
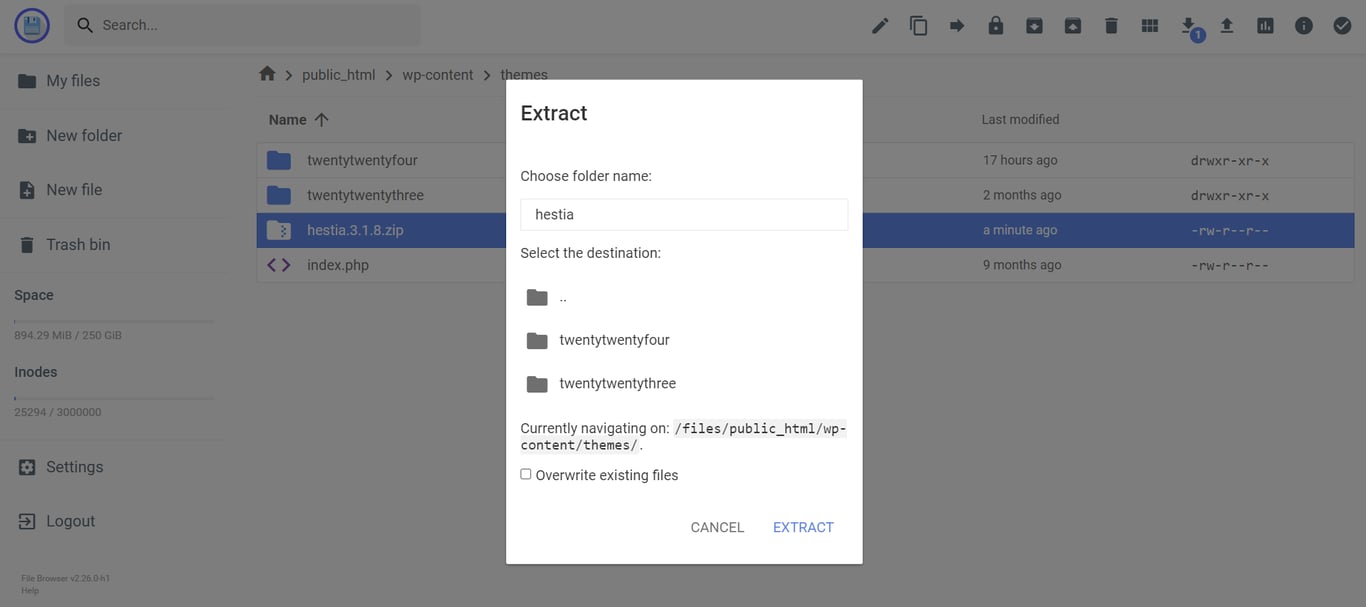
- Drag and drop the theme’s ZIP file to the folder. Right-click the file and select Extract. If your web host’s File Manager doesn’t have this feature, unzip the file before uploading it to WordPress.
- Head to Appearance → Themes from your WordPress dashboard. The new theme should appear in your list of installed themes. Don’t forget to Activate the theme to start using it.
5. Installing a WordPress theme using the WP-CLI
WordPress Command Line Interface (WP-CLI) is a tool for managing your WordPress site from the command line. Like the previous method, it lets you install a theme without accessing the WordPress dashboard.
WP-CLI is excellent for automating tasks, like installing themes on multiple sites through scripts. It also uses fewer server resources than the graphical dashboard, making it perfect for servers with limited resources.
Follow these steps to install a WordPress theme using WP-CLI:
- Connect to your hosting account via SSH. Hostinger users can find their SSH details via Advanced → SSH Access from the hPanel dashboard. Check out our guide on connecting to a host server using the PuTTY SSH client.

- Enter your WordPress installation folder using the cd command. Here’s an example:
cd public_html/wp-content/themes
- Use the wp theme search command to find your preferred theme in the WordPress theme directory. Replace theme-name with the name or keyword of the theme you want. For example:
wp theme search twentytwentyfour
- Install the theme using the wp install theme command. Replace theme-slug with the actual theme slug from the previous step.
wp theme install twentytwentyfour
- Activate the theme with the wp theme activate command.
wp theme activate twentytwentyfour
The steps to install a WordPress custom theme not listed in the official directory are slightly different. Here’s how:
- Upload your theme’s ZIP file to WordPress using a File Manager or an FTP client. For this example, we put it in the themes folder within wp-content.
- Enter the folder using the cd command, then install the theme from the ZIP file. Replace theme-file.zip with the actual file name.
wp theme install public_html/wp-content/themes/theme-file.zip
- Activate the theme. Replace theme-slug with the theme’s folder name within the ZIP file. Unzip the file to find the slug if needed.
Choosing a WordPress theme to install
A good theme is more than just a pretty design. Consider these factors when looking for a WordPress theme to install:
- Functionality. Most themes cater to specific niches with features tailored to their target users. For example, if you own an eCommerce website, pick a theme that comes with a product catalog template and a built-in shopping cart.
- Responsiveness. As most internet users browse using mobile devices, your theme must be responsive and visually appealing on all screen sizes.
- Customizability. Ensure you can make changes to the theme’s design without coding or hiring a web designer.
- Compatibility. Using a theme that works with the latest WordPress version and popular plugins reduces the risk of conflicts. This also implies the theme gets frequent updates, eliminating security vulnerabilities.
- Search engine optimization (SEO). A well-optimized theme can increase your site’s visibility on search engines, attracting more traffic that can be converted into leads. The theme should offer SEO features, fast load times, clean code, and responsiveness.
- Support. Having easy access to the theme’s support team helps resolve issues quickly before they can impact website performance and user experience.
- Premium features. Free themes are budget-friendly but often lack features and support. Premium themes offer advanced features, dedicated support, and more design options at a cost. If you can’t invest yet, start with a free theme and upgrade as your site grows.
How to install a WordPress theme video tutorial
Need a visual guide? Watch our video tutorial for a step-by-step guide on each theme installation method.

Conclusion
Your WordPress theme decides how your website will look, so it’s essential to choose the right one and install it correctly.
Let’s recap the five ways to install your chosen theme:
- Through the WordPress theme directory in the dashboard.
- Uploading the theme’s ZIP file through the dashboard.
- During WordPress’s onboarding flow on Hostinger.
- Adding it to the installation folder using a File Manager or FTP client.
- Uploading the WordPress theme files using WP-CLI.
Installing too many themes can slow down your website and create security vulnerabilities. To boost website performance and simplify maintenance, it’s highly recommended that you remove unused WordPress themes.
We hope this article will help you switch WordPress themes more efficiently. If you have any questions, check out the FAQ section or leave a comment below.
How to install WordPress themes FAQ
This section covers some of the most common questions about installing WordPress themes.
Why can’t I install a WordPress theme?
You might not be able to install a WordPress theme because of permission issues, a corrupted theme file, or server configuration issues. Make sure you have the necessary permissions, download the theme from a reliable source, and check your server settings for any file type restrictions.
How do I install a custom WordPress theme?
To install a custom WordPress theme, you can upload the theme’s ZIP file via the WordPress dashboard. Alternatively, you can upload the theme files directly to your WordPress installation folder using a File Manager or FTP client. Then, activate it from the dashboard.
How do I activate a new WordPress theme?
To activate a new WordPress theme, go to Appearance → Themes from your WordPress dashboard and click the Activate button on the installed theme you choose. Keep in mind that only one theme can be active at a time. Activating a new theme will automatically deactivate the previous one.
All of the tutorial content on this website is subject to Hostinger's rigorous editorial standards and values.

Jordana is a Senior Content Writer with a background in Information Systems. She has over five years of experience in WordPress and is casually dabbling with PHP and MySQL. Her passion for writing and technology drives her to create tutorials for anyone wanting to build their online presence. Follow her on LinkedIn.

Domantas leads the content and SEO teams forward with fresh ideas and out of the box approaches. Armed with extensive SEO and marketing knowledge, he aims to spread the word of Hostinger to every corner of the world. During his free time, Domantas likes to hone his web development skills and travel to exotic places.


