To access Hostinger Webmail, go to mail.hostinger.com and log in with your full email address and password, or open it from Hostinger dashboard. Hostinger Mail, also called Webmail, is the browser-based email client you use to send, receive, and organize messages for your Hostinger Email addresses from any browser.
Before you start
Make sure you have:
-
An active Hostinger Email mailbox (how to create an email account)
-
Your full email address (for example,
user@yourdomain.com, instead of just “user”) -
Your email password
How to access and log in to Webmail
Choose one of two ways to log in to Hostinger Email webmail: the direct login URL for the fastest access, or Hostinger dashboard if you’re already managing your email settings there.
Option 1 – Log in to Webmail via direct URL (Recommended)
Use this option for the fastest and simplest access.
-
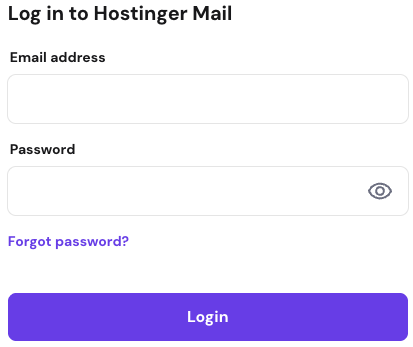
Open your browser and go to: https://mail.hostinger.com/auth/login
NOTE: The webmail URL is fixed and cannot be customized. -
Enter your full email address.
-
Enter your email password.
-
Click Log In.
Option 2 – Log in to Webmail via Hostinger dashboard
Use this option if you are already managing email settings in Hostinger dashboard.
- Log in to your Hostinger account.
-
Go to the Emails page.
-
Click Mailboxes next to your domain.

-
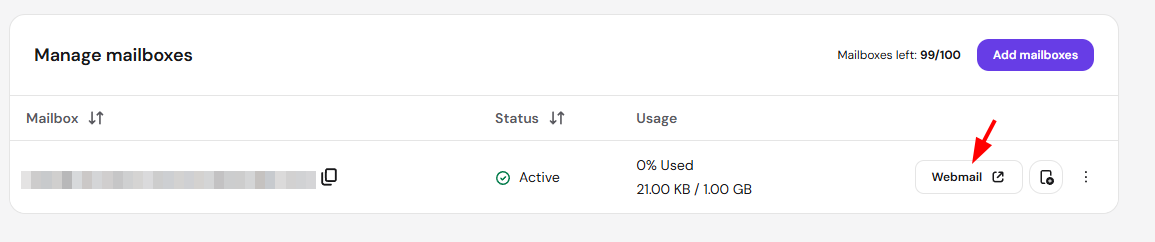
Click Webmail next to the mailbox you want to log in to.
- Enter your full email address.
- Enter your email password.
- Click Log In.
Session persistence: If you are already logged into Webmail, clicking the Webmail button in Hostinger dashboard will open your current active session directly — no need to log in again.
Tab sync: If you have multiple Webmail tabs open, they automatically refresh when you log in or log out in another tab.
When you log in to Hostinger Mail for the first time, a Setup Guide is displayed to help you configure your mailbox.
The guide walks you through 5 onboarding steps:
- Selecting a theme
- Selecting a layout
- Adding a sender name
- Adding an email signature
- Connecting a device
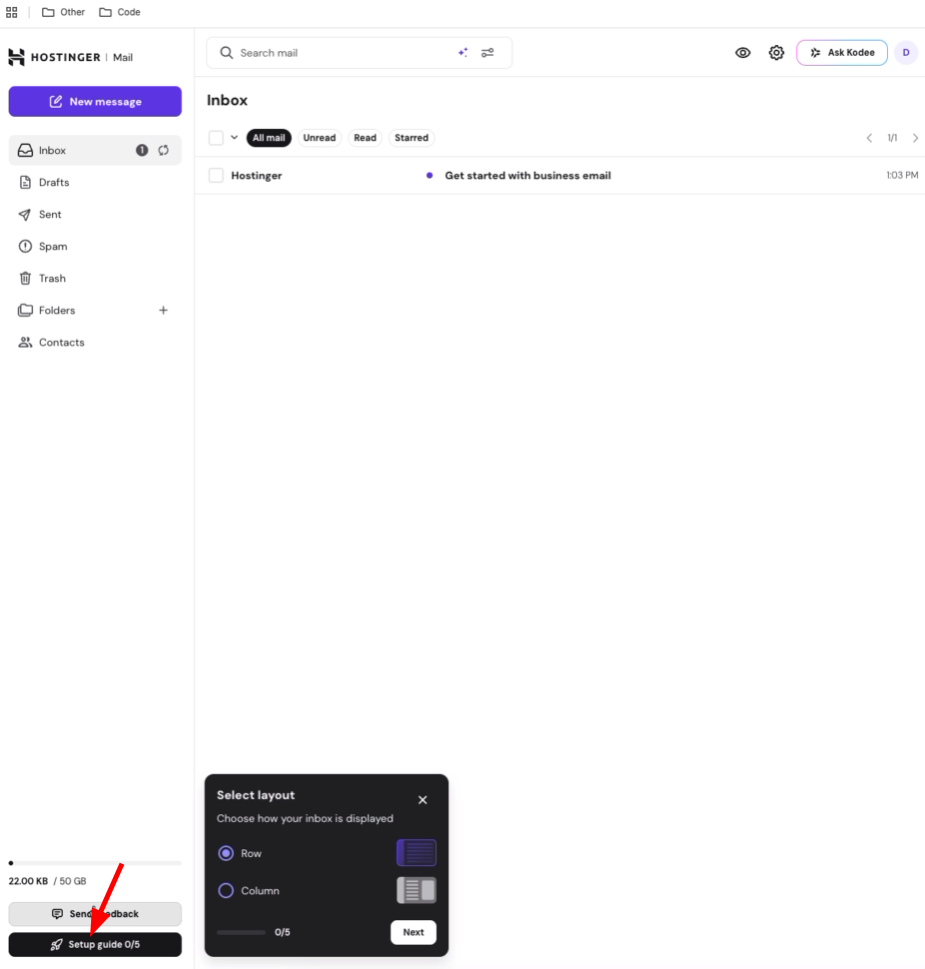
You can complete the steps in any order. If you prefer to set them up later, you can skip the guide and return to it from Settings at any time.
Troubleshooting login issues
If you cannot access webmail, check this article: What to Do if You Can’t Log in to Your Hostinger Email Account
The usual reasons are:
-
Incorrect email address
Make sure you enter the full email address, including the domain. -
Incorrect password
Reset your mailbox password by following how to reset a Hostinger Email mailbox password, then try again. -
Email account does not exist
Confirm the email account is created and active in Hostinger dashboard. - Mailbox is suspended
This can happen if the mailbox is hitting the email limitations or sending spam emails. -
Mailbox temporarily blocked
Multiple failed login attempts can temporarily block access. Wait a few minutes and try again.
Switch between multiple mailboxes in Webmail
Webmail lets you sign in to more than one mailbox and switch between them without logging out of your active session.
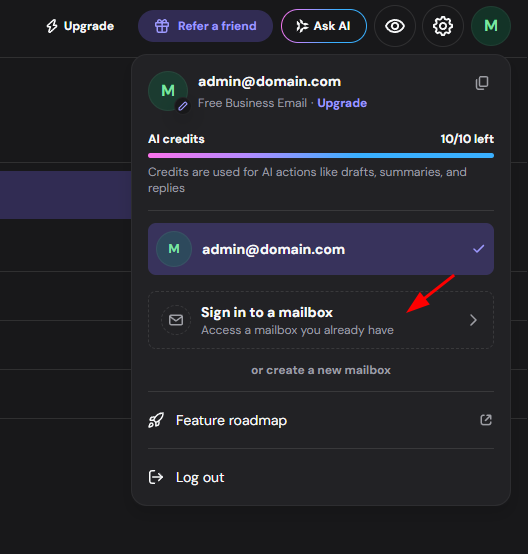
To view your mailboxes:
- Click your profile icon in the top-right corner of Webmail.
- Webmail lists your mailboxes, with a checkmark next to the one you’re currently signed in to.
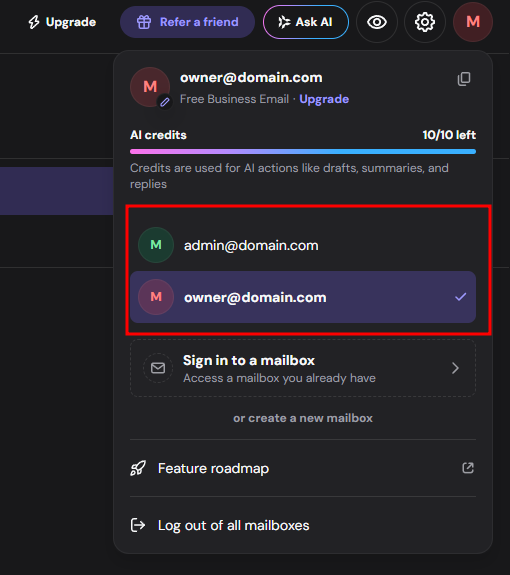
To switch to another mailbox that’s already signed in, click its email address in the list. Webmail switches to that mailbox immediately, without asking for a password.
To sign in to a mailbox whose session has ended, click Sign in next to it in the list.
To sign in to a mailbox that isn’t listed yet:
- Click Sign in to a mailbox in the profile menu.
- Enter the email address and password for the mailbox you want to sign in to.
- Click Login.
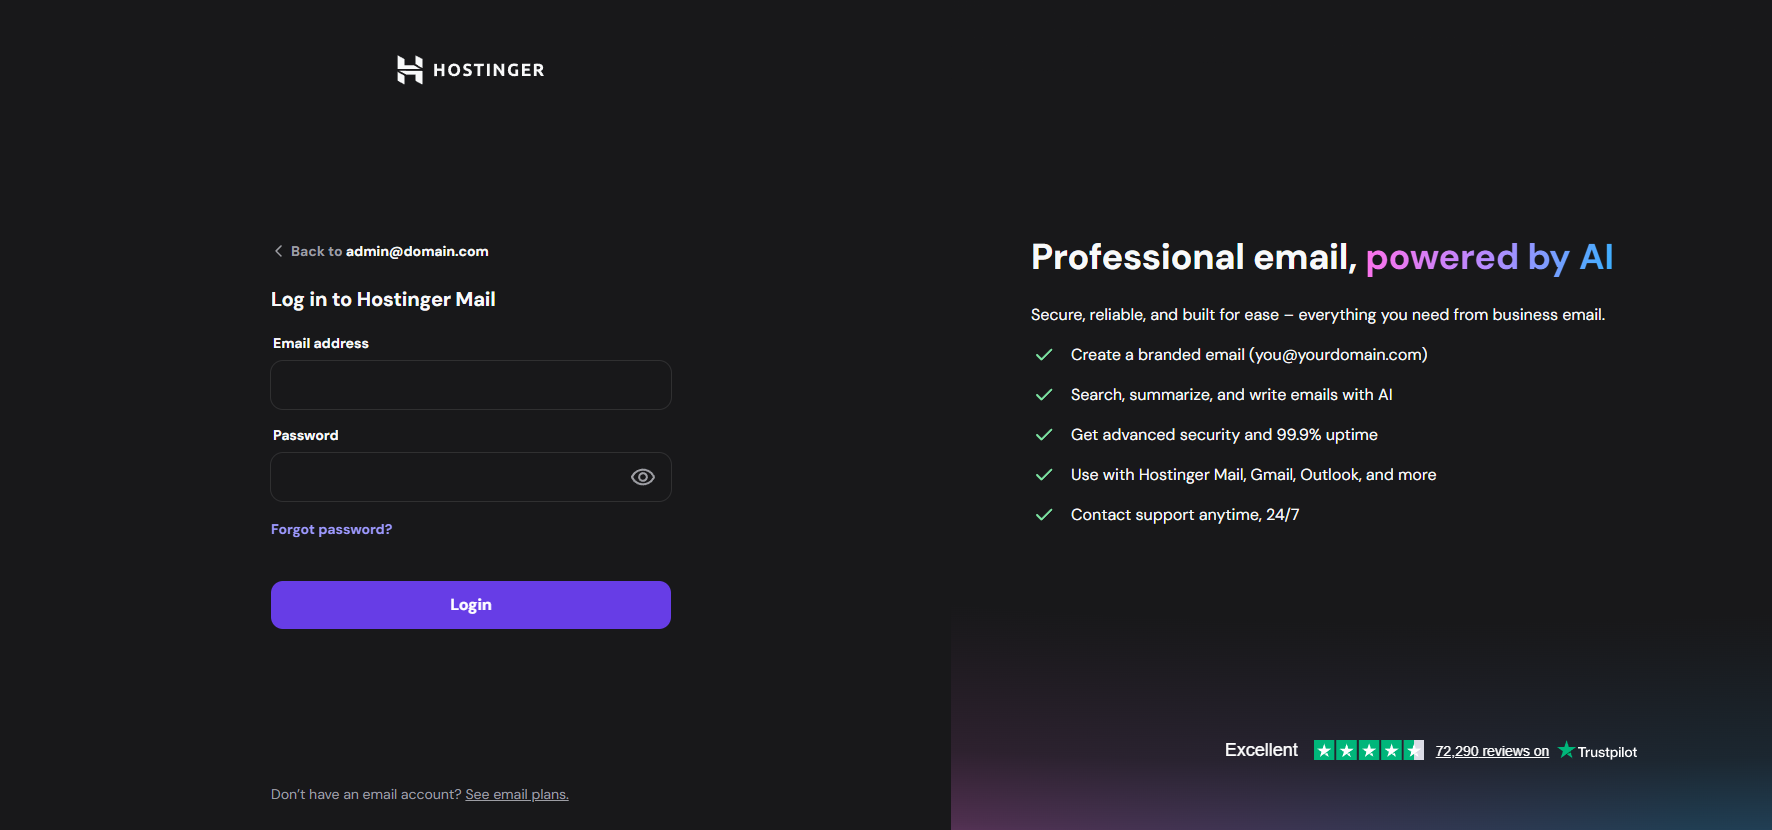
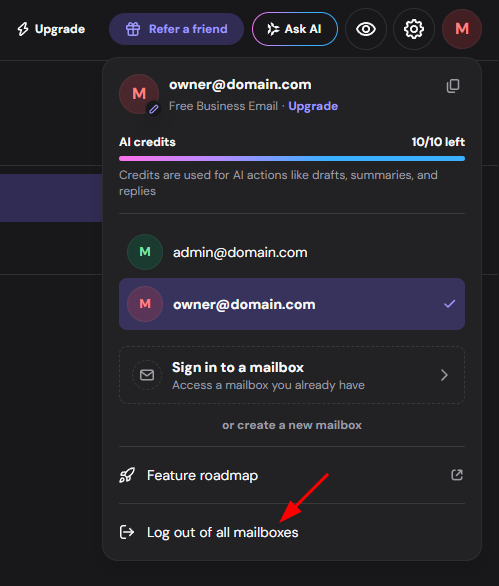
Signing out of one mailbox does not end the sessions of your other signed-in mailboxes.
To sign out of every mailbox at once, click Log out of all mailboxes in the profile menu.
How to use Webmail
Once logged in, use Hostinger Mail’s tools to manage your inbox, including language settings, Conversation view, message composition, search, storage, and contacts.
Language settings in Hostinger Mail
To change your Webmail display language:
- Click the gear (Settings) icon in the top right corner of Webmail.
- In the dropdown menu, find Language, which shows your current language (e.g. Language (English)).
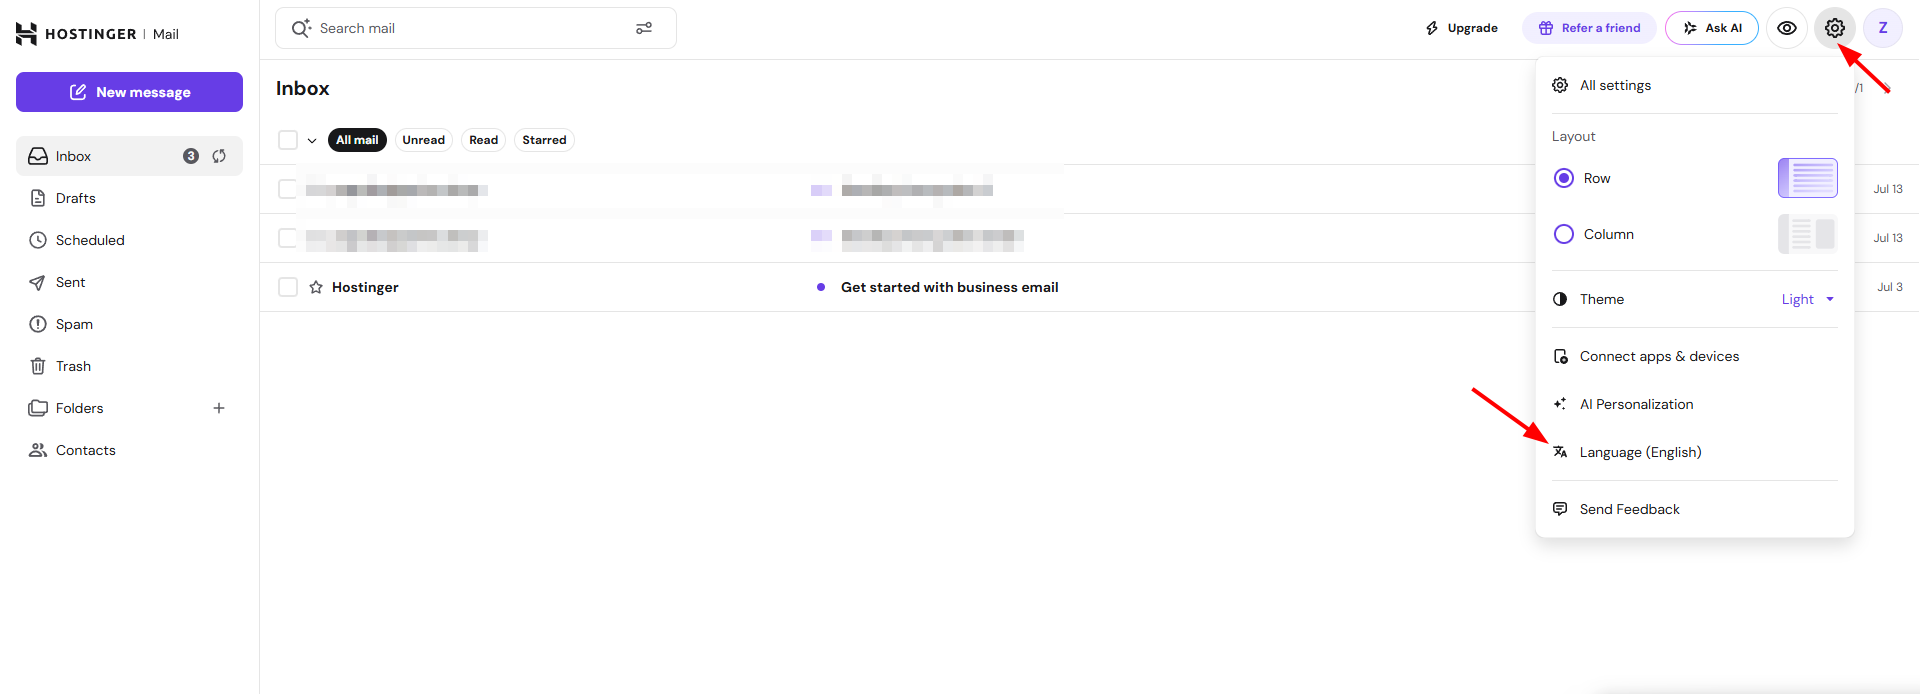
- Click it and choose your preferred language from the list.
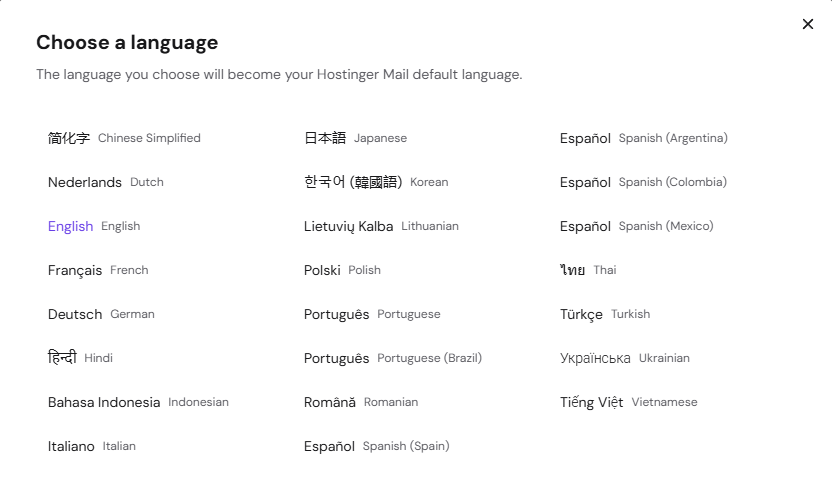
- The interface updates immediately.
Conversation view in Hostinger Mail
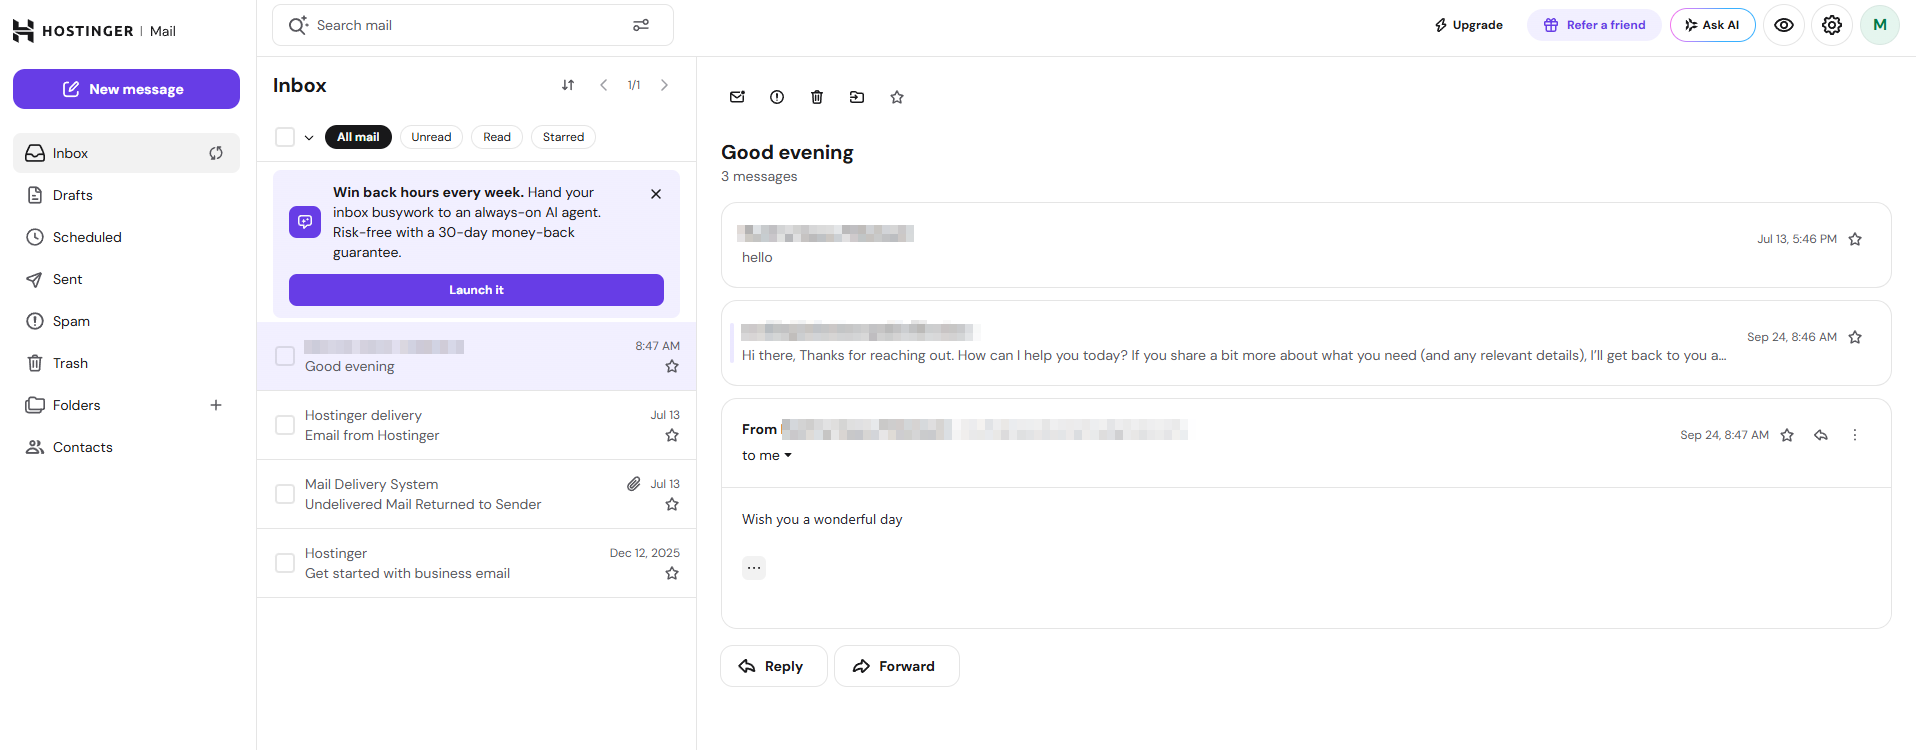
Conversation view groups related messages from the same email thread into a single view, instead of listing each message separately.
To turn on Conversation view:
- Click the gear (Settings) icon in the top right corner of Webmail.
- In the dropdown menu, turn on the Conversation view toggle.
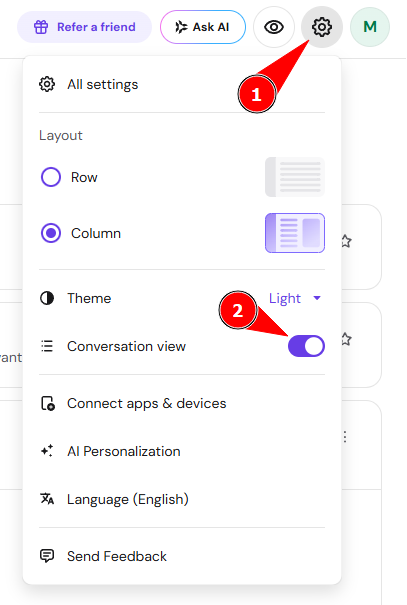
Conversation view is available to all Hostinger Mail users.
Sending options in Hostinger Mail
Hostinger Mail provides advanced tools to manage how and when your messages are delivered. These features help you maintain control over your communication by allowing you to retract accidental sends or plan messages in advance.
Undo send
After clicking Send, a brief window allows you to cancel the message before it is delivered. Click Undo in the notification that appears at the bottom of the screen to retract the email.
-
Available for: All Hostinger Email users.
Schedule send – Business Premium plans
Schedule send in Hostinger Mail lets you choose a specific date and time to deliver an email instead of sending it immediately. Schedule send is available only on the Hostinger Email Business Premium plan.
To schedule an email:
-
Compose your message in Hostinger Mail.
-
Click the arrow next to the Send button.
-
Select Schedule send.
-
Choose the desired date and time.
-
Click Schedule.
To cancel a scheduled email, open the Scheduled folder, select the message, and click Cancel send.
-
Available for: Business Premium plan.
Unsubscribe from emails (all Hostinger Email plans)
When an email supports it, Hostinger Mail will display an Unsubscribe button directly inside the message view. This lets you opt out of mailing lists or newsletters with a single click — without leaving Webmail or searching for an unsubscribe link inside the email.
To unsubscribe from an email:
- Open the email in Hostinger Mail.
- Look for the Unsubscribe button near the sender’s name or at the top of the message.
- Click Unsubscribe.
- Confirm the action if prompted.
The sender will be notified of your unsubscribe request. You may still receive emails that were already queued before the request was processed.
Email List Statuses
When viewing your inbox or any email folder, each message may display a status indicator to help you track your interactions. The following statuses are available:
- Replied — you have replied to this email
- Forwarded — you have forwarded this email
- Replied & Forwarded — you have both replied to and forwarded this email
Viewing and downloading attachments
When you open an email with attachments in Hostinger Mail:
- Attachments are listed at the top of the email message.
- Each file type displays its own icon (for example, PDF, image, or document) for quick identification.
- Up to 5 attachments are visible at a glance on desktop, and 1 on mobile. If there are more, select Show all to expand the full list.
- For long emails, an attachment summary also appears at the bottom of the message, with a link to jump back to the top attachment list.
- To download all attachments at once, click Download all — available from both the top and bottom attachment areas.
- To download a single file, click the attachment directly.
Composing emails in Webmail
When replying to or forwarding a message, a composer appears at the bottom of the message thread. This is called the inline composer.
Pop-up mode for the email composer
The inline composer supports two display modes:
- Inline mode — the composer appears at the bottom of the message thread (default).
- Pop-up mode — the composer opens in a floating window, giving more space to write.
To switch to pop-up mode:
- Open a message and click Reply or Forward.
- In the inline composer, click the pop-up icon at the end of the message. The composer expands into a floating window.
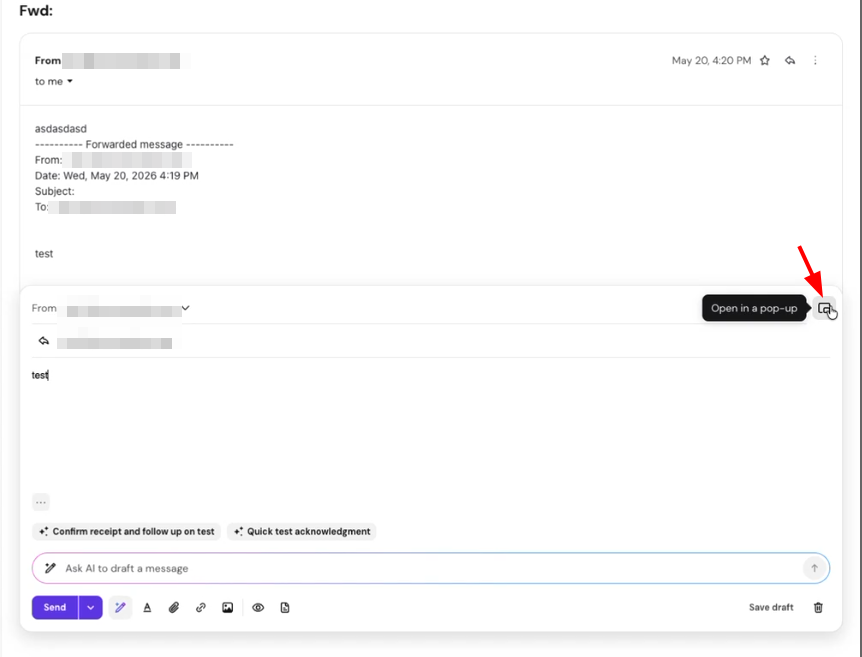
To return to inline mode:
- Click the same button inside the pop-up window to collapse it back to inline.
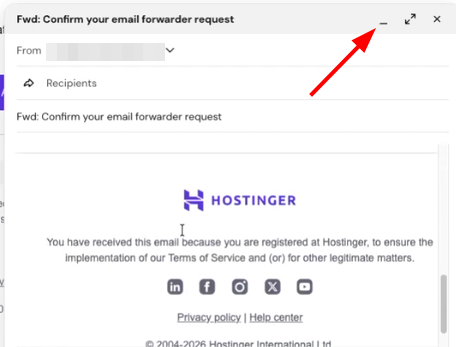
Both modes support the same formatting options, templates, and send controls.
Copy or change a recipient email address in the Hostinger Mail composer
Right-click a recipient chip in the To, Cc, or Bcc field of the Hostinger Mail composer to copy its email address or change it. A recipient chip is an email address you already added to a recipient field. On mobile, tap the chip instead, and the same actions open in a bottom sheet.
To copy a recipient email address:
- Right-click the recipient chip in the To, Cc, or Bcc field. On mobile, tap the chip.
- Select Copy. Hostinger Mail copies the email address to the clipboard.
To change a recipient email address:
- Right-click the recipient chip in the To, Cc, or Bcc field. On mobile, tap the chip.
- Select Change email address. Hostinger Mail moves the email address back into the input so you can edit it in place.
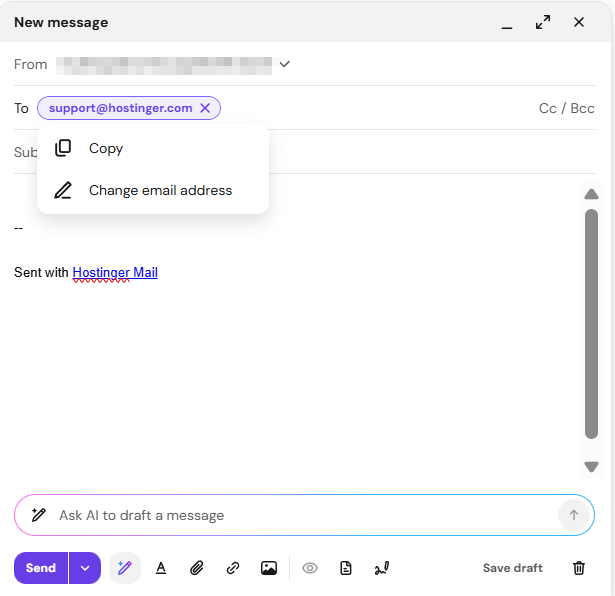
The recipient keeps its display name and position when you change its email address. Use Change email address to fix a typo without deleting the chip and retyping the whole address.
Viewing quoted text in replies
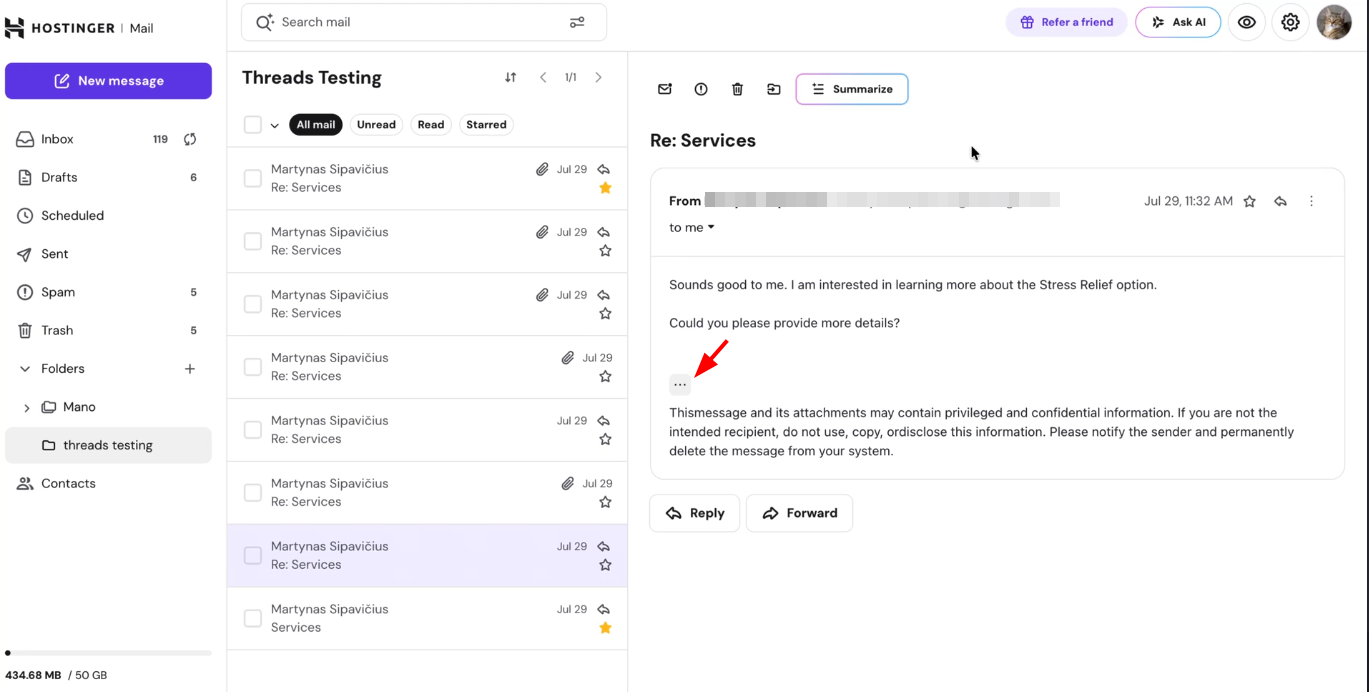
When you open a reply that includes an earlier message in the thread, the quoted text is collapsed behind a … button by default. Click it to expand and view the full quoted conversation.
Resizing inline images
To resize an image inserted in the email body, click the image to select it, then drag the resize handle to the desired size. Image resizing is also available when editing email templates and creating signatures.
Attachments section in the composer
Before sending, you can preview attached files directly in the composer. Attached files appear in the composer area; click a file to preview its contents and confirm the correct file is attached.
Composer auto-save and crash recovery
The composer automatically saves your in-progress draft locally and restores it after a reload, crash, or an accidentally closed tab. This works in both the pop-up and inline reply/forward composers.
- How saving works: Typing in the subject or body is saved every 5 seconds. Discrete actions are saved instantly, including adding or removing recipients, changing the sender, attaching files, tracked file uploads, toggling tracking, and switching message type.
- One draft at a time: Only one auto-saved draft exists per account, and it is owned by a single tab at a time. The first tab where you start composing becomes the owner. A second tab will not auto-save, so tabs cannot overwrite each other. Only the owner tab restores the draft, and it opens automatically on app load, so it will not appear unexpectedly in another tab. If the owning tab crashes or is closed, ownership is released automatically, and the next tab you use will recover the draft.
- When the draft is cleared: The saved draft is removed only when you discard it, save it to Drafts, or send it successfully. A failed send never causes your text to be lost.
- Security: Locally saved draft data is tied to the logged-in account. It is cleared on logout or when the session ends, and any leftover data from a different account is removed on app load, so a different person logging into another mailbox on the same browser cannot see the previous user’s draft.
New mailbox warmup guidance
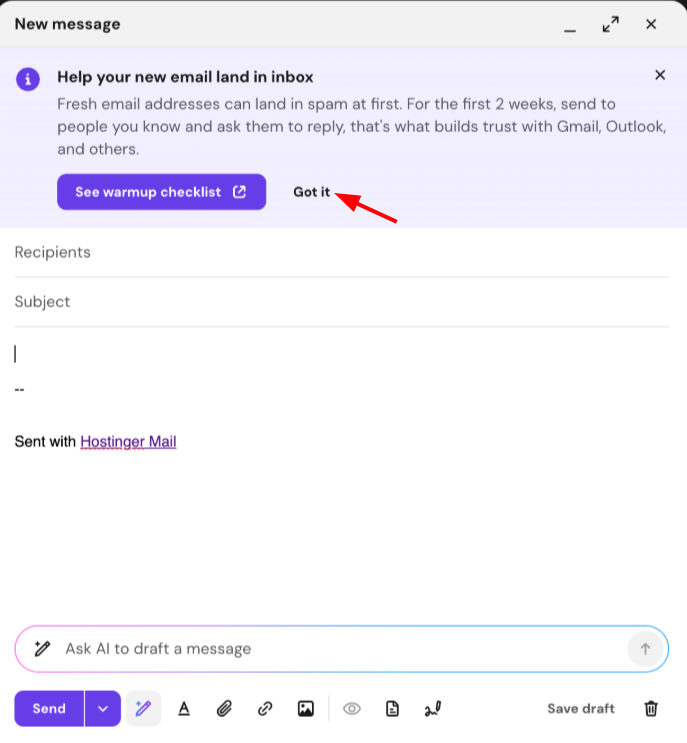
When composing a new message, reply, or forward, Webmail may show a heads-up card at the top of the composer letting you know that fresh email addresses need time to build trust with providers like Gmail and Outlook. The card links to a 2-week warmup checklist with steps to help new mailboxes avoid landing in spam.
It is shown until you dismiss it or until the email plan passes the 30-day mark, whichever comes first. Click Got it to dismiss the card. Your choice is remembered per mailbox, so dismissing it in one mailbox does not affect others.
Searching emails
Webmail supports searching across all folders. In the search bar, you can choose to search within Inbox only or across All folders using the toggle at the top of the search panel.
You can also narrow your search using the Search in options: Sender, Subject, Recipient, and Body. All four are selected by default, and you can deselect any you don’t want included.
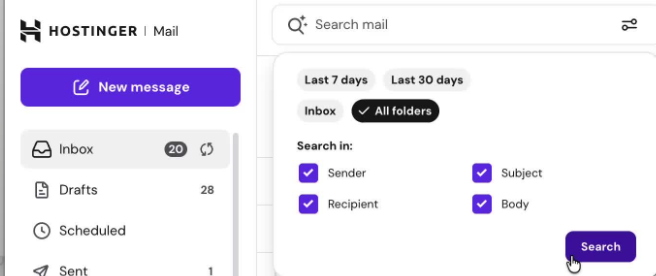
A time range filter is also available, letting you limit results to the Last 7 days or Last 30 days.
Sorting and selecting Emails
Sorting emails
In any folder or search results view, click the sort control at the top of the message list and select Date or Size. The selected sort order is saved and applied consistently across all folders and search results.
Filtering emails
Click the filter button next to the sort control to narrow the message list to All mail, Unread, Read, or Starred. A blue dot on the filter button shows when a filter is active. Filtering applies across all pages in the current folder. This is available on both desktop and mobile.
Star action in the message list
The star action on messages in your inbox list is always visible. You can star any message with a single click to mark it for easy follow-up.
Selecting multiple emails (desktop)
Use keyboard and mouse shortcuts to select multiple messages at once:
- Ctrl/Cmd + A — select all messages in the current view
- Shift + click — select a range of messages between two clicks
- Ctrl/Cmd + click — add or remove individual messages from the selection
After selecting multiple messages, use the toolbar actions (Delete, Move, Mark as read, etc.) to apply changes in bulk.
Monitor Hostinger Email storage warning notifications
Hostinger Mail displays direct notifications in Webmail when your mailbox storage nears its limit. Warning banners appear at the following thresholds:
- 90% full – A dismissible banner suggests upgrading your plan or purchasing more storage.
- 94% full – A more prominent dismissible banner appears.
- 98% full – An urgent dismissible banner is displayed.
- 100% full (storage limit reached) – The warning banner becomes permanent and cannot be dismissed. At this point, you cannot receive new emails until storage space is freed up or expanded.
When a storage warning banner appears, you can temporarily dismiss it (at 90%, 94%, and 98%) to continue using Webmail, or click the direct link within the banner to upgrade your email plan or purchase additional storage.
Performance and display appearance
Faster email loading
Hostinger Mail includes enhanced performance optimizations for email message rendering. Messages open faster, and during high-load scenarios, memory usage is optimized to be up to two times lower. This ensures a responsive experience when navigating large mailboxes.
Faster inline image loading
Inline images in an email load independently, so you can start reading the message content without waiting for every image to load.
- The placeholder size may differ slightly from the final image size when an image does not include width and height attributes.
- Images attached using the composer, and images in forwarded original messages, include width and height set automatically, so their placeholders match the final image size exactly.
- Opening the Forward action is instant, as it reuses the same image loading state as the main email content.
- Images smaller than 24×24 px do not display a placeholder.
- Images with broken URLs display your browser’s default broken image icon.
Display appearance in the message view and composer
The message details page and the email composer (both inline and pop-up modes) are displayed in light mode, regardless of your system or browser dark mode settings. This ensures a consistent and predictable experience when reading and composing emails in Hostinger Mail.
Allow and Block lists in Hostinger Mail
Webmail supports Allow/Block lists, accessible from Settings → Allow / Block Lists.
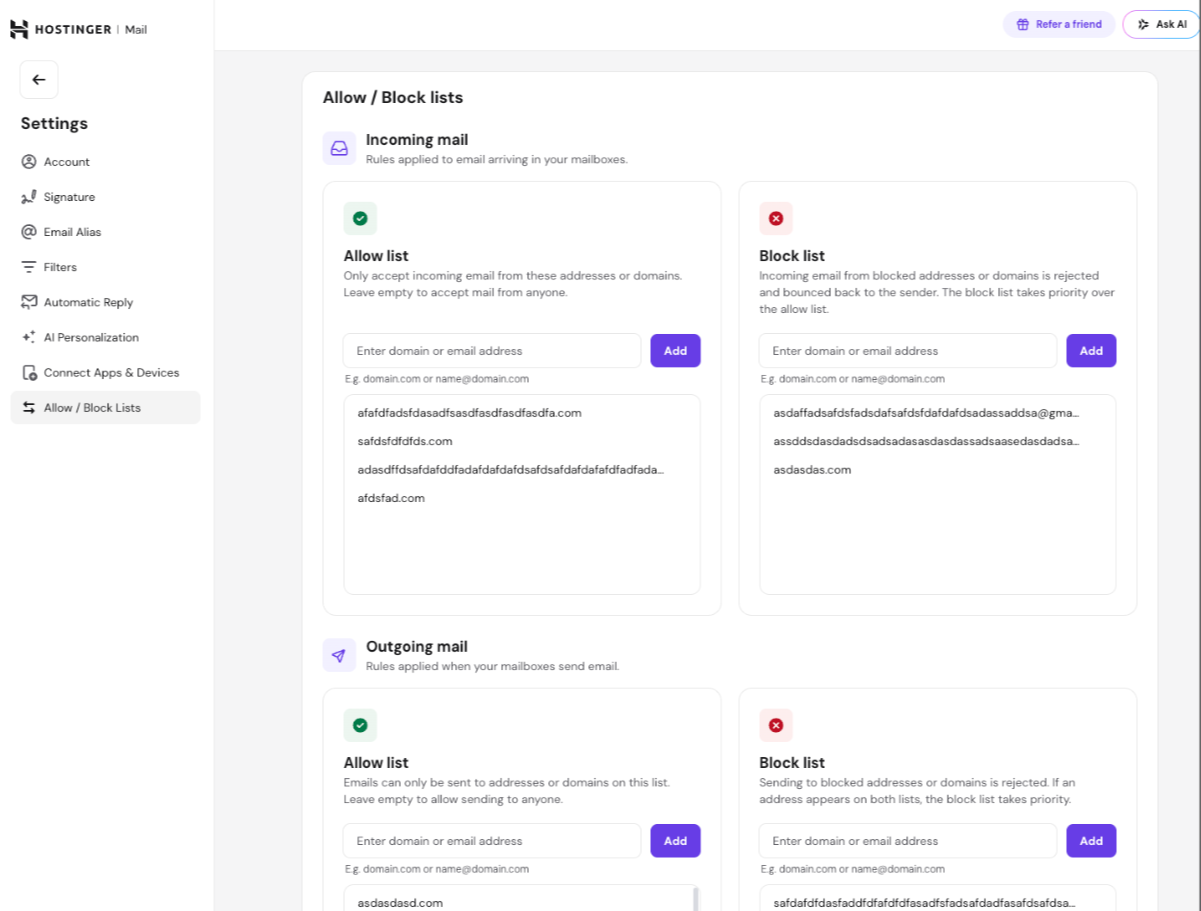
Rules are grouped by direction:
- Incoming mail — rules applied to email arriving in your mailboxes. Add addresses or domains to the allow list to only accept mail from them, or leave it empty to accept mail from anyone. Add addresses or domains to the block list to reject and bounce incoming mail from them back to the sender. The block list takes priority over the allow list.
- Outgoing mail — rules applied when your mailboxes send email. Add addresses or domains to the allow list to only permit sending to them, or leave it empty to allow sending to anyone. Add addresses or domains to the block list to reject outgoing mail to them. If an address appears on both lists, the block list takes priority.
To add an entry, enter a domain or email address in the relevant field and click Add.
Contacts section layout
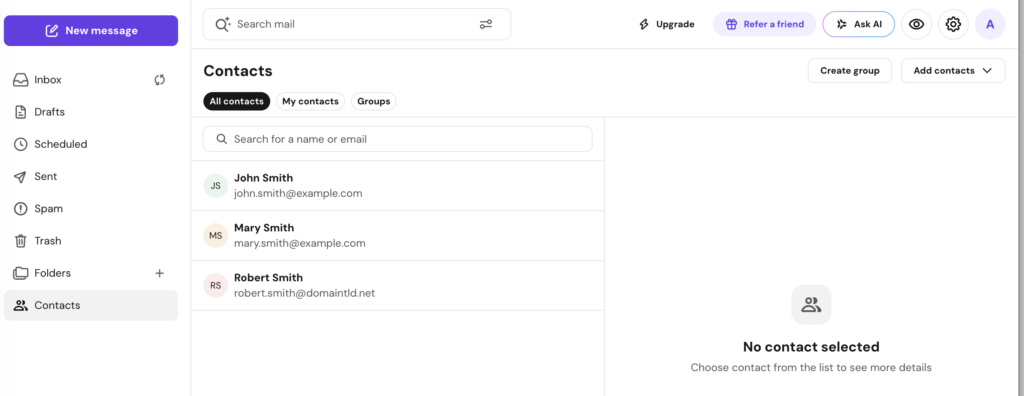
The Contacts section features an expanded contact card system that supports detailed records beyond a name and email address.
Available contact details
- Phone numbers – Supports custom labels such as Work, Home, or Mobile.
- Multiple addresses – Supports labeled physical addresses.
- Company details – Includes organization names and specific job titles.
- Birthday
- Additional email addresses
Clicking a contact opens a side panel on the right side of the screen where you can view all saved details, click Edit to update information, click Delete to remove the contact, or start a new email message directly from the card. Contact avatars pull automatically from Gravatar when available. You can also set up your own profile picture in Hostinger Webmail through Gravatar.
NOTE
- If your email account was migrated from Roundcube, your additional contact details (phone numbers, addresses, etc.) were preserved during the migration. They will automatically appear in your new contact cards without any action needed.
Managing the Trash folder
Emptying the Trash folder
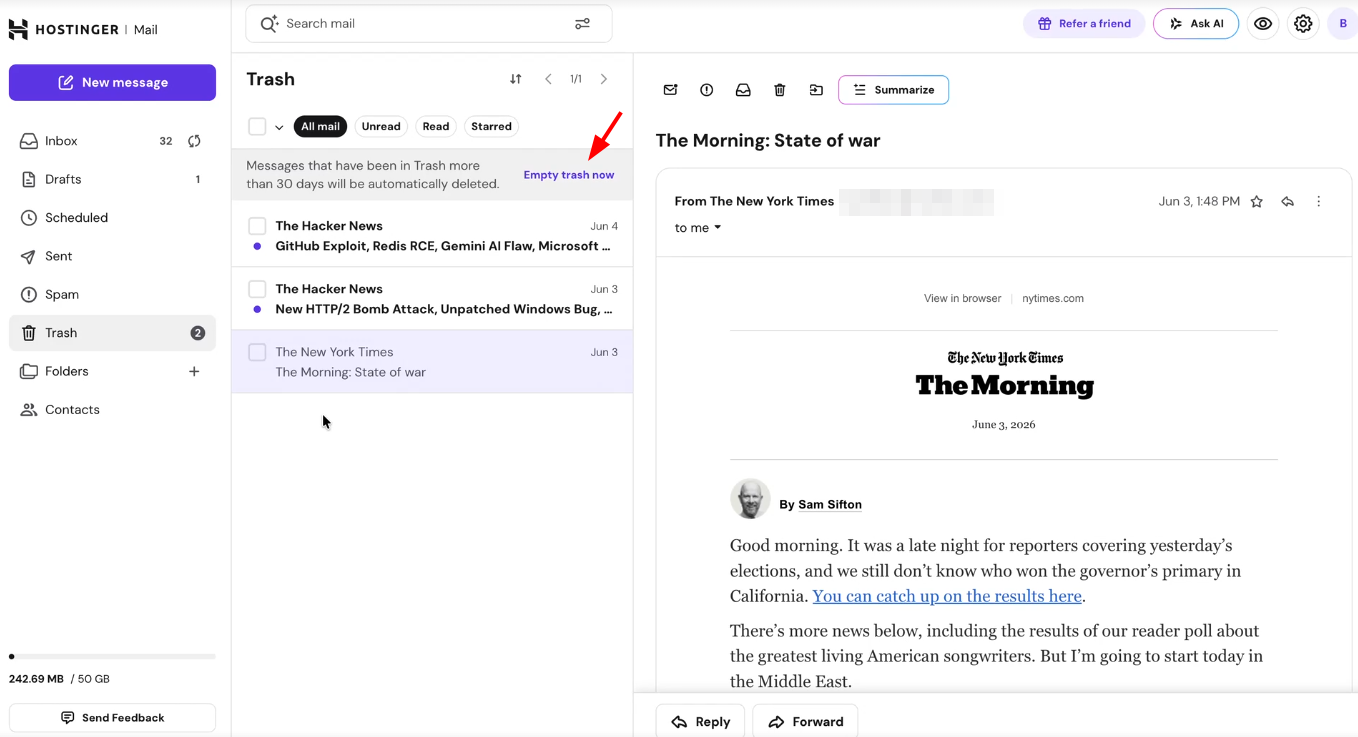
To remove all messages from Trash at once, open the Trash and click Empty Trash Now. This permanently deletes all messages in Trash and cannot be undone.
Automatic Trash cleanup
Messages in Trash are automatically and permanently deleted after 30 days. Webmail displays a notice in the Trash folder as a reminder. To recover a message before it is permanently deleted, move it to another folder (e.g., Inbox).
More Webmail features
Hostinger Mail includes additional tools to help you organize, personalize, and track your email:
- Integrate Hostinger Email into your website
- Create and use email templates
- Use calendar invitation cards in Hostinger Webmail
- Create and manage email groups in Hostinger Webmail
- Set up email filters (rules) on Hostinger Mail
- Use read receipts in Hostinger Mail
- Use link and file tracking
- Send emails from an email alias using Hostinger Mail Web App. This guide covers sending from an alias in Webmail only.
- Recover deleted emails in Hostinger Email
- Export emails from Hostinger Email
- Import contacts to Hostinger Email via Webmail
- Connect your mailbox to AI agents and workflows with Agentic Mail
Security tips
-
Click Log out (or Log out of all mailboxes if you have more than one mailbox signed in) when using webmail on shared or public devices, since signing out of one mailbox does not affect other active sessions.
-
Use a strong, unique password for your email account.
-
Keep your login details private.