When managing your email services at Hostinger, you’ll find everything you need in the Email section of your Hostinger dashboard. Here’s a quick guide on what you can access and manage there.
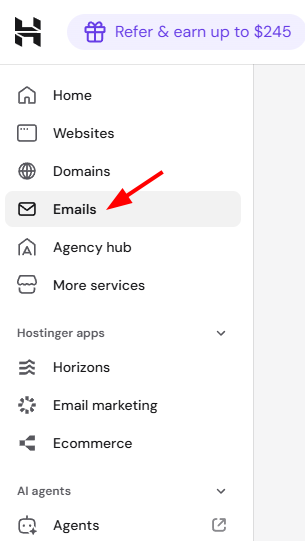
Select the Emails area on the sidebar of your Hostinger dashboard:
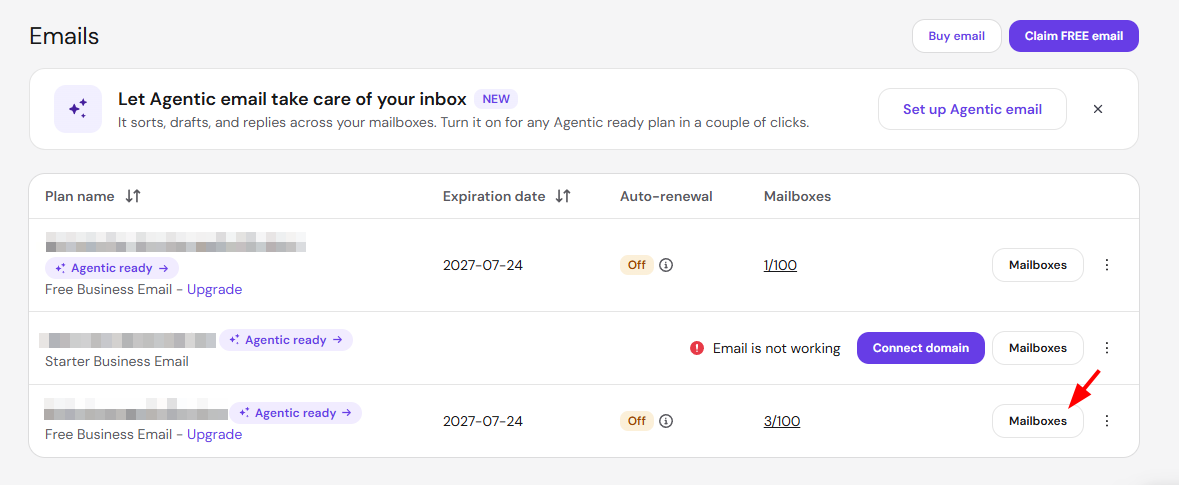
And then click Mailboxes next to the domain or subdomain you want to manage emails for:
Mailboxes
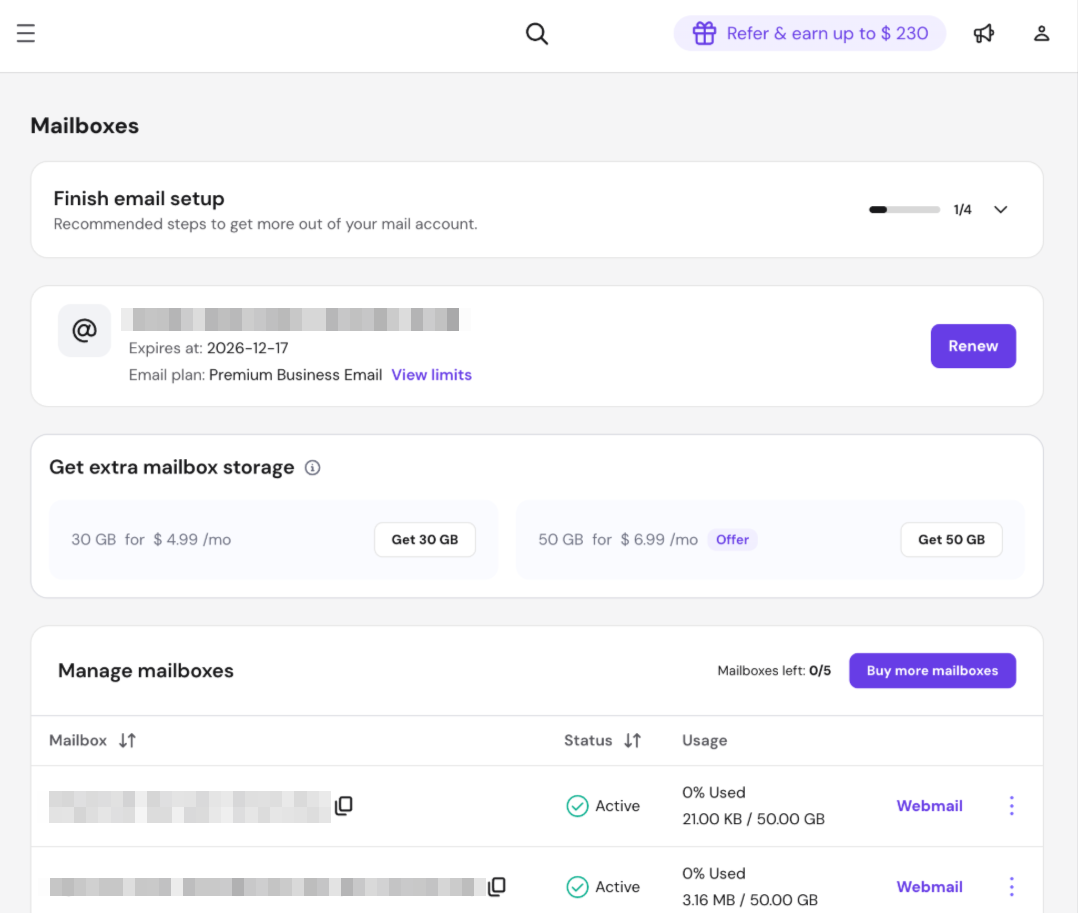
The Mailboxes page consolidates all email management in one place:
- Plan details (linked domain, expiration, plan name, and limits)
- Create mailboxes
- Mailbox list with quick actions such as webmail access, settings, password reset, forwarders (see known limitations and alternatives), aliases, and auto-reply
- Catch-all setup for undelivered addresses
- Managing email storage by upgrading your email plan or deleting the mailboxes
Domain settings
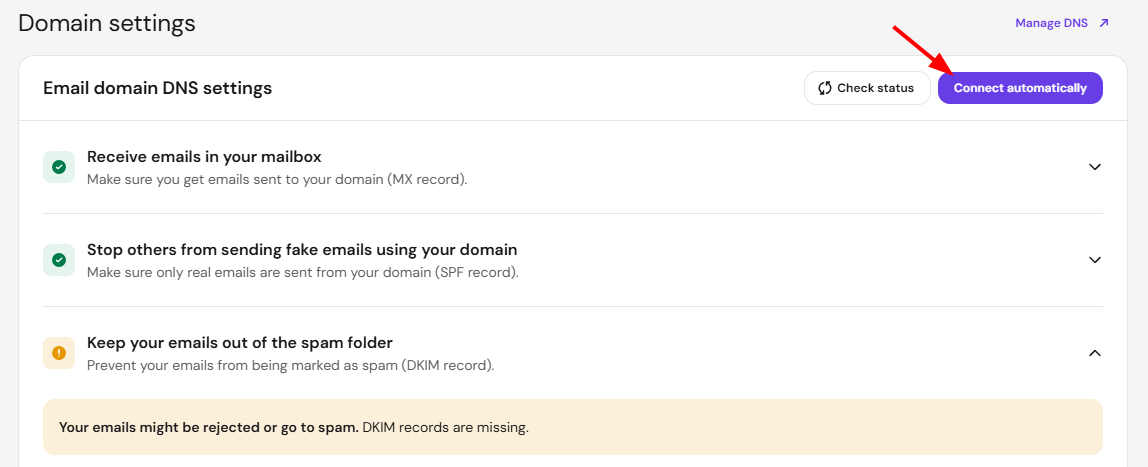
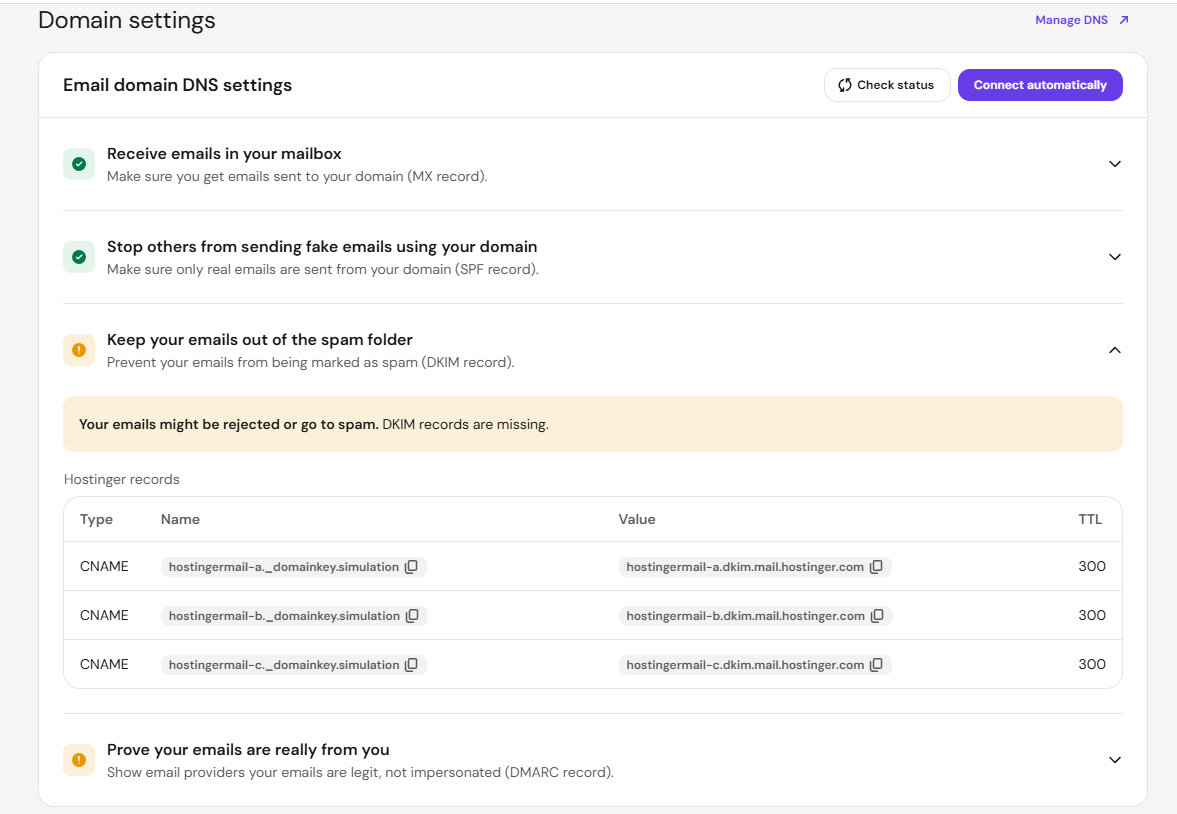
Here, you can verify your domain’s connection to the email service. The system checks whether all necessary DNS records are correctly configured.
-
If everything is correctly set up, you’ll see a green status icon.
-
If any record is missing or incorrect, a warning icon will appear.
If your domain uses Hostinger’s nameservers and you are using Hostinger Email, you can fix DNS issues automatically by clicking Connect automatically.
If your domain is connected to external nameservers, on the “Domain settings” tab, you can find the list of the required DNS records for Hostinger Email. You can then manually update them at your domain provider’s platform.
Connect apps & devices
This section provides quick setup instructions for connecting your mailbox to Gmail, Outlook, Apple Mail, or another email client. Select your app, and copy the pre-filled email address, IMAP, and SMTP server settings directly into it.
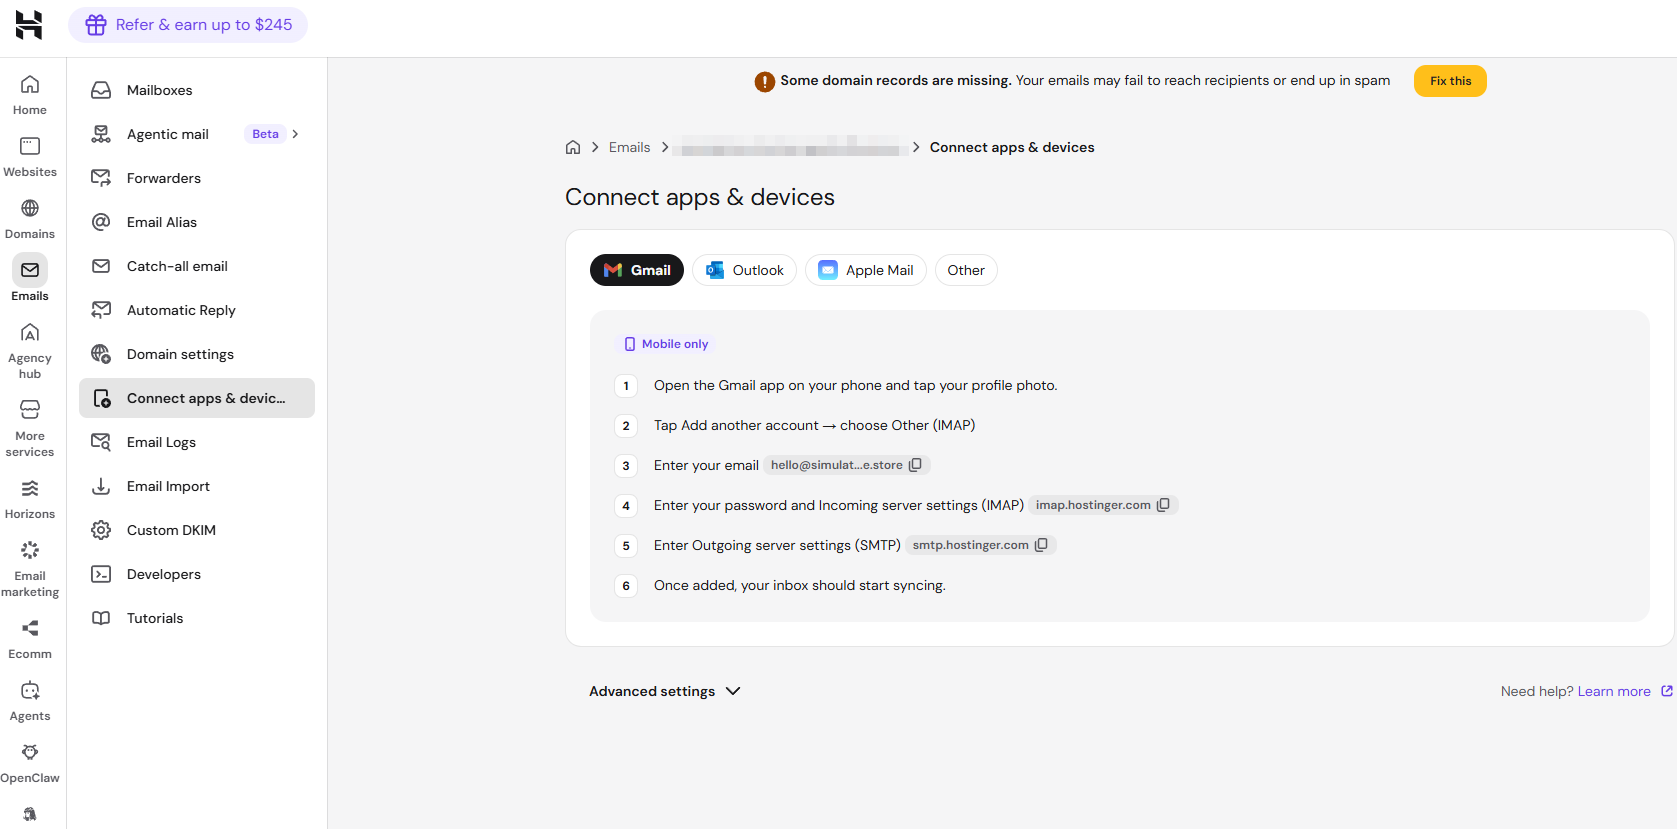
See set up Hostinger Email on your applications and devices for the full walkthrough across all supported devices and clients.
Developers
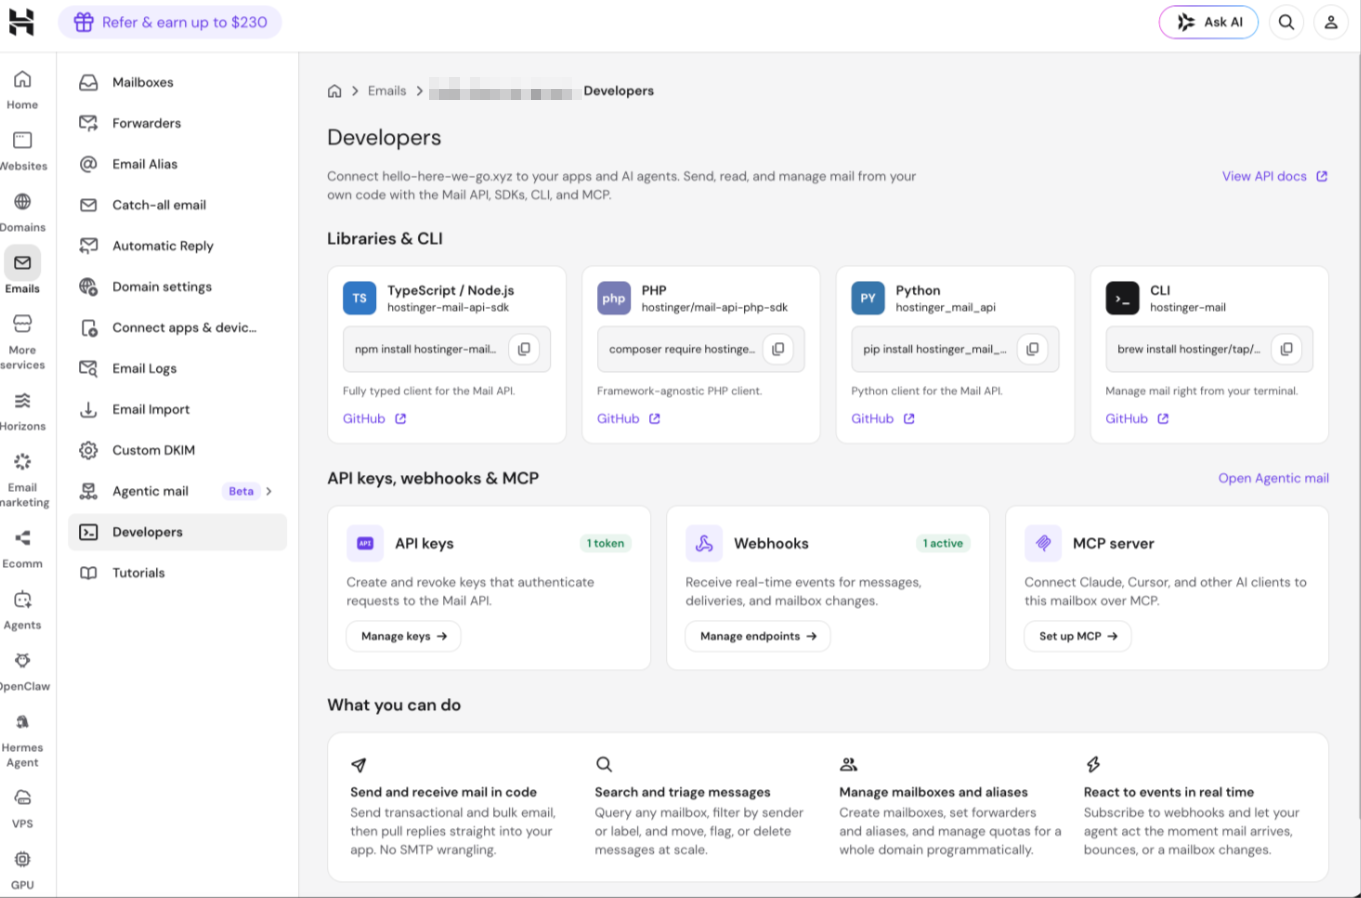
This section brings together the resources needed to connect your mailbox to your own apps and AI agents, including:
- Libraries & CLI — install snippets and GitHub links for the TypeScript/Node.js, PHP, and Python SDKs, plus the CLI tool
- API keys — create and revoke keys used to authenticate requests to the Mail API
- Webhooks — manage endpoints that receive real-time events for messages, deliveries, and mailbox changes
- MCP server — connect Claude, Cursor, and other AI clients to a mailbox over MCP
From here, you can also view the full API documentation to see what’s possible with sending, searching, and managing mail programmatically.
Agentic Mail
Agentic Mail gives your AI agents a real inbox to act on incoming messages and reply automatically. It’s also available directly from Webmail if you only need to manage settings for the mailbox you’re logged into. From Hostinger dashboard, it includes:
It includes:
- API access — send, retrieve, and organize emails programmatically via a RESTful API.
- MCP Server — connect your agentic stack with minimal setup through a dedicated Model Context Protocol server.
- Webhooks — receive instant HTTP notifications when email events occur, so your agent reacts the moment mail arrives.
- Allow/Block lists — control which addresses this mailbox can send to and receive from.
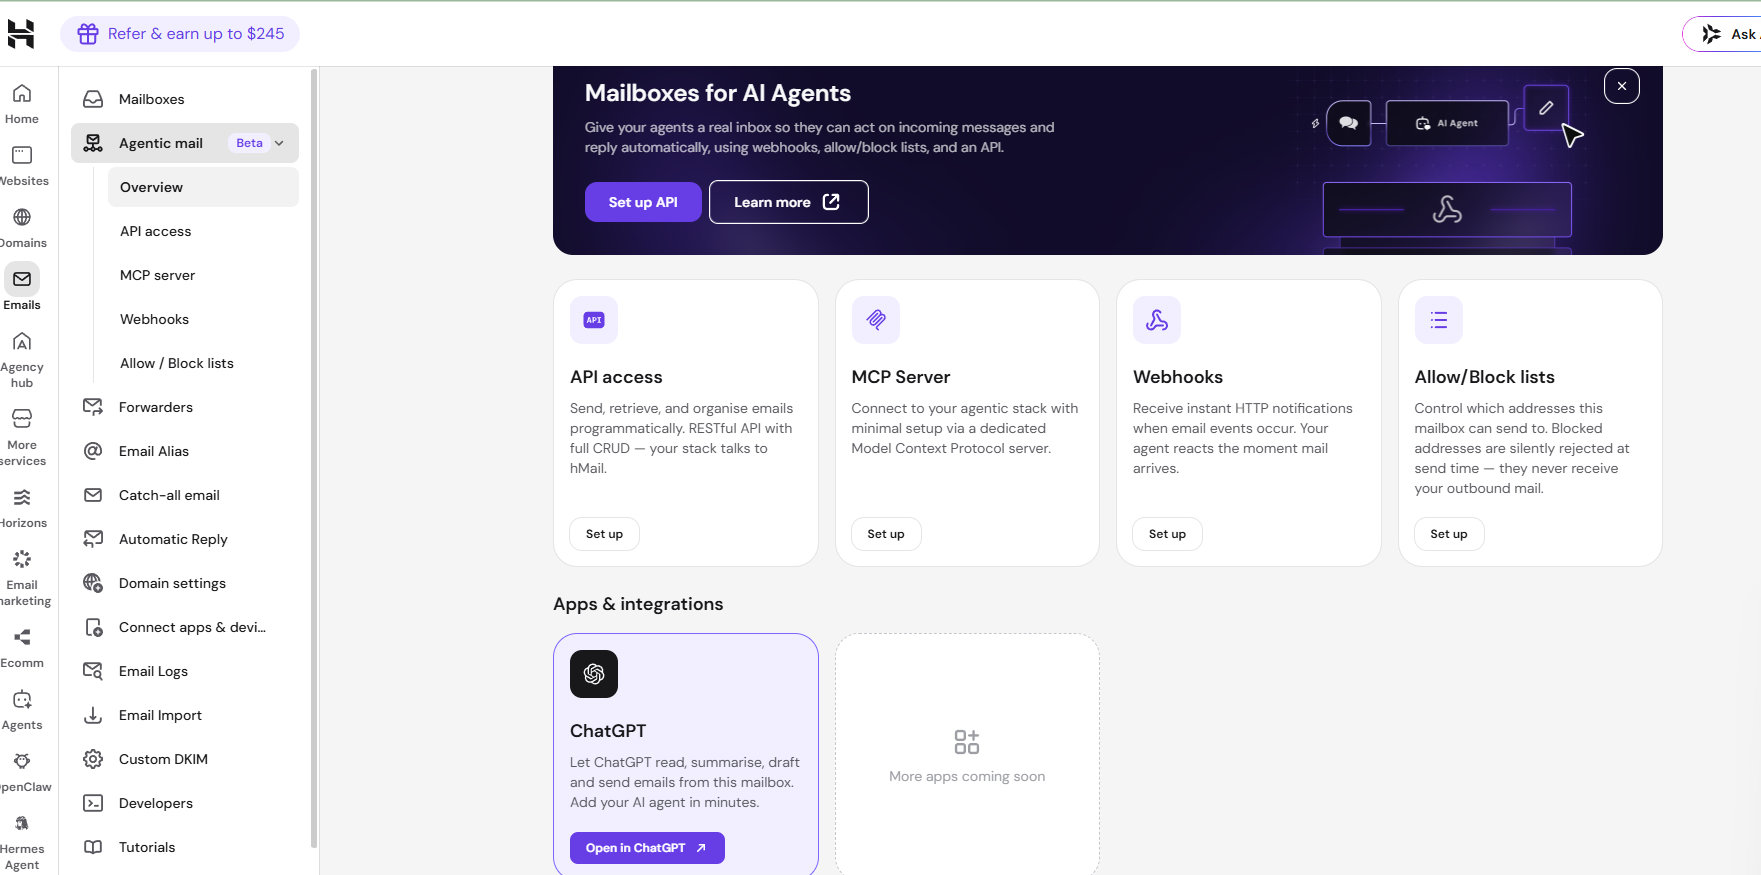
See how to use Agentic Mail for setup instructions. Agentic Mail also supports direct integrations, such as connecting ChatGPT to read, summarize, draft, and send emails from a mailbox.