Quick overview
Forms in Hostinger Reach are one of the simplest and most effective ways to grow your email marketing contact list. A form is typically a short sign-up element where visitors can enter their email address (and optionally other details like name) to subscribe to your communications that can be added either directly to your site or shared using a standalone link.
Once a visitor submits a form, their contact details are automatically added to your Reach contacts list — ready for future campaigns.
Step-by-step integration guides
Before creating your form, choose how you want to use it on your site. Follow the relevant guide below:
- Add a form to a WordPress site
- Add a form to a Hostinger Website Builder site
- Add a form to a Hostinger Horizons site
Note that you can add a form built with Reach to any site. These step-by-step guides are just to support non-technical people to succeed.
Why use forms?
Forms are essential for building a high-quality email list because:
- ✅ They collect legitimate, consent-based contacts
- ✅ Visitors explicitly opt-in to receive your emails
- ✅ You can grow your audience organically
- ✅ Contacts are automatically synced to Reach
This ensures you’re reaching people who are genuinely interested in your content — whether it’s promotions, updates, or educational material.
How forms work
A form usually includes:
- Email address field (required)
- Optional fields (e.g., name, surname)
- Consent checkbox (GDPR compliance, depending on your region)
When a visitor submits the form:
- Their data is captured
- They are added to your Reach contacts
- You can target them in future campaigns
Types of forms in Reach
Hostinger Reach currently supports:
1. Embedded forms
- Added directly into your website pages
- Always visible (e.g., newsletter section in footer or homepage)
- Best for consistent, passive subscriber collection
2. Standalone forms (shareable link)
- Hosted on a separate page
- Can be shared via:
- Social media
- Messaging platforms
- Great for collecting subscribers outside your website
3. Pop-up forms (coming soon)
- Will appear as overlays on your website
- Ideal for capturing attention and boosting conversions
Best practices: Give users a reason to sign up
People are more likely to subscribe if there’s a clear benefit. Common incentives include:
- 🎁 Discount codes
- 📘 Free e-books or resources
- 📩 Exclusive content or tips
- 🎓 Educational material
How to create a form in Hostinger Reach
Step 1: Name your form
Give your form an internal name (only visible to you).

Step 2: Design your form
- Click Start designing
- Choose your incentive
- Reach AI will generate a form layout
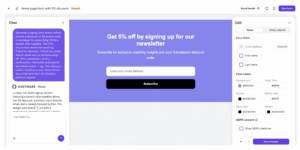
You can then customize it in two ways:
Chat mode (AI-assisted):
- Ask to change layout or style
- Add images
Edit mode (manual):
- Modify text and sections
- Add more fields (e.g., name, surname)
- Reorder or remove elements quickly
- Adjust colors, buttons, and styles
- Check “after submission” message
Step 3: Set up your audience
Choose how contacts will be organized in Reach when a new subscriber signs up:
- Add a tag (recommended)
- Create a segment (optional but useful)
This helps you target subscribers from this form later.
Step 4: Activate your form
Before using your form, you must activate it.
⚠️ Important
- If the form is not active (still in draft or paused), it will not display, even if embedded in your site or shared via link.
Step 5: Add or share your form
You now have two options:
- Embed on your website
- Share via direct link
For detailed instructions, follow the integration guides listed at the beginning of this article.
Summary
Forms in Hostinger Reach are a powerful, flexible way to:
- Grow your subscriber list
- Collect consent-based contacts
- Automatically sync users into your email marketing system
You can embed them on your site or share them as standalone pages — depending on your strategy.