Set up automated email marketing workflows to send follow-up messages after someone submits a form.
With Hostinger Reach, you can automatically send an email after someone submits a specific form. This helps you instantly deliver event details, welcome messages, confirmation emails, resource links, or other relevant follow-ups.
Form submission automations can be triggered for:
- New subscribers who join your Reach audience through the form
- Everyone who submits the form, including contacts who already exist in Reach
This is useful when you want to:
- Thank attendees for registering and share event details, calendar links, or reminders
- Confirm that you received an inquiry and explain the next steps
- Deliver a lead magnet, guide, discount, or other requested resource
- Send a follow-up whenever someone submits a recurring registration or request form
Recommended setup
For forms created directly in Hostinger Reach, use the Contact submits Reach form automation trigger.
The recommended setup is:
- Create and activate a Reach form.
- Add the form to your website or open its preview URL.
- Go to Automations and create a new automation.
- Select the Form submission email template.
- Choose Contact submits Reach form as the trigger.
- Select the form that should start the automation.
- Choose whether the automation should run for new contacts only or for everyone submitting the form.
- Add your follow-up email and any additional steps.
- Activate and test the automation.
Using the dedicated form submission trigger is recommended because it connects the automation directly to the selected Reach form and can also work for existing contacts.
Step 1 — Create and publish your Reach form
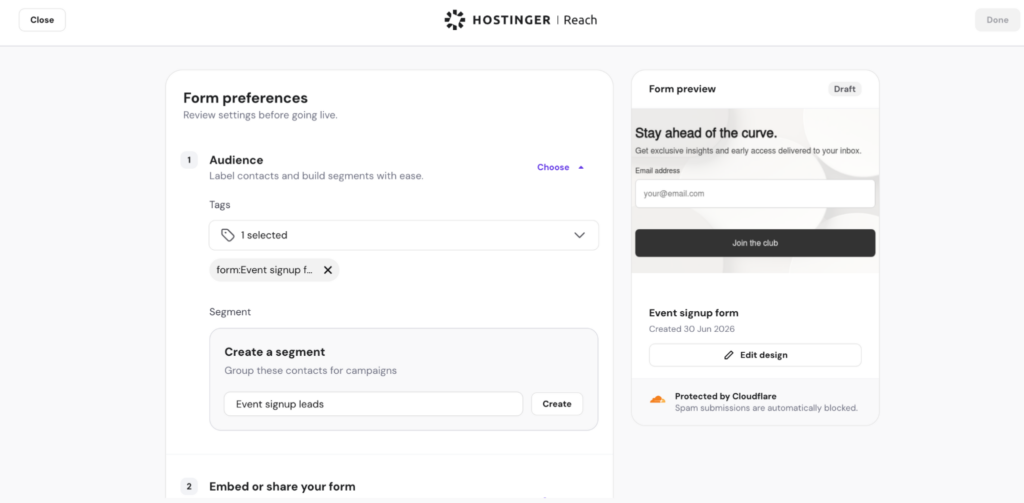
Before creating the automation, make sure your Reach form is ready to collect submissions.
To create a form:
- Go to Forms in Reach.
- Create a new form and customize its fields and design.
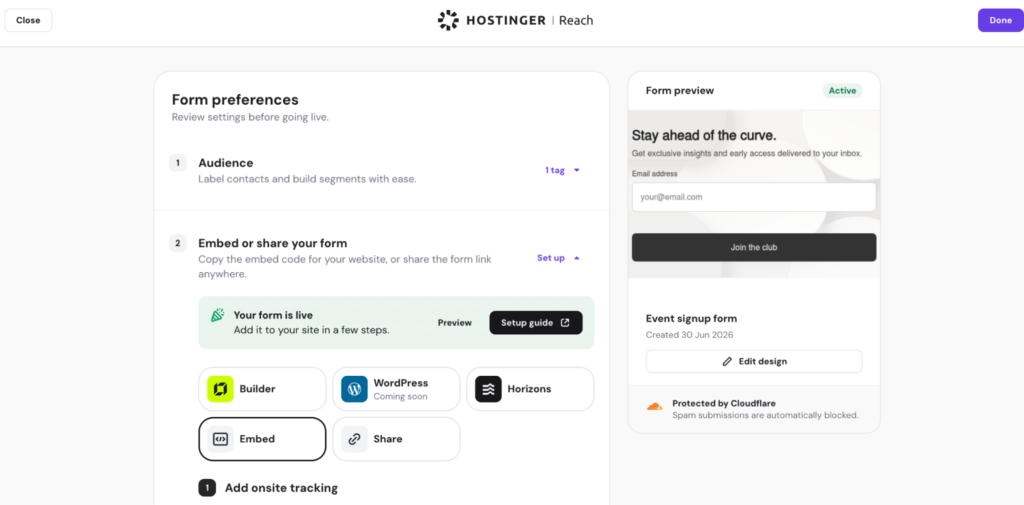
- Activate the form.
- Add it to your website or open the form’s preview URL from the Share options.
The form must be active and accessible before it can collect submissions and start the automation.
Step 2 — Create the automation
Once the form is ready:
- Go to Automations in Reach.
- Click New automation.

- Under the First steps category, select Form submission email.
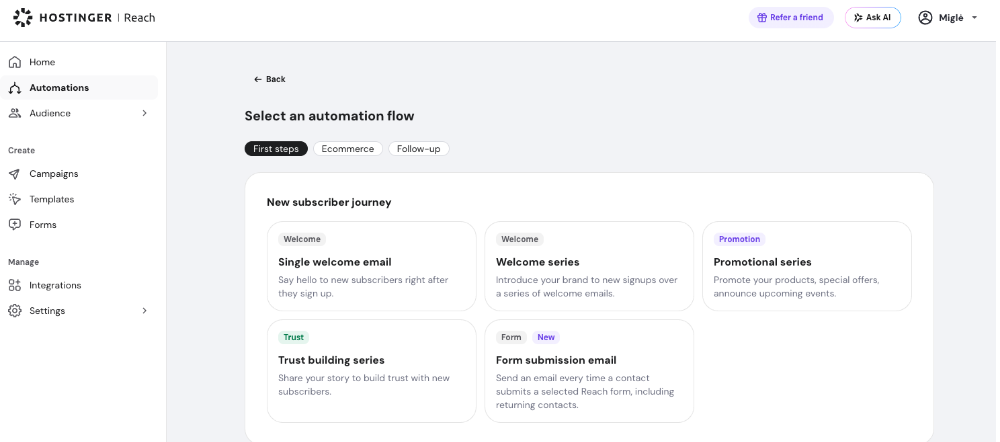
This template includes:
- A pre-filled Contact submits Reach form trigger
- A follow-up email step that you can customize
You can also create an automation from scratch and select Contact submits Reach form as the first step.
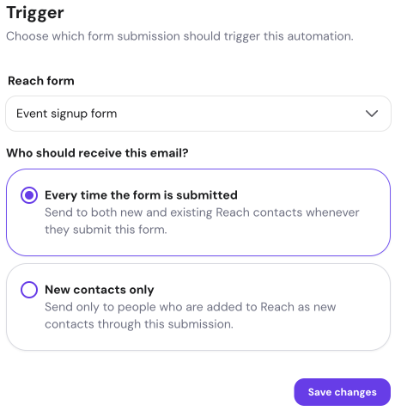
Step 3 — Select the form
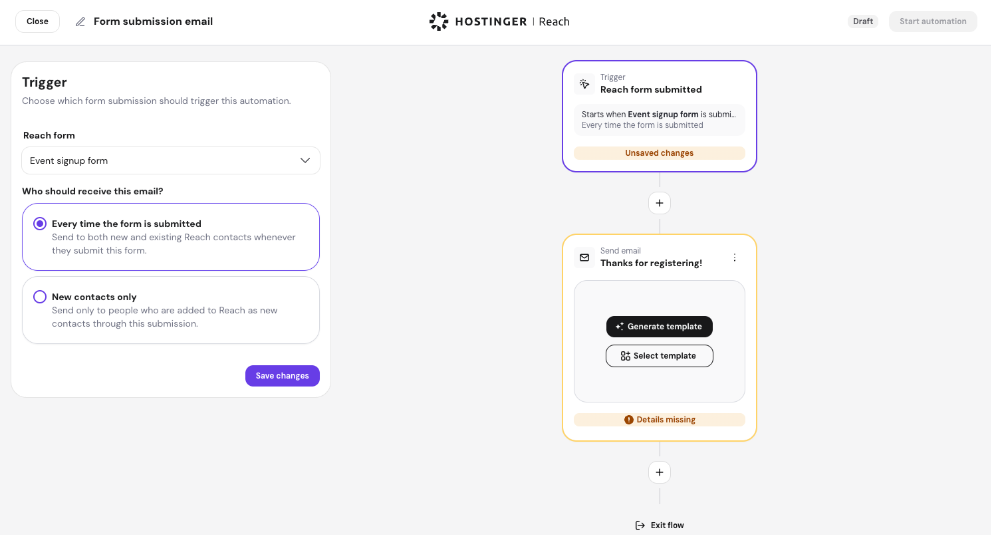
In the automation trigger settings, select the Reach form that should start the workflow.
Only forms created directly in Reach can currently be selected with this trigger.
If the form does not appear:
- Confirm that it was created in Reach
- Refresh the automation editor and try again
Step 4 — Choose who should enter the automation
Select how the automation should behave when the form is submitted.
Every time the form is submitted
The automation starts whenever someone submits the selected form.
This includes:
- New subscribers
- Existing Reach contacts
- Contacts submitting the same form again
Use this option for recurring registrations, inquiries, bookings, event signups, resource requests, or any workflow where every submission should receive a response.
New contacts only
The automation starts only when someone is added to Reach as a new contact through the selected form.
Existing contacts who submit the form will not enter the automation.
Use this option for one-time welcome emails, initial onboarding flows, or campaigns intended only for newly collected subscribers.
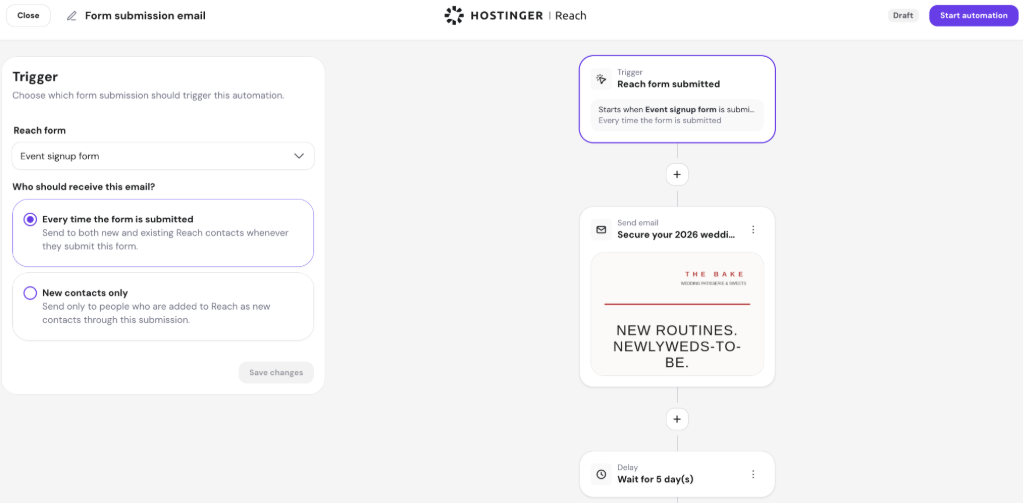
Step 5 — Add the follow-up email
After configuring the trigger:
- Open the email step.
- Create or customize the email that should be sent after the form submission.
- Add any additional steps required for your workflow.
You can add:
- More emails
- Time delays
- Conditions
- Follow-up paths based on contact behavior
For example, you can immediately send an event confirmation, wait one day, and then send a reminder or additional information.
Step 6 — Activate and test the automation
Before testing, make sure the automation is active.
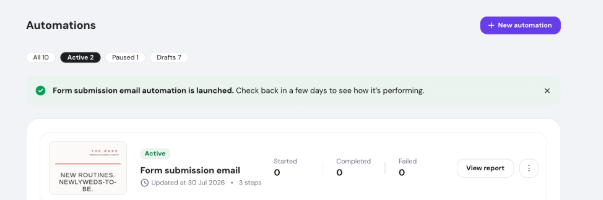
Then continue following these steps:
- Open the form on your website or use its preview URL.
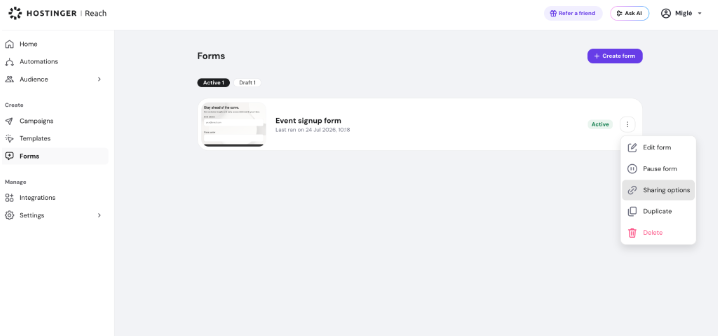
- Submit it using a test email address.
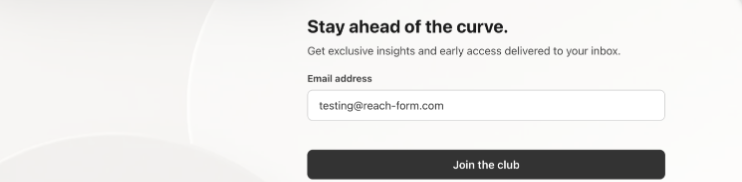
- Check that the contact appears under Audience → Contacts.
- Confirm that the automation starts and the follow-up email is sent.
When testing the New contacts only option, use an email address that does not already exist in your Reach audience.
When testing the Every time the form is submitted option, you can also use an existing Reach contact to confirm that repeat submissions start the automation.
Using forms from Hostinger integrations
The Contact submit Reach form trigger currently works only with forms created directly with Hostinger Reach Form.
If you collect contacts through forms created in:
Use the segment or tag created for that form submission instead, as for every unique form, a unique form and segment is automatically created for you.
To create an automation for an integrated form:
- Confirm which segment or tag is assigned to contacts submitting the form.
- Go to Automations.
- Create a new automation.
- Select the relevant segment-based trigger.
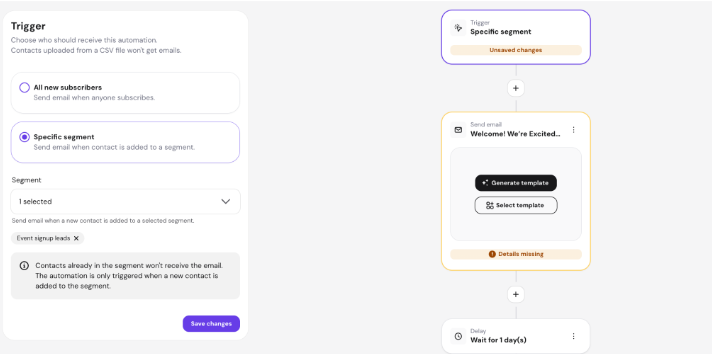
- Choose the segment connected to the form.
- Add the follow-up email and activate the automation.
Keep in mind that segment-based triggers may only start the automation when a contact newly enters the selected segment. They may therefore behave differently from the dedicated Reach form submission trigger, especially for contacts who already exist in Reach.
You will now automatically send the appropriate follow-up whenever someone submits your selected form.
Additional resources: