If you run a Hostinger Ecommerce store, consider enabling Stripe. It’s a convenient and trustworthy online payment provider that supports a variety of payment methods.
The default payment method available with Stripe is bank cards. Other payment methods mentioned below are available depending on the store’s regional settings, such as the store country and the currency. Hostinger Ecommerce checkout doesn’t show the Stripe name when you use Stripe. It shows card brand logos under Popular payments options instead.
Payment methods supported by Stripe
|
Payment method |
Popularity |
Supported currencies |
|
Popular worldwide |
||
|
Popular worldwide |
||
|
Popular worldwide |
||
|
Popular in China |
CNY, AUD, CAD, EUR, GBP, HKD, JPY, SGD, MYR, NZD, USD |
|
|
Popular in Belgium |
EUR |
|
|
Popular in Poland |
PLN |
|
|
Popular in Brazil |
BRL |
|
|
Popular in France |
EUR |
|
|
Popular in Austria |
EUR |
|
|
Popular in Malaysia |
MYR |
|
|
Popular in Germany |
EUR |
|
|
Popular in Malaysia and Singapore |
SGD, MYR |
|
|
Popular in the Netherlands |
EUR |
|
|
Popular in Europe and the USA |
EUR, GBP, DKK, NOK, SEK, USD |
|
|
Popular in Singapore |
SGD |
|
|
Popular in Poland |
EUR, PLN |
|
|
Popular in China |
CNY, AUD, CAD, EUR, GBP, HKD, JPY, SGD, USD, DKK, NOK, SEK, CHF |
|
|
Popular in Europe |
USD, CAD, GBP, AUD, NZD, or EUR |
Enabling Stripe payments (by bank card)
Before enabling Stripe, check if your business doesn’t fall under any of Stripe’s restricted business categories.
To enable Stripe, follow these steps:
- Go to Settings → Payments in your Hostinger Ecommerce Store Manager, and click on Connect next to Stripe. If you use Hostinger AI Builder, you can also reach them from the online store settings area.
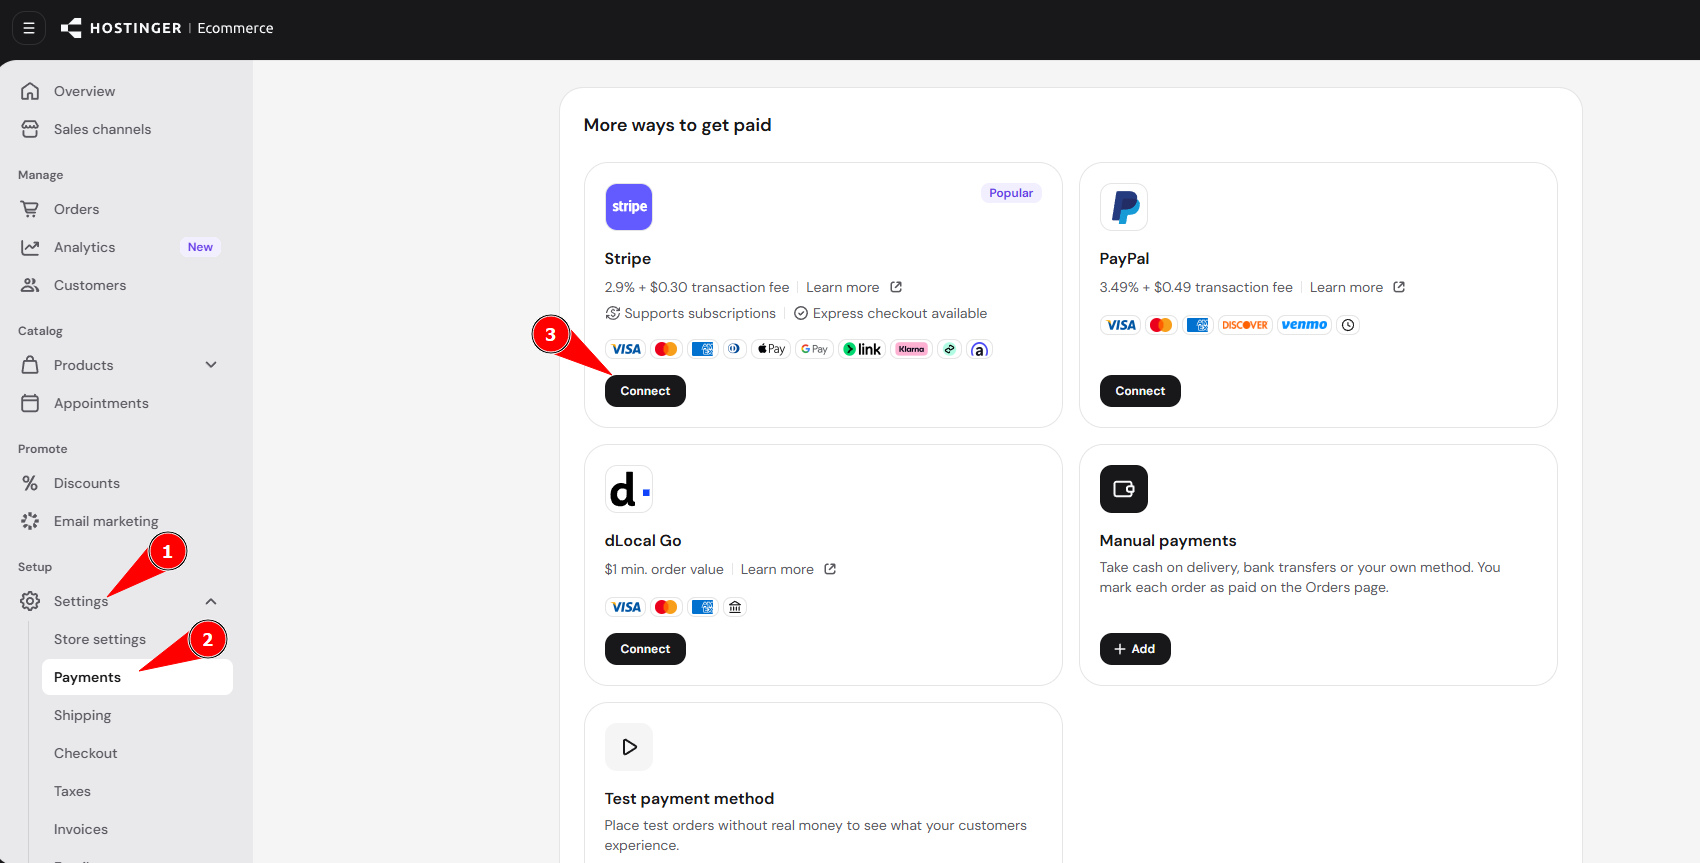
- Log into your Stripe account (or create one for free) and continue with the steps on the screen.
- Finally, double-check your details and click Submit.
Stripe will review and verify your account within 1-3 business days. You’ll receive an email notification once it’s done.
Enabling additional payment methods via Stripe
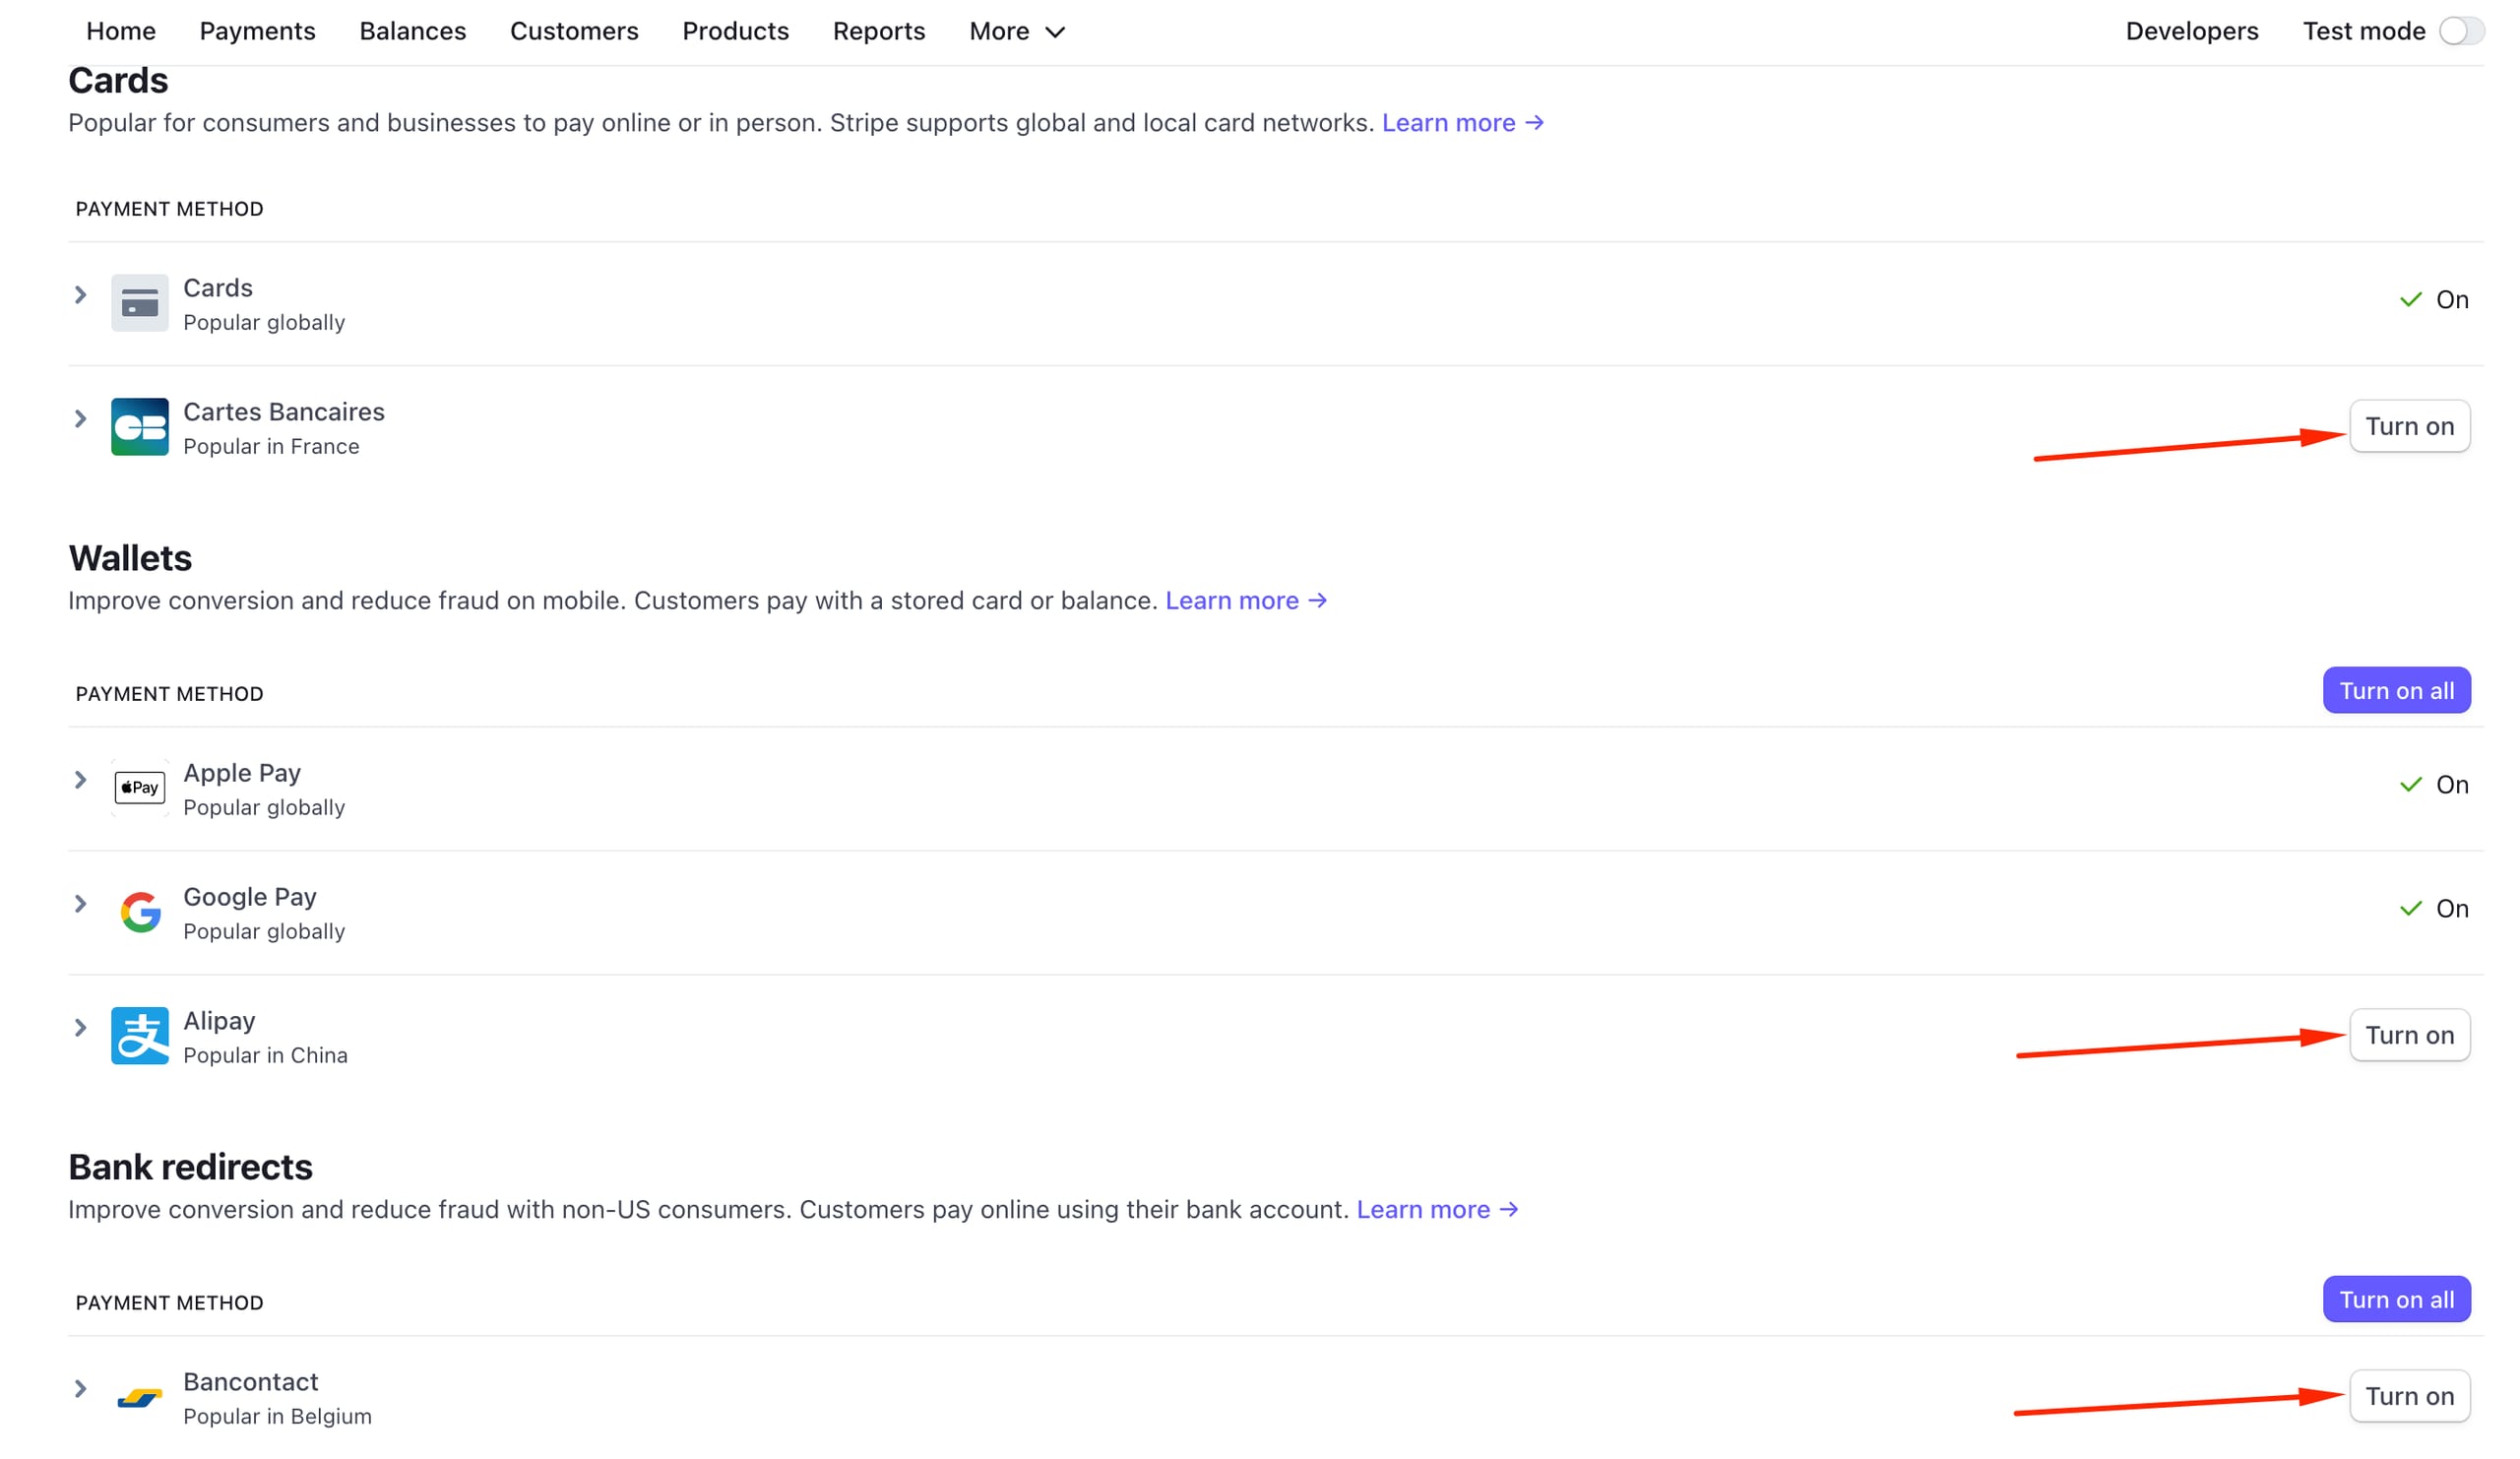
- In your Hostinger Ecommerce Store Manager, go to Settings → Payments → Manage (Stripe), and open your Stripe account.
- Within your Stripe account, go to the payments settings and enable the preferred payment methods by clicking on Turn on next to each (or click on Turn on all to enable all at once):
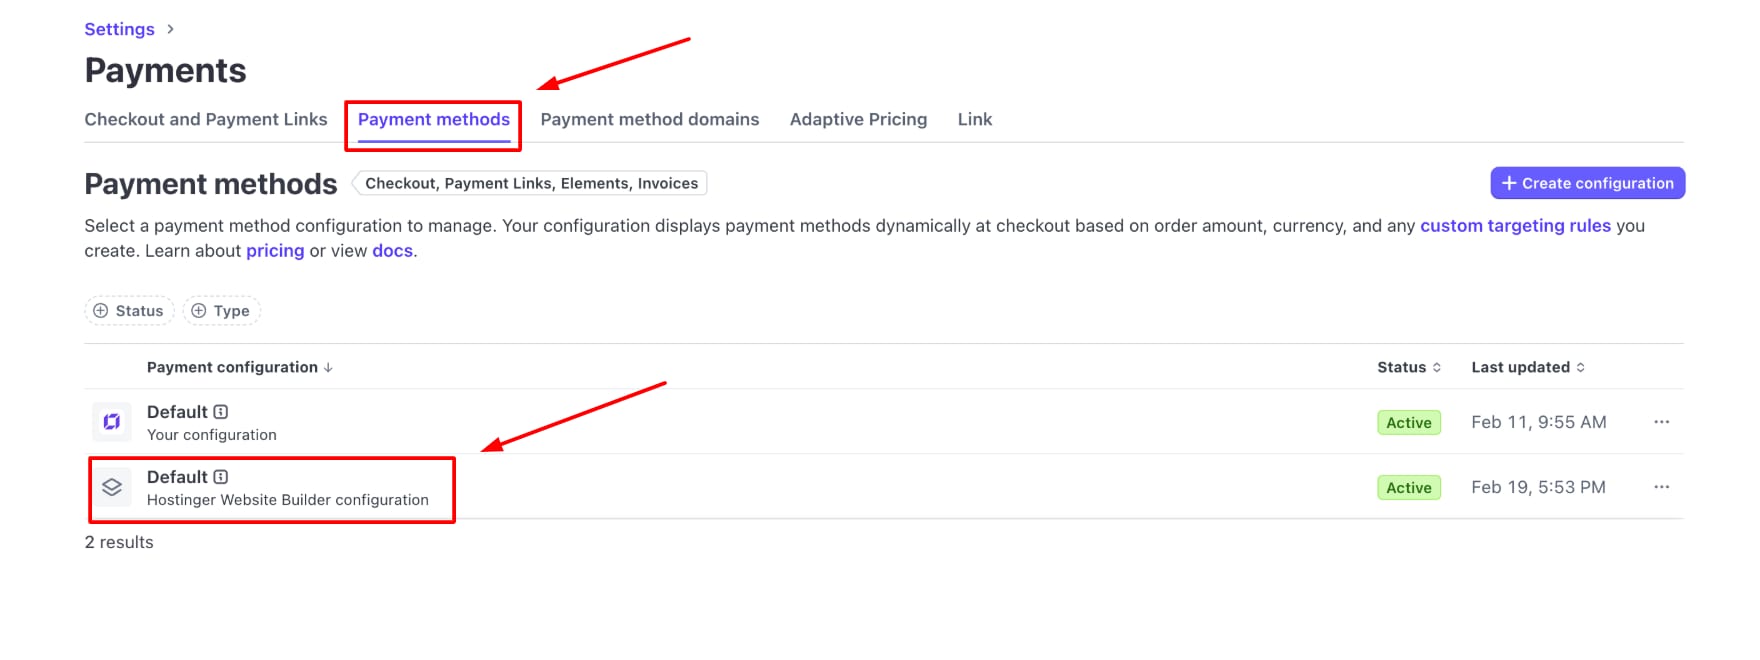
- When connecting payments, you need to select Hostinger Payment Configuration list in Stripe instead of the default option:
Other payment methods are available under special conditions, for example:
-
Google Wallet is available for clients who have it set up on their devices
-
Apple Pay is available for those who have it set up on their devices and use the Safari browser
-
Country-specific payment methods are available depending on your store’s country and your clients’ location
Additional useful information about connecting your Hostinger Ecommerce store with Stripe:
-
Once Stripe is disconnected from your store, that Stripe account gets deleted. When trying to reconnect Stripe to your store, you will be granted a new Stripe account with a new ID number, being unable to use the previously granted account.
-
When Stripe restricts your account, an Action required badge and a red warning banner appear in the Added payment methods list: “Stripe has restricted your account. Your customers can’t pay with Stripe until you fix the issue in your Stripe account.” Resolve the restriction in your Stripe account to remove the alert.