Connect your Hostinger AI Builder agentic mode CRM project to Twilio to manage WhatsApp customer support tickets efficiently. This guide covers retrieving your sandbox credentials, configuring webhooks, and launching your live, approved WhatsApp sender.
Before you start
- You must have an active Hostinger AI Builder account and an existing CRM project.
- You need a registered Twilio account.
- A verified Meta (Facebook) Business Manager account is required if you plan to launch a live WhatsApp sender.
Retrieving Twilio credentials
- Log in to your Twilio Console.
- Locate the Account SID and Auth Token on your dashboard interface. Copy these values to a secure location, as you will add them to your Hostinger AI Builder project later.
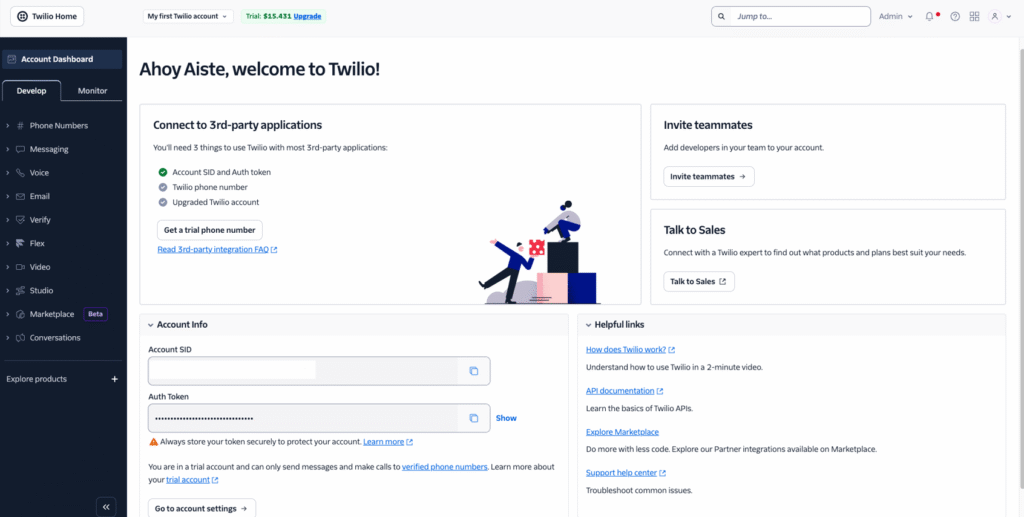
- Access the Twilio sandbox by navigating to Messaging ❯ Try it out ❯ Send a WhatsApp message.
- Follow the instructions on the screen to join the sandbox. The displayed number serves as your testing environment.
- Save the gathered Twilio Account SID, Twilio Auth Token, and Twilio WhatsApp sandbox number directly into your Hostinger AI Builder project settings.
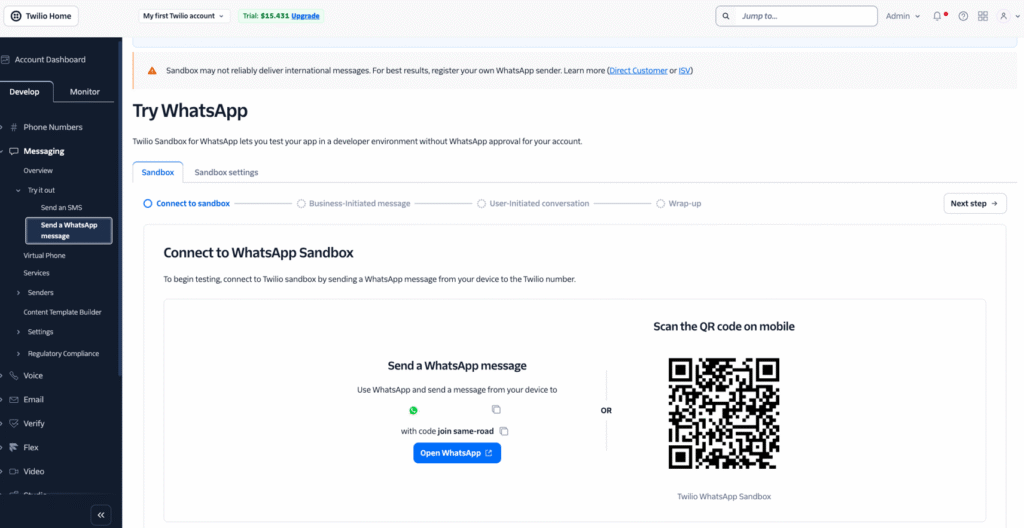
Sandbox access automatically expires after 72 hours per device. You can rejoin the sandbox at any time by resending the designated join code or scanning the provided QR code.
Configuring sandbox webhooks
- Open your Hostinger AI Builder workspace and click Publish in the top-right corner to generate a live URL for your project. Copy your site URL.

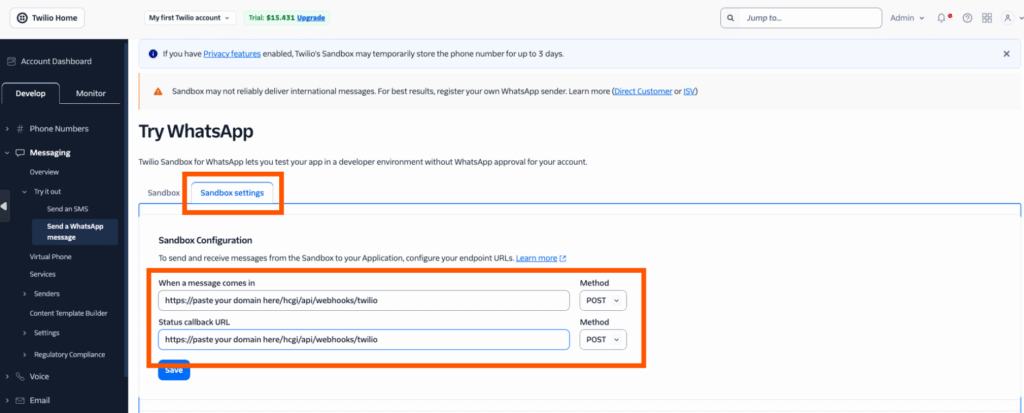
- Return to the Twilio Console and navigate to Messaging ❯ Try it out ❯ Sandbox settings.
- Locate the Sandbox Configuration area and enter your customized webhook URLs:
- When a message comes in: https://<your-domain>/hcgi/api/webhooks/twilio
- Status callback URL: https://<your-domain>/hcgi/api/webhooks/twilio/status
- Replace <your-domain> in both URLs with your actual published Hostinger AI Builder site URL, and save the updates.
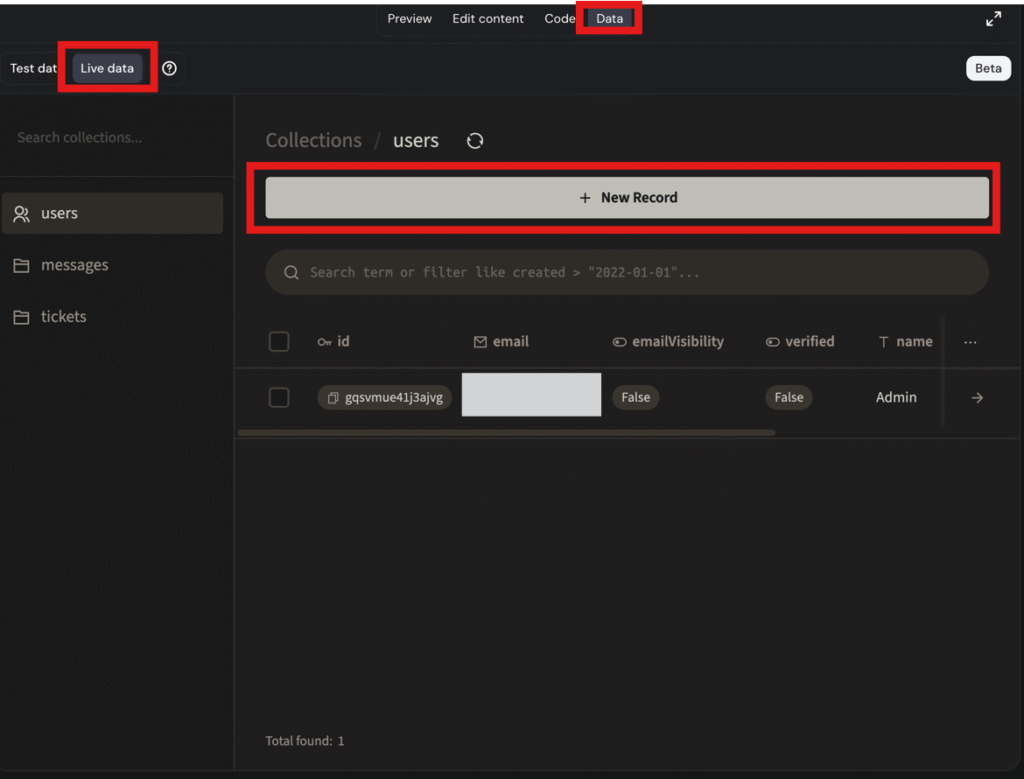
- Access your Hostinger AI Builder Live Data dashboard to set up an administrative account. Navigate to Live Data, click + New Record, enter your administrative details, and log in to your CRM application.
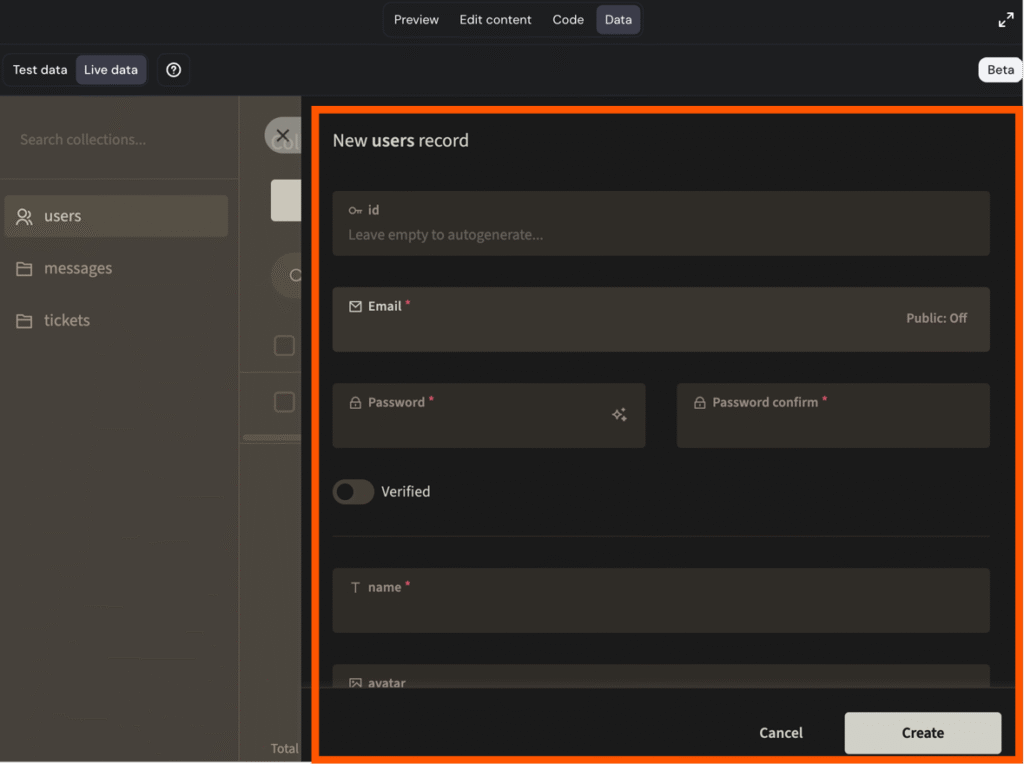
- Test the connection by sending a WhatsApp message to your sandbox number from an independent device.
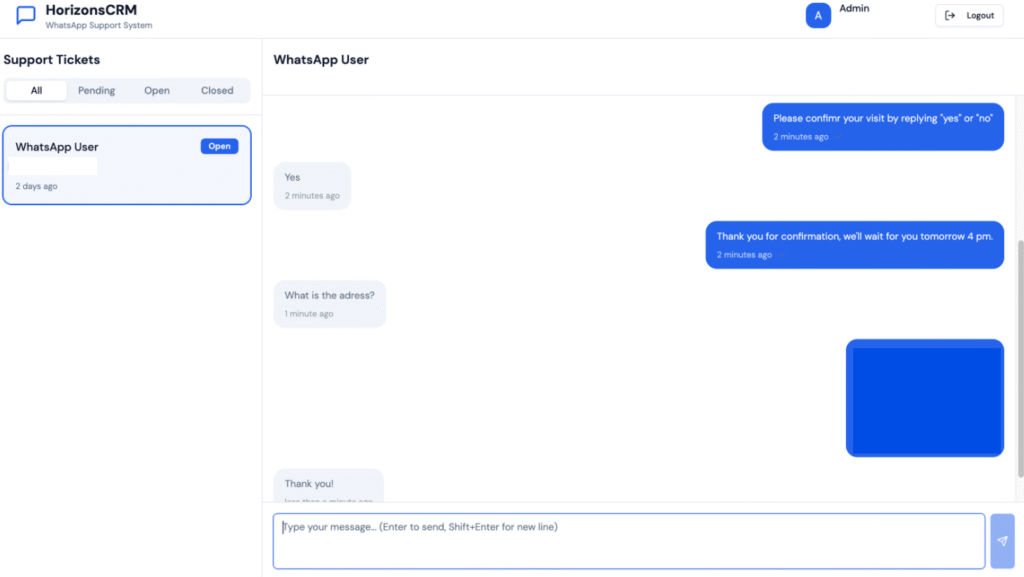
- Open your Hostinger AI Builder CRM app to verify that a new support ticket has generated from your test message.
- Open the ticket inside the CRM interface and type a reply. The response automatically routes back to the sender via WhatsApp.
Launching your live WhatsApp sender
- Navigate to Messaging ❯ Senders in your Twilio Console and complete the required Business Profile approval process. Twilio will send an email confirmation once the profile is approved.
- Open your Hostinger AI Builder project settings and update the following environment variables with your newly approved live number
- TWILIO_WHATSAPP_NUMBER
- TWILIO_WHATSAPP_FROM_NUMBER
- Open the configuration page for your approved sender within the Twilio Console.
- Set the live webhook URLs using your published Hostinger AI Builder URL:
- When a message comes in: https://<your-domain>/hcgi/api/webhooks/twilio
- Status callback URL: https://<your-domain>/hcgi/api/webhooks/twilio/status
- Send a final test message to your live WhatsApp number to verify end-to-end message delivery.
Your WhatsApp CRM communication system is now successfully connected and ready to manage live support conversations directly through Hostinger Hostinger AI Builder.
Follow along with this step-by-step video guide: