A subdomain allows you to create a separate section or an independent website under your main domain. For example, an online store can be hosted on shop.domain.tld.
Before you start
How you create a subdomain depends on your hosting type:
-
Web and cloud hosting: follow the steps below
-
Agency hosting: check the guide for subdomains on Agency hosting
-
VPS hosting: subdomain creation depends on your control panel or operating system template. Follow the documentation for your VPS setup
store.shop.domain.tld) are not supported on web, cloud and Agency hosting.Step 1 – Create the subdomain
There are two ways to create a subdomain in Hostinger. The right option depends on how you want to manage the website.
Method 1 (recommended) – Create a subdomain as an independent website
Use this method if you want to manage the subdomain as a separate website, for example: a WordPress website, a Hostinger Website Builder website, an online shop, or a standalone application.
This is also the method to follow if the root domain of the subdomain is connected to a Hostinger Website Builder or Hostinger Horizons website.
To create the subdomain:
-
Follow Step 1 of the guide: How to add a website in Hostinger
-
During onboarding, enter the subdomain name (for example,
shop.domain.tld)
This method creates a fully independent website with its own settings and management options.
Create the subdomain as part of an existing website
This option is available only if the main domain is hosted at Hostinger as a PHP/HTML website (including WordPress) or a Node.js application. It is not supported for websites created with Hostinger Website Builder or Hostinger Horizons.
Use this option only if:
-
the main domain is hosted at Hostinger as a PHP/HTML website (including WordPress), or a Node.js application, and
-
the subdomain should act as a section of the same website, not as a separate site
To create the subdomain:
-
Open hPanel → Websites
-
Locate the website connected to your main domain and open Dashboard
-
From the sidebar, open Domains → Subdomains

-
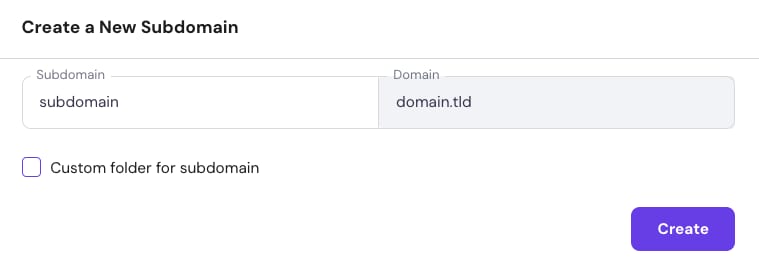
Enter the subdomain name (for example,
assets).
-
Keep the default directory (recommended) or change it if needed.
-
Select Create.

This creates a subfolder inside the website’s main directory using the same name as the subdomain.
How to choose between the two methods
-
Choose Method 1 if you want to manage the subdomain as a fully independent website, or if the main domain is connected to a Hostinger Website Builder or Hostinger Horizons website.
-
Use the alternative option only if the subdomain needs to remain part of the same website structure and the main domain is not connected to a Website Builder or Horizons website.
Step 2 – Connect the subdomain
For a subdomain to be accessible in a web browser, the required DNS records must exist for the main domain.
If the main domain uses Hostinger nameservers
If your main domain points to Hostinger nameservers, DNS setup is handled automatically.
After creating the subdomain, allow a few minutes for it to become available online.
If the main domain uses external nameservers
If your domain points to external nameservers (for example, Cloudflare), DNS records must be added at the provider managing the domain.
-
For subdomains hosting PHP/HTML, WordPress, or Node.js websites, create an A record for the subdomain pointing to the IP address of your hosting plan.
-
For subdomains hosting a Hostinger Website Builder or Horizons project, follow the appropriate domain-pointing guide:
After DNS changes are applied, allow up to 24 hours for DNS propagation.