You can connect a domain to Hostinger Website Builder in two ways:
- Via nameservers: your domain’s DNS zone is transferred to and managed by Hostinger.
- Via CNAME records: your DNS zone stays with your current provider.
If your registrar does not support root CNAME records, the recommended alternatives are:
- Transfer the domain to Hostinger, or
- Use a DNS provider that supports CNAME flattening (e.g., Cloudflare).
Once your domain is pointed to Hostinger, make sure your website is published, and give it some time (up to 24 hours) to start working 💡
Option 1 – Via nameservers
If your domain is registered at Hostinger, it’s pointed to Hostinger nameservers by default. However, if you use a third-party domain (that’s not registered at Hostinger), you need to update your domain’s nameservers manually.
Pointing your domain to Hostinger nameservers sets your email-related records for Hostinger Email.
If you already use a different email service, make sure to update the MX records with those of your email provider after the nameserver change has fully propagated.
To manually point your domain to Hostinger nameservers, follow these steps:
-
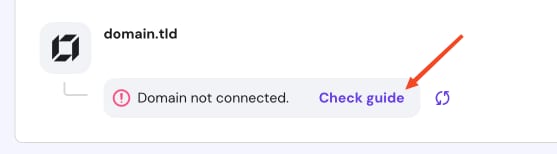
Go to the Websites section of hPanel, find your website in the list and click on Check guide next to the Temporary domain or Domain not connected message:
-
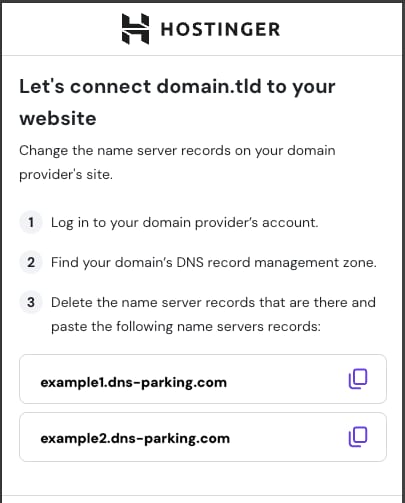
Copy the nameserver values provided—they will look similar to this:
-
Log in to your domain provider’s website.
-
Find your domain’s nameserver settings and delete all the current nameservers
-
Insert the values provided by Hostinger.
-
Save the changes.
The nameserver values provided in this step may vary depending on the domain. Always use the exact ones shown in your panel when making changes.
After updating the nameservers, your website will be up and running within 24 hours.
Option 2 – Via CNAME Records
Alternatively, you may point your domain to Hostinger Website Builder by adding two CNAME records to your domain’s DNS zone:
-
Log in to your domain provider’s website.
-
Find your domain’s DNS management zone.
-
Make sure to delete all A and/or AAAA records (if any) for your root domain (@)
-
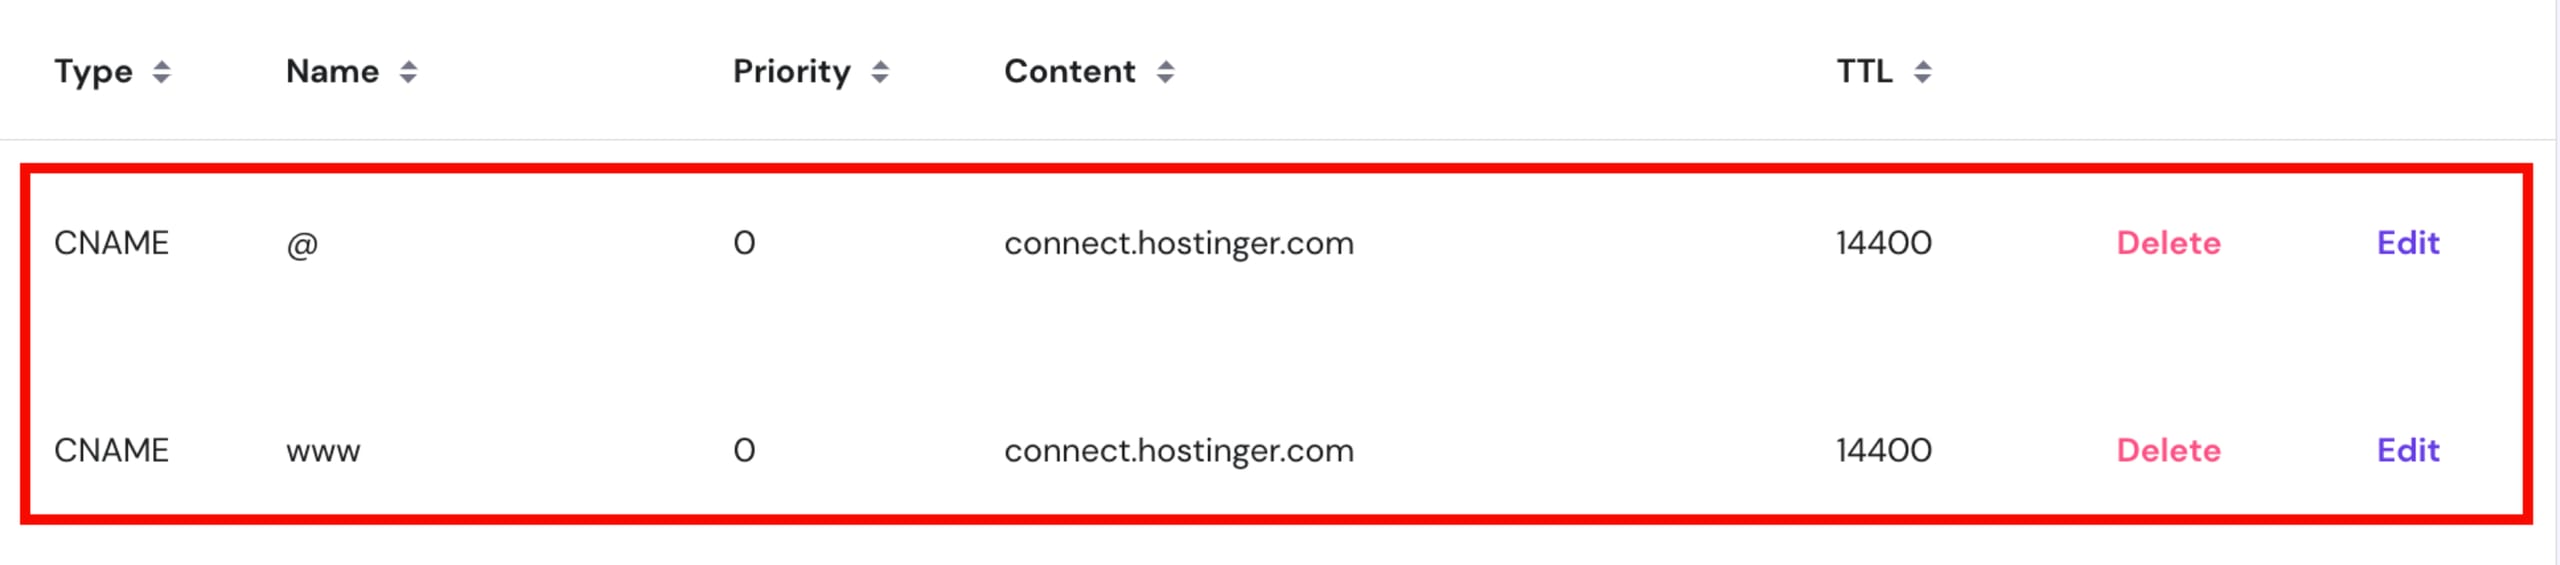
Add the following CNAME records:
|
CNAME 1 |
CNAME 2 |
|
Name: @ Points to: connect.hostinger.com TTL: default, or 14400 |
Name: www Points to: connect.hostinger.com TTL: default, or 14400 |
After saving the changes, your website will be up and running within 24 hours.
Connecting an external domain
Additionally, you can connect an externally registered domain directly from hPanel without leaving the Hostinger interface.
After updating your nameservers or DNS records at your domain provider, click I’ve Updated NS/DNS in hPanel. A Domain is Connecting notice will appear for up to 24 hours while DNS propagates.
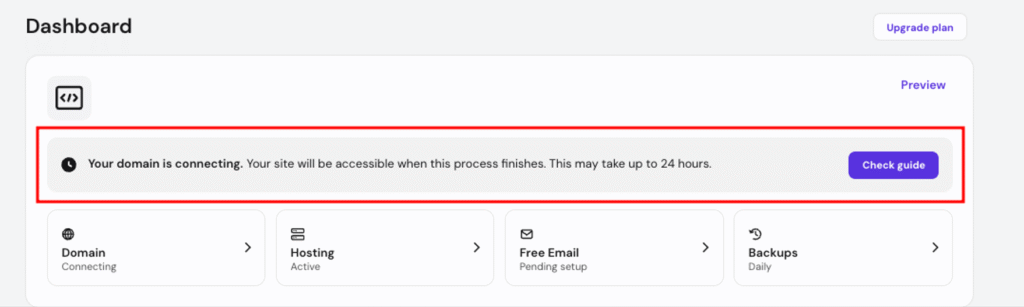
This replaces the previous “Connect Domain” prompt and confirms your changes have been registered.
Subdomains: DNS instructions specific to your subdomain are shown directly in the connection flow.