Find your Hostinger nameservers (also called DNS nameservers or name servers) to point your domain to Hostinger’s hosting or VPS services. Nameserver values differ depending on your hosting type and domain, and using them is the most common way to update all necessary DNS records — including A, CNAME, and MX — for both your website and email at once.
Web, cloud and Agency hosting nameservers
For domains registered at Hostinger, the nameservers are set up automatically. Ensure the domain is added to your hosting plan beforehand. For domains registered elsewhere, use one of the following options to find your nameservers:
Option 1 – Find nameservers during domain connection
After creating a website using a temporary domain, including websites created with Hostinger AI Builder, you can connect a custom domain at any time.
- Go to Hostinger dashboard → Websites
- Locate your website and click on Connect domain.
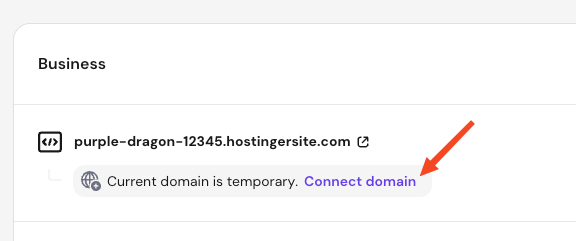
- The specific nameservers for your domain will be provided during the connection process.
NOTE
- Nameservers are not displayed for temporary domains because their DNS records cannot be managed directly.
Option 2 – Find nameservers from Hostinger dashboard
For PHP, HTML and Node.js websites, follow these steps:
- Go to Hostinger dashboard → Websites.
- Click on Dashboard next to your domain name.
- For web and cloud hosting, select Hosting plan → Plan Details on the left sidebar.
- For Agency hosting, select Plan Details directly on the left sidebar.
- On the Plan Details page, locate the Nameservers card to get your exact values.
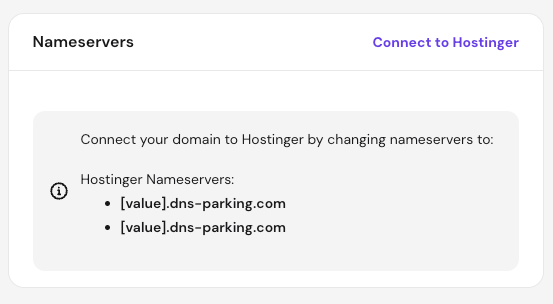
Nameservers may vary by domain; always use the exact values shown in your Hostinger dashboard.
VPS hosting nameservers
Domains registered at Hostinger will be automatically assigned nameservers to work with Hostinger VPS. For domains registered with external providers, follow these steps:
- Go to Hostinger dashboard → VPS
- Click on Manage next to your server.
- Select DNS Manager from the left sidebar.
- The assigned nameservers will be displayed in the domain list.
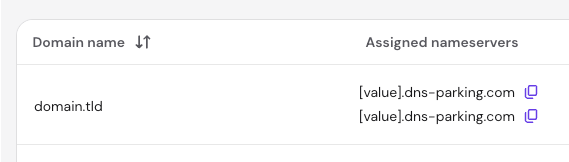
NOTE
- To set up custom nameservers for your VPS, refer to your operating system template documentation on DNS zone creation and configuration.
cPanel hosting nameservers
If you use a legacy cPanel hosting plan, follow these steps to locate your nameservers:
- Go to the Hostinger dashboard home page.
- Click on the Manage button next to your cPanel plan.
- Scroll down on the Hosting Dashboard page to find the Nameservers and IP address section.
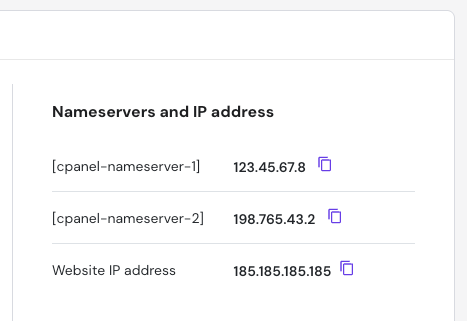
Update your domain’s nameservers to cPanel values:
- For domains registered at Hostinger, refer to this guide: How to change nameservers at Hostinger.
- For domains registered elsewhere, log in to your registrar’s control panel to apply the changes.
Once you have located your nameservers, you can update them at your domain registrar if needed to finish connecting your site — see how to change nameservers at Hostinger for domains registered with Hostinger, or how to change DNS records at other domain registrars if your domain is registered elsewhere. DNS changes typically take up to 24 hours to propagate globally.