I bought a domain name – now what? 8 next steps
Sep 03, 2026
/
By Alma F. & Leonardus N.
/
13 min Read
After buying a domain name, secure it, decide its purpose, connect hosting, configure DNS, create email, and build the website.
Start by confirming the domain’s registration and renewal settings so it stays active, then decide whether it will host a website, redirect elsewhere, or stay parked for later use.
Once that’s settled, connect the domain to a hosting account and configure its DNS records so they point to the right hosting and email services.
From there, set up a mailbox and the records needed to send and receive mail from the domain.
Finally, add content and publish the website the domain will point to.
1. Secure your new domain
As soon as you register a domain, check three settings in your registrar account: domain privacy, transfer lock, and auto-renewal.
They protect the domain in different ways. Privacy protection limits which contact details appear publicly; the transfer lock helps stop someone from moving the domain without permission, and auto-renewal keeps the domain registered when its renewal date arrives.
Enable domain privacy protection
Domain privacy protection hides or replaces eligible contact details, such as your name, email address, phone number, and street address, so they don’t appear in public domain searches.
Privacy protection isn’t available for every domain extension, and support also varies by registrar. Open your domain settings to see whether you can keep your registration details private.
Turn on the domain transfer lock
A transfer lock protects your control of the domain by preventing it from being moved to another registrar until you unlock it.
Check that the transfer lock is active and keep it on unless you’re preparing to transfer the domain.
Since the lock only prevents unauthorized transfers, you also need to protect the registrar account itself. Use a strong password and two-factor authentication to protect your domain from unauthorized access.
A transfer lock protects the domain registration, not the website itself. An SSL certificate serves a different purpose: it protects information sent between the website and its visitors.
Enable auto-renewal
Turn on auto-renewal so you keep control of the domain when its current registration period ends.
Registering a domain doesn’t mean you own the name permanently. You control it for the period you paid for, and need to renew the registration to keep using it.
Auto-renewal charges the saved payment method before the domain expires. If the renewal fails, the website and email connected to the domain may eventually stop working. After the registrar’s recovery period ends, someone else may be able to register the name.
When you manage your domain renewal settings, confirm that:
- Auto-renewal is turned on.
- Your saved payment method is valid.
- Your account email address is current.
Your registrar uses that email address to send renewal reminders and warn you if a payment fails.
2. Decide how you’ll use the domain
You can use the domain for a website, a custom email, a redirect, something you plan to build later, or a sale.
Decide which of these you want before paying for hosting or changing any settings. A website and custom email need extra services, while redirecting, parking, and selling the domain require a different setup.
You can use the domain to:
- Build a website or online store. The domain becomes the address for a business website, portfolio, blog, store, membership site, or web application.
- Create custom email addresses. You can use addresses such as hello@yourdomain.com or support@yourdomain.com, even without a website.
- Redirect visitors somewhere else. Anyone who enters the domain can be sent to an existing website, product page, campaign page, or social profile.
- Park the domain. Point it to a simple placeholder page so it doesn’t sit unused while you decide on a longer-term plan.
- Hold the domain for later. Continue renewing it until you’re ready to use it.
- Sell the domain. If you no longer need the name, list it for another person or business to buy.
A website needs hosting and a connection between the domain and the hosting server. Custom email needs a mailbox and the correct email records. Redirecting, parking, and selling typically don’t require a separate web hosting plan.
How do a domain, DNS, hosting, and a website work together?
A domain, the Domain Name System (DNS), web hosting, and the website itself work together to show visitors the right pages when they enter your web address.
Component | What it does |
Domain | Provides the address people enter, such as yourdomain.com |
DNS | Tells the browser which server or online service the domain should connect to |
Web hosting | Stores the website files and sends them to visitors’ browsers |
Website builder or content management system (CMS) | Lets you create and update the pages, text, images, and features |
Understanding how domains and hosting work together helps you avoid paying for the wrong service.
A domain and web hosting do different jobs: the domain is the address people enter, while hosting stores the pages, images, and other files that make up the website.
The DNS connects that address to the hosting server. Its settings tell a visitor’s browser where to find the website when they enter the domain.
You create and update the pages through a website builder or CMS, such as WordPress. To show those pages on your domain, the website must be stored on a hosting server, and the domain must point to that server.
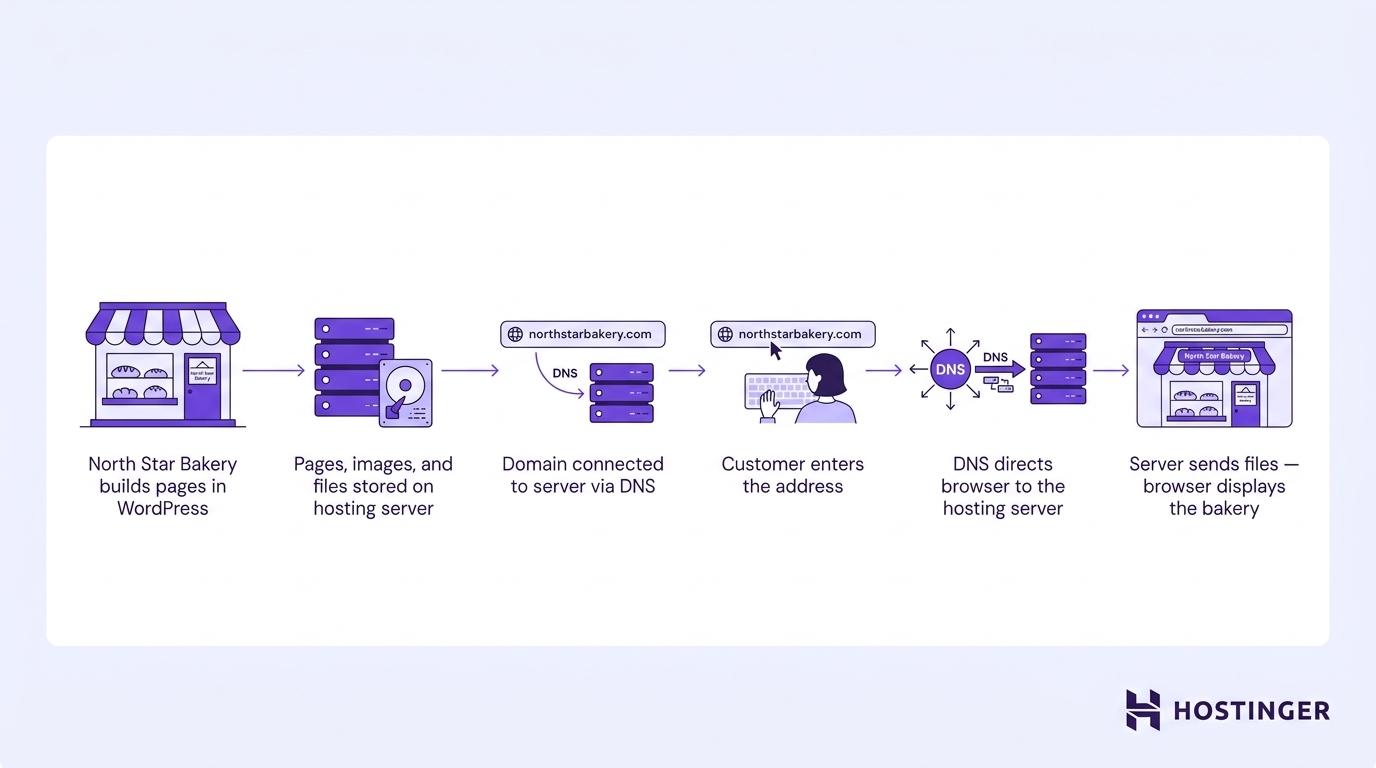
Take a bakery called North Star Bakery:
- The bakery creates its pages with WordPress or a website builder.
- Its pages, images, and other files are stored on a hosting server.
- The bakery connects northstarbakery.com to that server through its DNS settings.
- A customer enters northstarbakery.com in their browser.
- DNS directs the browser to the hosting server storing the bakery’s website.
- The server then sends the files to the browser, which displays the pages.
Some website builders include hosting and handle the domain connection for you. Others require you to buy hosting separately and update the DNS settings yourself, so check what your chosen platform includes before paying for another service.
3. Choose a web hosting plan
Choose hosting that supports the way you plan to build your website. First, check whether your website-building platform already includes hosting. If it does, you don’t need to buy another plan.
Hosting stores your website’s pages, images, and other files so people can open them online. You can skip this step if you only want to use the domain for email, redirect it to another page, keep it for later, or sell it.
If you need to buy hosting, compare these options:
Hosting type | Best for | What it gives you | What to know |
Shared hosting | First websites, portfolios, blogs, and small business sites | An affordable way to put a simple website online | Your website shares a server with other sites, so it has less room for heavy traffic |
Managed WordPress hosting | Blogs, business websites, and stores built with WordPress | Hosting prepared for WordPress, with many updates and server tasks handled for you | It is designed for WordPress rather than other website platforms |
Cloud hosting | Growing websites, busy online stores, and agencies | More capacity when visitor numbers increase | It costs more than shared hosting |
Virtual private server (VPS) hosting | Custom applications, game servers, and projects that need special server software | More control over the server and its settings | You need the technical knowledge to manage the server, updates, and security |
To find the right hosting option for your website, check these factors:
- How much storage and backup space the plan includes.
- Which updates and technical tasks the provider handles.
- Whether you can upgrade when the website grows.
- How much the plan costs when you sign up and renew.
Once the hosting is ready, connect your domain to it so the website opens when someone enters your web address.
4. Connect your domain to web hosting
To connect your domain to web hosting, copy the connection details from your hosting account into your domain settings. Once the settings update, entering your domain will open your website.
These details are part of the Domain Name System (DNS). DNS directs domain traffic by telling browsers where to find your website and email services where to deliver messages.
If your domain and hosting are in the same Hostinger account, they may already be connected. Check hPanel before changing anything.
If you bought them from different providers, open the domain connection instructions in your hosting account. They will show which method the service supports.
Some hosting services give you two options:
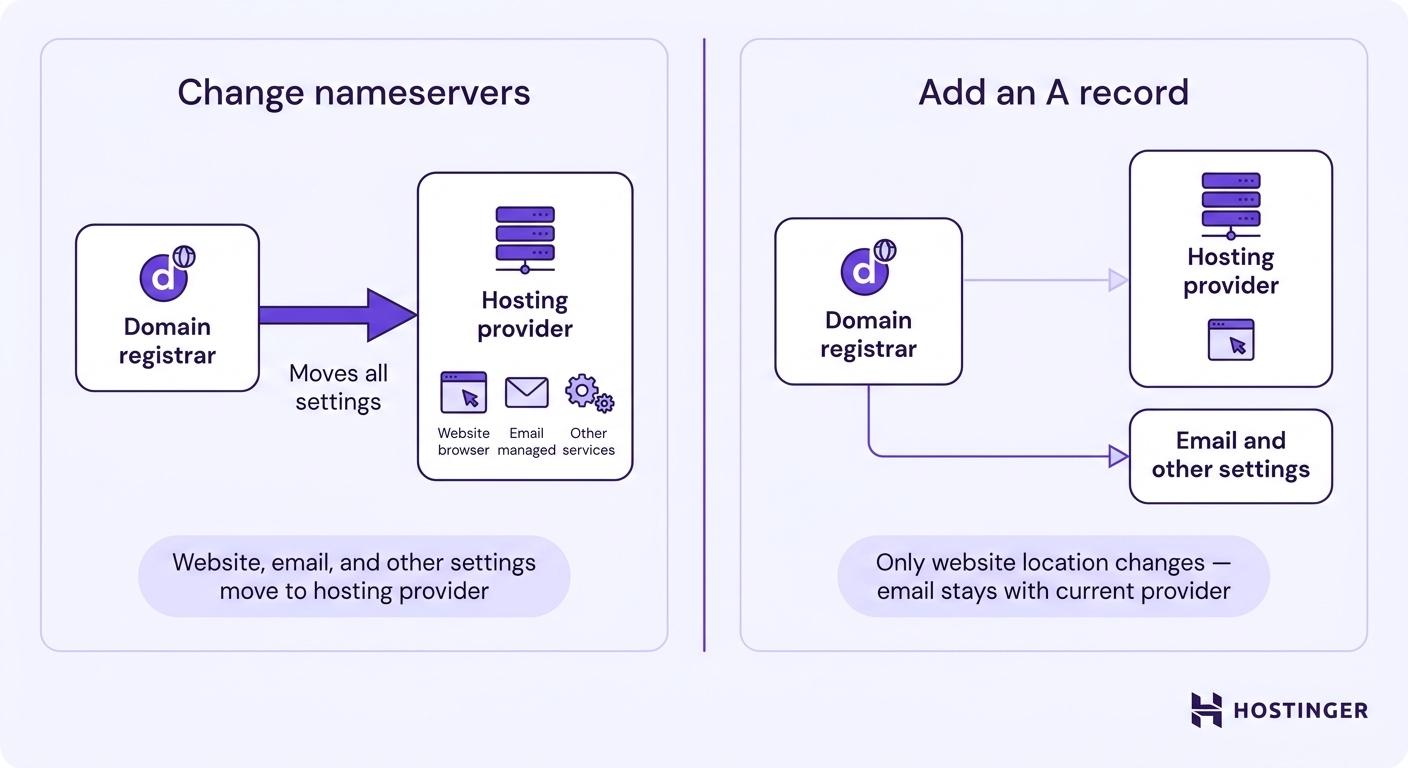
- Change the nameservers to manage the domain’s website, email, and other DNS settings through the hosting provider.
- Add an A record to connect only the website while leaving email and other DNS settings with the current provider.
Other platforms support only one method, so use the connection details shown in your account.
If you use Hostinger hosting with a domain registered elsewhere, add the domain to your website in hPanel first. hPanel will then show whether you need to change the nameservers or add an A record.
To find a Hostinger nameserver connection, copy the exact addresses shown under Websites → Dashboard → Plan Details. Nameserver values can vary by domain, so use the ones shown in your hPanel account.
The video below shows how to find the correct nameservers and add them through the company where you registered the domain.


Connect the domain by changing nameservers
Change the nameservers when your hosting account gives you nameserver addresses to enter.
This moves the domain’s website, email, and other connection settings to your hosting provider. After the change, you will manage those settings through the hosting account instead of the company where you registered the domain.
Connect the domain with an A record
Use an A record when your hosting account gives you a server address and lets your current provider continue handling the rest of the domain’s settings.
This changes where the website opens without moving email or other services to the hosting provider.
After saving the A record, check that the domain points to the correct server. If it still opens the wrong website, compare the saved address with the one shown in your hosting account.
Not every website platform supports this method. Follow the connection instructions in your account rather than adding an A record unless the platform specifically provides one.
How long do DNS changes take?
After you change the nameservers or A record, the new connection won’t work everywhere immediately. Most changes appear within 24 hours, although an individual record can take up to 72 hours in rare cases. This delay is called DNS propagation.
As the changes roll out, some visitors may see the new website, while others may still see the previous site or an error because some devices and networks still hold cached DNS records.
Wait for the propagation period to finish before changing the same setting again. If the domain still opens the wrong website afterward, compare the saved values with those in your hosting account and correct any typing errors.
5. Create a custom email address
Create a custom email address by choosing an email service, then creating an address that ends with your domain, such as info@yourdomain.com.
Buying a domain doesn’t automatically give you an email inbox. Check whether email is included with your web hosting. If it is, create the address through your hosting account. If it isn’t, sign up for a separate email service. You can use a custom email even if you don’t have a website.
If you use Hostinger, check whether your hosting plan includes the one-year Business Email trial before buying email separately. You can also buy a Hostinger Business Email plan without web hosting or choose Google Workspace through Hostinger if you prefer to use Gmail.
Start with addresses that match the messages you expect to receive:
- info@yourdomain.com for general questions
- support@yourdomain.com for customer help
- sales@yourdomain.com for sales inquiries
- yourname@yourdomain.com for messages sent directly to you
Only create addresses that someone will check regularly. For example, a support address won’t help customers if no one reads the inbox.
To set up a mailbox using your domain:
- Sign in to your email or hosting account.
- Enter the address you want to create.
- Set a secure password.
- Follow the provider’s instructions to connect the domain.
Your email provider may ask you to add DNS records. These are instructions attached to your domain that help email services deliver and verify messages.
The main records are:
- MX records tell email services where to deliver messages sent to your domain.
- SPF records show which services are allowed to send email using your domain.
- DKIM records add a digital signature that helps prove a message came from your domain and wasn’t changed during delivery.
Some providers add these records automatically. Others give you values to copy into the account where your domain’s DNS settings are managed.
If your domain uses Hostinger nameservers, hPanel can add the required MX, SPF, and DKIM records for you. If another provider manages the DNS settings, copy the values from hPanel and add them through that provider.
Enter each value exactly as shown when you configure the DNS records required for email. Once the changes take effect, send a test message to the new address and reply from it. Both messages should arrive successfully.

6. Build your website or online store
Build your site with a beginner-friendly website builder, a CMS, or an ecommerce platform.
A beginner-friendly website builder handles much of the initial setup and lets you create pages without coding. A CMS gives you more control over the content and features, while an ecommerce platform provides the tools needed to sell products and manage orders.
Building method | Examples | Best for | What to expect |
Beginner-friendly website builder | Hostinger AI Builder | First business websites, portfolios, landing pages, and other straightforward sites | Guided tools that help you create, edit, and publish pages without coding |
Content management system (CMS) | WordPress | Blogs, publications, and websites that will grow to include more content or features | More control over the website, but more setup and maintenance |
Ecommerce platform | Hostinger Ecommerce | Websites where selling products is the main purpose | Tools for products, payments, stock, shipping, and orders |
A beginner-friendly website builder is a good starting point when you want help getting the first version online. Hostinger AI Builder can create a site from your instructions, leaving you to adjust the pages, wording, images, design, and features as you create and customize your website.
A CMS makes more sense when you need to organize a growing amount of content. For example, a publication may need hundreds of posts, several authors, and categories that help readers find related articles. WordPress supports that kind of growth, but it takes more time to set up and maintain.
Learn how to build a WordPress website and prepare its first pages for publishing.
An ecommerce platform gives you the tools needed to run the selling side of the website. Hostinger Ecommerce includes those tools in a store-focused platform.
Before you start an online store, check that the platform supports the payment and delivery methods your customers use and review any transaction fees.

7. Launch your website and submit it to search engines
To launch your website, test its pages and forms, publish it, and then submit its sitemap to search engines like Google and Bing.
Before publishing, check that visitors can use the site without running into errors:
- The website opens with HTTPS and doesn’t show a security warning
- Pages look correct on phones, tablets, and computers
- Menu links, buttons, and other important links open the right pages
- Contact, signup, booking, and checkout forms work
- Test messages and orders reach the correct inbox or dashboard
- No sample text, temporary images, or test products remain
- Contact details, prices, opening hours, and other business information are correct
After publishing, find your website’s sitemap. A sitemap is a file that lists the pages search engines should check. Most website builders and content management systems create one automatically, and you can usually find it in the website or SEO settings.
Add the website to Google Search Console and Bing Webmaster Tools, then submit the sitemap through both services. This helps search engines discover the new website and find its pages.
After submitting it, check that the tool accepts the sitemap without an error. A successful submission means Google or Bing can read the file.
Submitting a sitemap doesn’t guarantee that every page will appear in search results or rank for a particular search. It simply gives search engines a direct list of pages they can review.
Expert Tip
It takes six plus months to start ranking a newly-created site, sometimes even up to a year. Building authority can help you rank better. To do so, it’s good to choose a niche for your site and expand from there. For example, instead of directly getting into digital marketing, you could focus on creating content for a subtopic like SEO or email marketing.

Neil Patel
Digital marketing expert and entrepreneur
8. Promote your new website
Promote your website through one or two channels your potential visitors already use, such as search engines, social media, or email.
Start with one or two methods to bring more visitors to your website rather than trying everything at once:
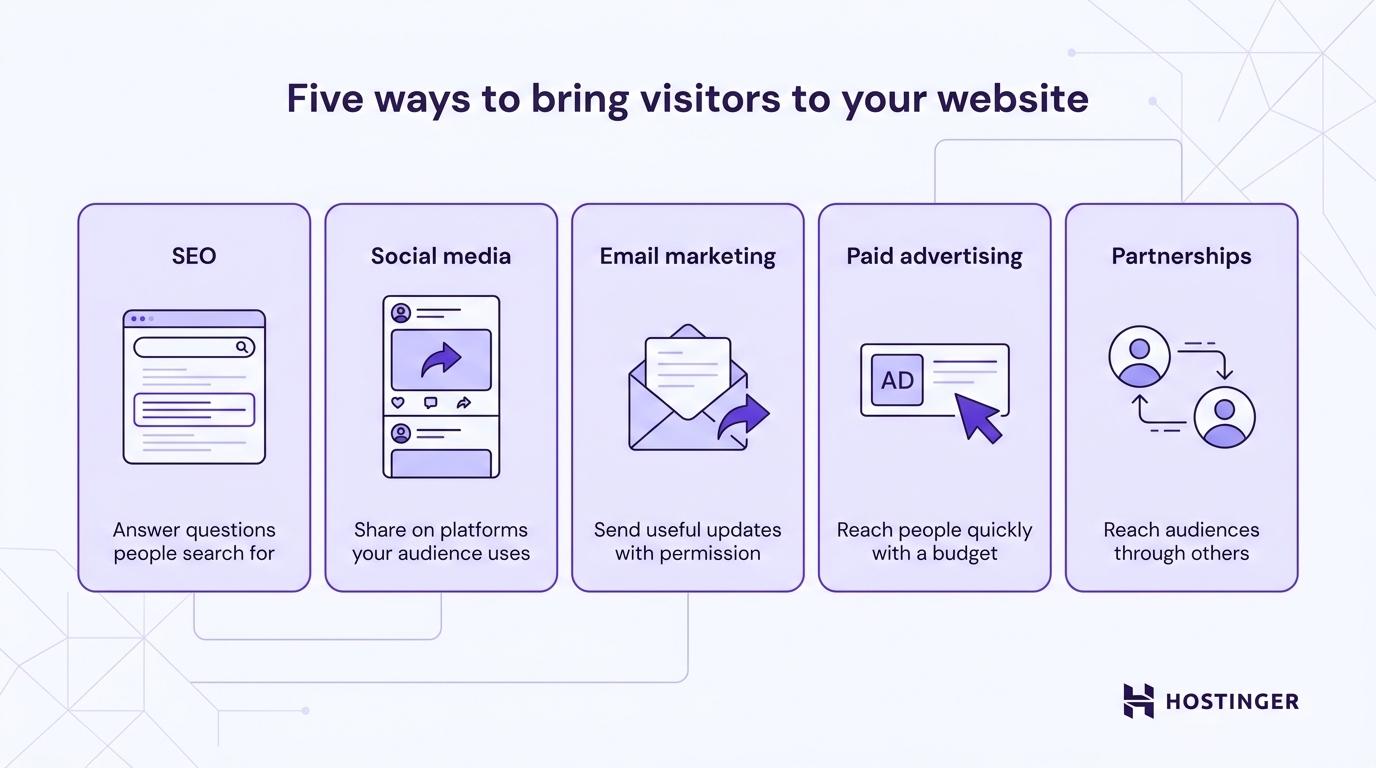
- Search engine optimization (SEO). Create pages that answer questions people search for. Use clear page titles, headings, descriptions, and links between related pages.
- Social media. Share useful advice, recent work, new products, and website updates on the platforms your audience uses.
- Email marketing. Ask visitors for permission to contact them, then send useful updates, new content, product announcements, or offers.
- Paid advertising. Run search or social media ads when you want to reach people quickly and have a clear budget.
- Partnerships. Work with businesses, creators, publications, or communities that already reach the people you want to attract.
Choose the methods that match how people usually find a business like yours. A local service business might focus on search and local partnerships, while an online store might rely more on social media, email, and paid ads.
Track what visitors do after reaching the website. Look for useful actions such as submitting a contact form, joining your email list, booking a service, or completing a purchase.
Spend more time and money on the channels that lead to those actions.
When should you redirect, park, or sell your domain?
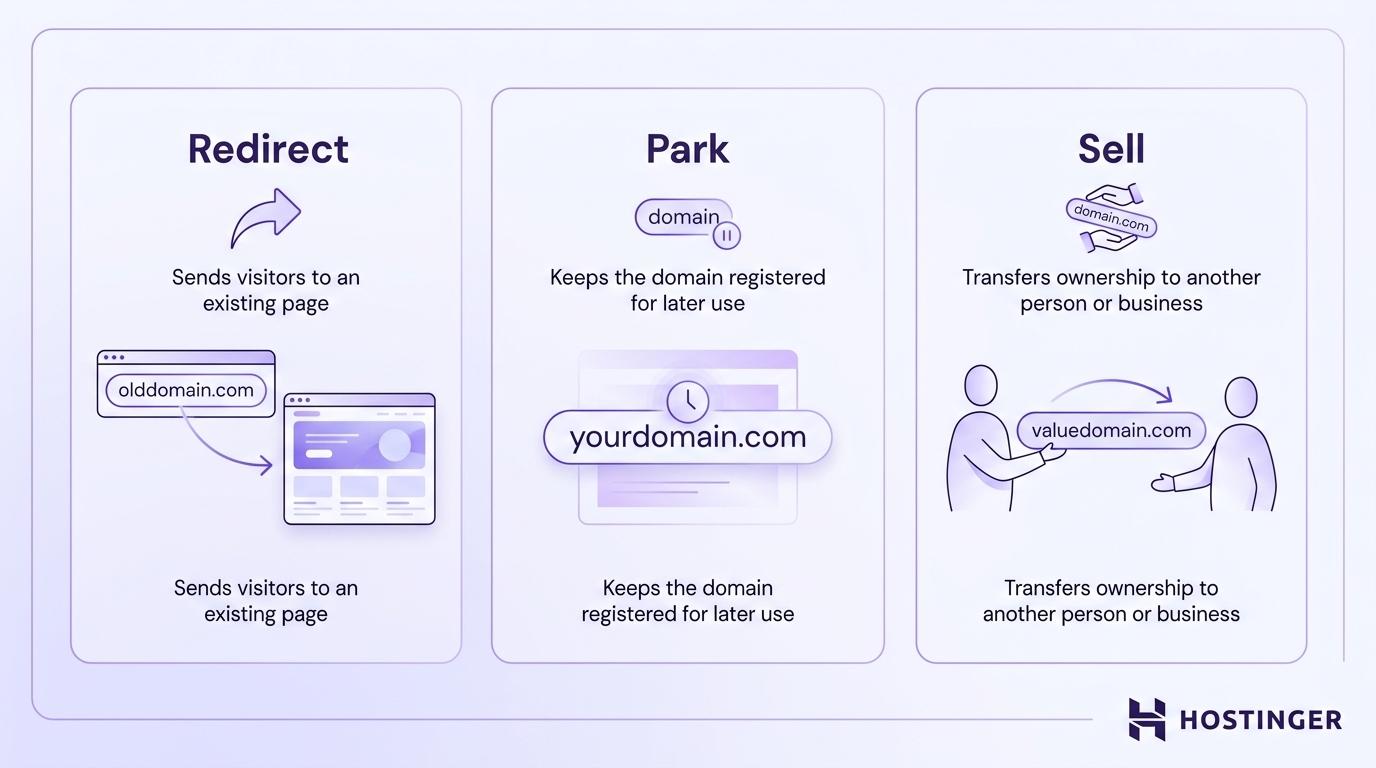
Redirect, park, or sell a domain when you don’t plan to build a new website for it.
A redirect sends visitors to an existing page; parking keeps the domain registered for later use; and selling lets another person or business take ownership of it.
Redirect the domain
Redirect a domain when you want it to open another website or page that already exists. For example, you could redirect:
- An old brand domain to your new company website
- A campaign domain to a product page
- A short domain to a longer web address
- A common misspelling of the domain name to the correct website
Set up a redirect through your domain registrar or hosting account to automatically send visitors to another website. Once it’s active, entering the domain will open the page you chose.
A redirect changes where visitors go, but the domain stays registered with the same company. To move the registration elsewhere, you need to transfer it instead.
Check whether you should redirect or transfer the domain based on whether you want to change its destination or its registrar.
Park the domain
Park a domain when you want to keep it registered but aren’t ready to use it.
Depending on the registrar or parking service, the domain may show a temporary page, a short message, advertisements, or nothing at all.
You might also park related names, extensions, or common misspellings so someone else cannot register a similar domain.
The main purpose of parking is to keep the domain registered until you are ready to use it. It doesn’t guarantee advertising income or increase the domain’s value.
Keep auto-renewal active while the domain is parked. If the registration expires, someone else may be able to claim the name.
Sell the domain
Sell a domain when you no longer plan to use it and think another person or business may want to buy it.
Several details affect what buyers might pay:
- How short and memorable the domain is
- How easy it is to say and spell
- Whether it could work as a business or product name
- The domain extension
- Any visitors the domain already receives
- Prices paid for similar domains
A valuation tool can help you estimate the domain’s potential market value, but it cannot predict the final sale price.
Research similar domains that have already sold to get a more realistic starting point. NameBio records reported domain sales, while ShortNames focuses on sales and auctions involving short domains. NamePros also has community discussions about pricing, appraisals, and selling domains.
Look for names with a similar length, extension, and purpose. One unusually high sale is not enough to show what buyers will pay for yours.
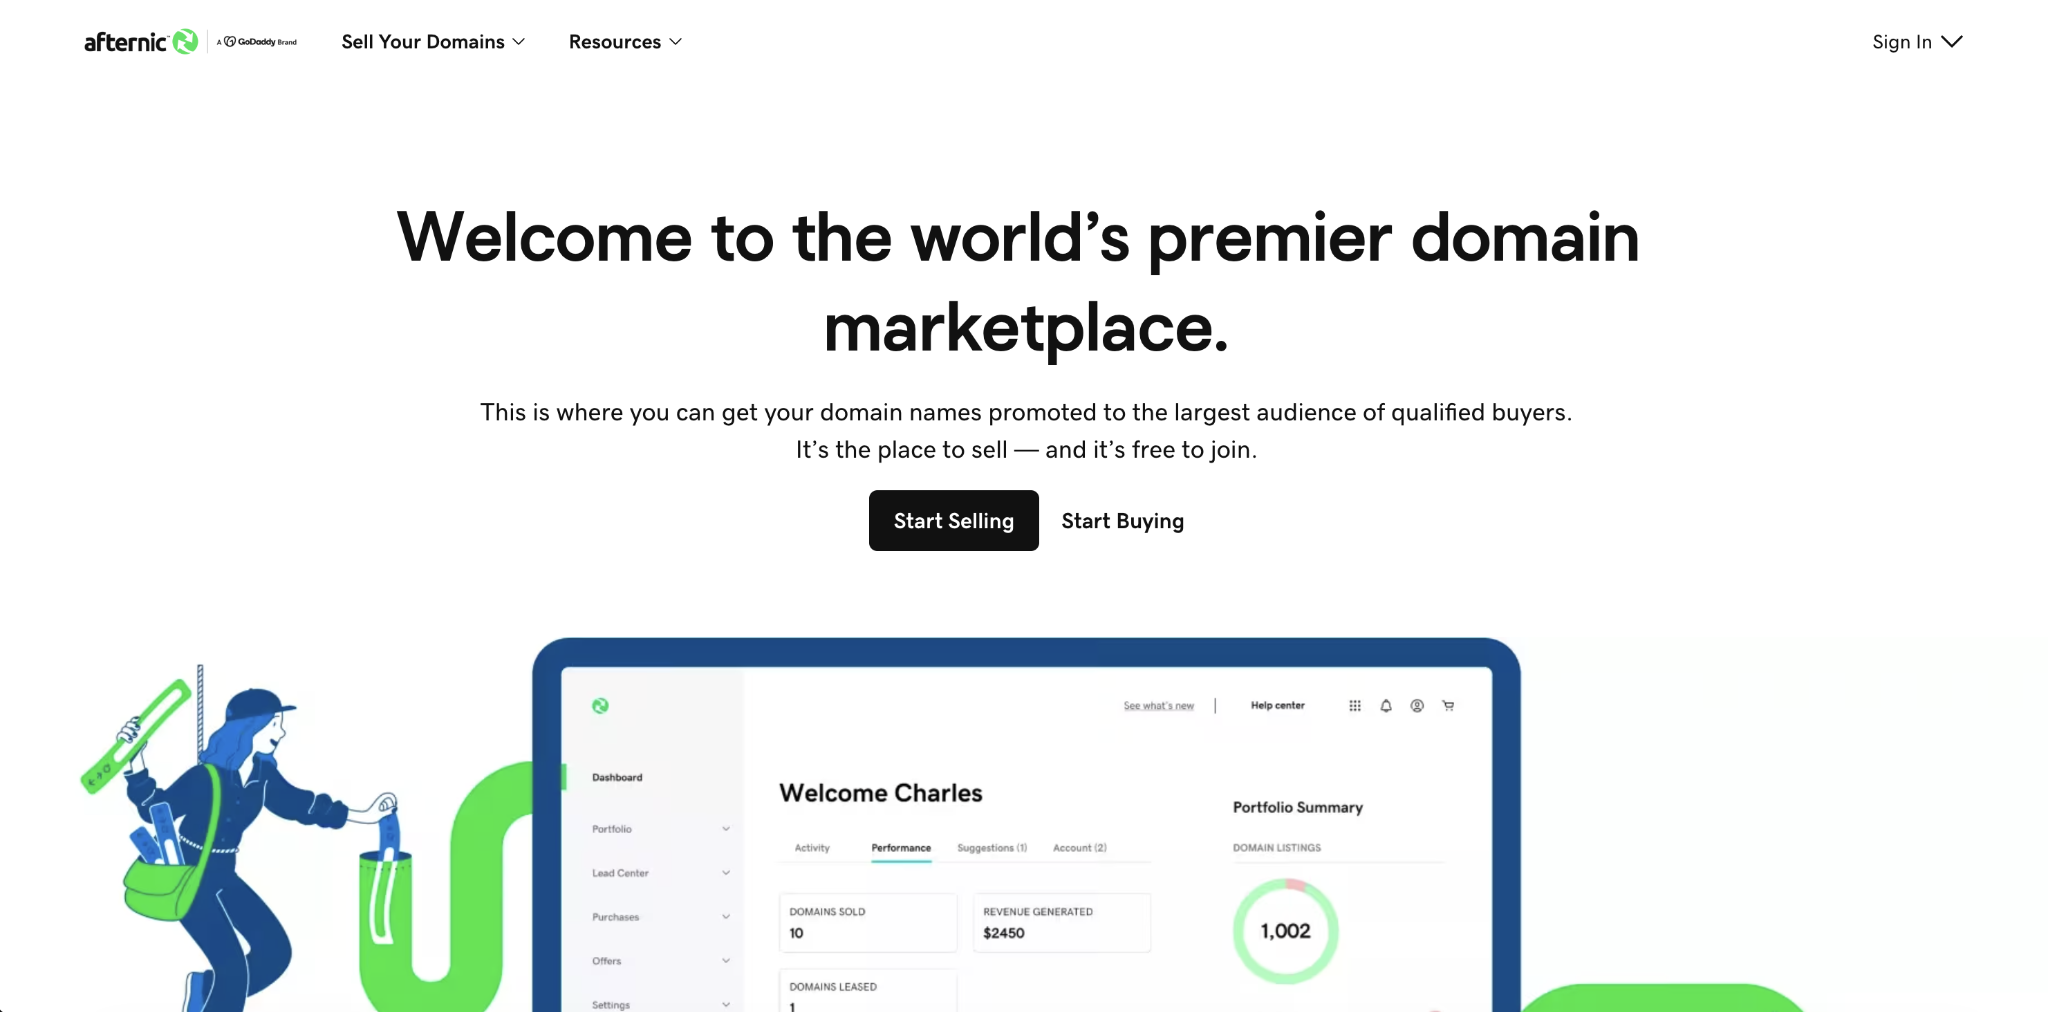
When you’re ready to prepare and list the domain for sale, you can use a marketplace such as Afternic, a sales platform such as Efty, or your own sales page.
Compare the fees, commissions, payment process, and listing terms before choosing where to sell it.
Next steps for your new domain
Decide whether you want to use the domain for a website, a custom email, a redirect, a future project, or a sale.
If you’re building a website, choose how you want to build it and check whether hosting is included.
From there, you can turn your new domain into a complete website by connecting it, creating any email addresses you need, testing the site, and publishing it.
You can skip web hosting if you only want a custom email, plan to redirect the domain to an existing page, want to keep it for later, or intend to sell it. Keep auto-renewal active for as long as you want to own the domain.
All of the tutorial content on this website is subject to Hostinger's rigorous editorial standards and values.

Alma is an AI Content Editor with 9+ years of experience helping ideas take shape across SEO, marketing, and content. She loves working with words, structure, and strategy to make content both useful and enjoyable to read. Off the clock, she can be found gaming, drawing, or diving into her latest D&D adventure.

Leo is a Content SEO Specialist and WordPress contributor. Armed with his experience as a WordPress Release Co-Lead and Documentation Team Representative, he loves sharing his knowledge to help people build successful websites. Follow him on LinkedIn.