Create a web application using AI prompts in Hostinger AI Builder agentic mode, without writing code. This guide covers setting up your first project, refining your prompts, and publishing your app for public access.
Create a web app
Follow these steps below to start creating your first web app by using Hostinger AI Builder agentic mode.
Step 1 – Sign up and start a new project
Begin by visiting Hostinger AI Builder’s official page and choosing a plan that fits your needs.
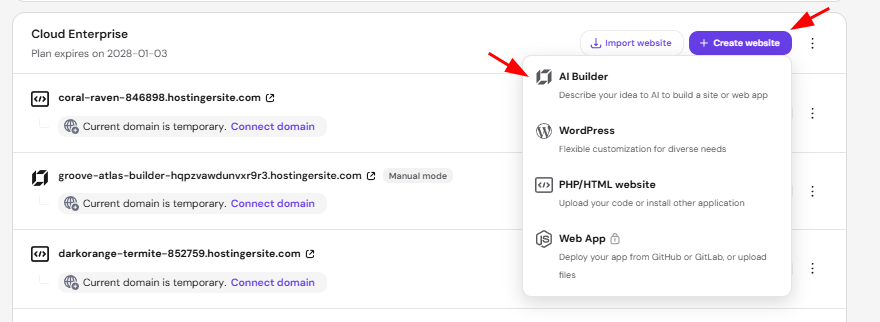
After completing your payment, head to the Hostinger dashboard and select Websites → Websites list in the left sidebar. Then, click Create Website and choose AI Builder.
Step 2 – Navigate the tool’s interface
It’s time to get started with Hostinger AI Builder agentic mode.
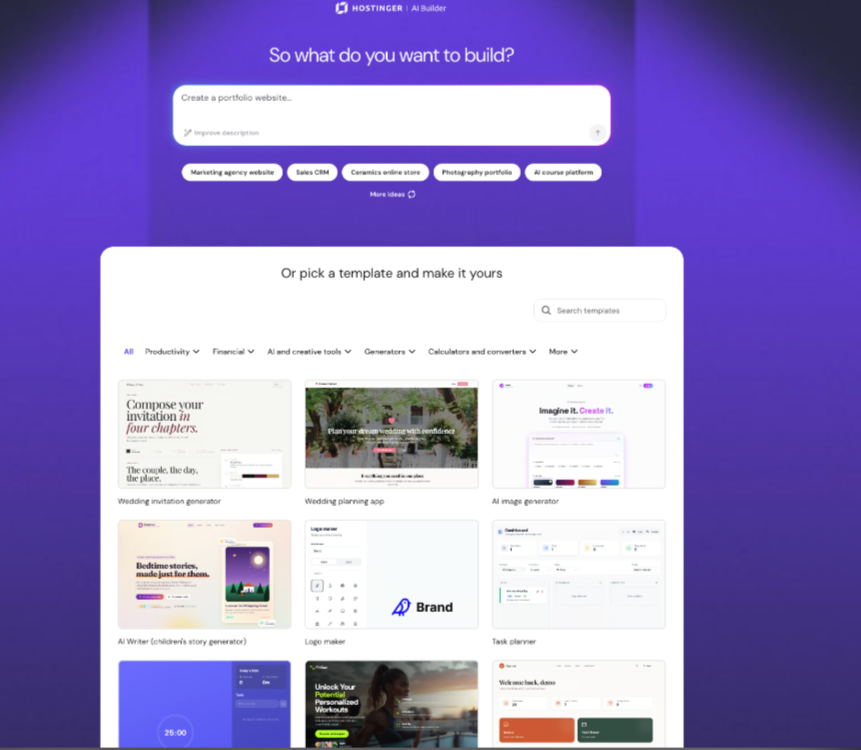
You’ll see a text field where you can write your prompt in more than 80 languages. You can also attach an image, PDF, or HTML file alongside your prompt to guide the AI, for example a wireframe, design reference, or a document with your site’s content. Hostinger AI Builder reads an attached HTML file and generates a website based on it. After describing your web app, press Enter, or you can also pick template directly.
Next, choose a domain name for your website, or select Use temporary domain to set one up later, then proceed.
Hostinger AI Builder will take a few moments to process your prompt. Once ready, the dashboard will split into two panes:
- Left pane – enter additional prompts here to add more features or refine your web app. Underneath the prompt field, you can find the number of message credits left in your plan.
- Right pane – shows a real-time preview of your app as you make adjustments. You can interact with the elements to test their functionality.
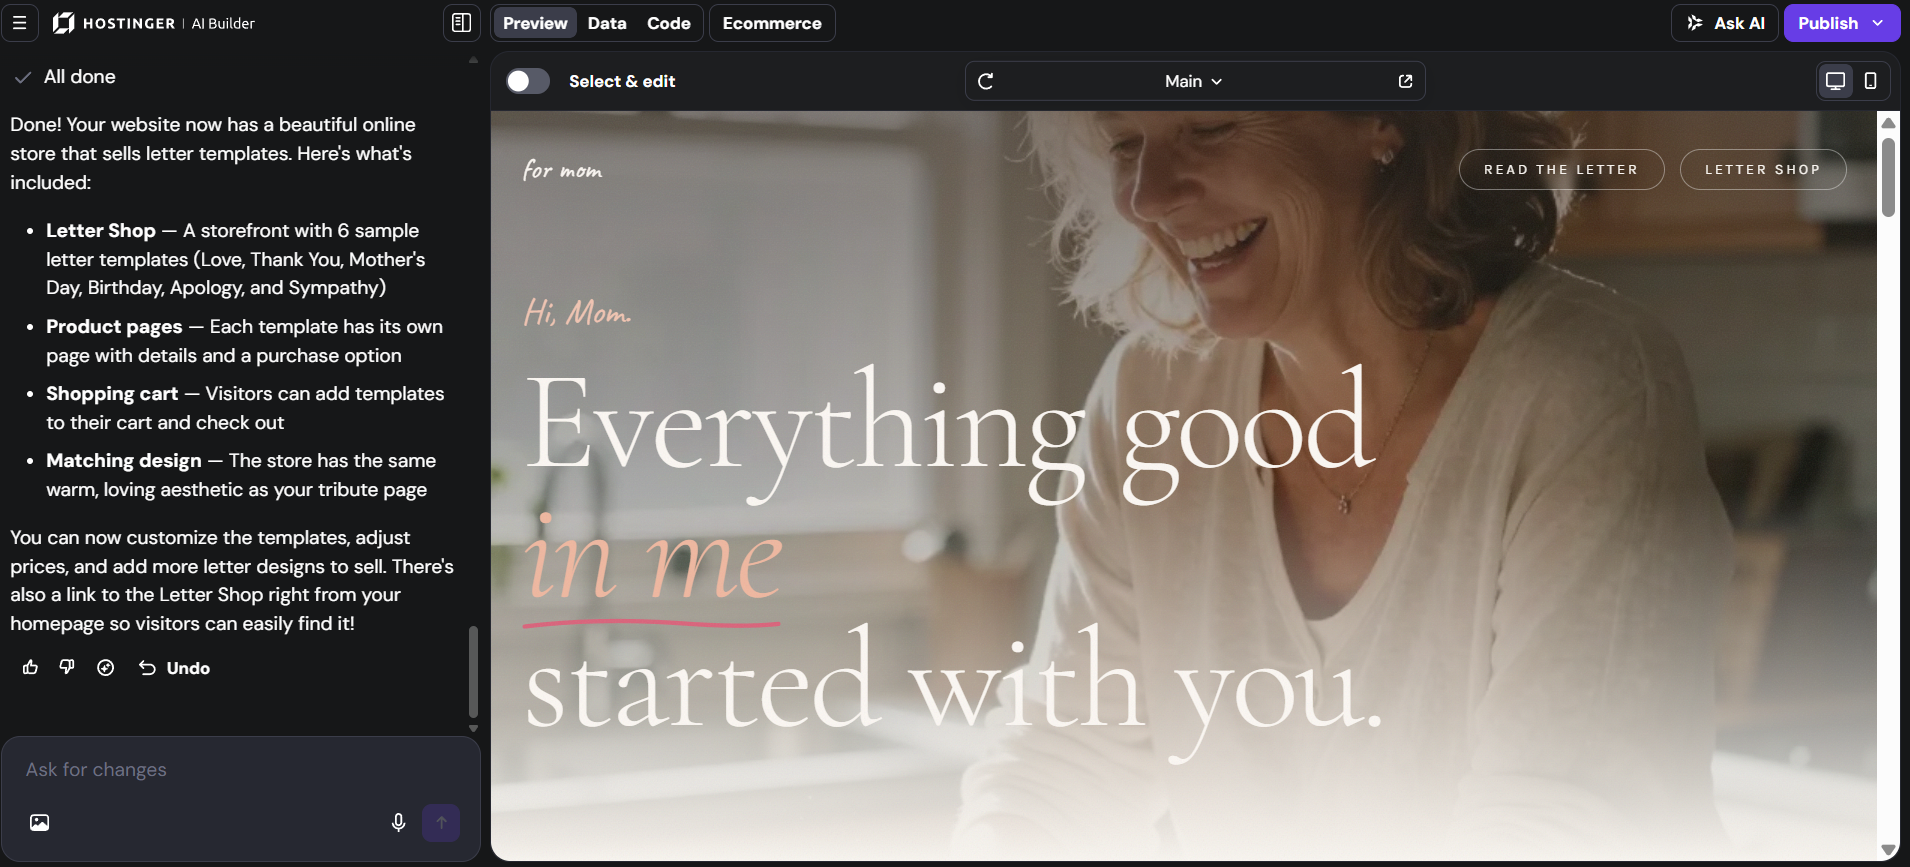
In the top-right corner of the dashboard, you’ll find the Publish button to launch your web app and make it publicly accessible.
Step 3 – Define your web app’s purpose
Hostinger AI Builder relies on well-structured prompts to generate the web app you envision. So, the more precise your prompts, the better the results.
When defining your web app’s purpose, include these key details so that Hostinger AI Builder understands your idea:
- App purpose – clearly state the problem your web app solves, for example, “helping users track fitness progress.”
- Core features – list essential functions you want to include, such as user login, forms, dashboards, or reports.
- UI preferences – be specific about design elements like layout, color scheme, and overall aesthetics.
Here’s a prompt example for a fitness platform that generates personalized workout and diet plans:
Like any other AI tool, Hostinger AI Builder’s first output might not be perfect regardless of how detailed your initial prompt was. We can build upon this first iteration of the app by entering follow-up prompts.
Step 4 – Customize your project’s design
The next step is customizing the application’s design. In addition to making your app more visually appealing, this process involves adding important elements for navigation and functionality.
Here are some of the important front-end components to include in your application:
- Menus – areas like a sidebar, tab, or drop-down menu that contain shortcuts to different pages.
- Forms – fields that let users input data, such as an email address or image.
- Pages – full-screen windows containing different settings and information.
- Buttons – elements that will perform certain actions, like submitting data or navigating to another page.
If you have a wireframe detailing the application’s layout and element placements, you can upload it to Hostinger AI Builder as a prompt. This will result in a more accurate output.
Otherwise, use a text-based prompt, like this example:
Remember to add more details about your application design, such as colors, text size, and font style. For inspiration and guidance, check out our web design tips tutorial.
Step 5 – Refine the logic and structure
Now that you have the design laid out, let’s refine the app’s functionality. The process remains the same: you provide follow-up prompts on aspects you want to improve.
During this stage, the areas for improvement are usually related to the logic and features of your application. Some of the most common ones are:
- Business logic – the underlying rules of your application. For example, your fitness app should give different recommendations according to the health data you input.
- Decision tree – the flow of your application based on users’ decisions. For example, if a user selects a certain menu, a pre-determined page should pop up.
- Event handling – the reaction to user actions, such as clicks, swipes, and keypresses. For instance, a toggle should switch when clicked.
- Data flow – the handling of user data when passed through forms, validated, or uploaded. For example, a user password must be a string of text that matches the database entry.
When writing prompts for Hostinger AI Builder, make sure you clearly describe the logic or feature you want to improve. Giving the AI more context helps it produce a more accurate output.
Here’s a prompt example for refining the data flow:
Then, check whether Hostinger AI Builder has properly configured your application’s logic and functionality by testing them in the preview. This will also help you identify if any feature is missing.
To get the best and most accurate results, refine one aspect of your application at a time.
Step 6 – Test and publish your web app
At this point, your application should be fully developed and functional. Before finalizing it, check all the features and navigation to make sure they work properly.
In Hostinger AI Builder, you can check and interact with your application directly from the preview menu on the right pane.
Here’s a checklist of what you should check during web application testing:
- Functionality – all the features should work properly in the live environment. This includes the ability to perform CRUD database operations and business logic.
- Navigation – the flow of your app and the functionality of the navigational elements. For example, if you click Log in, you should be redirected to the main dashboard.
- Visibility – the appearance of your web application on mobile and desktop. Make sure all elements are scaled properly and usable.
Now, let’s publish your project. Click the Publish button at the top right.
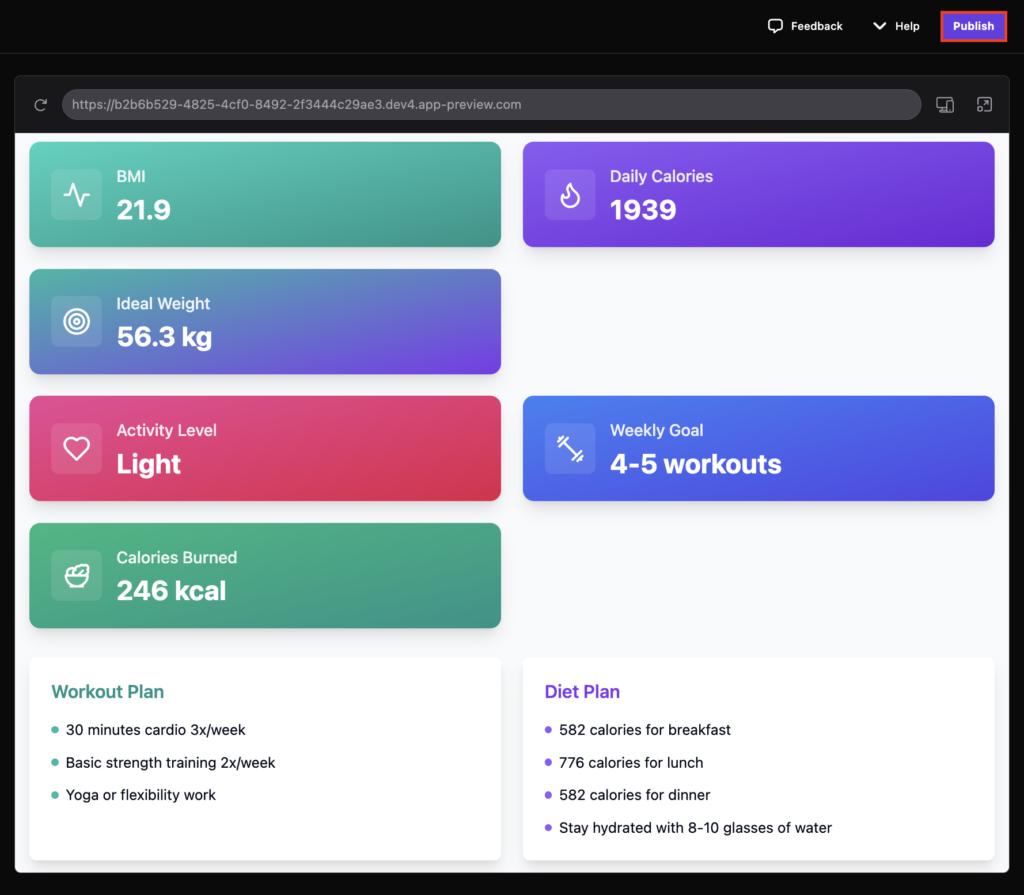
If you connected a domain during setup, Hostinger AI Builder will publish your project to that domain. Otherwise, it will use a temporary domain until you connect one. Before connecting or changing your domain, let’s complete a few more additional tests.
Start by verifying cross-browser compatibility. To do so, access your application on different web browsers and devices to see if any issues arise.
Then, check its performance and loading speed using a benchmark tool like GTMetrix. If the result is suboptimal, ask Hostinger AI Builder to optimize the code.
If everything looks good, return to the Websites menu in Hostinger dashboard to connect your domain to the web application.
That’s it! Congratulations, you’ve created and published a web app using Hostinger AI Builder.
Additional resources
If you want to learn how to build specific types of web apps, check out our detailed guides on how our colleagues built their:
Simple, right? Go ahead and try to develop your own web app using Hostinger AI Builder.