How to create an email: A practical guide
Dec 19, 2025
/
Larassatti D. & Saulius L.
/
7 min Read
Email addresses are essential for accessing online services, staying connected, and managing business tasks. Whether you need one for personal use or professional communication, learning how to create an email helps you establish and maintain your online presence.
There are two types of email accounts: personal and business. Personal emails are typically free, using generic domains from the email provider, such as @gmail.com. Business emails, on the other hand, use a custom domain and come with enhanced security, credibility, and control – making them ideal for creating a professional email address.
While each email provider has a different flow for signing up, these are the common steps to create an email:
- Pick an email service that suits your personal or business needs. Use criteria like storage, security, and pricing.
- Enter your basic information. Provide your personal details, such as your name and birthdate, to set up your account.
- Set your email name and password. This includes choosing a professional username and creating a strong password.
- Confirm your identity. Verify your account using a code sent via text or email to ensure you’re the rightful owner.
- Add backup contact details. Recovery options like a phone number or alternate email help you regain access if you forget your password.
- Enhance your account security. Adding features like two-factor authentication (2FA) helps keep your inbox safe from unauthorized access.
- Connect your email to your devices. Setting up your email on mobile and desktop clients makes it easier to access your inbox anytime, anywhere.
By following these steps, you can quickly create a standard email account for everyday use. However, if you’re running a business, building a brand, or communicating with clients, it’s worth creating a professional email using your own domain.
A custom business email helps you appear more credible, keeps your communication organized, and strengthens your brand identity. The setup process is also similar, but you’ll need to start by purchasing a domain and selecting a business email service, rather than using a free provider.
1. Choose the right email provider
When comparing email provider options, consider storage limits if you frequently handle large files, and ensure the provider offers robust security features, such as two-factor authentication.
Also, check the provider’s third-party integrations to make organizing your tasks easier. For instance, having an inbox that syncs with your calendar or cloud storage tools can make daily tasks much more convenient.
Ultimately, consider what you’re creating the email for. A free service is perfectly fine for personal use, but for professional purposes, getting a business email with a custom domain is the smarter choice. We’ll dive deeper into the differences between personal and business email later.
Here are some common email providers that you can choose from:
- Gmail. Best for personal use if you need seamless integration with Google Workspace tools, such as Drive and Docs.
- Outlook. A strong choice for users heavily invested in the Microsoft Office ecosystem and Teams.
- Yahoo Mail. A simple, user-friendly option for those who want a straightforward interface without complex add-ons.
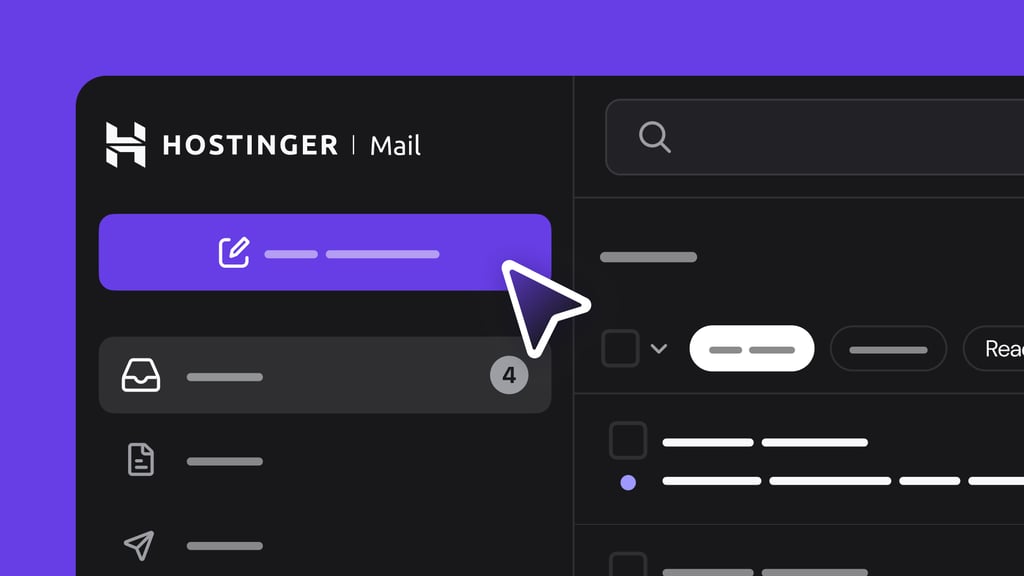
- Hostinger Mail. A business email provider that facilitates a custom domain registration, provides a custom domain, and offers high storage.
While the registration process is different across email platforms, they’re mostly similar. We’ll demonstrate the steps to create an email using Gmail, as it’s the most widely used provider to date.
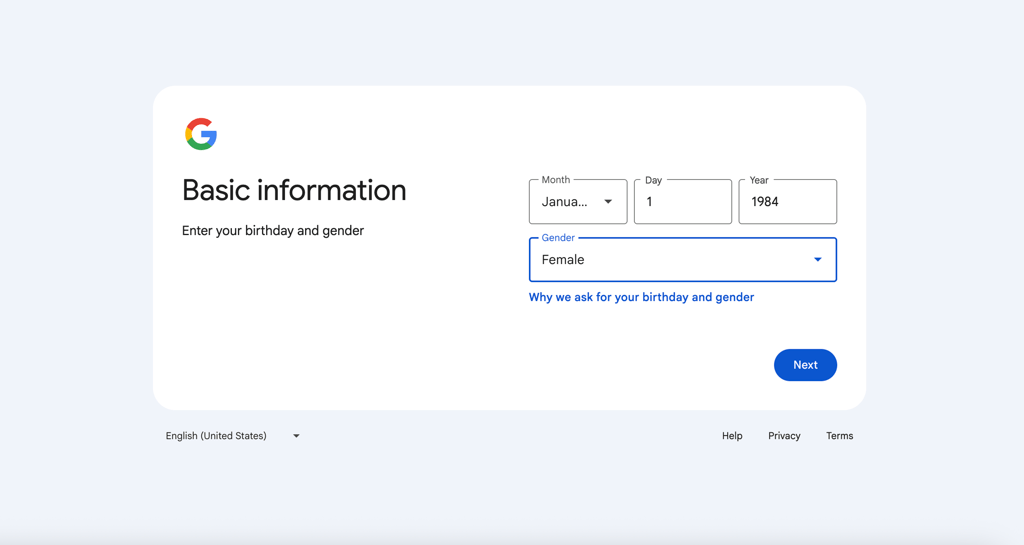
2. Fill in your personal details
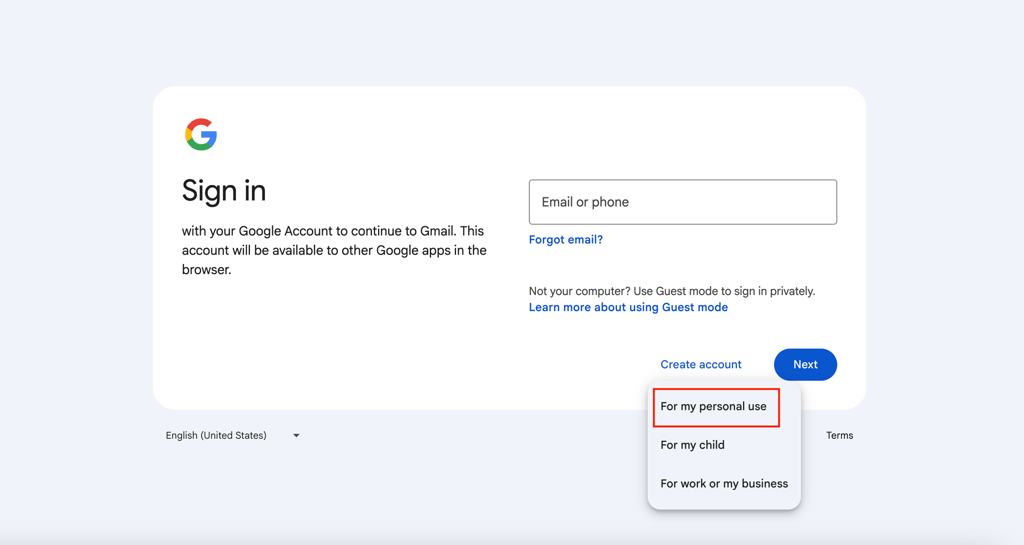
Navigate to the sign-up page of your chosen email provider. For Gmail, go to the mail.google.com login page and click Create account → For my personal use, to proceed with a standard account.
Then, provide your basic personal information. You’ll first need to enter your first and last name.
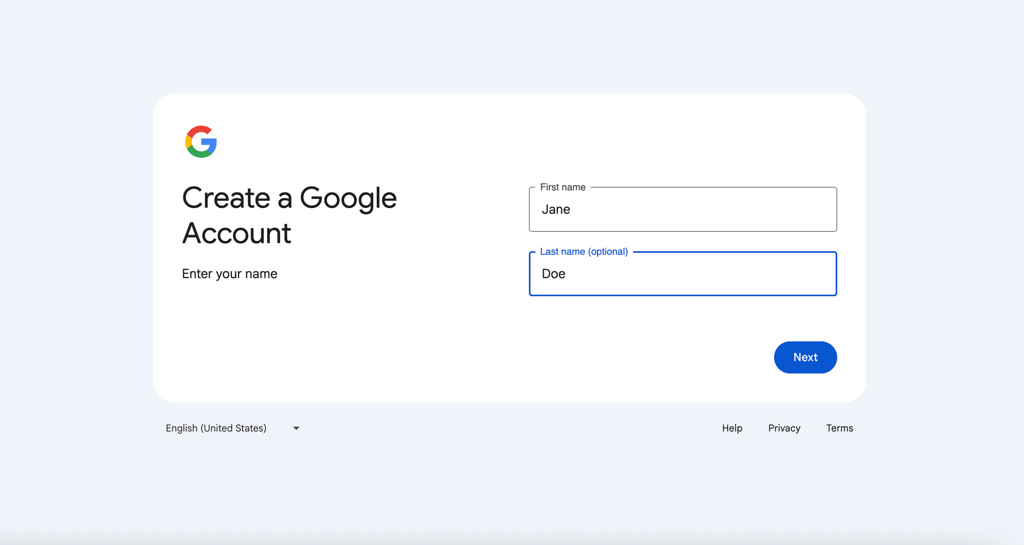
Continue filling in your date of birth to confirm you meet the age requirements for the platform. Additionally, gender, although optional, helps verify your identity.
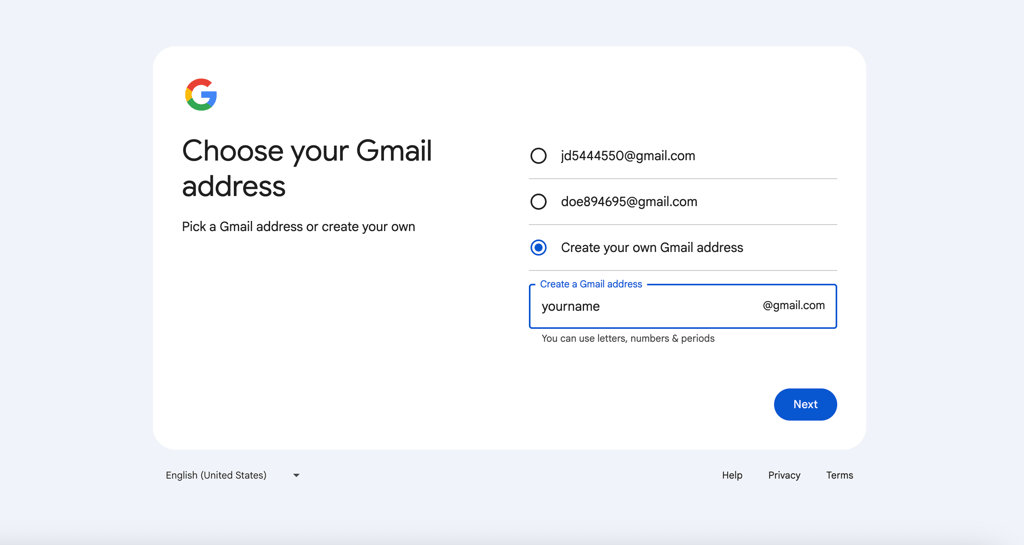
3. Create your email address and password
Your email username is the part of the email before the “@” symbol, while the complete line is the address. Aim for a professional and a username that’s easy to remember, like your firstname.lastname.
If your preferred choice is taken, try adding a middle initial or a meaningful number. Avoid complex strings of random characters, as they are hard to share verbally.
After clicking Next, set a password for your email.
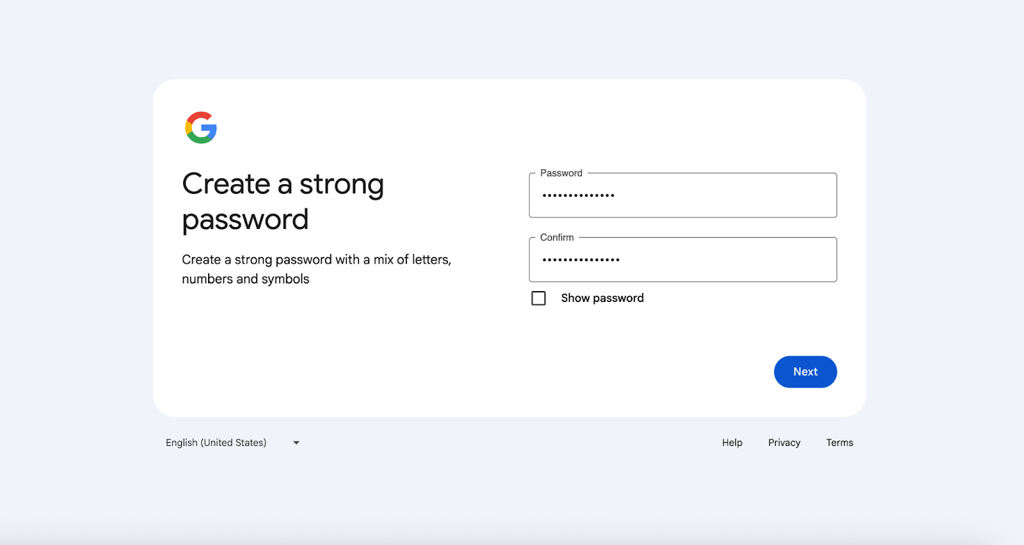
As many sites allow you to use a Google account to log in, your password protects not just your messages but often your identity across the web. So, make sure to use strong passwords with these criteria:
- At least 12 characters.
- Mix uppercase letters, lowercase letters, numbers, and symbols.
- Never reuse a password from another site.
Best security practices recommend storing your passwords in a password manager so you can keep everything safe without juggling multiple logins.
4. Verify your account
To prevent bots and spam, email providers require you to verify that you are a real person. The process is usually instant.
With Gmail, you’ll be asked to provide your phone number to send a 6-digit verification code via SMS.
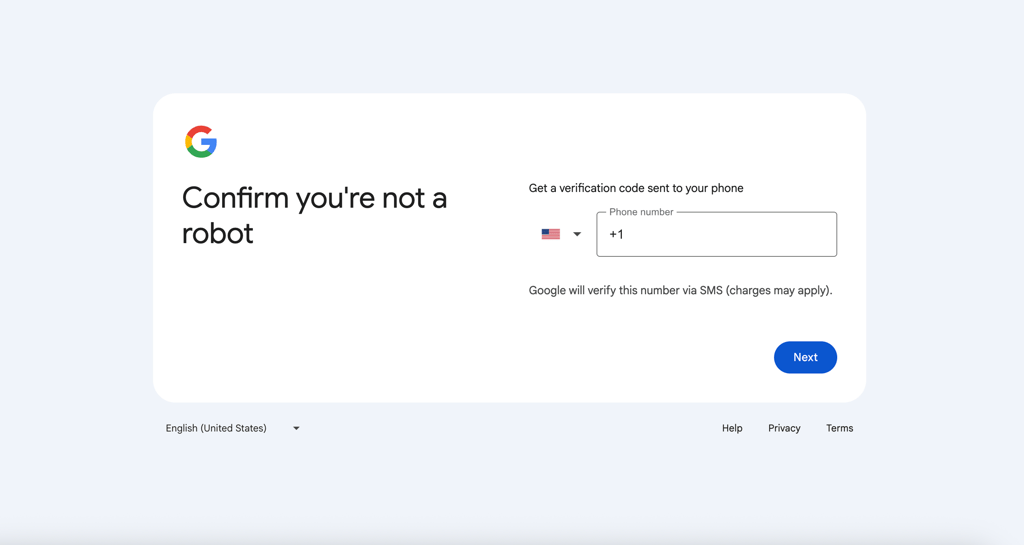
Other email providers may also ask you to solve a CAPTCHA puzzle (identifying objects in images) to prove you are human.
Whichever method you choose, enter the code sent to you into the required field to verify.
5. Provide recovery information
This is the most critical step for long-term account safety. If you forget your password or get locked out due to suspicious activity, this is how you get back in.
Typically, you’ll need to provide an alternative email address or phone number. With Gmail, you’ll be asked to provide an email address by default. If you want to add a recovery phone number, you can do so through your account settings later.
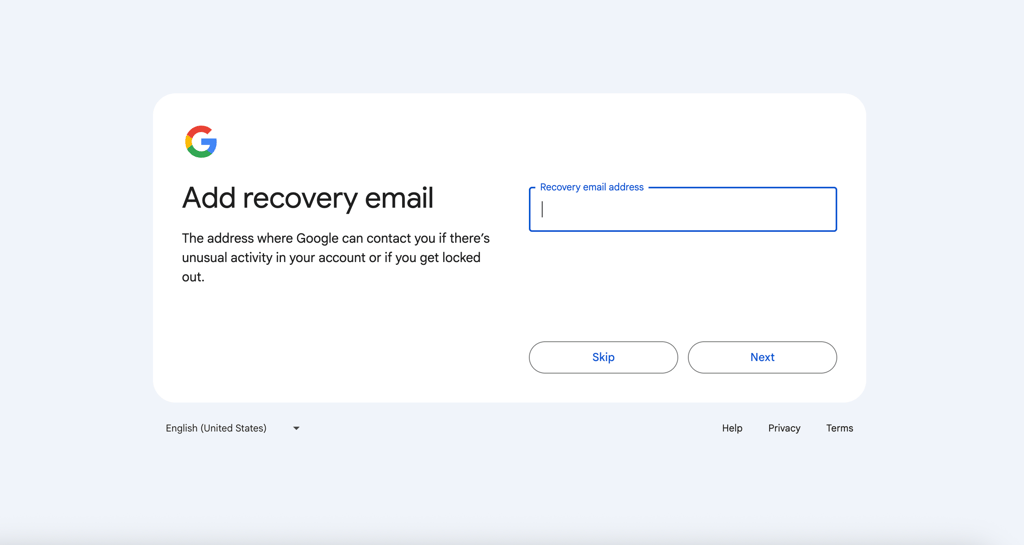
After clicking Next, review your email account, and agree to Google’s Privacy and Terms.
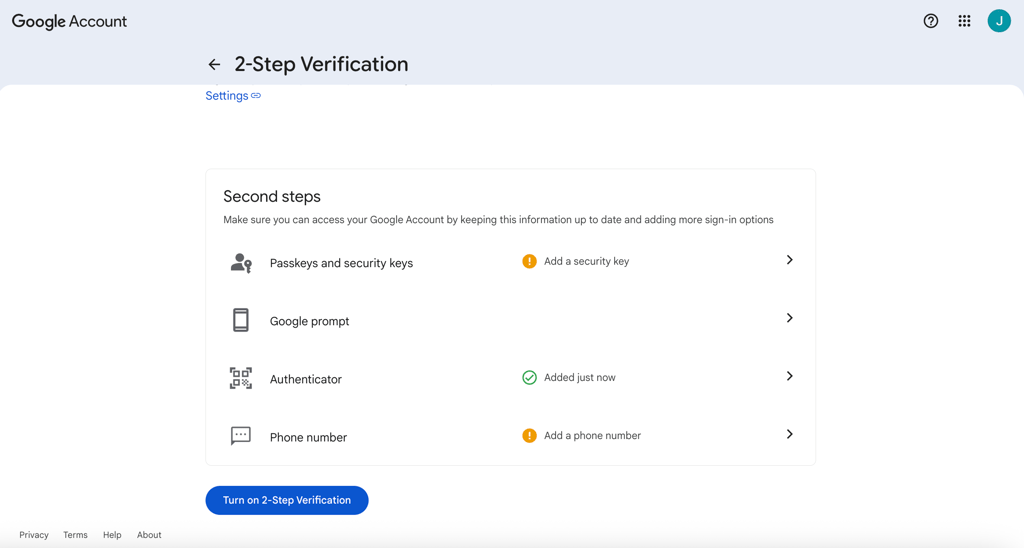
6. Add an additional security layer
Once your account is active, enable two-factor authentication (2FA) immediately. This acts as a second lock on your digital door. With 2FA enabled, even if a hacker steals your password, they can’t access your email without entering the second-layer code that you set.
If you use Gmail, follow these steps to activate 2FA:
- Click on your Google account profile picture in the top right corner of your inbox.
- Select Manage your Google account → Security & sign-in.
- Scroll to the How you sign in to Google section and select 2-Step Verification.
- Enter your email password to verify it’s you.
- Choose a 2FA option and follow the next steps according to your chosen method. You should see a green checkmark once it’s activated.
7. Set up an email client on your devices
You don’t have to rely on a web browser every time you want to check your inbox. You can connect your email accounts to an email client on your computer or mobile device so you can access messages faster, receive instant notifications, and keep everything organized in one place.
Setting up an email client is generally simple: open your chosen mailing app, and enter your email address and password. Modern apps usually detect the correct IMAP or POP settings automatically.
Here’s an overview of the most commonly used email clients and what they’re best for:
- Outlook. Built for productivity, it combines email, calendars, tasks, and contacts in one dashboard, making it useful for business users or anyone already working with Microsoft 365. If you need help setting it up, you can follow our Outlook setup guide.
- Thunderbird. A free, open-source email client that focuses on customization and privacy, it supports add-ons, advanced filtering, and robust security features. Learn how to set up your email in Thunderbird in our tutorial.
- Apple Mail (Mac Mail). Coming pre-installed on macOS, it’s a natural choice for anyone using a Mac. It integrates smoothly with iCloud and other Apple apps. We also have a tutorial on setting up Mac Mail if you prefer step-by-step instructions.
- iOS Mail (iPhone/iPad). Provides quick access to your inbox on the go, with support for multiple accounts and deep integration with system features like notifications and widgets. For detailed steps, you can follow our guide to setting up email on iOS.
By choosing an email client that fits your workflow and syncing it across your devices, you’ll be able to manage your inbox more efficiently and stay connected with minimal effort.
What are the differences between personal and business email?
Personal email services like Gmail or Yahoo are meant for everyday use, while setting up a business email gives more control, branding, and security, which is beneficial for professional use.
See the table below to dive deeper into the differences between a personal email and a business email.
| Aspect | Personal email | Business email |
| Domain | Uses the email provider’s domain like @gmail.com or @yahoo.com | Uses a custom domain like @yourbusiness.com |
| Ownership | Owned and controlled by the individual user | Owned by the business or organization |
| Professional image | Casual and not ideal for branding | Strengthens credibility and brand identity |
| Security features | Standard security, depending on the email provider’s policy | Enhanced security, admin controls, and compliance options |
| Storage capacity | Often limited unless upgraded | Typically, larger storage and scalable plans |
| Support | Basic or self-service support | Dedicated support depending on the provider |
| Team management | Not suitable for multiple users | Allows multiple accounts and centralized management |
| Integrations | Limited business integrations | Designed to work with business tools like CRM or other collaboration apps |
How do I create an email with a custom domain?
Creating a custom email address with your business name attached builds credibility and makes your brand look more polished. To create a business email with your own domain, you’ll need to follow these three main steps:
1. Buy a domain name. Your domain is the “@yourbusiness.com” part of your email. You can purchase a domain from a domain registrar. Make sure the domain matches your brand or business name.
2. Choose a business email service. This could be a hosting company that includes email in its plans (like Hostinger), or a dedicated email service, such as Google Workspace or Microsoft 365. These platforms offer professional features, including increased storage, spam protection, and enhanced security.
3. Create your custom email address. Once the domain and service are connected, you can start creating mailboxes such as hello@yourbusiness.com, info@yourbusiness.com, or yourname@yourbusiness.com. Most providers offer a simple setup process through their dashboard.
Once the emails are created, you can integrate them into any desktop or mobile email client for easier access.
Is Hostinger a good business email provider?
Hostinger Mail is a strong option for anyone looking to set up a business email, especially freelancers, small businesses, and growing brands that need a professional email address without a high upfront cost.
Moreover, the platform is easy to set up, integrates well with desktop and mobile email clients, and gives you the stability you need for daily communication.
Our business email plans support custom domains, have spacious storage, and include essential security features like spam filtering, virus protection, and authentication tools (SPF, DKIM, DMARC) to help keep your inbox safe and your emails deliverable.

If you want to start an email newsletter with a custom address, Hostinger Reach makes it easy to design professional emails, automate campaigns, and manage subscriber lists directly from your Hostinger dashboard. This way, you can go beyond basic communication and use email as a marketing channel without relying on separate third-party tools.
All of the tutorial content on this website is subject to Hostinger's rigorous editorial standards and values.

Larassatti Dharma is a content writer with 4+ years of experience in the web hosting industry. She has populated the internet with over 100 YouTube scripts and articles around web hosting, digital marketing, and email marketing. When she's not writing, Laras enjoys solo traveling around the globe or trying new recipes in her kitchen. Follow her on LinkedIn

As VP of Product at Hostinger, Saulius oversees Web Hosting Platform & Tools, Managed WordPress, and WebPro Experience. Saulius enjoys observing users through their daily life activities, looking for problems to solve, and building products that make users more efficient online, help them spend more time on the things they love, and leave all the rest for technology to solve. Follow him on LinkedIn.