Managed OpenClaw is a streamlined solution that simplifies the implementation of personal AI assistants. This feature automates server management, infrastructure updates, and security settings, allowing you to focus entirely on configuring your assistant’s logic and interactions.
You can purchase a Managed OpenClaw subscription in two ways:
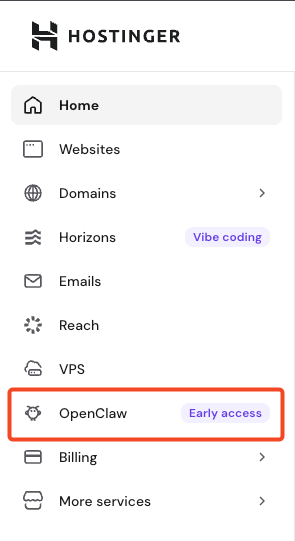
- From hPanel — log in to hPanel and click OpenClaw in the left sidebar. All users can see this menu item and purchase a subscription directly from there.
- From the Hostinger website — visit this page and select a plan.
With Managed OpenClaw, you receive:
- Automated Onboarding: Choose your AI provider and a communication channel like WhatsApp, Telegram, or Hostinger Email.
- Integrated AI Models: Use nexos.ai to connect with AI models without manual API key configurations.
- Isolated Environment: Your OpenClaw instance runs within a secure, dedicated Docker container.
- Managed Infrastructure: Hostinger handles all backend security features and automatic software updates.
Prerequisites
- A Hostinger account with access to Managed OpenClaw (currently rolling out by region).
- An active Telegram or WhatsApp account, or a Hostinger Email address, for the AI communication channel.
Set up your Managed OpenClaw instance
See how to set up OpenClaw the right way:
To begin, you must first purchase a plan and configure the basic settings:
- Get your Managed OpenClaw plan: Visit the Hostinger page for your brand and select Managed OpenClaw.
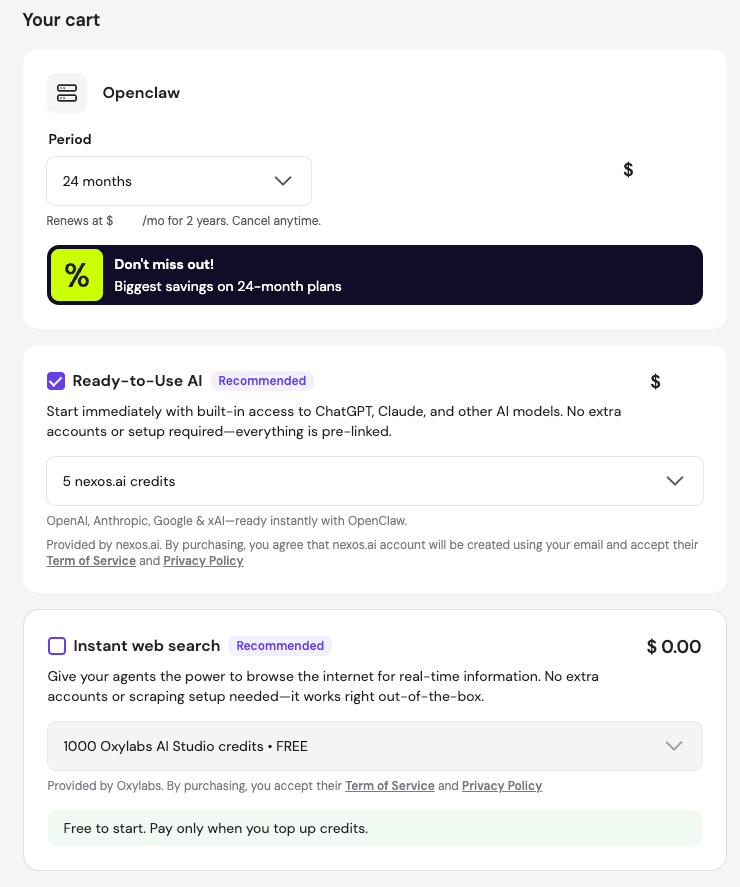
- Scroll down and click on Get OpenClaw. There is only one version for Managed OpenClaw. After selecting this option, you will be directed to the cart to proceed with payment.
- Select your plan duration and optional add-ons
- Ready-to-use AI: Selected by default; you can add up to 100 nexos.ai credits to start right away.
- Instant web search: Add 1000 free Oxylabs AI Studio credits to empower your agents for internet browsing.
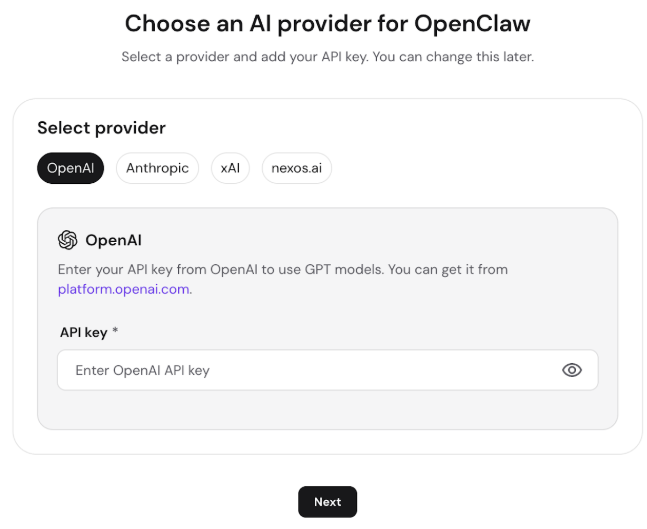
- Configure the AI Provider: If you purchased the version without Ready-to-use AI, enter your externally generated API key during the onboarding process.
- Select a communication channel:Connect WhatsApp or Telegram directly from hPanel — no need to open the OpenClaw dashboard.
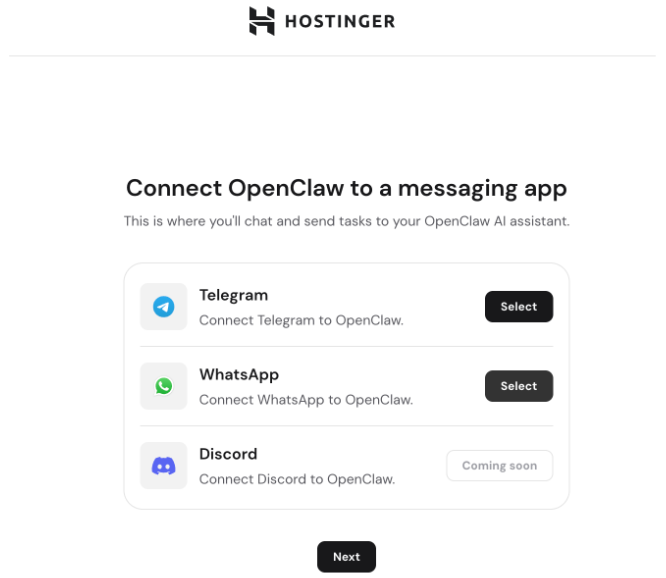
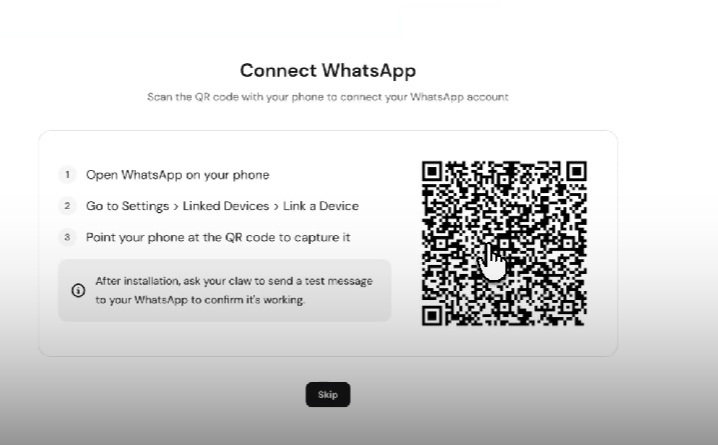
- WhatsApp: Follow the QR code pairing steps shown in hPanel. Open WhatsApp on your phone → Settings → Linked Devices → Link a Device → scan the QR code displayed on screen.
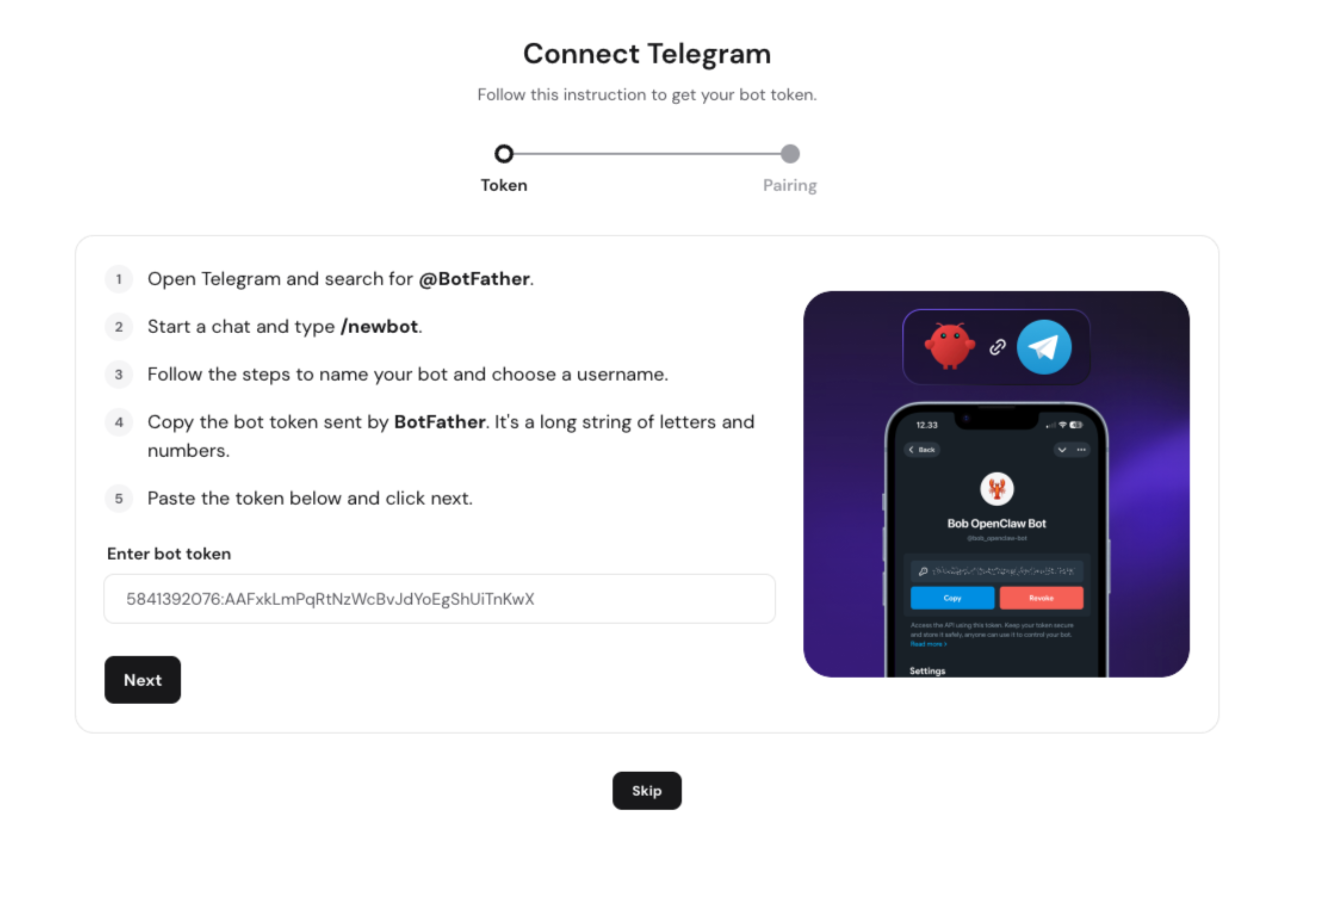
- Telegram: Follow the prompts in hPanel to connect via BotFather.

- Hostinger Email: Connect a dedicated Hostinger Email inbox to automate outreach, responses, and notifications. If you have a recently purchased but unconfigured Hostinger Email plan, a mailbox setup step will appear automatically during onboarding. Once completed, the mailbox is connected to OpenClaw with no extra steps. If you don’t see this step, you can connect your email manually after setup by asking your OpenClaw assistant.
- Discord: This option is currently under development.
- If you prefer to connect a messaging app later on, click next to skip this step.
- WhatsApp: Follow the QR code pairing steps shown in hPanel. Open WhatsApp on your phone → Settings → Linked Devices → Link a Device → scan the QR code displayed on screen.
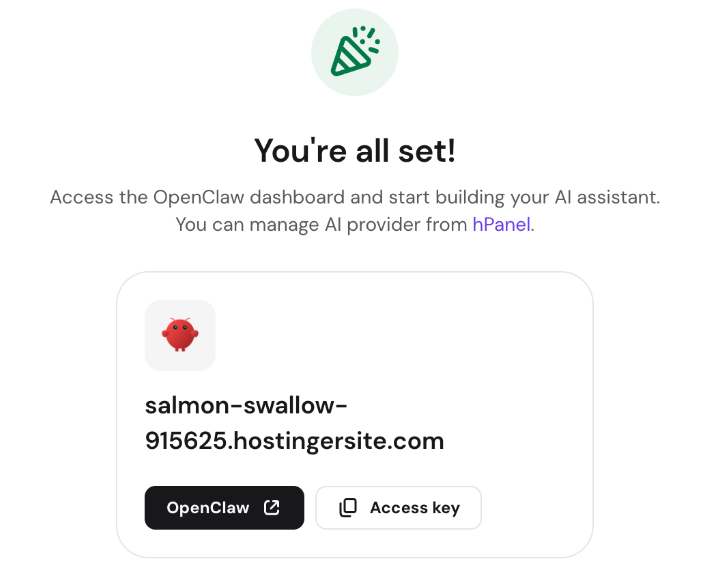
- Finalize the installation: The system will prepare your environment. Once complete, click the OpenClaw button to open the interface, or click Access key to copy your unique token.
Set up your AI preferences
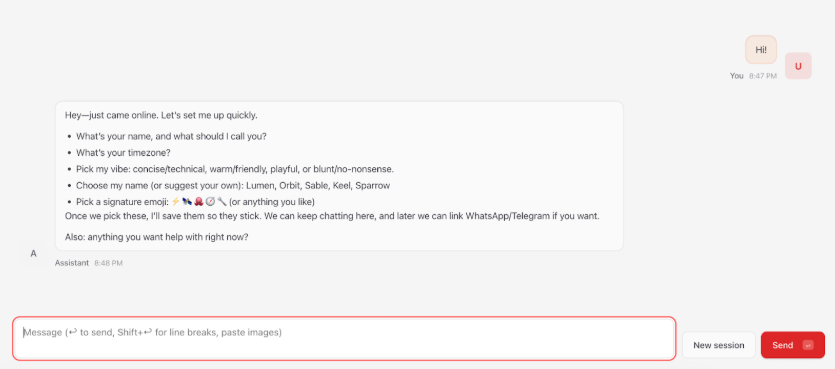
After the environment is prepared, send a message saying “Hi” to your assistant through your chosen messaging app. This begins an initial configuration interview where the AI will ask about your communication preferences and personal setup.
Manage your OpenClaw application
After completing the initial setup, you can manage your Managed OpenClaw instances at any time from the OpenClaw section on the Hostinger hPanel side menu.
For more details, refer to this guide: How to manage your Managed OpenClaw application on hPanel.
By completing these steps, you have successfully deployed a managed AI assistant environment. You can now interact with your OpenClaw instance to automate tasks and streamline your workflow.
Switching plans
If you purchased a Managed OpenClaw plan within the last 7 days and want to switch, you are eligible for one free subscription migration via Kodee. Available migration paths:
- Managed OpenClaw → Managed Hermes
- Managed OpenClaw → VPS (KVM 1)
After migration, you will receive an onboarding link to access your new service. This option is limited to one migration per customer.
NOTE
- If you require full root access or manual server control, we recommend exploring our OpenClaw VPS options and OpenClaw VPS installation guide.