To customize transactional emails in Hostinger Reach, connect Hostinger Ecommerce to Reach and open a template from Email previews on a Reach 500 or higher plan. Transactional emails are the emails your store sends to customers, such as order confirmations, shipping updates, and invoices. Hostinger Ecommerce groups them into six categories: order confirmation, shipping, digital file download, appointments, gift card, and invoices. You can edit every template in all six categories, and saved changes sync back to your Hostinger Ecommerce store.
Before you start
Make sure you have:
- A Hostinger Ecommerce plan with your store set up. Hostinger AI Builder websites need the Hostinger Ecommerce plan connected to the website.
- Hostinger Ecommerce connected to Hostinger Reach. See Hostinger Reach: How to connect and use the Hostinger eCommerce integration for the steps.
- A Hostinger Reach 500 or higher plan, which is required to edit templates.
- Optional: colors and fonts set in Brand details in Hostinger Reach, which Apply brand details styles needs.
Open a transactional email template from Hostinger Ecommerce
Select Edit in Reach next to a template on the Email previews page to open it in the Reach editor in Hostinger Reach. Email previews lists every template in six categories:
|
Category |
Templates |
|
Order confirmation |
Order confirmation Order confirmation (when manual payment used) Order confirmation (when delayed payment used) |
|
Shipping (physical products only) |
Shipping confirmation Shipping confirmation with tracking number Shipping update |
|
Digital file download |
Digital file download link |
|
Appointments |
Appointments confirmation Appointment cancellation Appointment rescheduled |
|
Gift card |
Gift card details |
|
Invoices |
Invoice of the order |
To open a template:
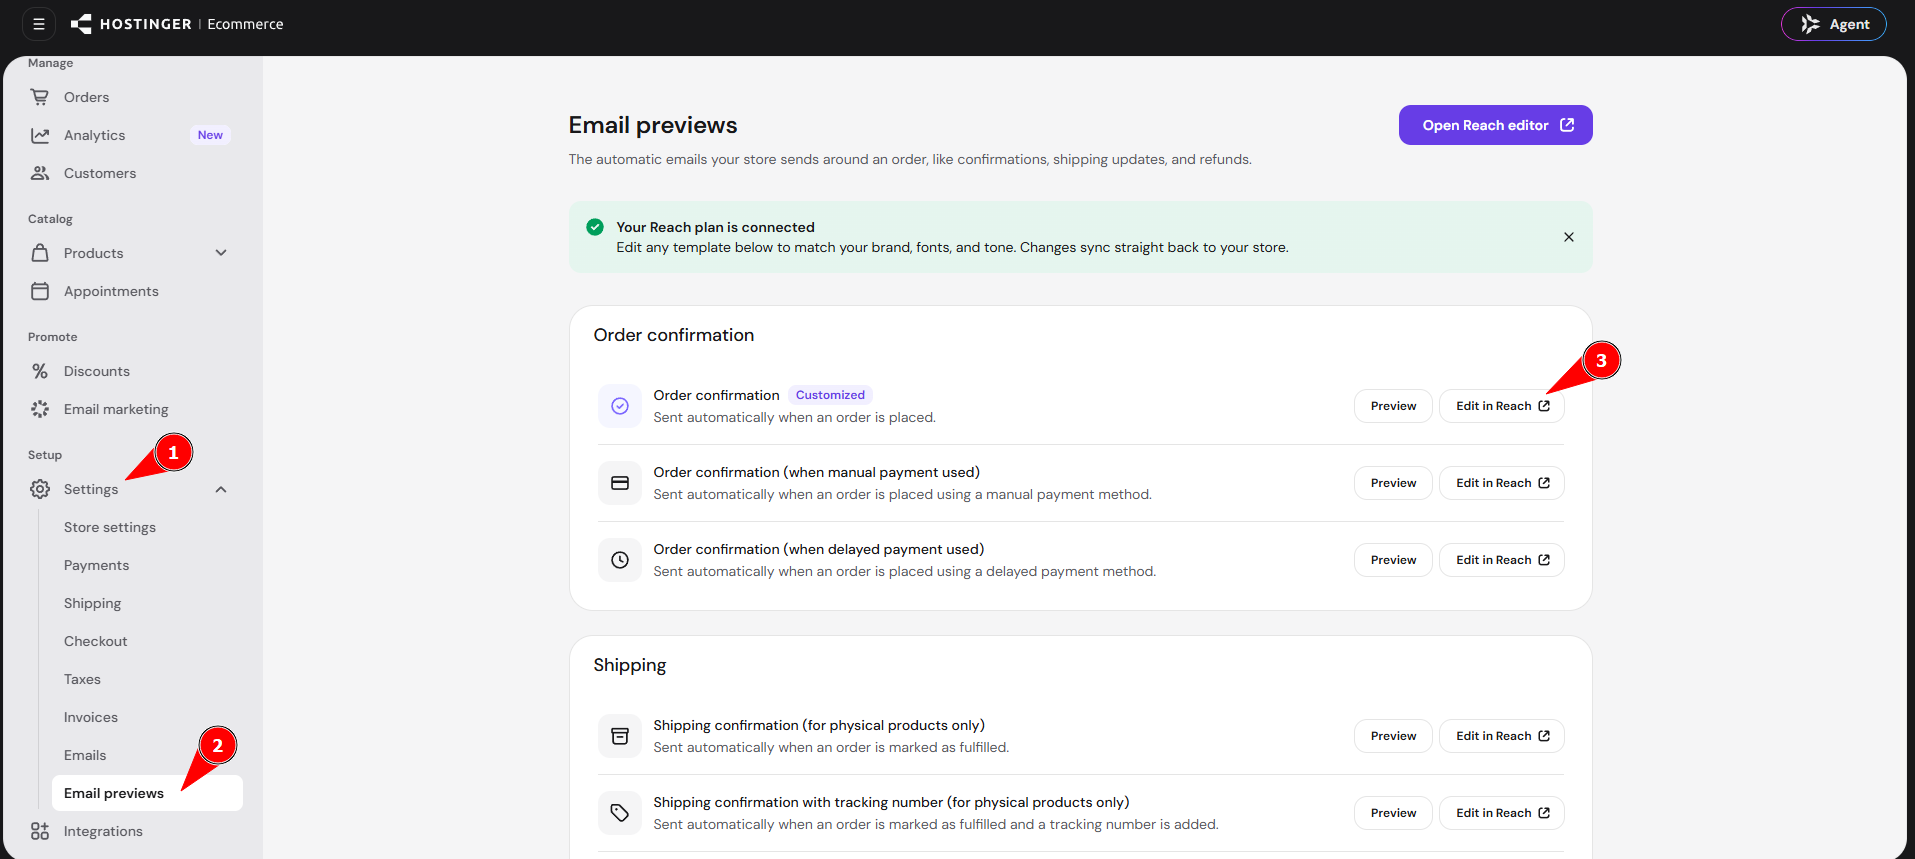
- Open your store in the Store Manager.
- Go to Settings → Email previews.
- Find the template you want to edit.
- Select Edit in Reach.
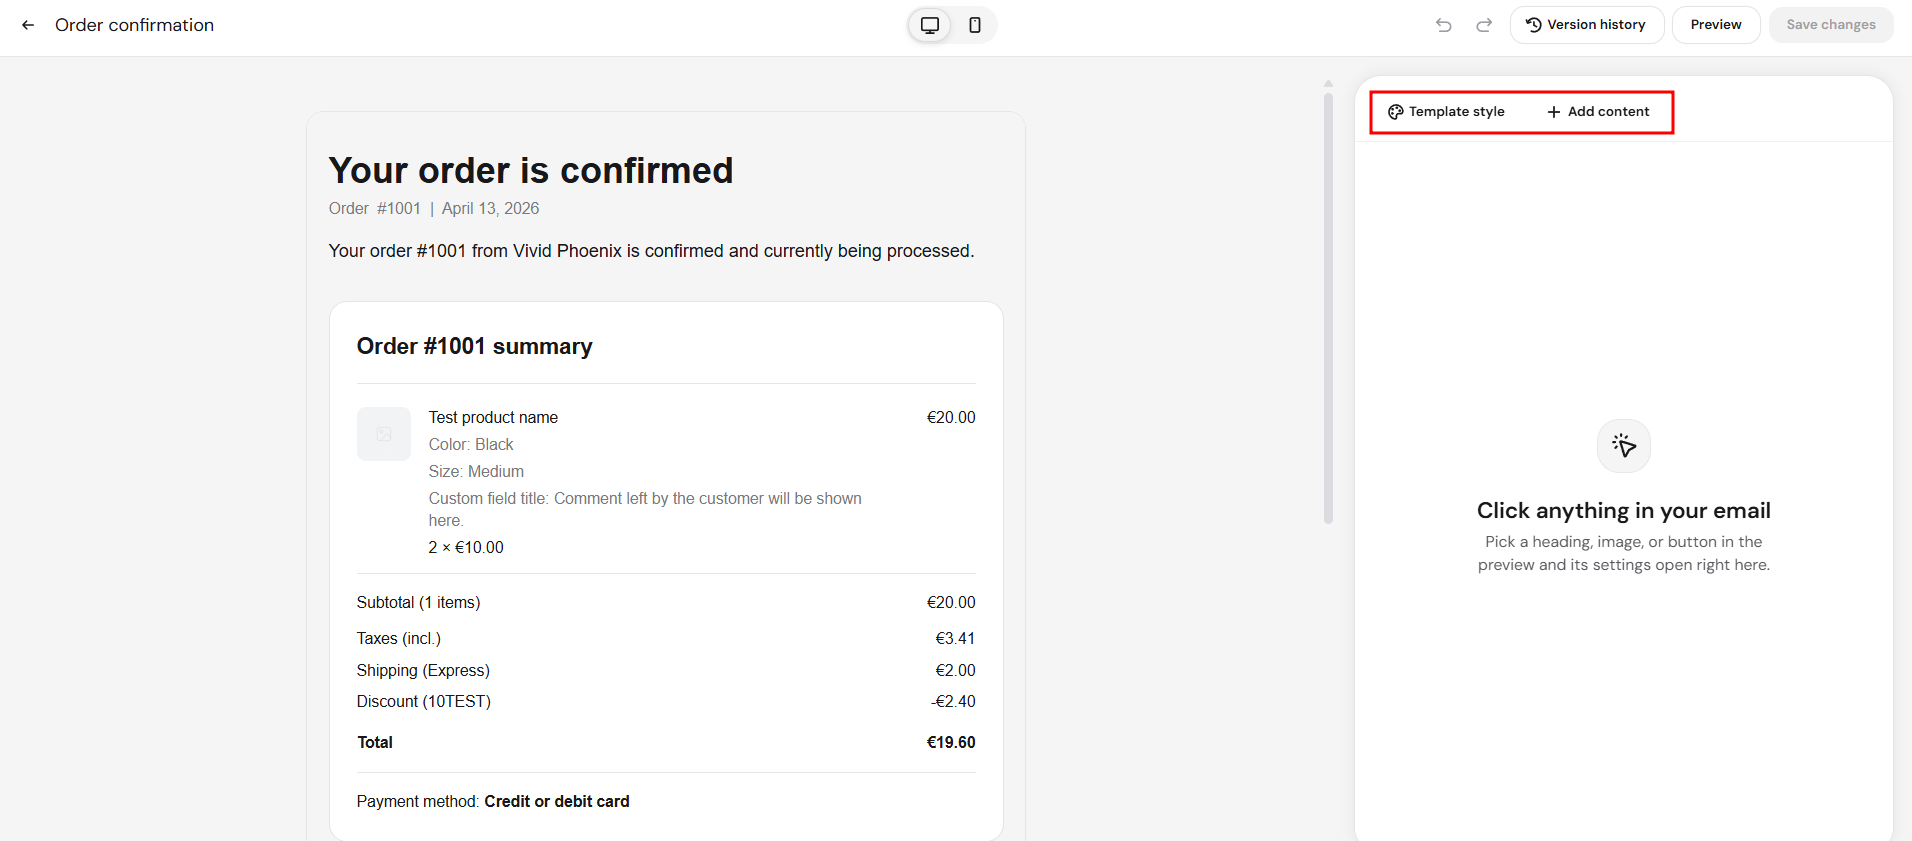
The template opens in the Reach editor with the Template style and Add content tabs.
NOTES
- If Hostinger Ecommerce is not connected to Hostinger Reach, each template has only a Preview button.
- Connect Hostinger Ecommerce to Hostinger Reach to add the Edit in Reach button.
Apply brand styles to a Hostinger Ecommerce email template
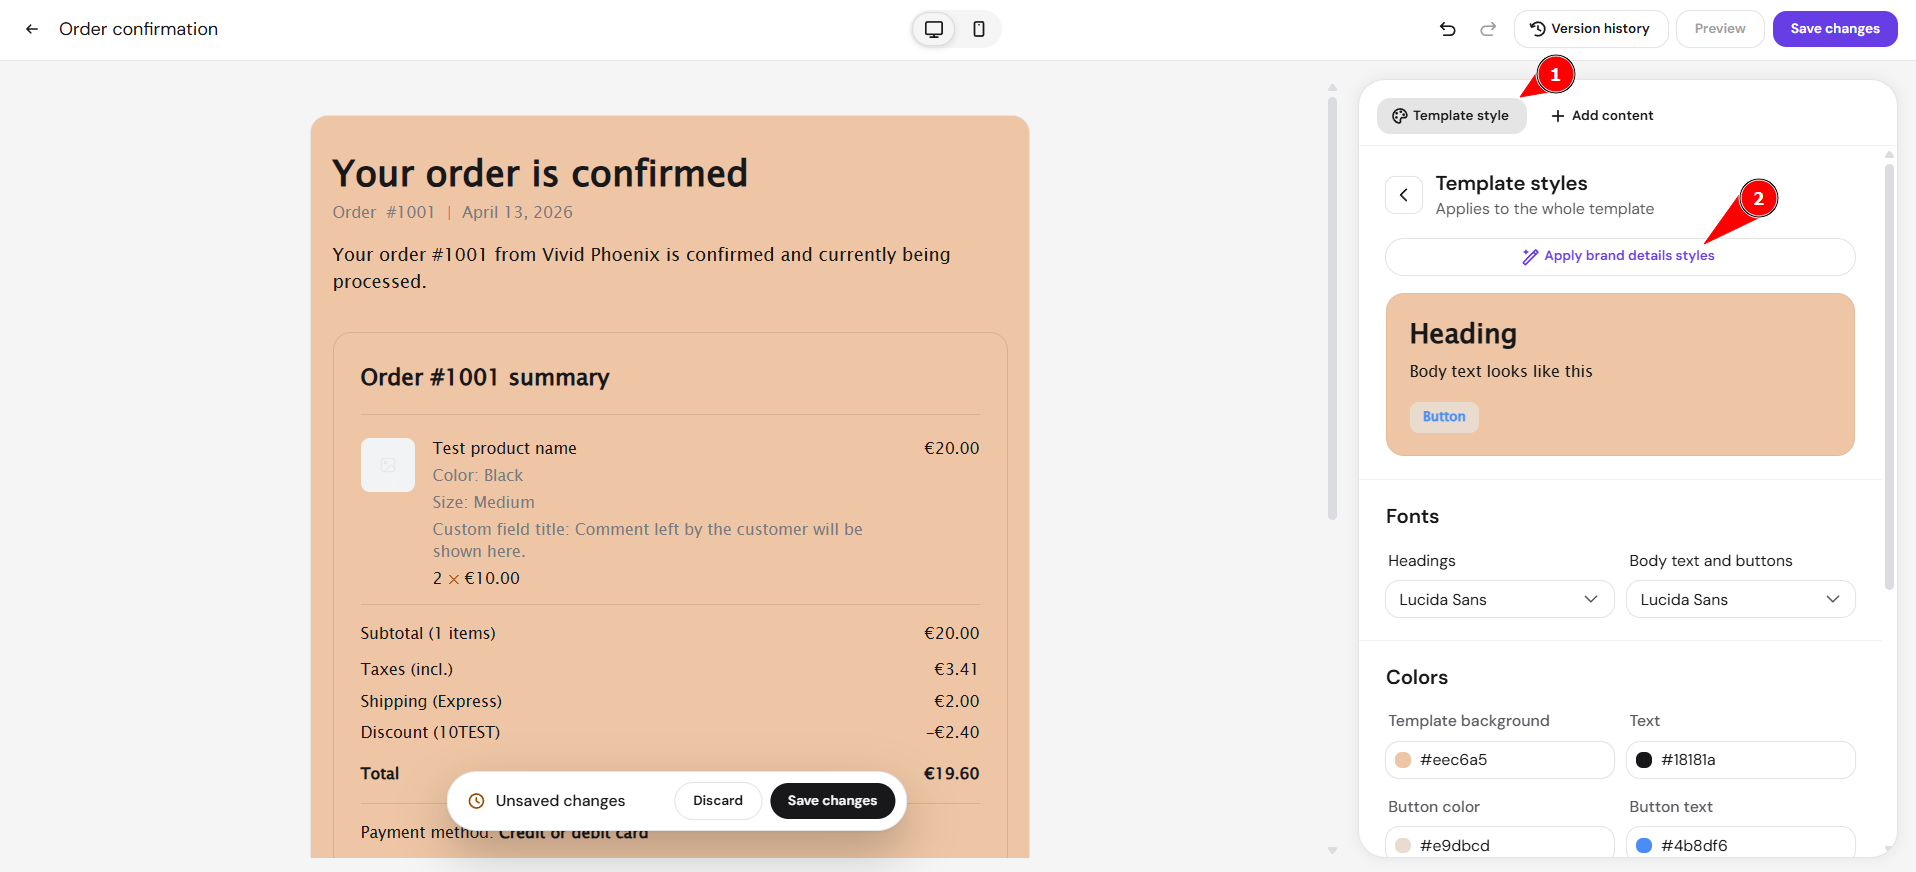
Set your colors and fonts in Brand details in Hostinger Reach, then select Template style → Apply brand details styles in the Reach editor to apply them to the whole template. The Apply brand details styles button stays unavailable until you set your colors and fonts in Brand details.
- In Hostinger Reach, go to Settings → Brand details.
- Set your font and your colors. For every field on that page, see Hostinger Reach: Adding business details.
- Select Save changes.
- Open your template in the Reach editor, select Template style, then select Apply brand details styles.
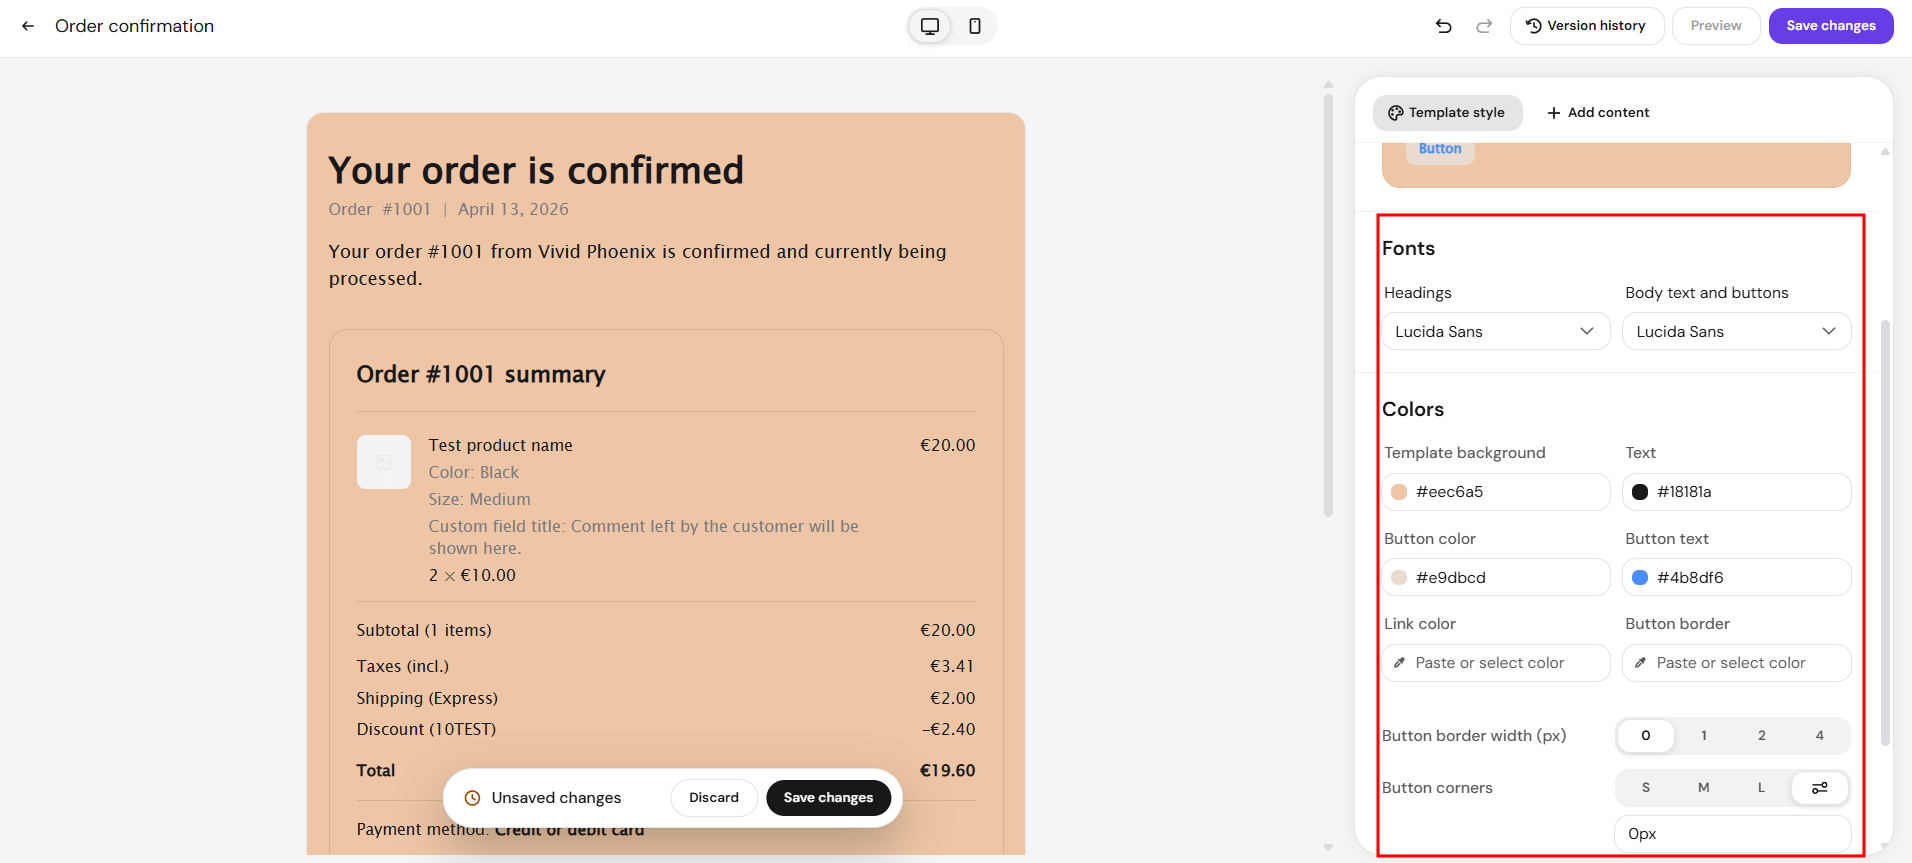
You can also set each style manually in Template style, without using Brand details:
- Fonts – set the font for Headings and for Body text and buttons.
- Colors – paste or select a color for Template background, Text, Button color, Button text, Link color, and Button border.
- Button border width (px) – choose 0, 1, 2, or 4.
- Button corners – choose S, M, or L, or enter a custom value in pixels.
Add content to a Hostinger Ecommerce email template
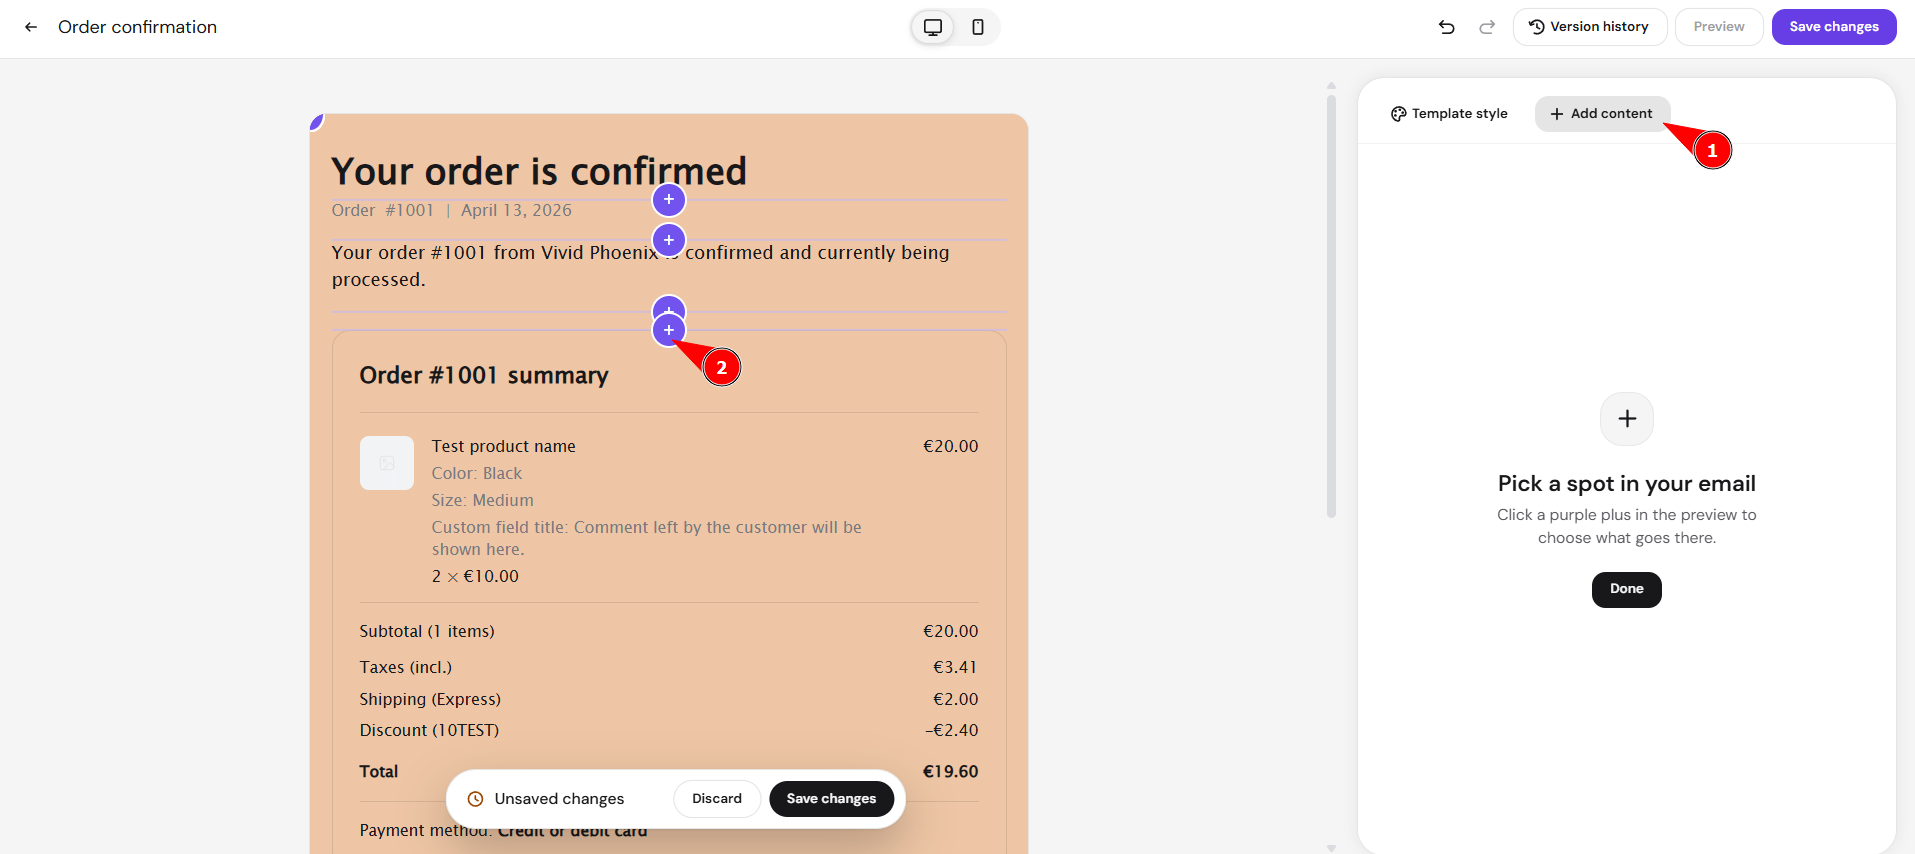
Select Add content, then select a purple plus in the email preview, to open the Add section window and insert a new section at that spot. Add sections with extra information, such as a return policy or support contact details.
- In the Reach editor, select Add content.
- Select a purple plus in the email preview where you want the new section.
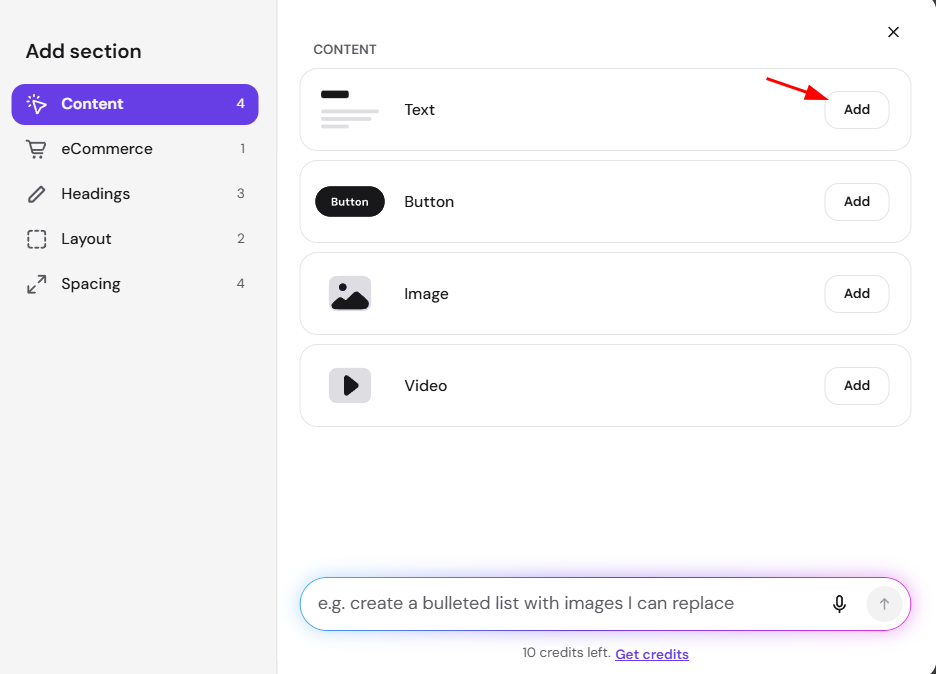
- In the Add section window, select a category on the left.
- Select Add next to the section you want.
- Select Done when you finish adding sections.
The Add section window groups ready-made sections into these categories:
- Content – Text, Button, Image, and Video.
- eCommerce – Abandoned cart button.
- Headings – Heading 1, Heading 2, and Heading 3.
- Layout – 2 Columns and 3 Columns.
- Spacing – Small, Medium, Large, and Divider.
To generate a section with AI instead, describe it in the prompt field at the bottom of the Add section window, for example “create a bulleted list with images I can replace”. The window shows your remaining credits under the prompt field. For the settings of each section type, see How to manually edit your email template in Hostinger Reach.
Customize text and styling in a Hostinger Ecommerce email template
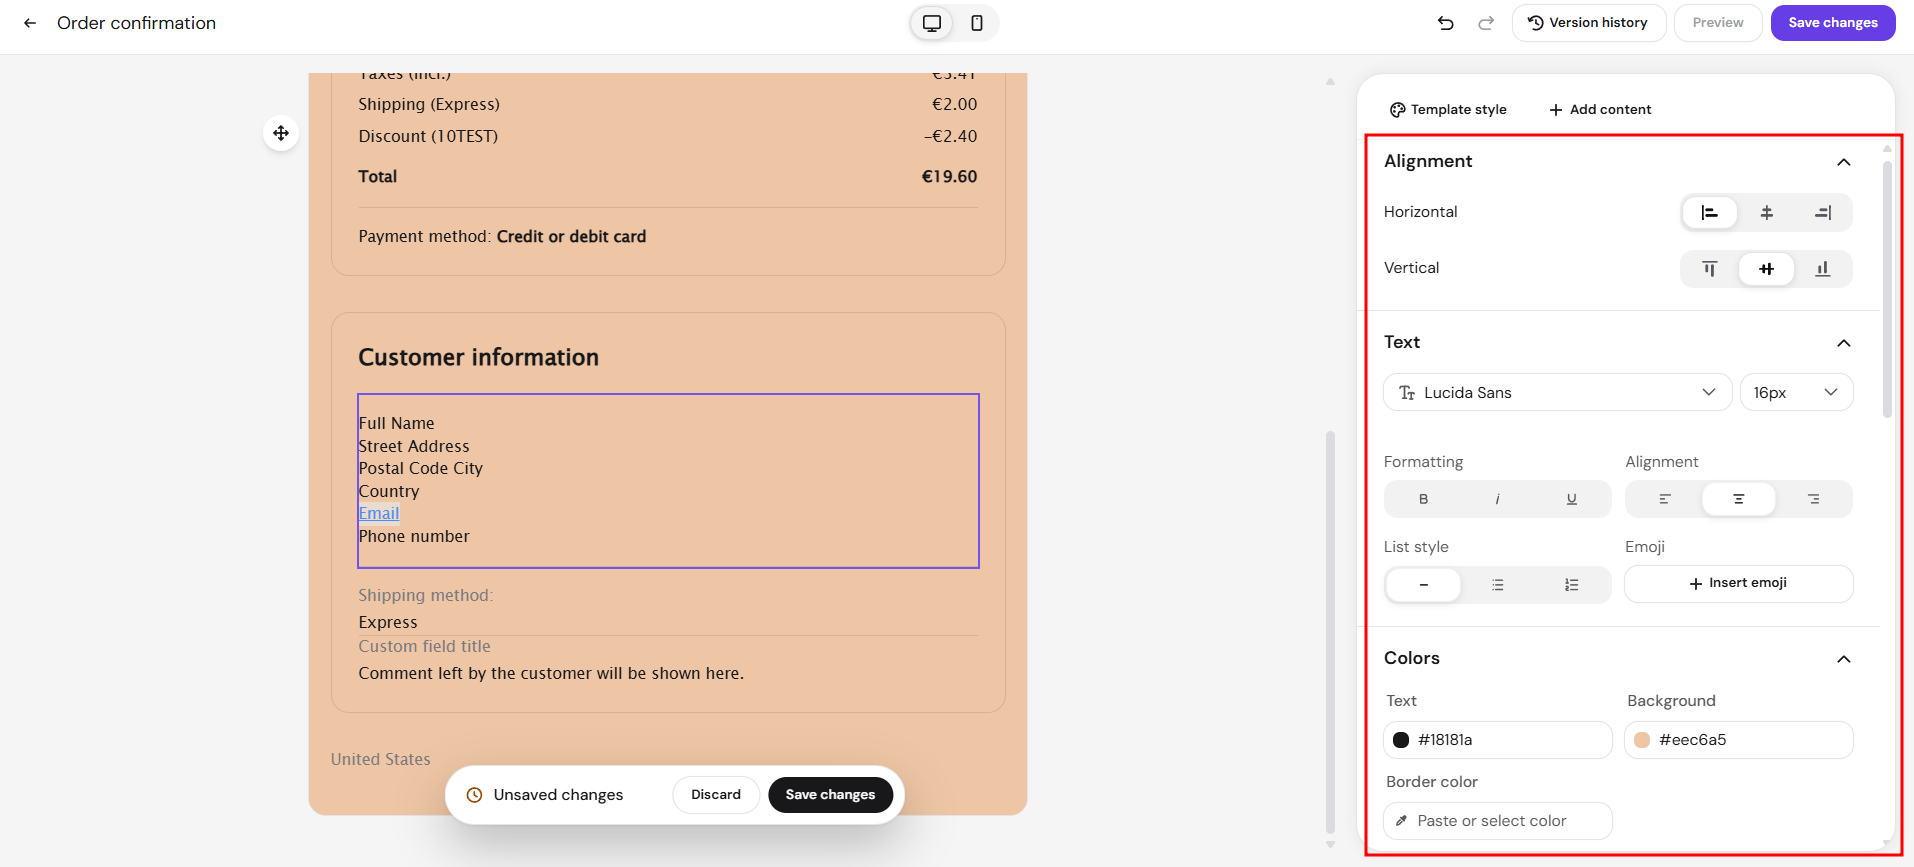
Select a block in the template to adjust its styling and colors, or to edit content you added yourself. Original text, links, and images can’t be edited in transactional emails. The sidebar shows some of these options, depending on the block:
- Text – set the font, font size, bold, italic, underline, and alignment.
- Alignment – set the horizontal and vertical alignment of a section, such as the customer address block.
- Colors – set the text color and the background color. Sections, such as the customer address block, also have a border color.
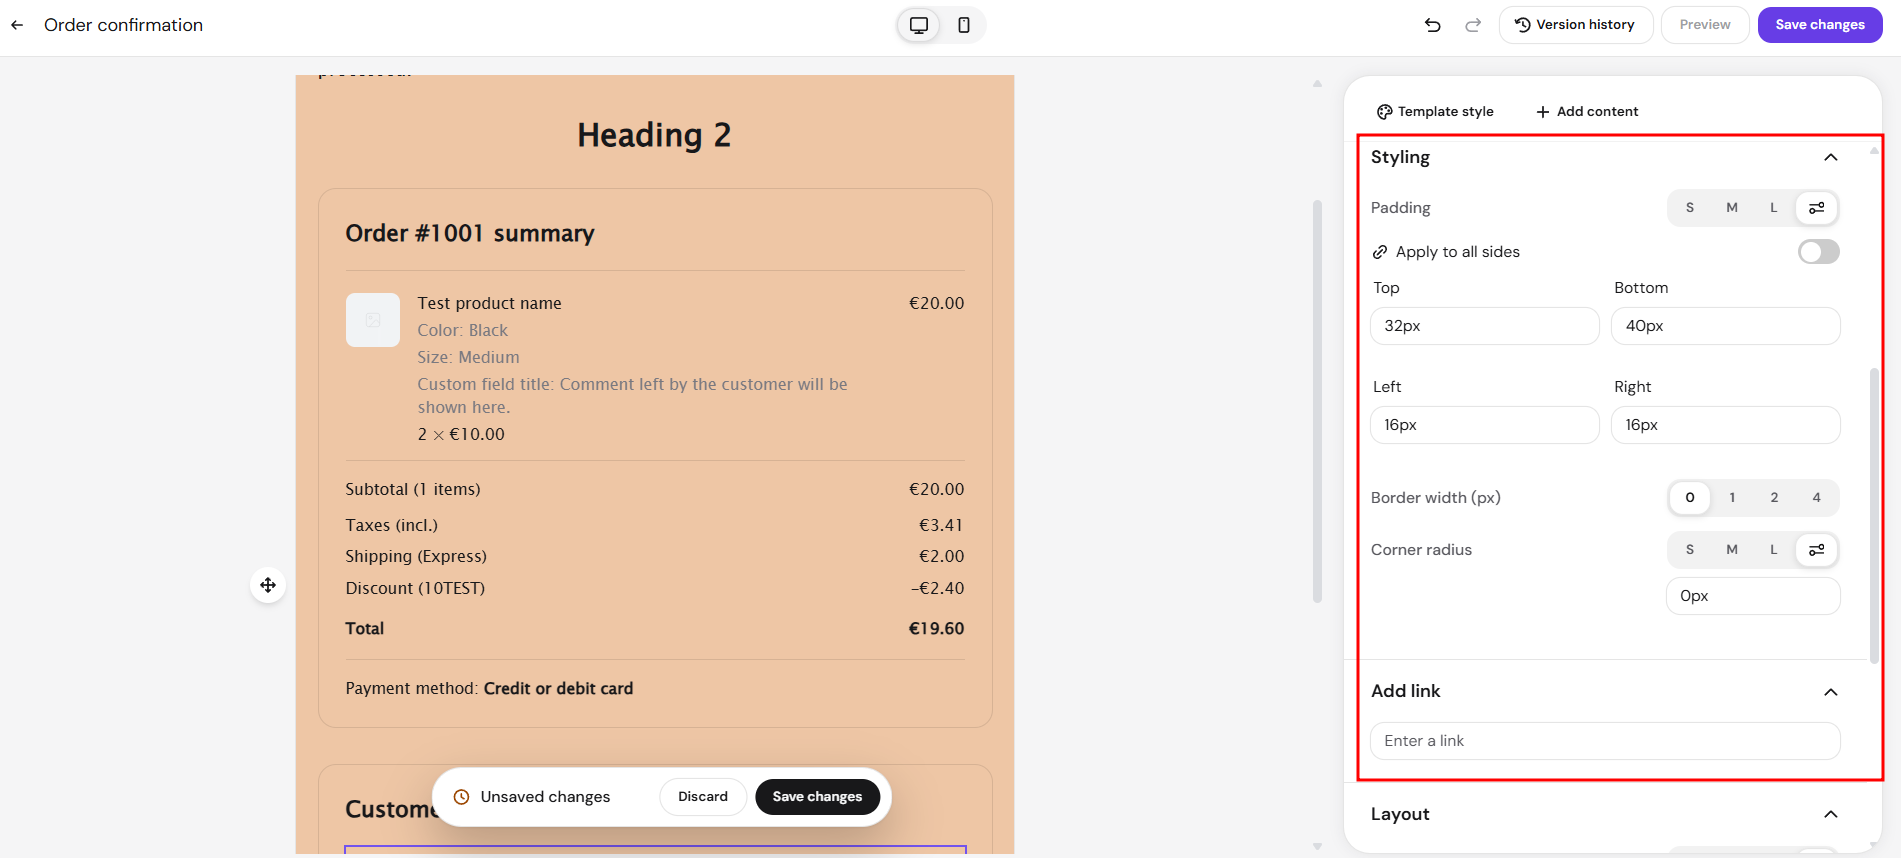
- Styling – set Padding, the space inside the block, using S, M, L, or custom pixel values for each side. Apply to all sides keeps all four values equal when it is on. Also set Border width (px) to 0, 1, 2, or 4, and Corner radius to S, M, L, or a custom pixel value.
- Add link – enter a URL in the Enter a link field to link the block.
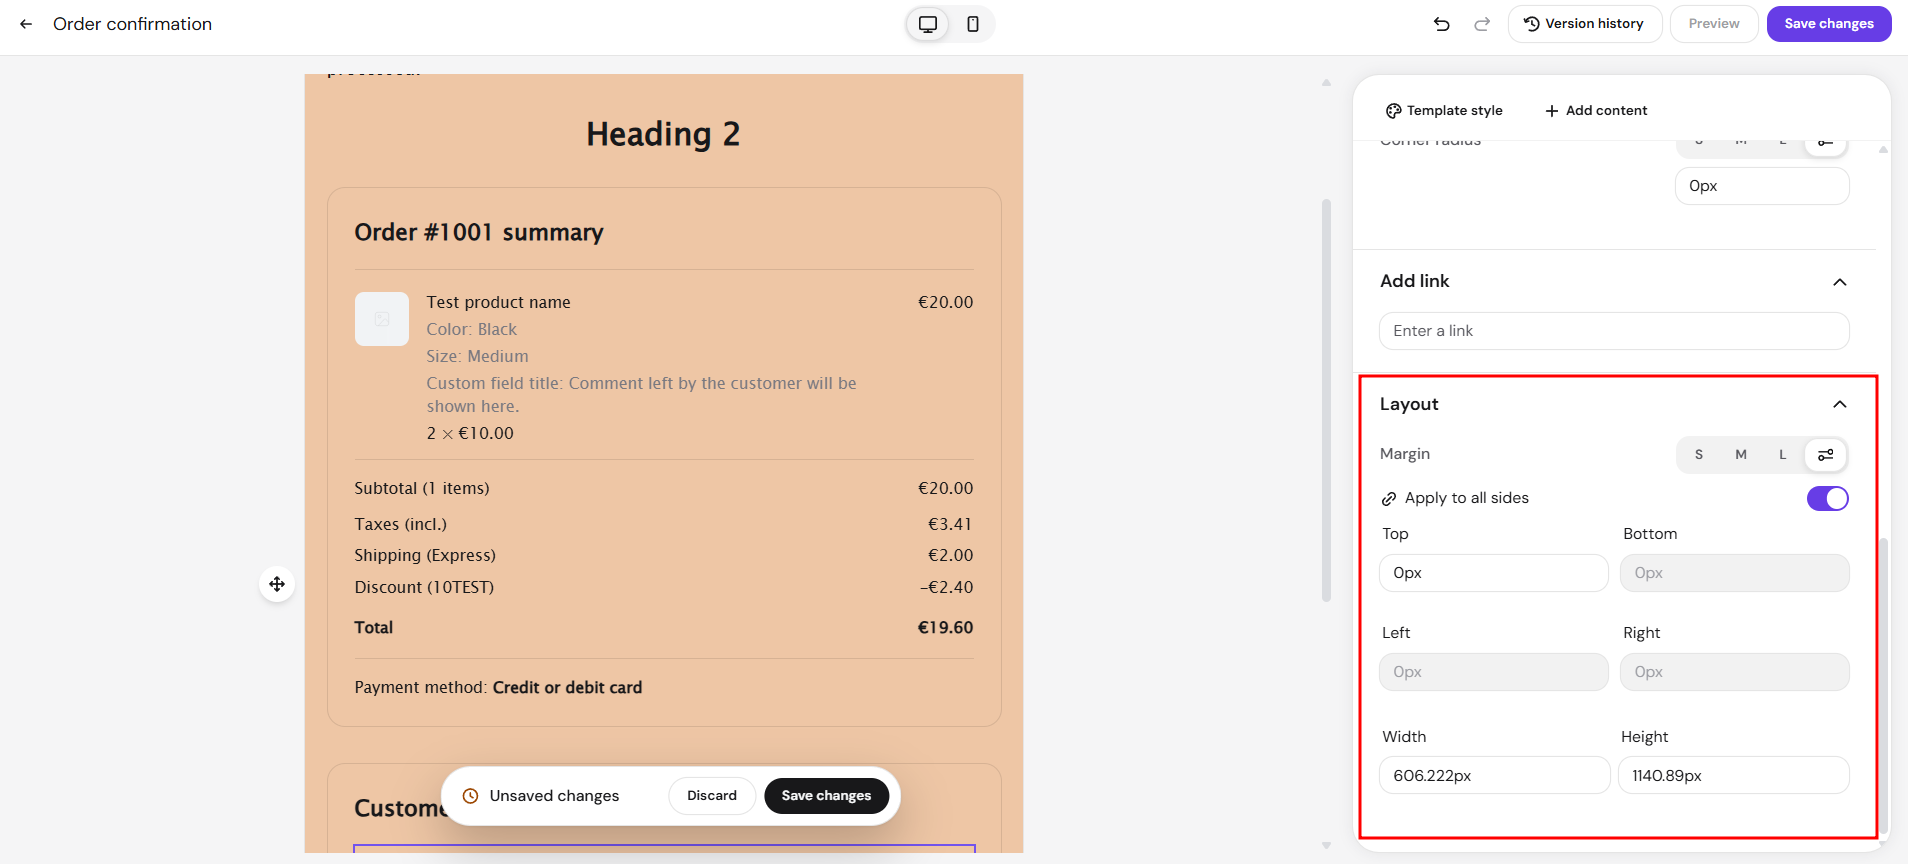
- Layout – set Margin, the space outside the block, using S, M, L, or custom pixel values for each side, and adjust the block’s Width and Height in pixels.
Save or discard changes to a transactional email template
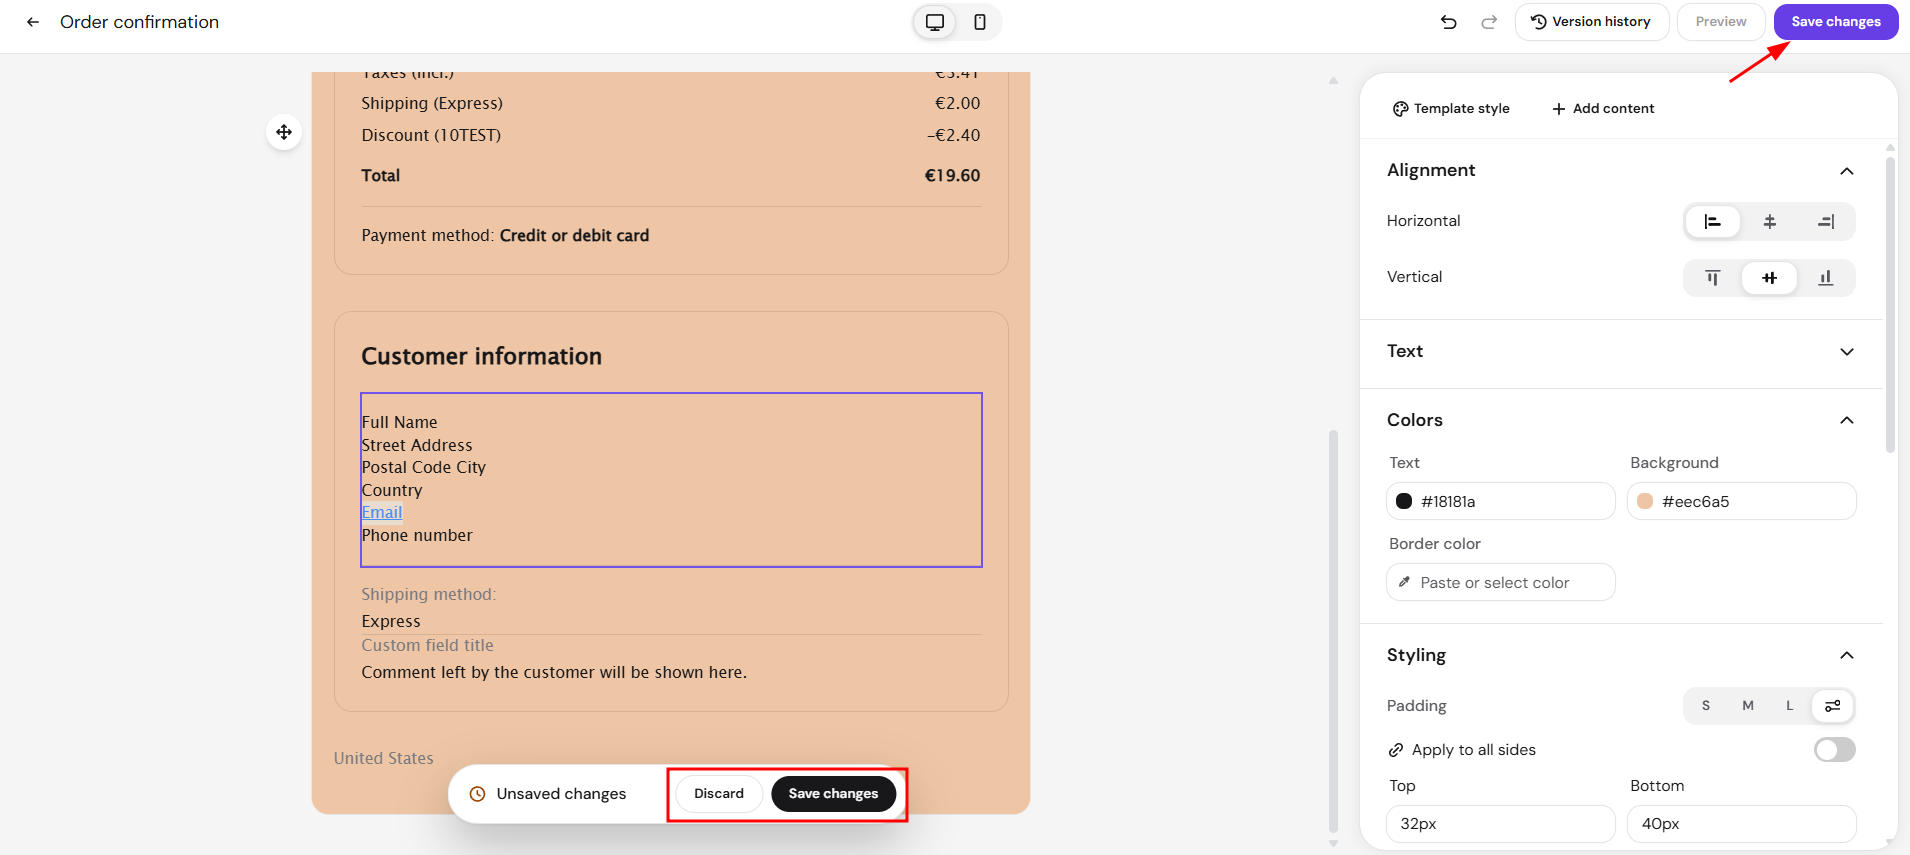
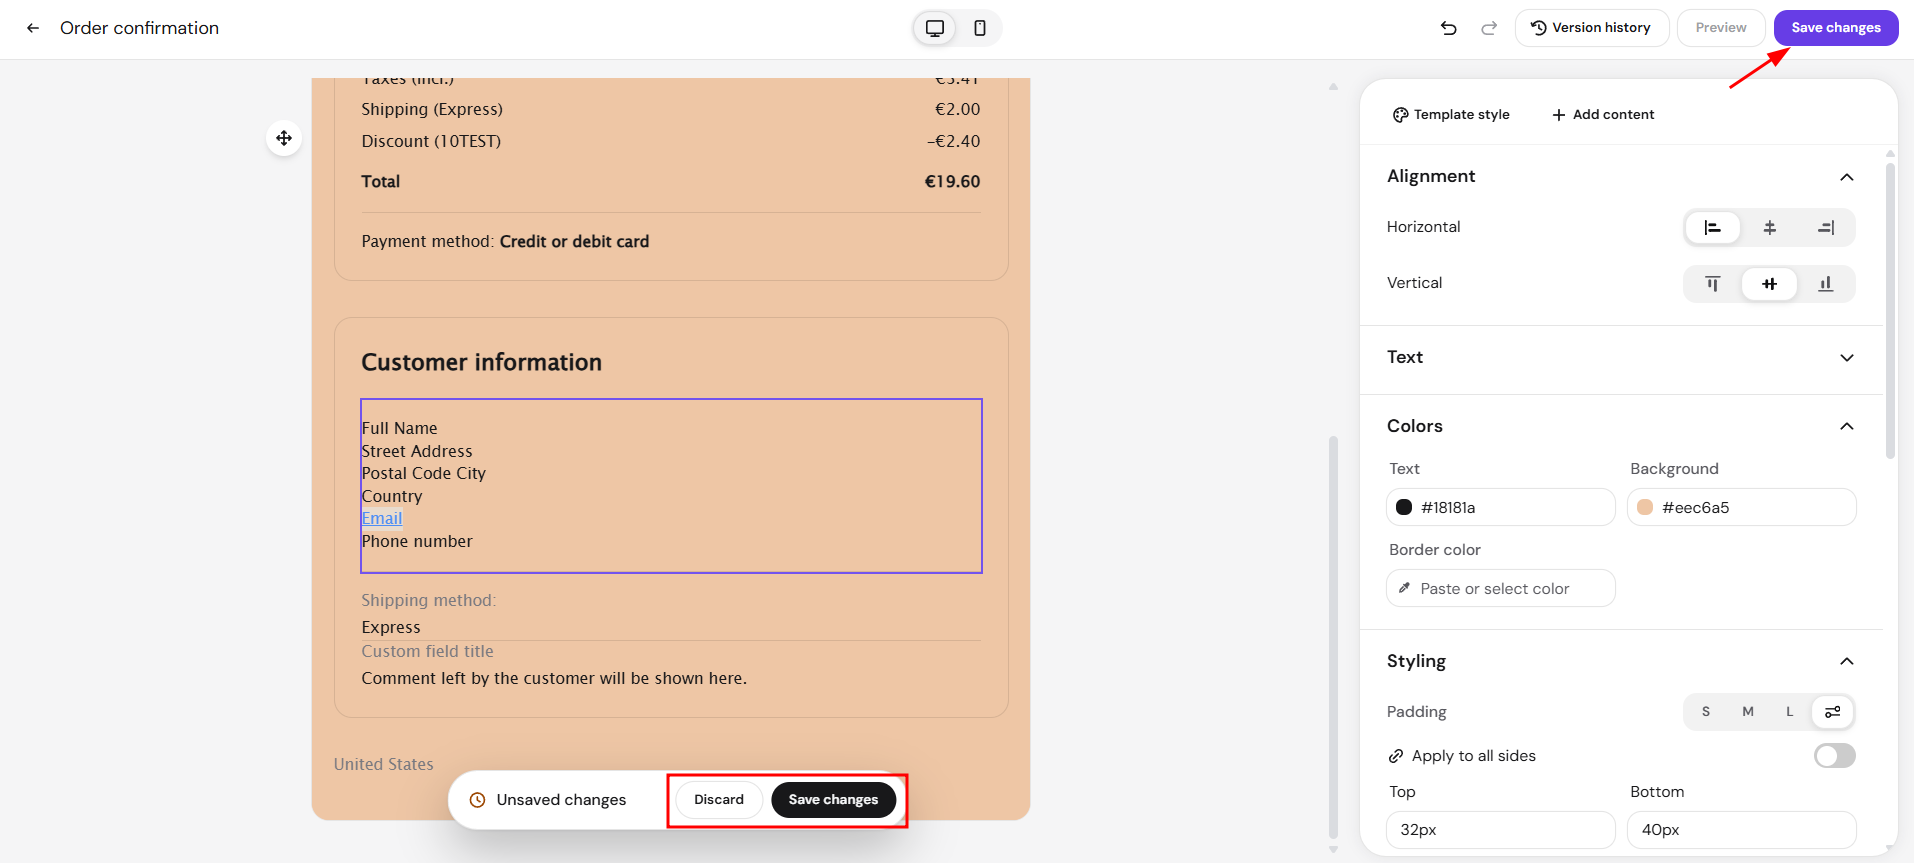
Select Save changes to save your edits, or Discard to remove them. The Unsaved changes bar with both options appears after your first edit.
- Make your edits to the template.
- Select Save changes in the Unsaved changes bar or at the top of the editor.
Saved changes sync back to your Hostinger Ecommerce store. Select Discard in the Unsaved changes bar to remove edits you have not saved.
Your transactional email templates now use your own styles and content, and the saved changes sync back to your store. Open Email previews again to edit another template.