Overview
Once your form is created in Hostinger Reach, you can add it to your WordPress site to start collecting subscribers directly from your pages.
If you haven’t created a form yet, refer to this article.
This guide focuses on embedding your already created form into any WordPress site.
1- Add the on-site tracking script
To display your form on a WordPress site, start by adding a tracking script to your website (one-time setup)
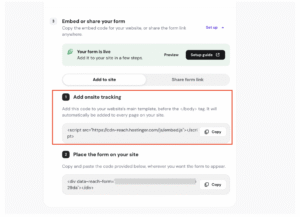
Before your form can load on your site, you need to add a script from Reach to your website files.
This code snippet should be placed in the footer.php file, right before the closing </body> tag. If the </body> tag is not present, you can paste the script at the very end of the file.
Option 1: Using WordPress Theme File Editor
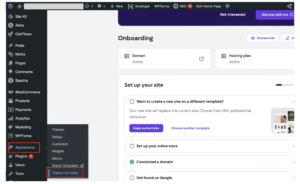
- Log in to your WordPress admin dashboard
- Go to Appearance → Theme File Editor

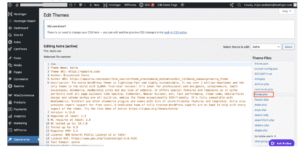
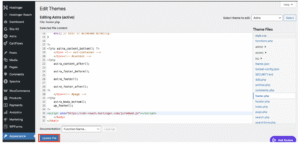
- Open the footer.php file

- Scroll to the bottom of the file
- Paste the script from Hostinger Reach (the snippet starting with <script>)
- Place it just before </body>, or at the end of the file if the tag is not present

- Place it just before </body>, or at the end of the file if the tag is not present
- Save your changes
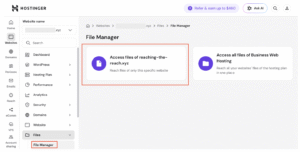
Option 2: Using Hostinger File Manager
- Log in to your Hostinger account
- Go to Websites → Dashboard (for your WordPress site)
- Open File Manager and click Access Files

- Search for footer.php


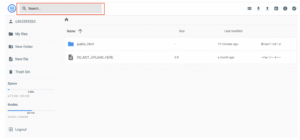
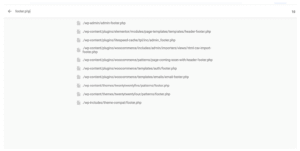
You may see multiple footer.php files. Make sure to:
- Select the file that belongs to your active theme
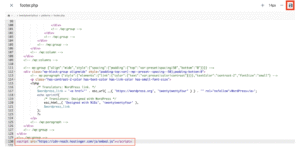
- Open the file and scroll to the bottom
- Paste the code snippet from Hostinger Reach:
- before the </body> tag
- If the tag is not present, paste it at the end of the file

- Save the changes
2- Place the form on your page
Once the tracking script is added, you can place the form anywhere on your site.
Start by copying the form embed code from Reach.
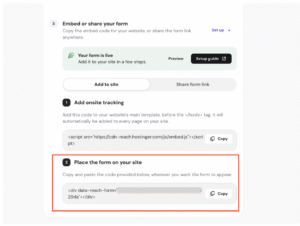
Then go to your WordPress editor and add it to the page where you want the form to appear.
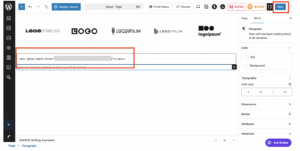
Using WordPress Block Editor
- Open Pages in your WordPress dashboard
- Edit the page where you want to display the form
- Add a Custom HTML block

- Paste the form code snippet from Hostinger Reach

- Update or publish the page
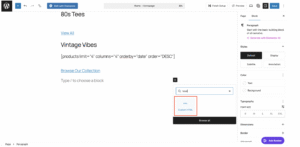
Using Elementor
- Open your page in Elementor
- Search for the HTML widget

- Drag it into your layout
- Paste the form code snippet
- Update the page
Final check
After publishing your page, open it in your browser and confirm that the form is visible and loads correctly.
If the form is not displaying:
- Make sure the form is activated in Reach
- Confirm the tracking script is added correctly
- Check that the embed code was pasted and saved in HTML block