What Is Litespeed Cache?
LiteSpeed Cache is a caching plugin for WordPress designed to improve the website’s performance and speed by caching static pages and posts, reducing the loading time and strain on the server.
You can learn more about it in this video tutorial:
Caching is generally helpful, though it may delay the visibility of website changes, which can be an issue during website development. If you want to see the latest changes immediately, here are a few options to clear the LiteSpeed cache:
Using the LiteSpeed Cache Plugin
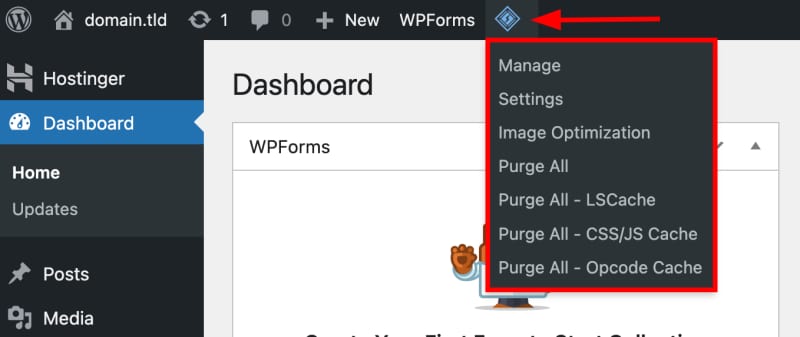
The easiest way to clear the cache is to use LiteSpeed Cache tools. You can find this option at the top of your WordPress administrator panel. Hover the mouse over the LiteSpeed Cache icon to Purge All or a specific cache:
You may also find these options in LiteSpeed Cache → Toolbox on the left:

Setting a Scheduled Purge Time
The LiteSpeed Cache plugin lets you schedule purge time. Go to LiteSpeed Cache → Cache and open the tab Purge:

Scroll down to find the section Scheduled Purge Time, and select the preferred time to purge the cache automatically:

Finally, save the changes.
Clear the LiteSpeed Cache Manually
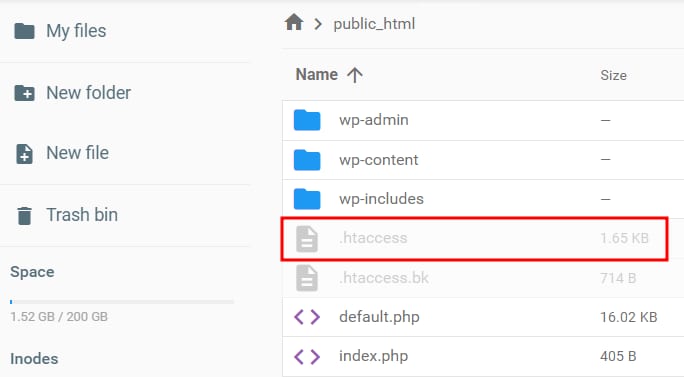
To purge the cache manually, open your website’s File Manager, access the public_html folder, and find the .htaccess file. Double-click to open it:
Remove the following lines from the file:

Finally, save the changes and the cache will be removed.
NOTE
-
The process in cPanel is the same, only the file manager has a different appearance. Learn more: How to Use the cPanel File Manager
Clear the LiteSpeed Cache Through SSH
You may also clear the LiteSpeed Cache via SSH. After accessing SSH, go to the WordPress folder. By default, the path is domains/your-domain-name.tld/public_html, so you can access the folder using this command:
cd domains/your-domain-name.tld/public_html
To remove the cache, use these commands:
wp cache flush
wp litespeed-purge all
The result will be:

The cache is purged successfully!