Display each product category on a dedicated page in your Hostinger AI Builder manual mode online store, once you’ve created your product categories.
Step 1 – Create pages for your product categories
Create as many pages as many product categories you have. For example, if you have three product categories (e.g., Bowls, Vases, Cutlery), create three pages and name them respectively. Learn more: How to Add More Pages
Step 2 – Insert product sections into your category pages
Insert Online store sections into each of your category pages. There are two types of eCommerce sections: a product list section and a single-product section. Make sure to use product list sections. By default, they display all products, but it’s easy to assign a particular product category to a particular section (see below).
Step 3 – Assign particular product categories to particular product sections
Click on the product list section and select Edit section. In the Filters tab, select a preferred product category to display:
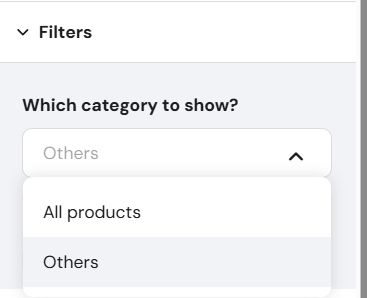
This way, with the help of product list sections, you’ll display different product categories on different website pages.
After creating category pages, you may assign them to a dropdown menu within the Pages and navigation panel.