Create product categories in your Hostinger AI Builder manual mode online store to organize your products.
Before you start
- You’ve added products to assign them to.
- You’ve created product categories in Store Manager.
Displaying product categories
To display product categories on your website, use product list sections.
-
You may show all product categories on a single page by adding multiple product sections to the same page (you can create a dedicated page for that)
-
Or you may create dedicated pages for each product category by adding more pages to your website and inserting product sections within each of them
By default, the product list section displays all products, but you can easily change that in the section settings. Click on Edit section:
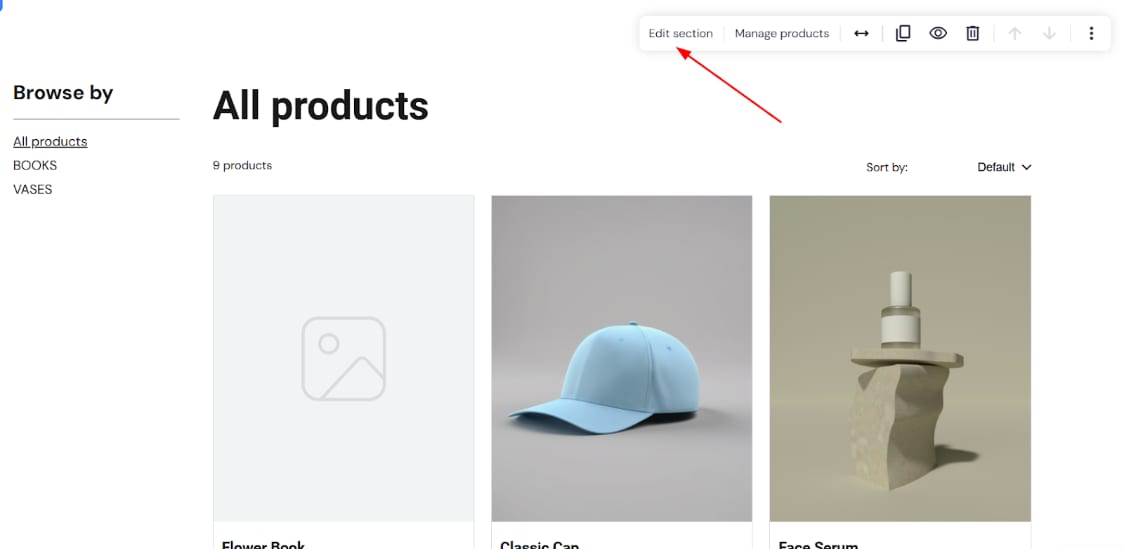
Select which products, by category, to show:
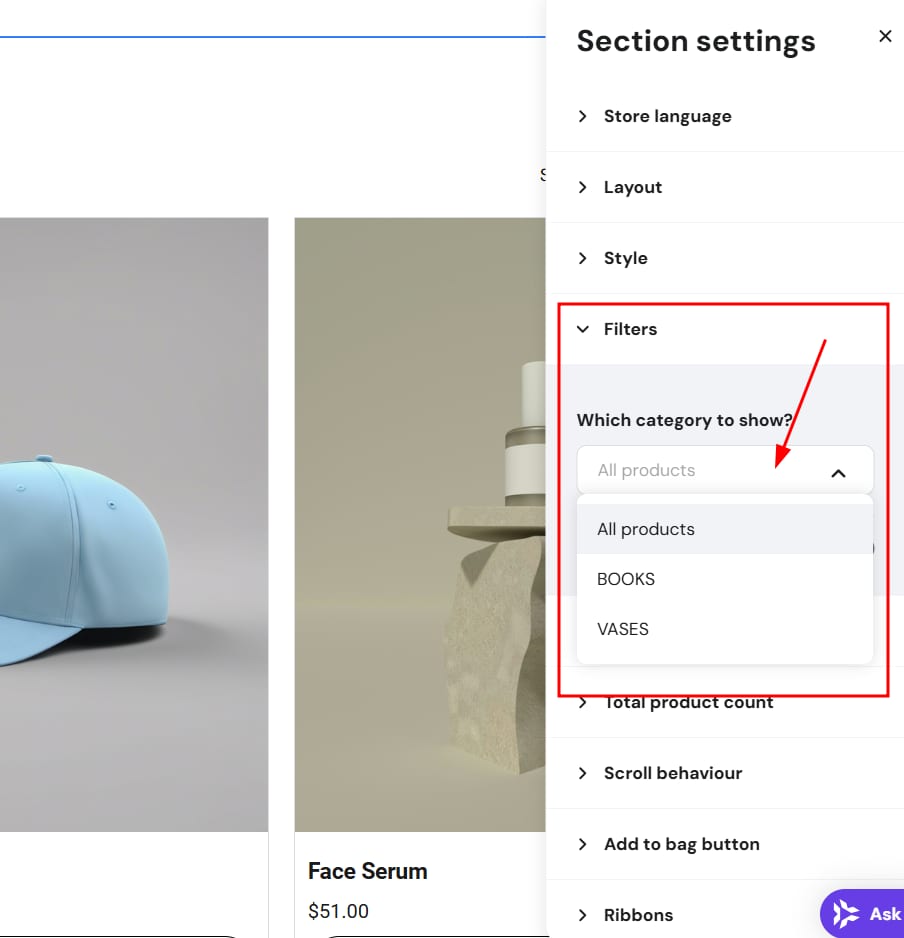
And that’s it!
Finding a link to a product category page
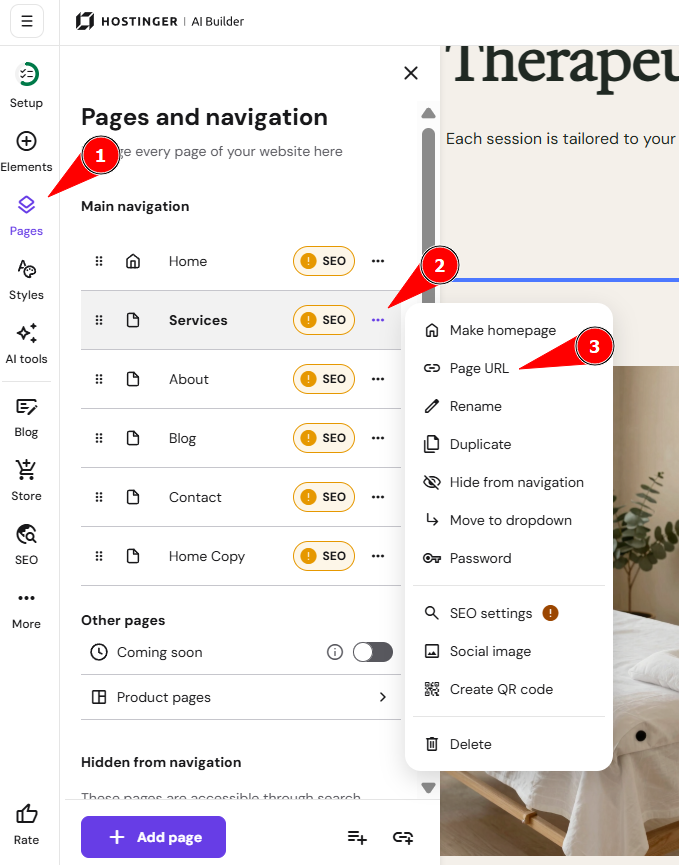
If you display your product categories on separate pages, you can find their links in the Pages and navigation panel on the left. Find your product category page and open its settings:
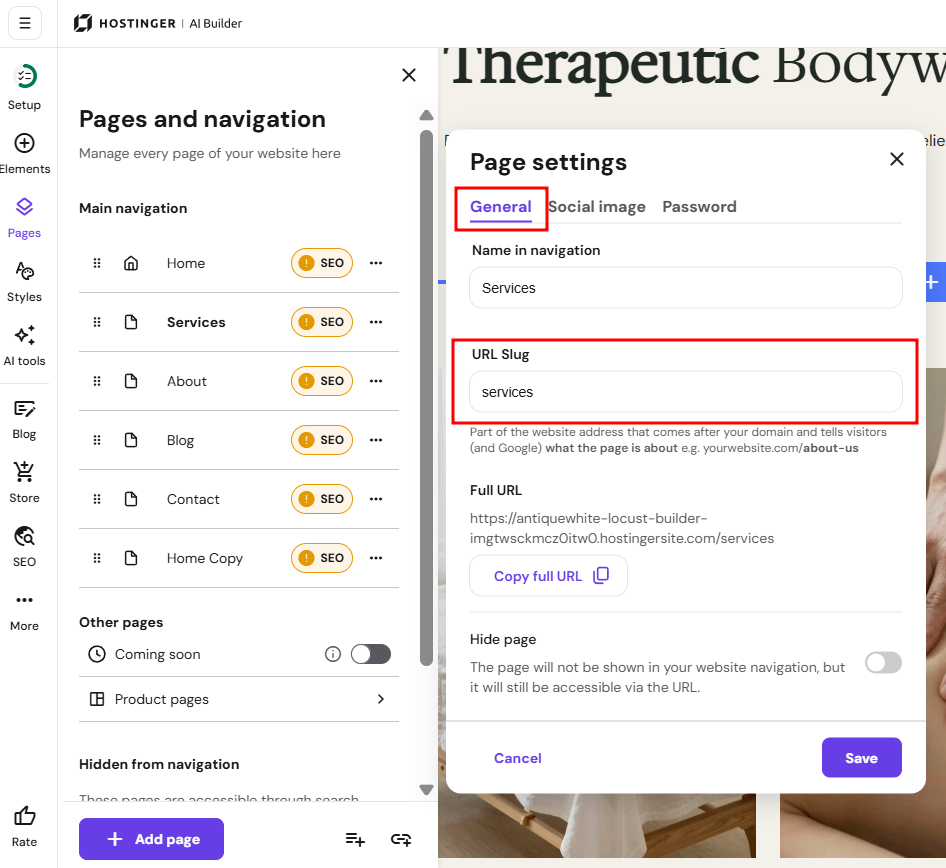
In the General tab, you will see the suffix of your page URL (you can edit it) and the URL slug of your category page that you can use:
NOTES
- You can add these links to a dropdown in your website’s menu bar.
- You can also manage product visibility to control which products appear in a category, or use your store as a catalog if you don’t need online checkout.