Create product categories in Hostinger Ecommerce from Store Manager: add a category, name it, assign products, and save. Categories group your products so they’re easier to manage and to show by group on your website.
Before you start
- Add your products first, so you can assign them to a category. See How to add products to your store to add them.
Create a product category in Hostinger Ecommerce
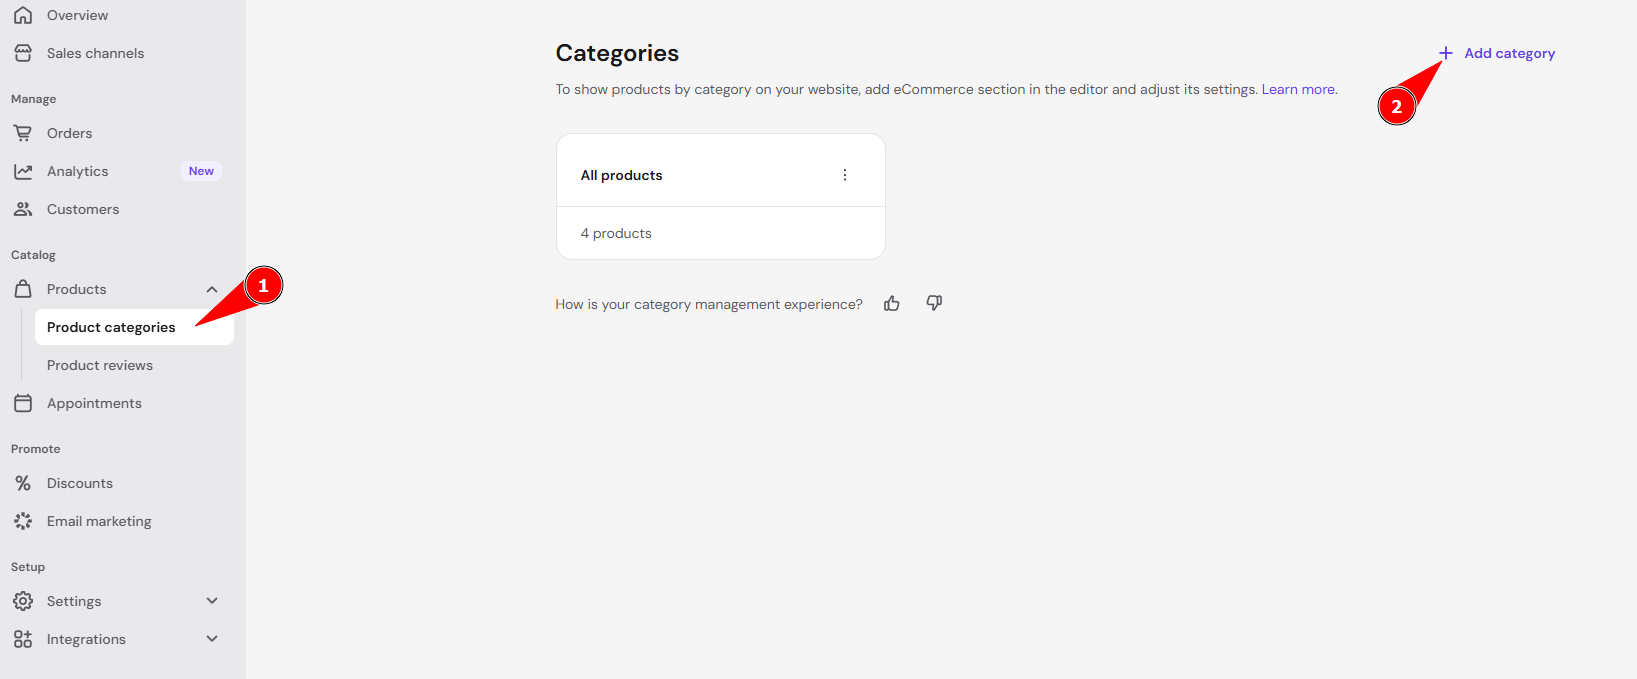
- In Store Manager, go to Products ❯ Product categories.
- Click Add category.
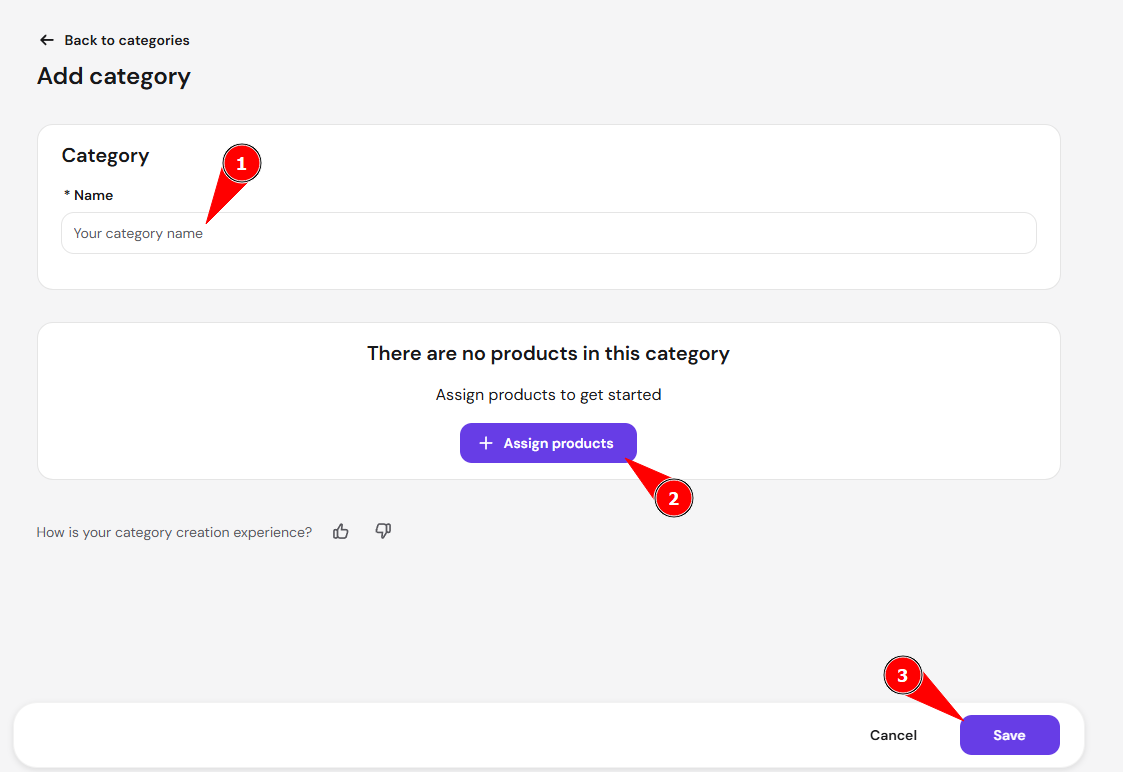
- Under Name, enter the category name. The name is required.
- Click Assign products.
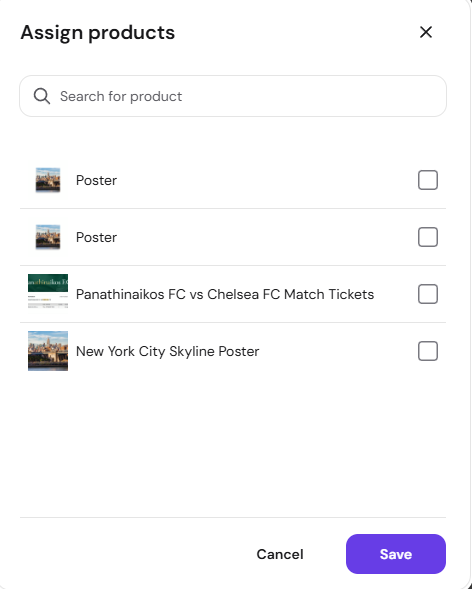
- In the Assign products window, select the checkbox next to each product you want in the category. Use Search for product to find a product by name. Then click Save.
- Click Save again to save the whole category.
The new category appears on the Categories page with its number of products.
Assign a product to a category when you create it
You can also assign a category while you add a product. In the product form, use the Categories field and click Assign to category or add new to create or assign one. See How to add products to your store for every field in the product form.

Show product categories on your website
Categories organize products in Store Manager. To show products by category on a Hostinger AI Builder manual mode website, add a product list section and choose the category in its settings. See How to create product categories in Hostinger AI Builder for the steps.
NOTE
- The All products category lists every product in your store.
After you save the category, your products are grouped under it in Store Manager, ready to show by category on your website.