In this article you will learn how to migrate your WordPress website to your Agency hosting plan. There are three options from which you can choose:
-
Automatic migration with just a few clicks
-
Manual file upload for us to restore
-
Manual file upload & restoration performed by you
You can find detailed steps on how to migrate for each option below.
Option 1: Automatic migration
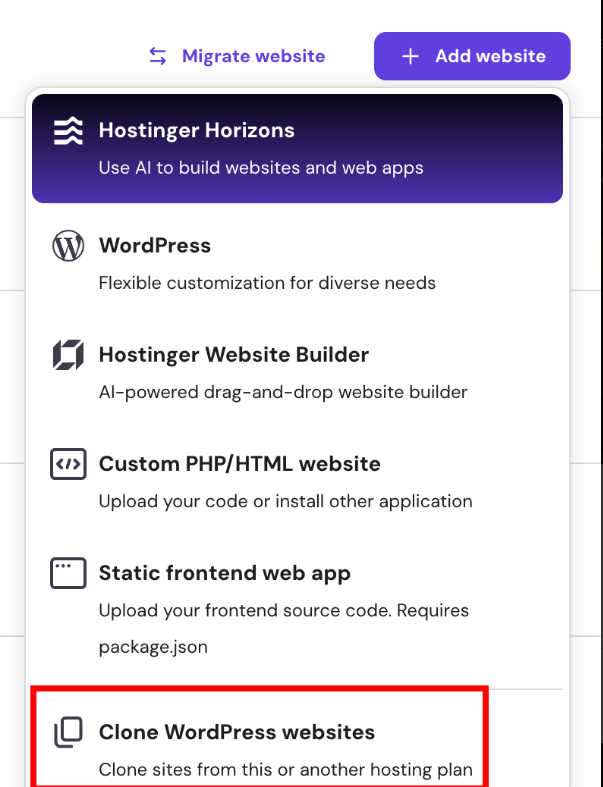
If your website is located under the same account but on different hosting plans, you can clone your WordPress website to the Agency plan by using the Clone WordPress website feature!
If your website is located in another hosting provider, you can refer to these steps below:
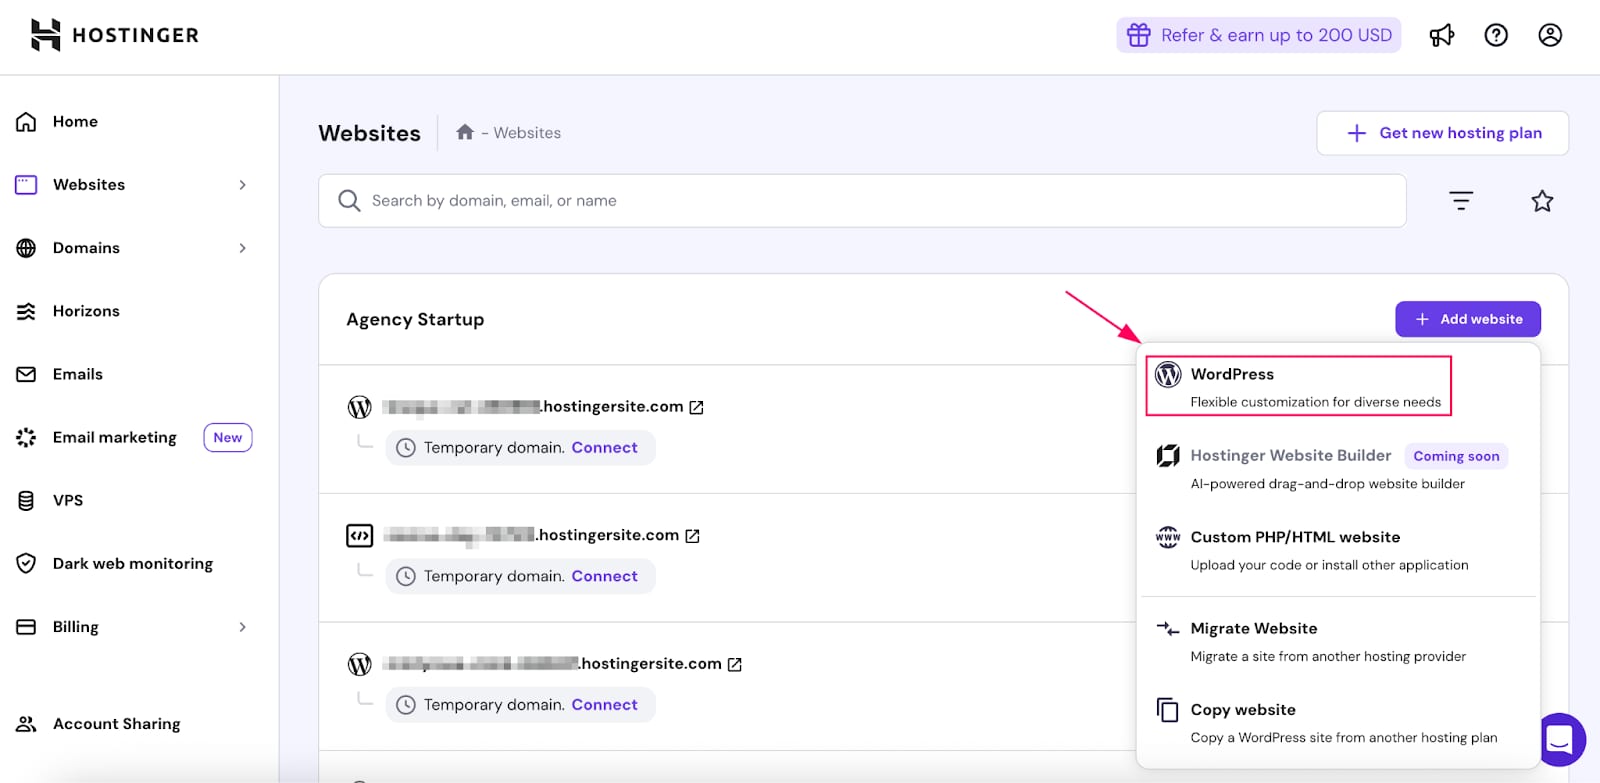
Click on Websites > Websites list > Migrate website:

Migrate Offline Website
If your site is offline or you have a backup, you can easily upload your website files and database using the ‘Upload Backup Files’ option.
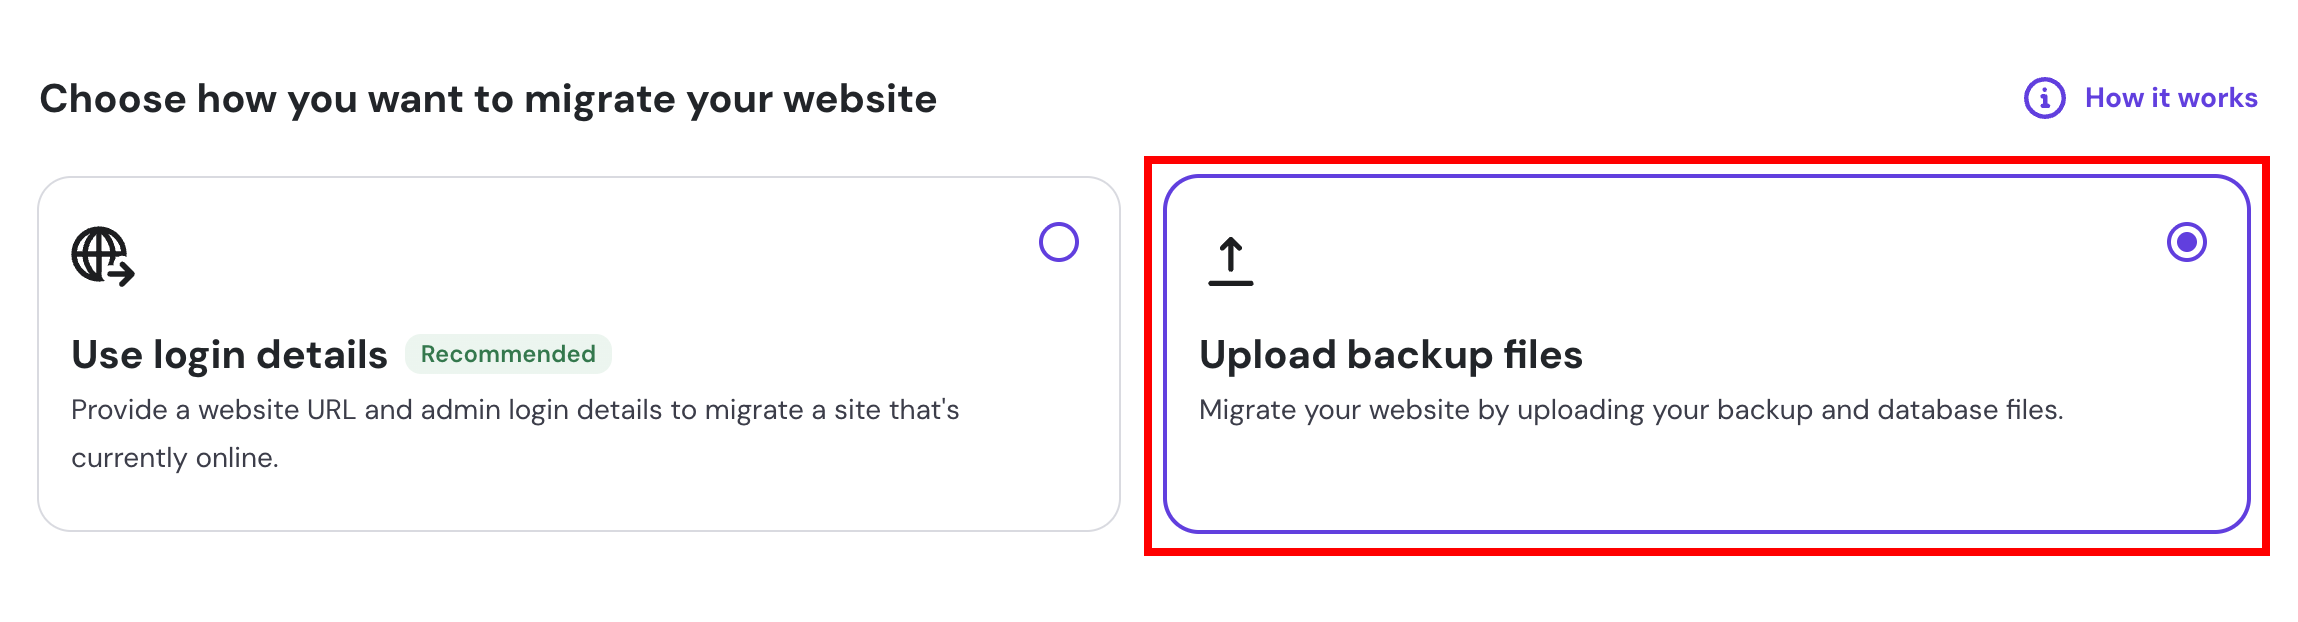
After uploading your website backup, you’ll be redirected to a summary page to review the migration details before final submission. Once the migration request is submitted, our expert migration team will handle the transfer for you, ensuring a smooth and hassle-free website migration.
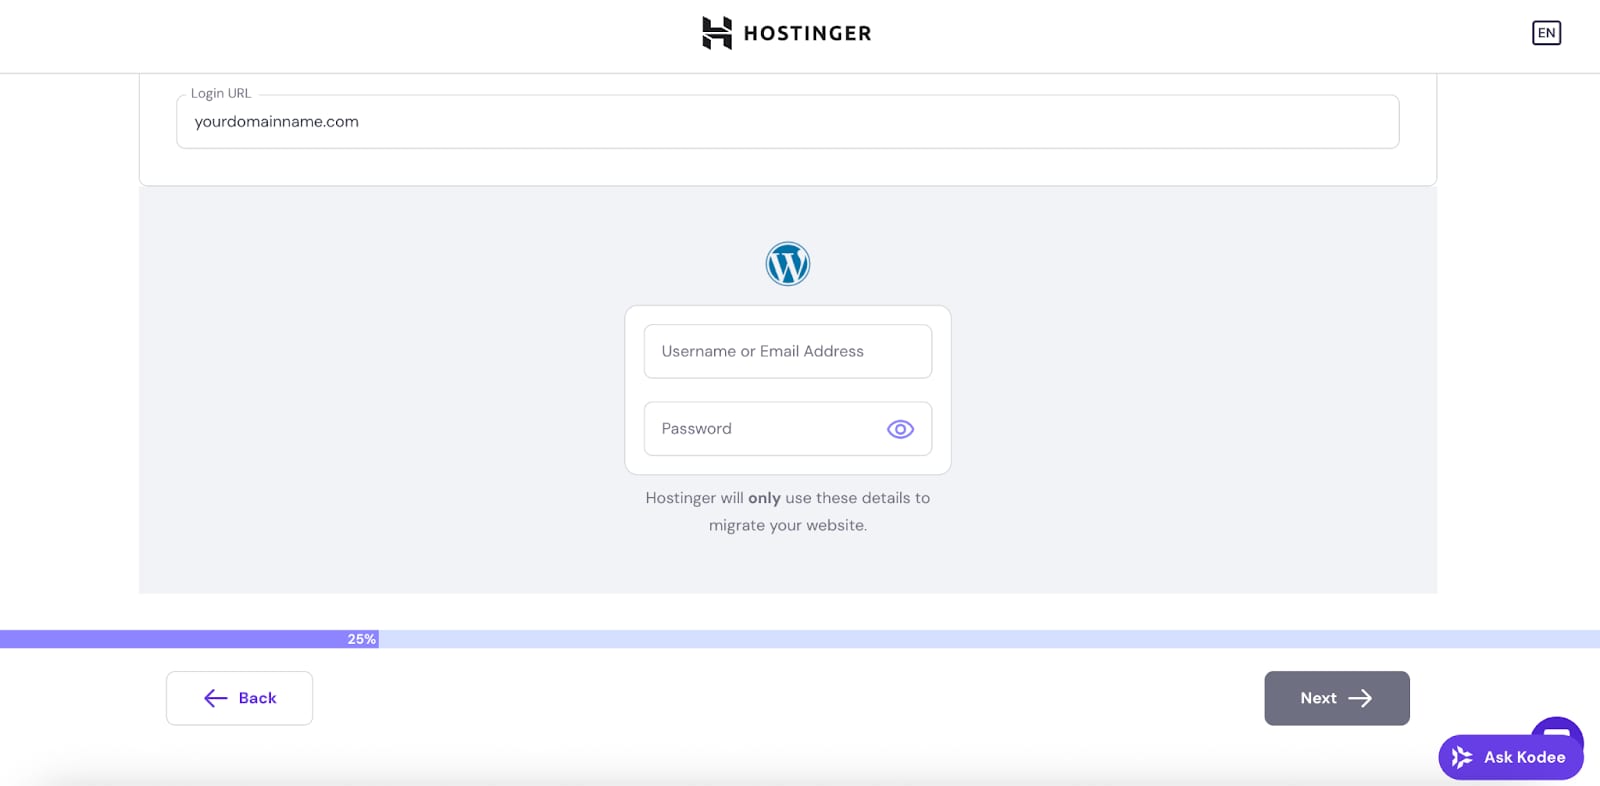
Migrate Online Website
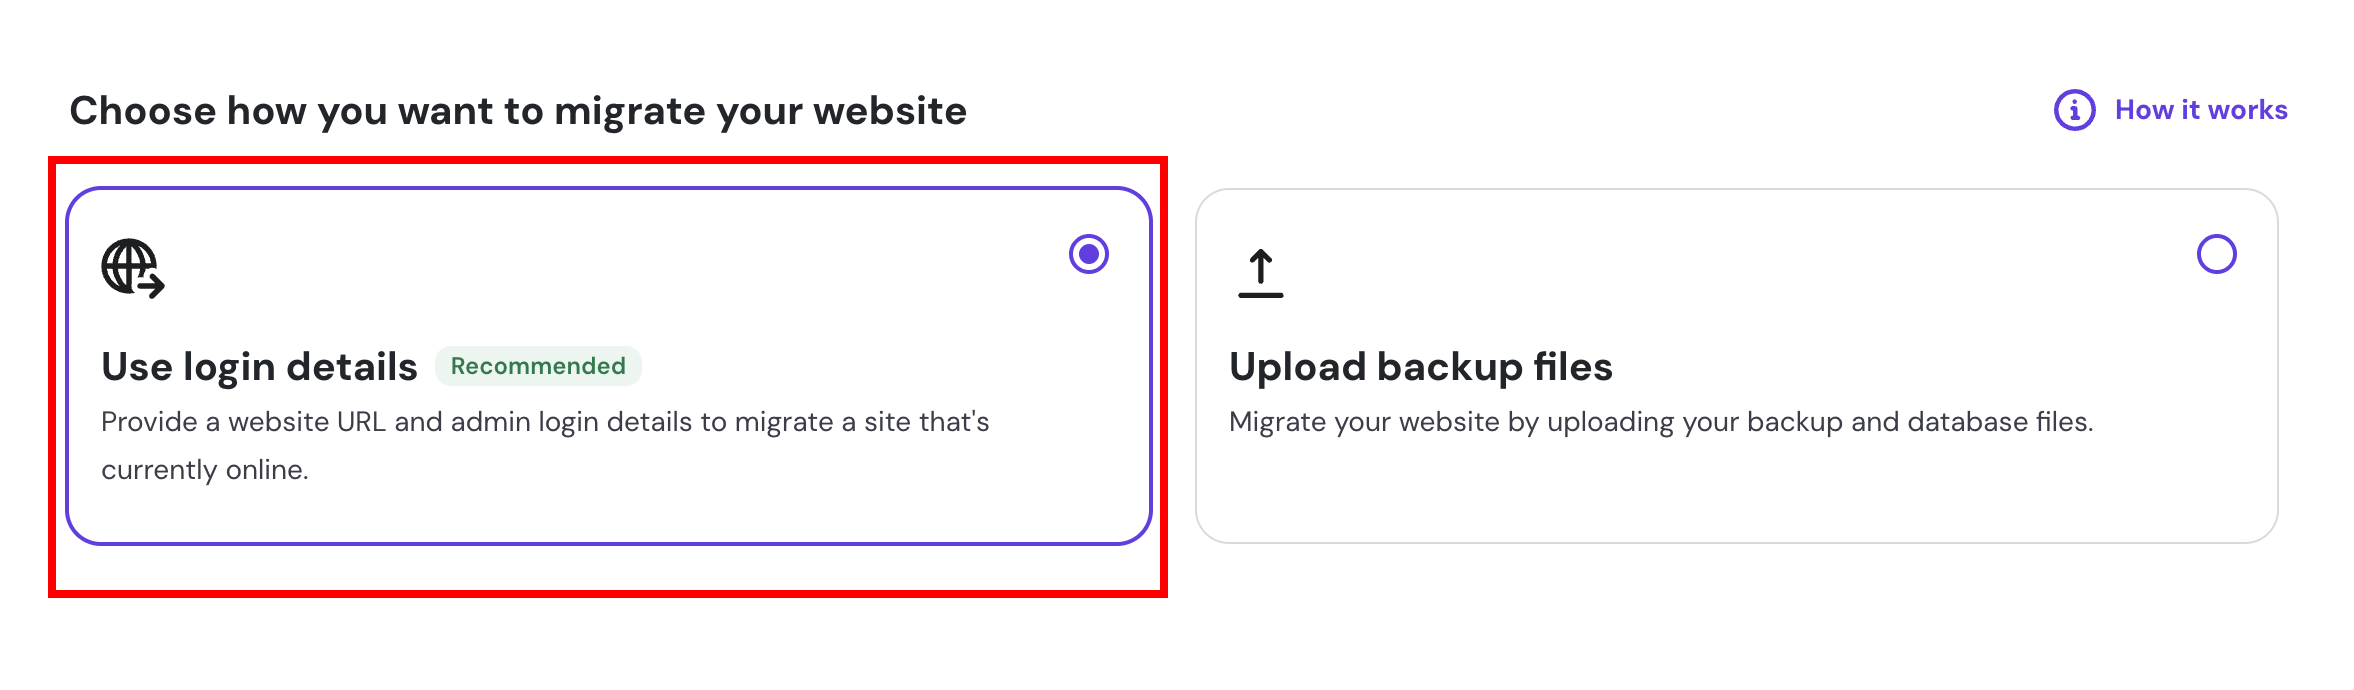
If your website is online and you have the login credentials, simply select the “Use Login Details” option to securely migrate your site with ease.
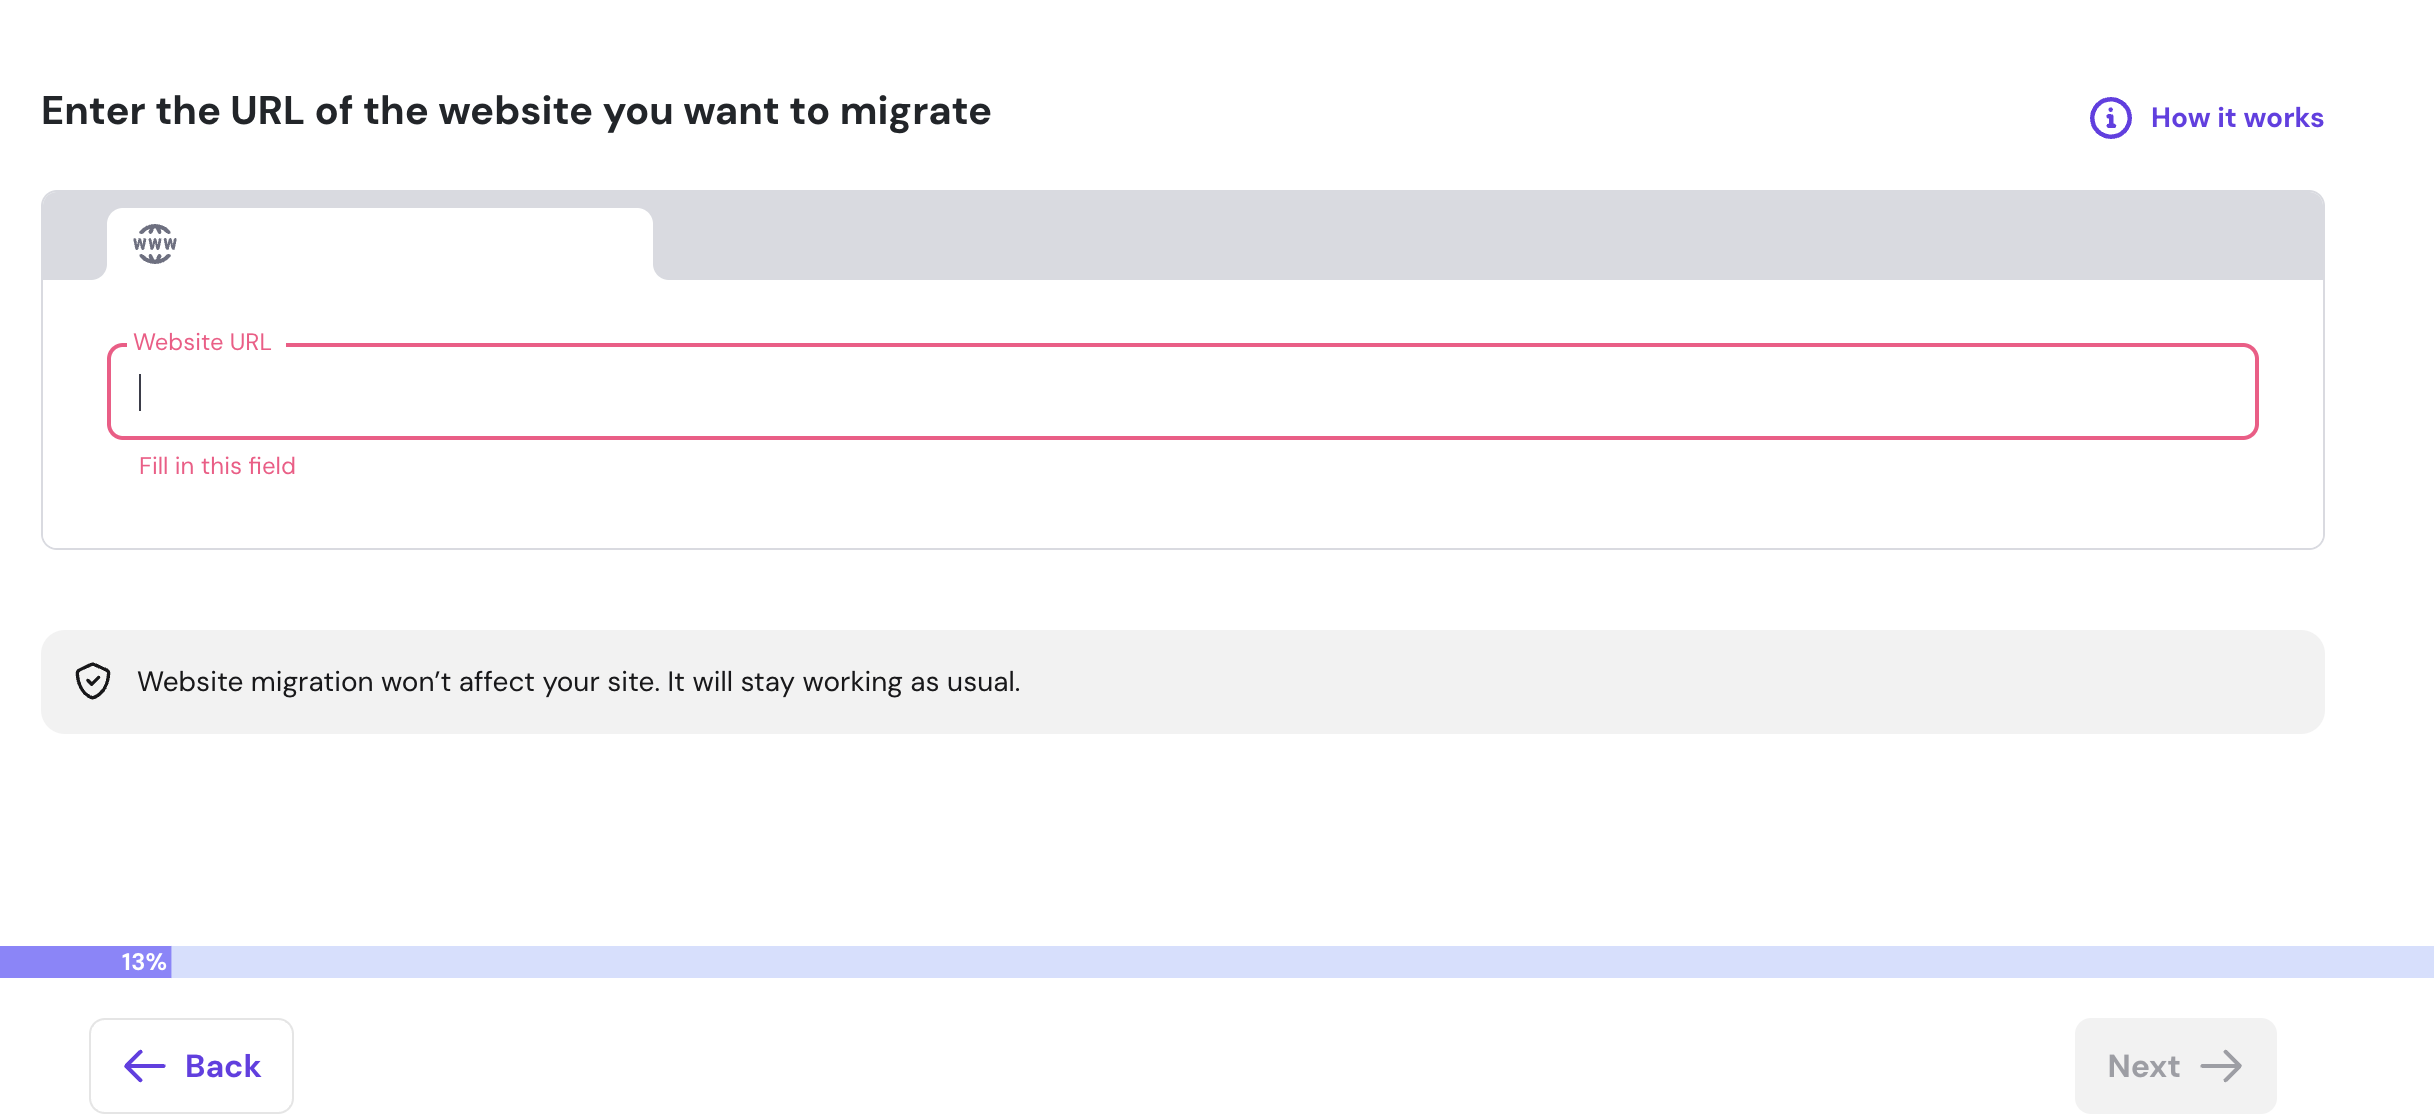
Enter your website address (domain name) and click Next
Enter your WordPress credentials and click Next
Click Submit request once you are ready or Change to select a domain from your plan

Wait for the migration setup to be completed
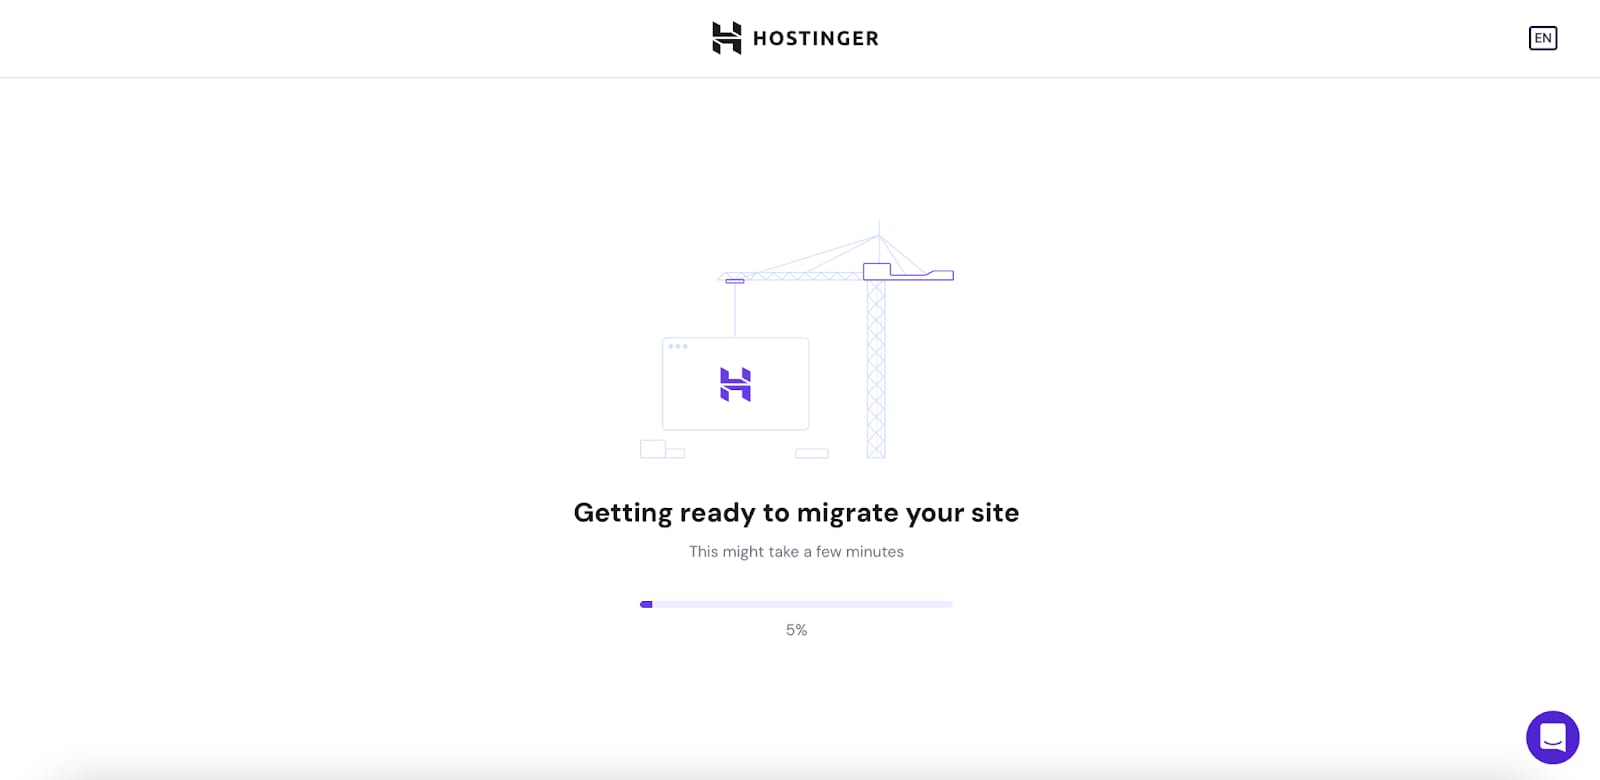
Do not leave this screen until the progress bar is completed. If you leave before the setup is complete all changes will be lost and you will have to repeat the process.
Wait for the migration to be completed. You will be notified about it via email.
Option 2: Manual migration
Step 1 – Take a compressed backup wp-content folder and export database at the previous hosting provider.
Step 2 – Click Add Website and select WordPress:
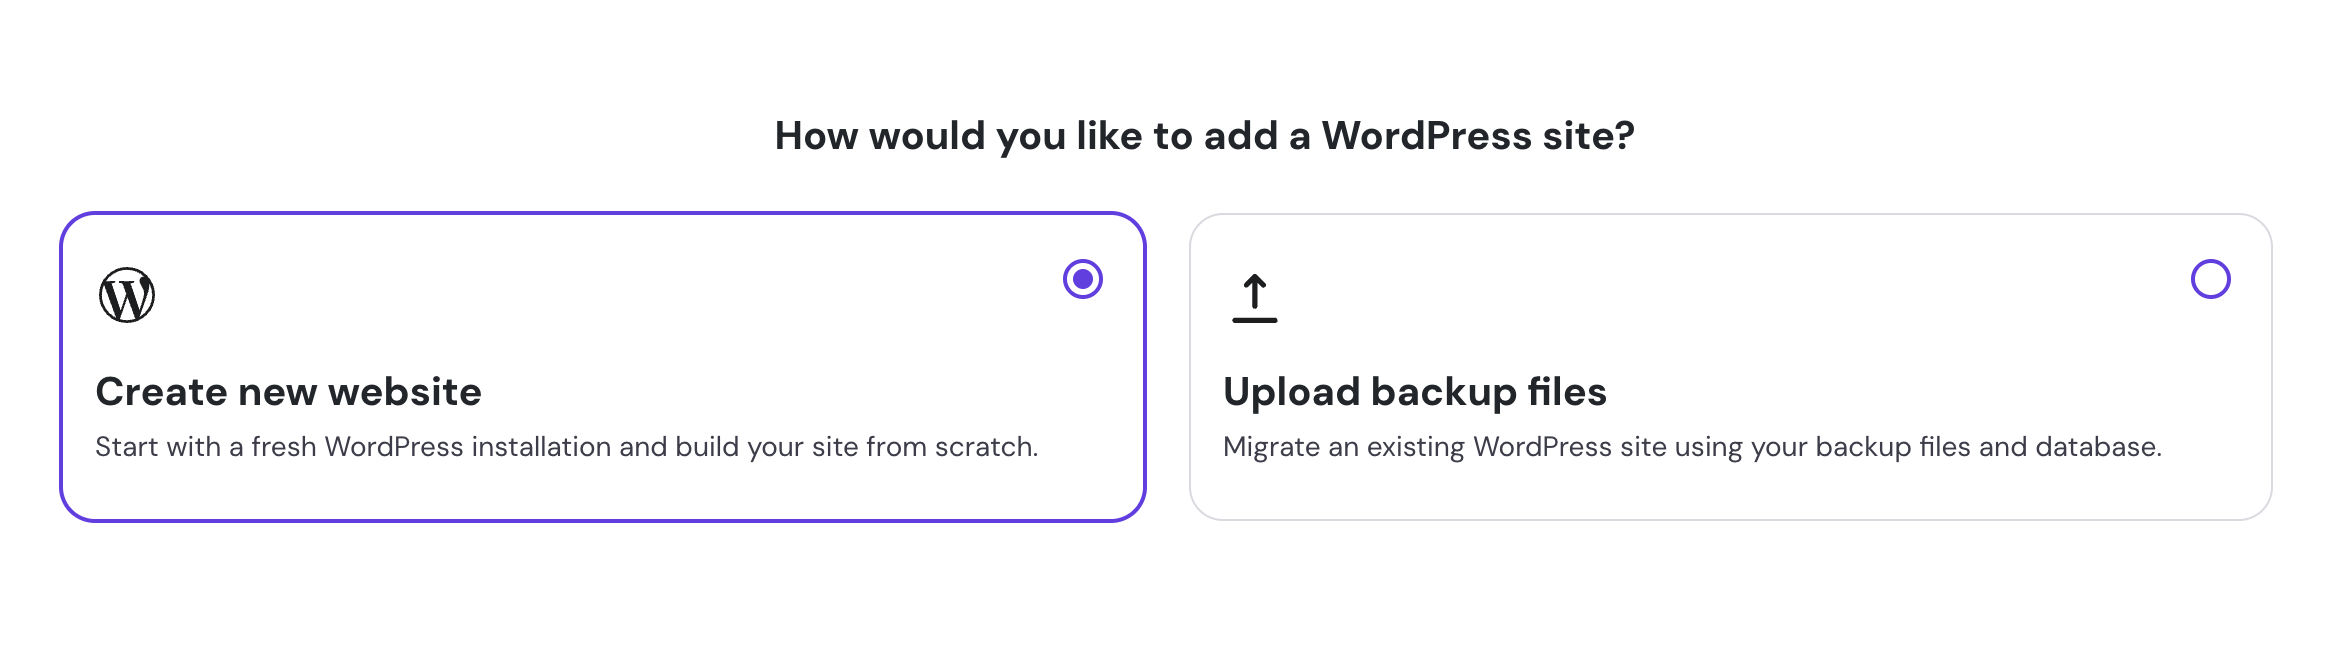
Step 3 – Select Create New Website
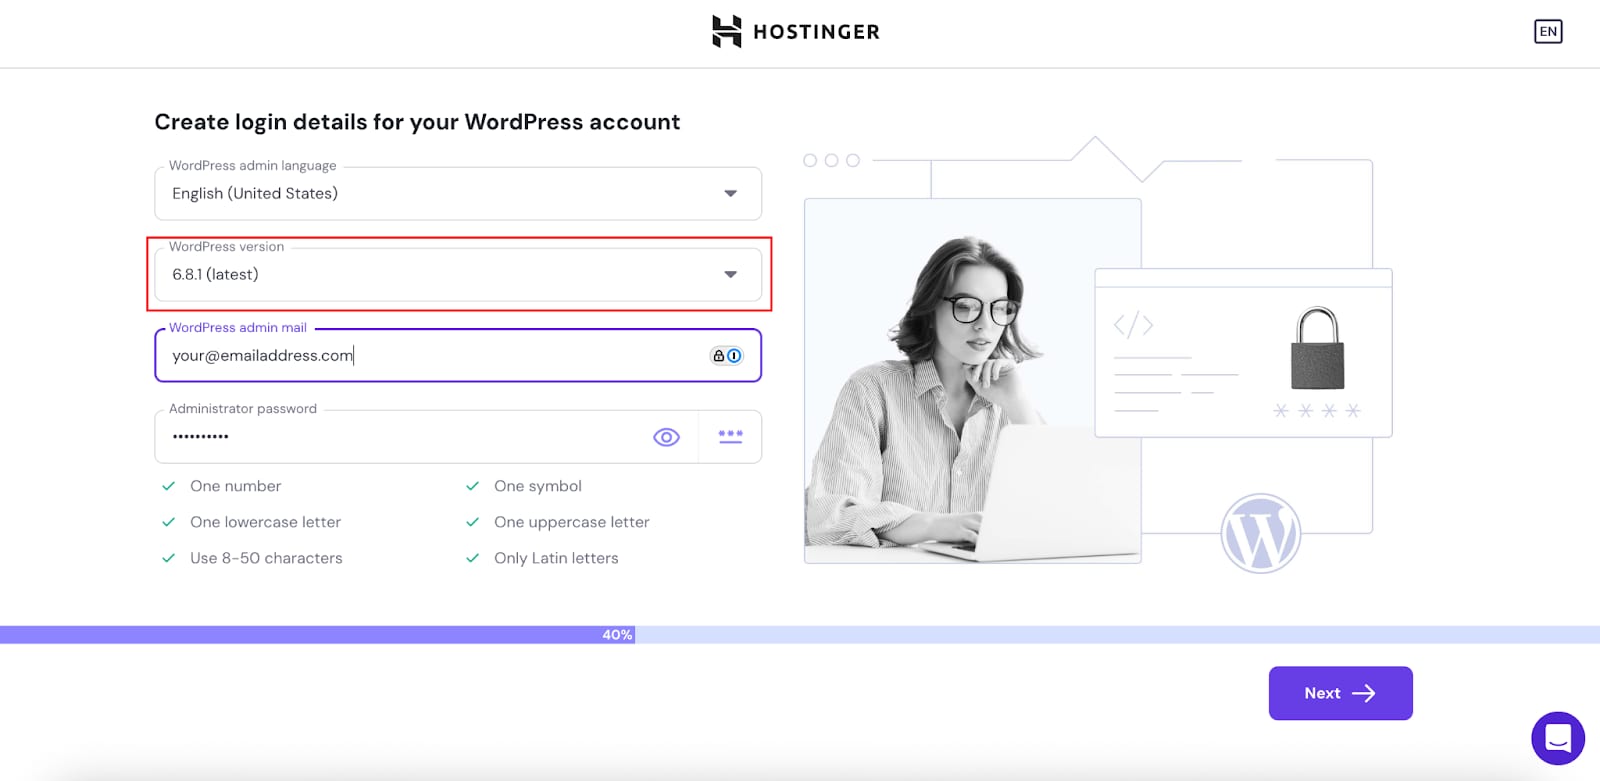
Step 4 – Fill in your credentials and select the same WordPress version as in your previous hosting and click next:
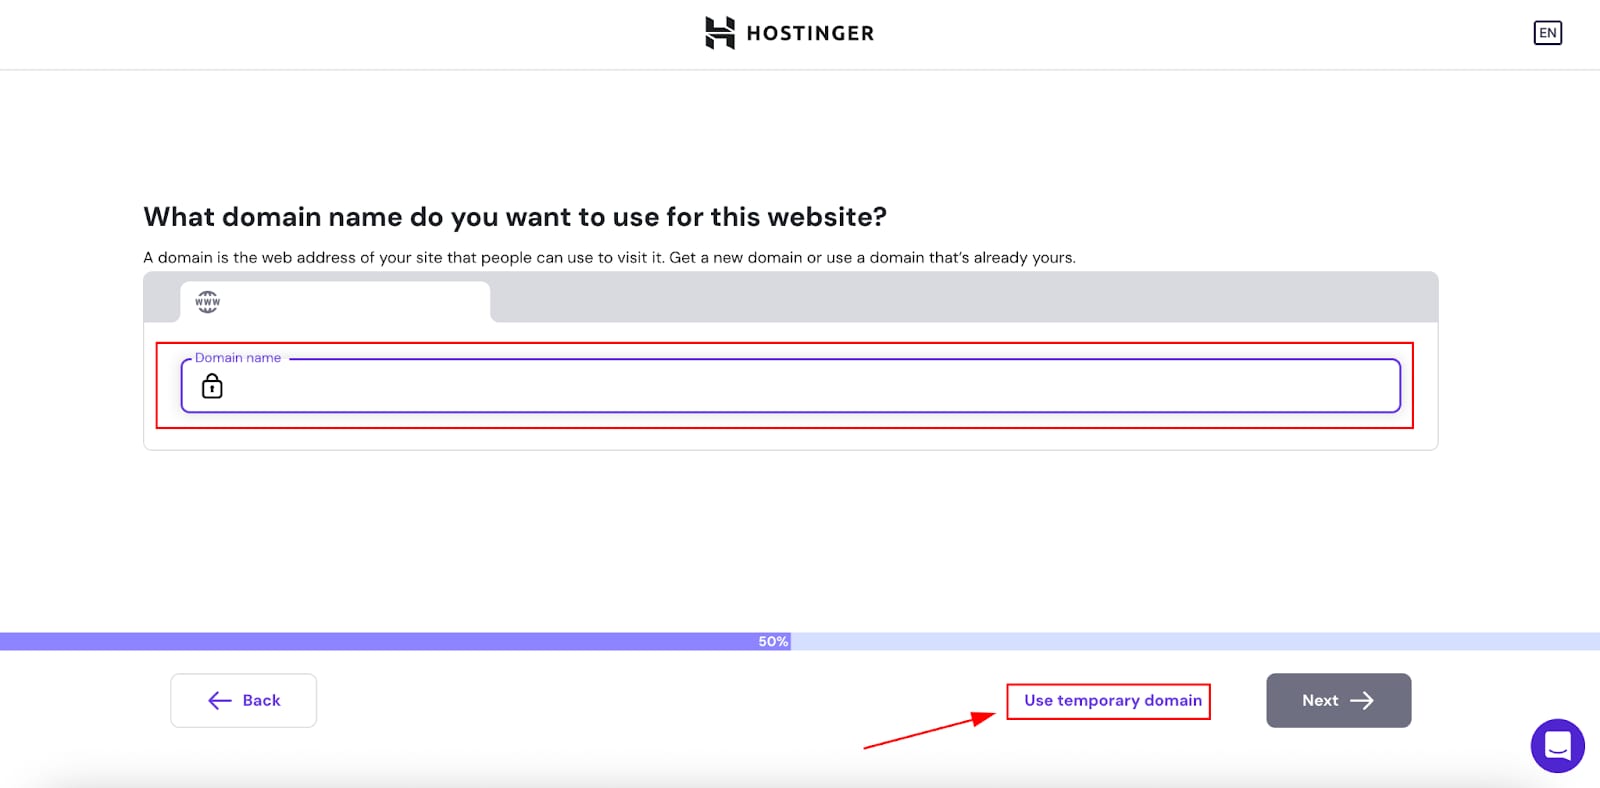
Step 5 – Enter the domain name of your website or choose a temporary domain and click next:
Step 6 – Go to File Manager of your fresh WordPress installation and delete the wp-content folder (everything will be deleted except one folder)
Step 7 – Upload and extract the wp-content folder from previous hosting provider
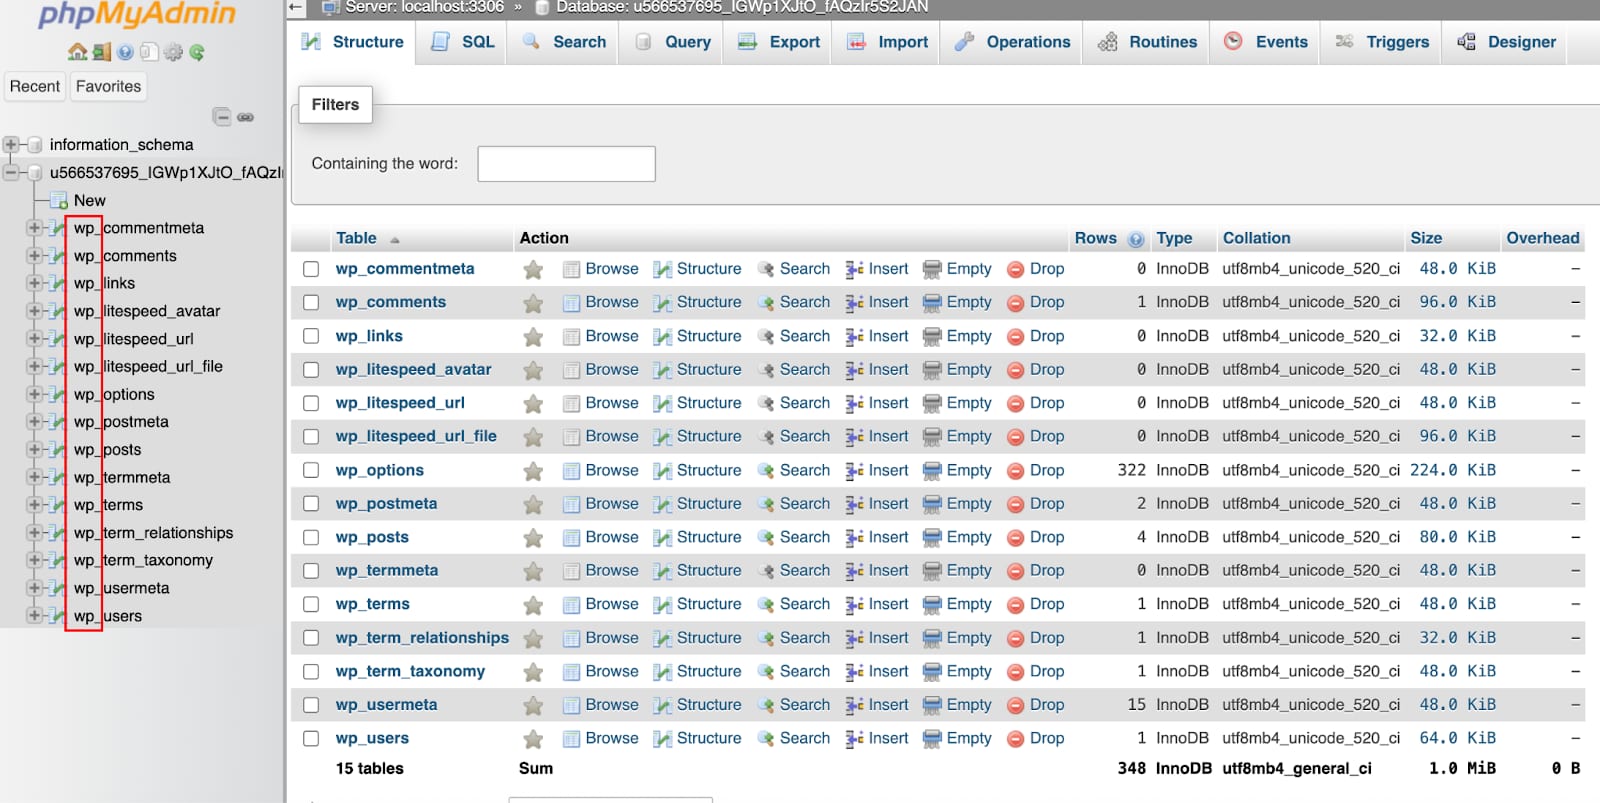
Step 8 – Access the database which was created when installing WordPress by going to Databases > Management and click on Enter phpMyAdmin:

Step 9 – Select and drop all database tables
Step 10 – Import the database backup from your previous host
Step 11 – Check db-prefix in phpMyAdmin:
Step 12 – If it’s different from “wp_”, then you need to update the wp-config file and set the same prefix as in the database (scroll down in the file to find the $table_prefix value):
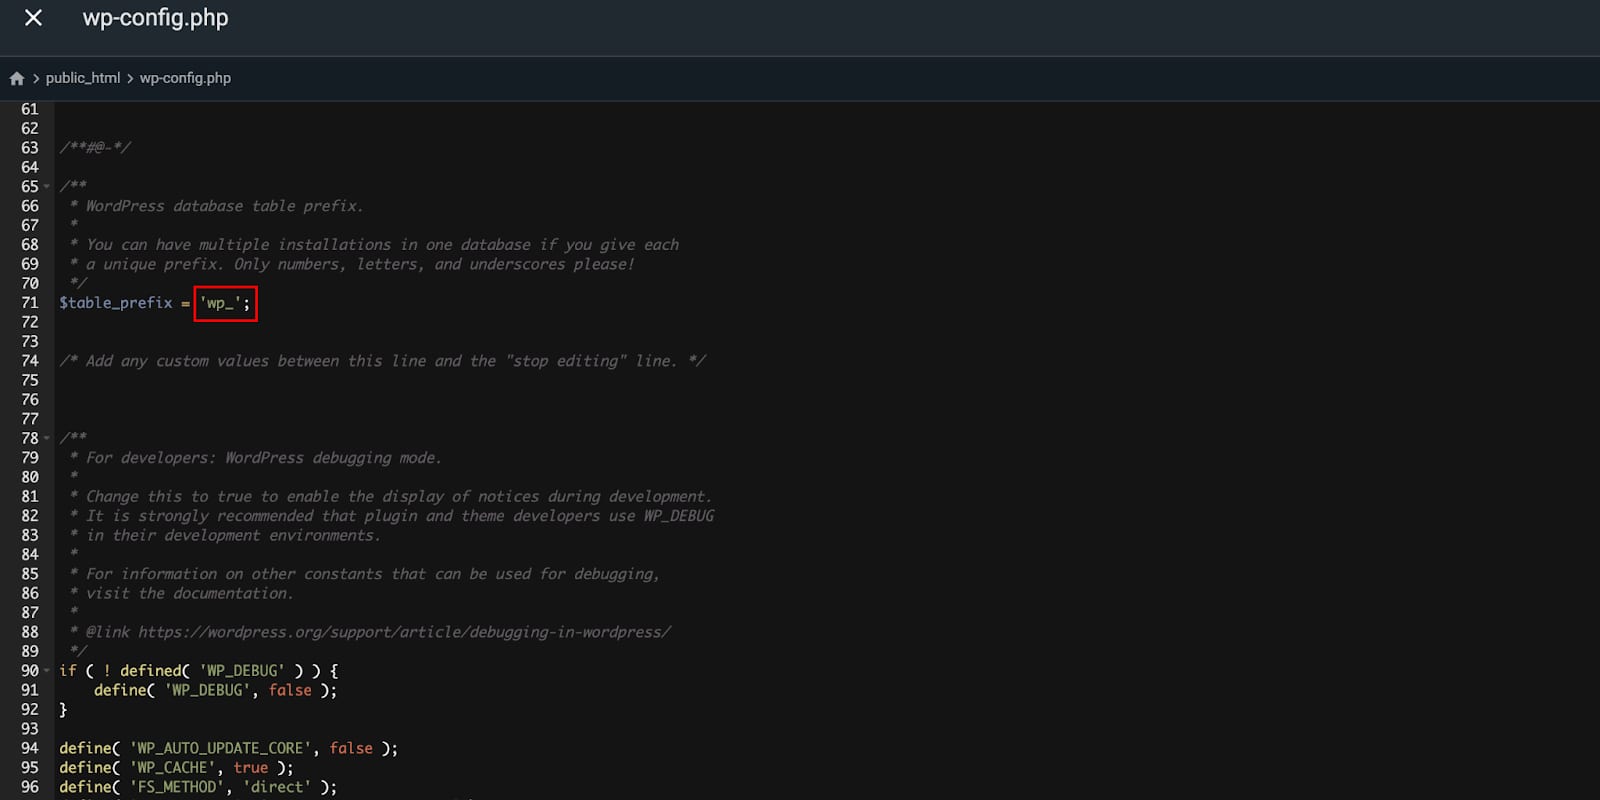
If you need to edit the wp-config file, you have to enable permissions by going to File Manager > Editing permission toggle off.
If migration is done to a different domain name than the original website (e.g. domain1.com migration to domain2.com or temporary domain xxxx.hostingersite.com) then you will also need to replace URLs in database for “home” and “site_url” values in wp-options table.
If the old URL is still visible on your website or the media of the site is not loading properly, you may need to use an additional tool to clear up the old site URLs in your database.