How to add custom CSS to WordPress (4 easy methods)
Dec 15, 2025
/
Aris S. & Ariffud M.
/
5 min Read
Cascading Style Sheets (CSS) define how HTML elements appear on a webpage, controlling fonts, colors, spacing, and layout. WordPress themes include built-in design settings, but you often need custom CSS to adjust visual elements that the default options can’t reach.
There are four reliable ways to add custom styling to your WordPress site:
- The block editor. Add a new CSS class in the Site Editor, then assign it to specific blocks from the Advanced settings panel.
- The theme Customizer. Open the Additional CSS panel in your dashboard and paste your code to preview changes in real time.
- A child theme. Create a child theme directory and edit the style.css file so your changes persist through parent theme updates.
- A plugin. Install a code snippet manager to insert, organize, and toggle custom CSS rules without editing theme files.
How to add a custom CSS class using the block editor
If you use a block theme (WordPress 5.9 and above), you can apply custom CSS to specific elements in the block editor. This method requires defining a class in the Site Editor and then assigning that class to a block.
First, add the CSS code in the Site Editor:
- Log in to your WordPress dashboard and go to Appearance → Editor.
- Click the Styles icon in the left sidebar (the black and white circle) and select Additional CSS.
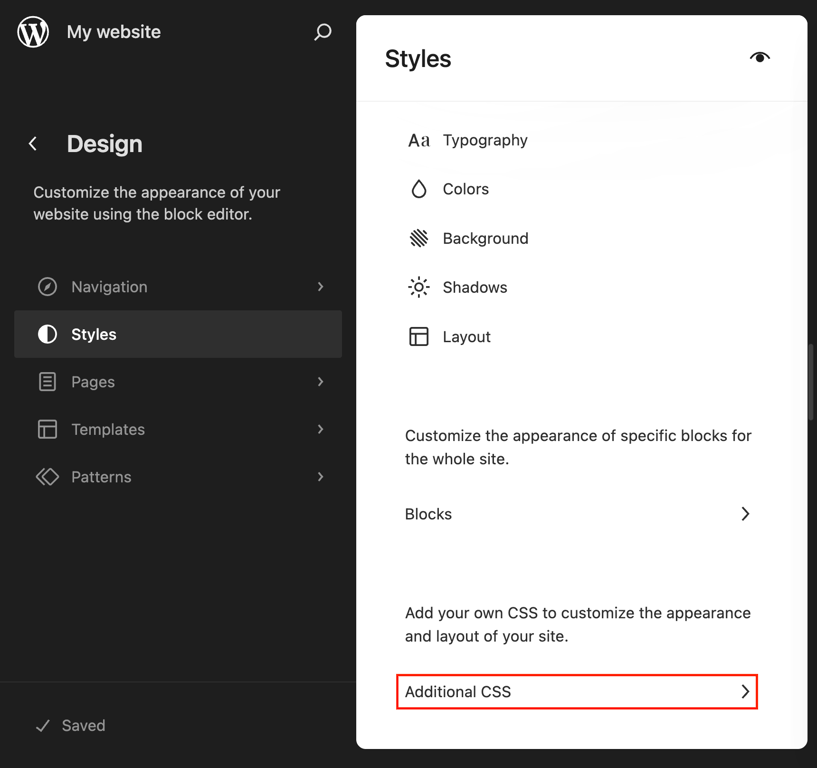
- Define your new CSS class. For this example, create a class named custom-highlight that adds a green background and white text:
.custom-highlight {
   background-color: #28a745;
   color: #ffffff;
   padding: 10px;
}
- Click Review 1 change → Save to apply your changes.
Once you define the class, assign it to any block in your posts or pages:
- Go to Posts → All Posts and edit the post you want to update.
- Select the block you want to modify (for example, a Paragraph block).
- In the right sidebar, open the Advanced section.
- In the Additional CSS Class(es) field, enter the class name you created.
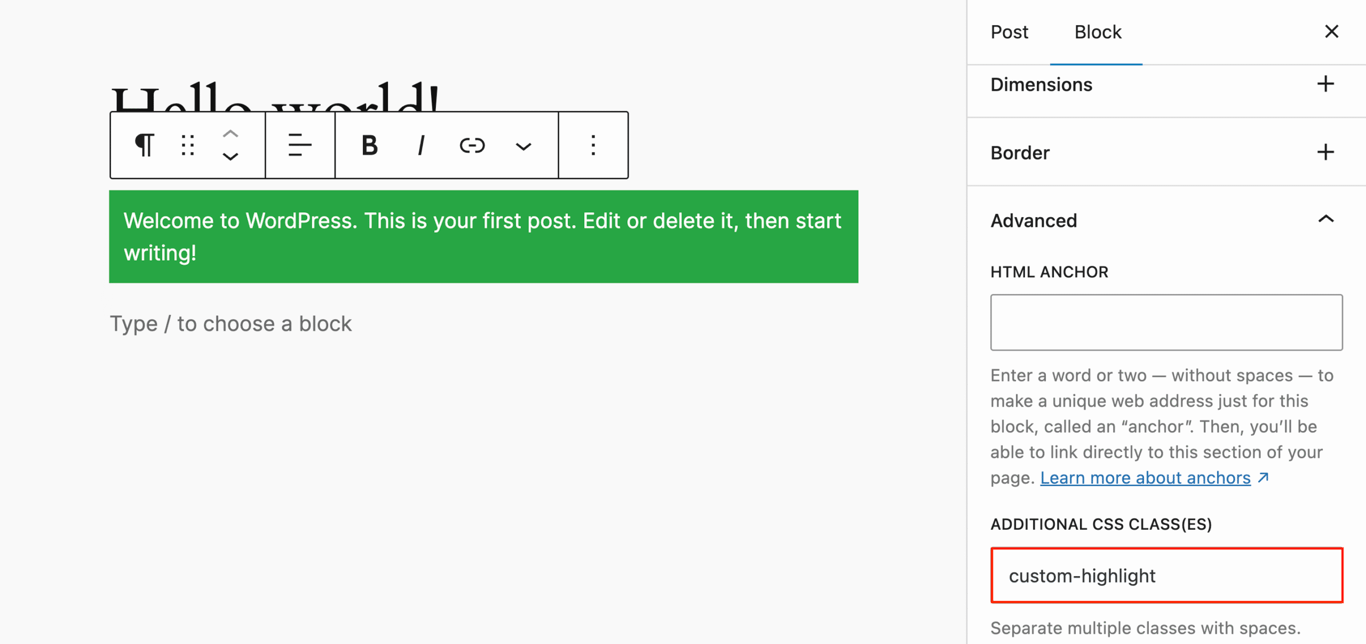
- Click Save. The block now reflects the styling defined in your stylesheet.
This method lets you apply styles to individual blocks instead of site-wide elements. It’s ideal for one-off styling, such as highlighting a single paragraph or call to action, without affecting other blocks of the same type across your site.
How to add custom CSS using the theme Customizer
If you use a classic theme, the WordPress Customizer is the most user-friendly way to add custom CSS. Introduced in WordPress 4.7, it lets you write CSS and see the changes immediately before publishing.
- Go to Appearance → Customize.
- In the left sidebar, click Additional CSS.
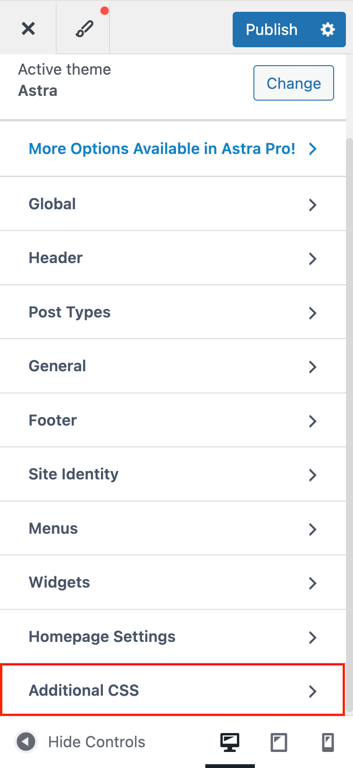
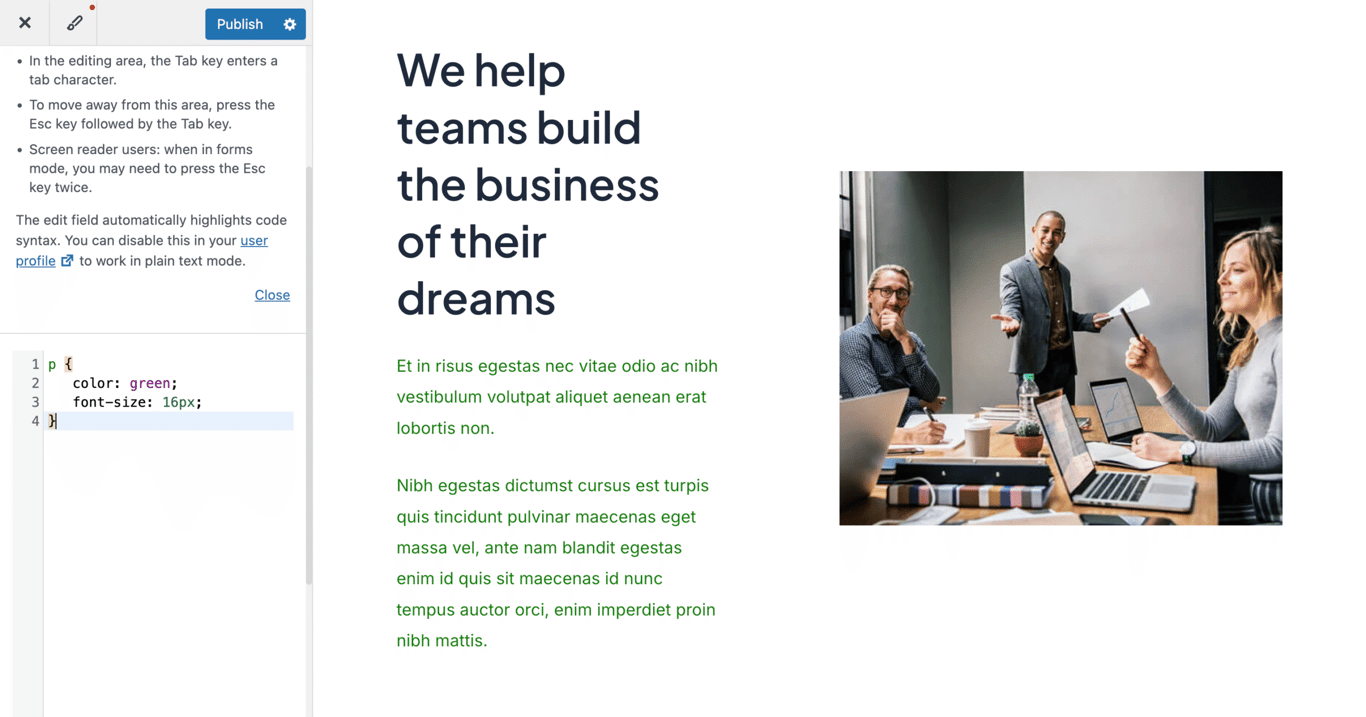
- A code editor opens. Type or paste your CSS rules. For example, to style paragraph text:
p {
   color: green;
   font-size: 16px;
}- The preview pane on the right updates instantly.
- When you’re happy with the result, click Publish.
This method saves your CSS to the database instead of the theme files, so your changes stay intact when you update the theme. However, they will disappear if you switch to a different theme. If you frequently change themes, consider using a plugin instead.
How to add custom CSS using a child theme
Editing the parent theme’s style.css file is risky because theme updates overwrite it and erase your customizations. A child theme prevents this by storing your changes in a separate directory that WordPress loads after the parent theme, allowing your changes to override the parent’s styles.
- Access your site files through the File Manager in your hosting control panel or an FTP client like FileZilla.
- Go to the wp-content/themes/ directory.
- Open your active child theme folder.
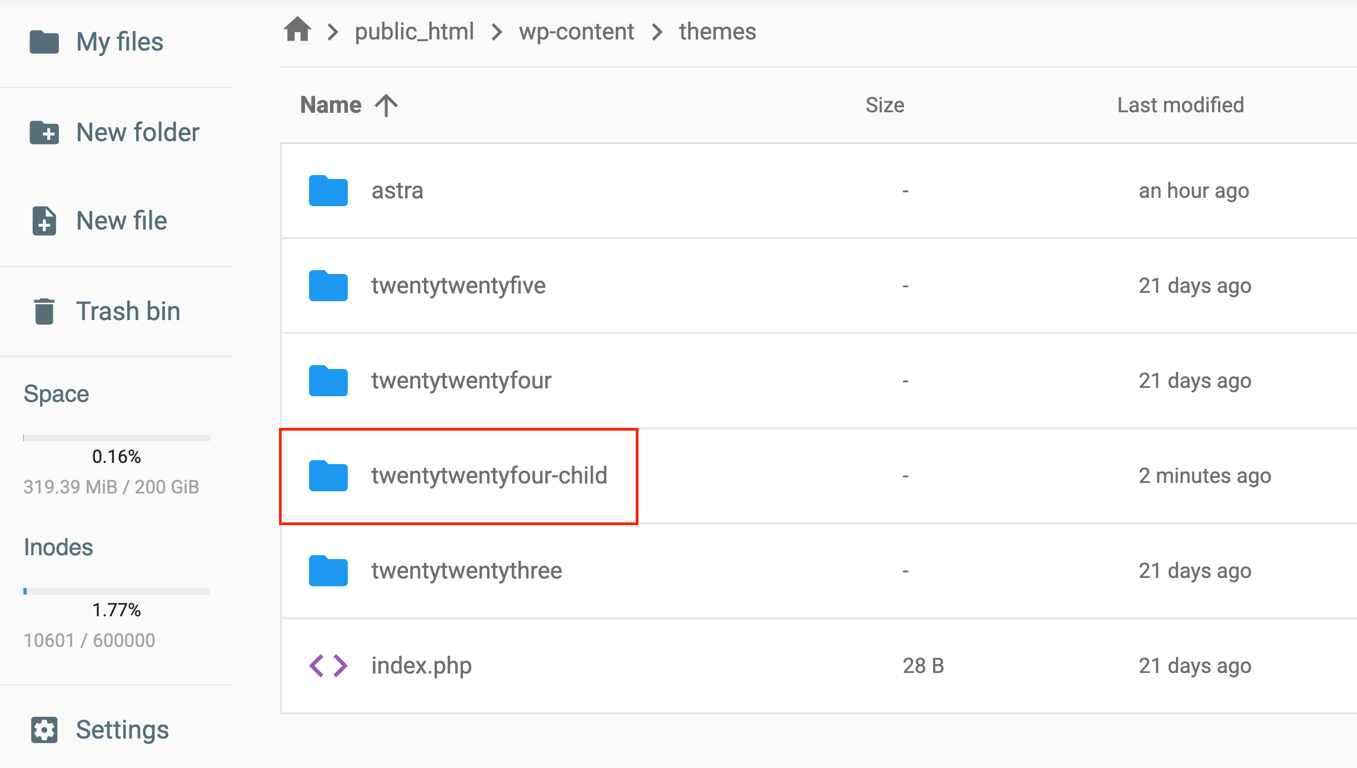
- Locate and open the style.css file.
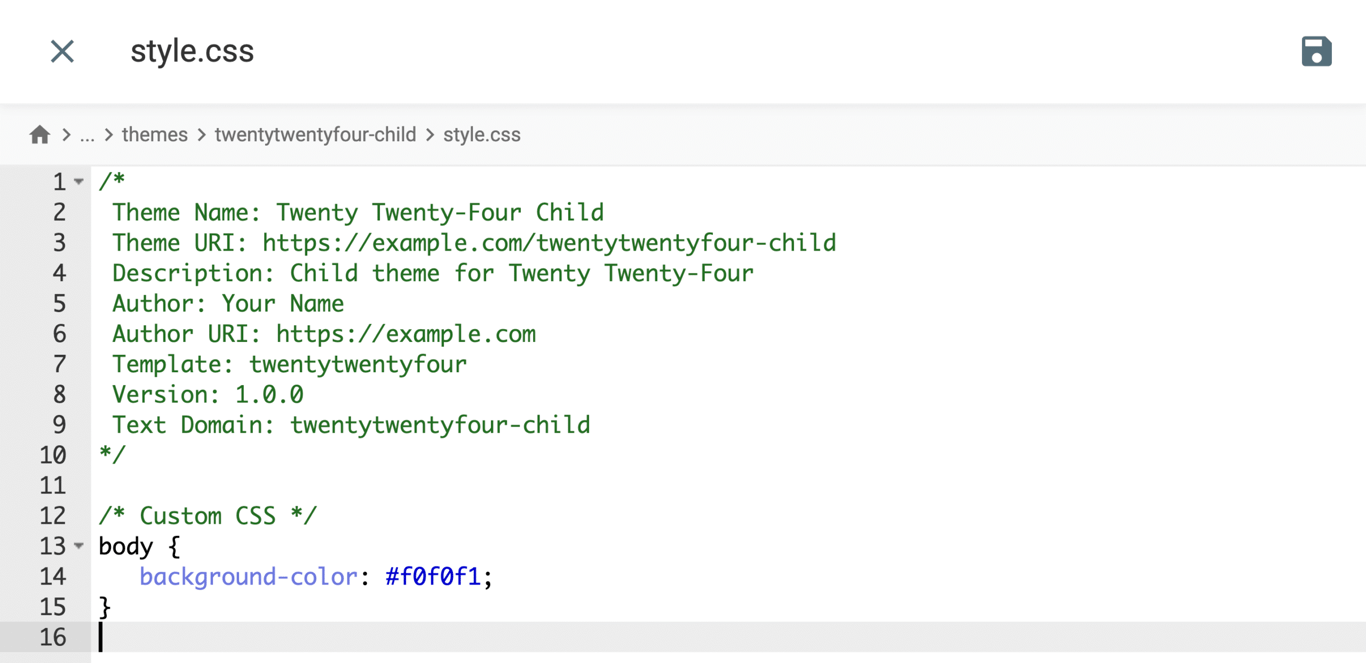
- Add your custom CSS at the bottom. For example:
body {
   background-color: #f0f0f1;
}- Save the file or re-upload it to your server.
This approach works best for developers or site owners planning extensive design updates, as it keeps custom code organized and protected from future theme updates.
How to add custom CSS using a plugin
If you prefer not to edit theme files or use the Customizer, a plugin offers a safe and organized alternative. We recommend using WPCode for its robust snippet management and its library of more than 100 pre-made snippets.
- Install and activate the plugin from Plugins → Add New Plugin.
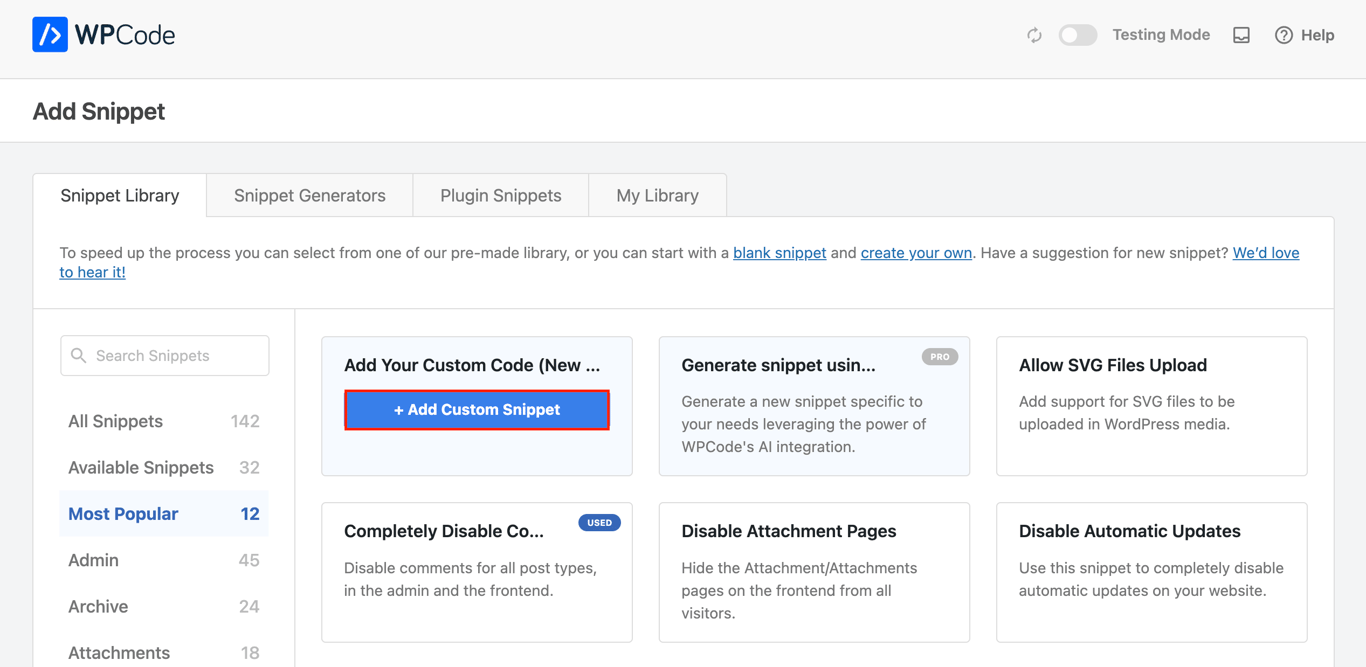
- Go to Code Snippets → + Add Snippet.
- Hover over Add Your Custom Code (New Snippet) and click + Add Custom Snippet.
- Select CSS Snippet as the code type.
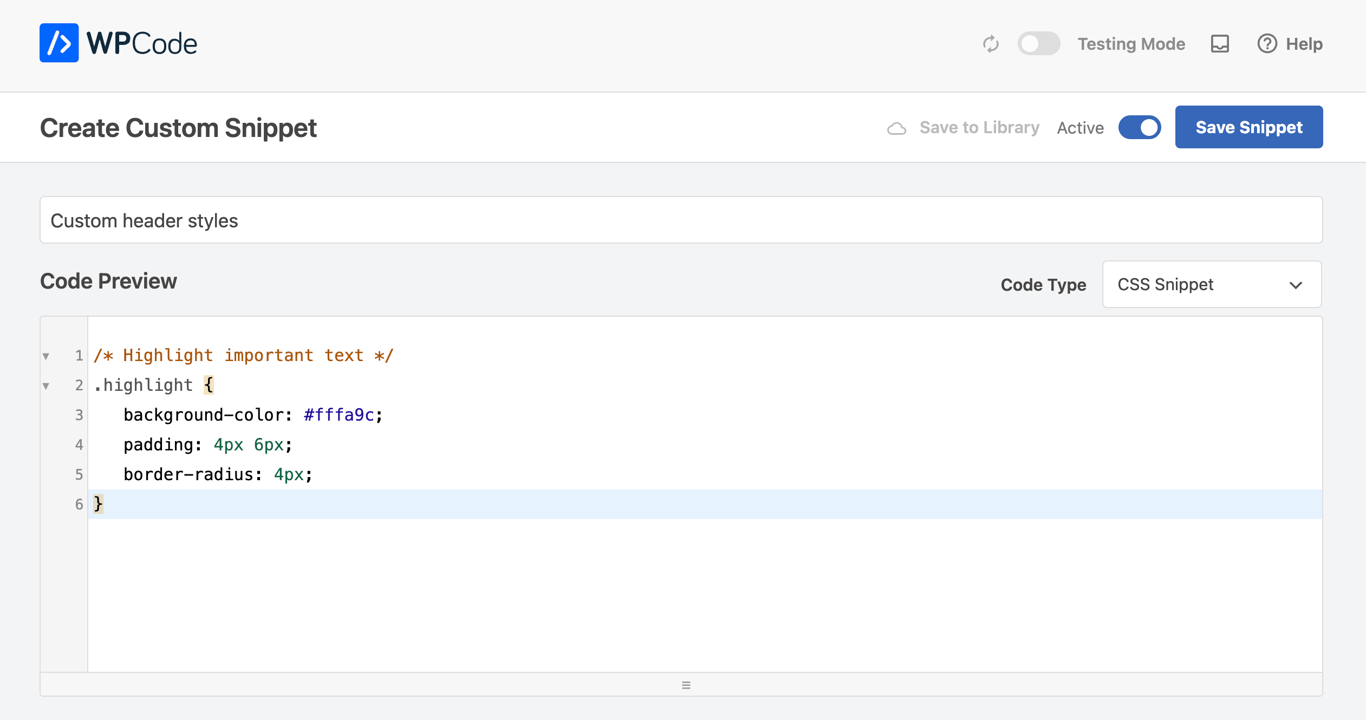
- Enter a title for your snippet (for example, “Custom header styles”).
- Paste your CSS into the code editor. For instance:
/* Highlight important text */
.highlight {
   background-color: #fffa9c;
   padding: 4px 6px;
   border-radius: 4px;
}- Toggle Active to On, then click Save Snippet.
Plugins are particularly useful if you frequently switch themes, as the CSS remains active regardless of which theme is currently selected. Your custom styles are stored independently from your theme files.
Troubleshooting common WordPress custom CSS issues
You can troubleshoot most WordPress custom CSS issues by clearing your cache, checking selector specificity, and fixing syntax errors.
Style changes are not appearing
The most common reason new styles don’t appear is caching. Browsers and caching plugins store static versions of your site to improve speed, which can prevent updated CSS from showing right away.
- Browser cache. Clear your browser cache or perform a hard refresh (Ctrl+Shift+R on Windows, Cmd+Shift+R on Mac). You can also open the page in an Incognito or Private window to bypass cached files.
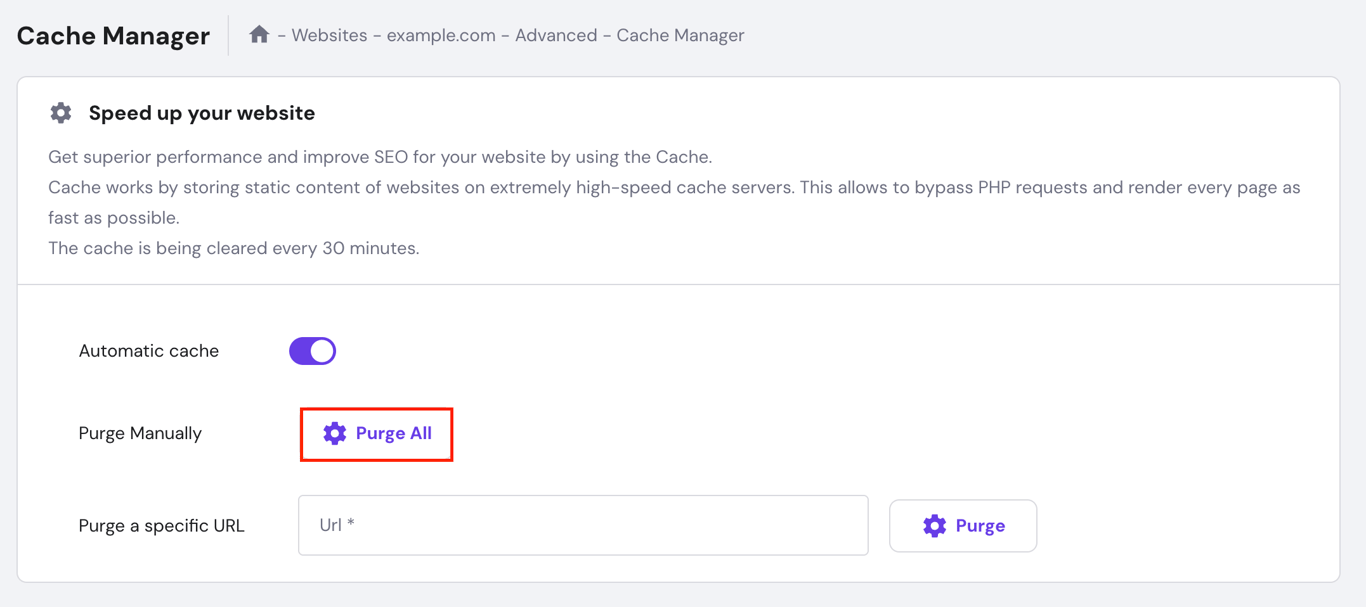
- Server or plugin cache. If you use a caching plugin such as WP Super Cache, W3 Total Cache, or LiteSpeed Cache, clear the cache from the plugin’s settings. If your WordPress host uses server-level caching (like Hostinger’s Cache Manager), clear it from your control panel as well.

CSS selector specificity
If your code is present but not applying, existing theme styles may be overriding it. CSS prioritizes rules based on specificity – a scoring system where inline styles outrank IDs, IDs outrank classes, and classes outrank element selectors.
To fix this, use a more specific selector. For example, instead of targeting .button, target div.content .button or include a parent container in your selector.
As a last resort, you can use the !important declaration:
.button {
   background-color: #ff0000 !important;
}
Remember to use !important sparingly. Overusing it makes maintenance harder because future changes will also need !important to override earlier rules. This leads to “specificity wars,” which make your styles harder to manage over time.
Misspelled CSS syntax
A single missing bracket } or semicolon ; can break your entire stylesheet. If you edit files manually, double-check that your syntax is correct.
We recommend using a code editor like Visual Studio Code, which highlights syntax errors in real time. The WordPress Customizer’s built-in syntax highlighter also flags errors in red before you save.
The new design is not responsive
Custom CSS can sometimes break your layout on mobile devices. Always test your changes on different screen sizes using your browser’s developer tools (Inspect → Toggle device toolbar).
To improve responsiveness, wrap your code in a media query:
@media only screen and (max-width: 600px) {
   body {
      font-size: 14px;
   }
}
How do I add other custom code to WordPress?
You can add other types of custom code to WordPress using two main methods, depending on the programming language and whether you need to modify server-side functionality or front-end behavior.
- PHP. To change core functions – such as creating custom post types or filtering content – add PHP code to WordPress. This code runs on the server before the page loads.
- JavaScript. For dynamic features like animations, event handling, or tracking scripts, consider adding JavaScript to WordPress. This code runs in the user’s browser after the page loads.
Regardless of the method you choose, always make sure you have a recent website backup before adding custom code to prevent data loss or site errors.
All of the tutorial content on this website is subject to Hostinger's rigorous editorial standards and values.

Aris is a Content Writer specializing in Linux and WordPress development. He has a passion for networking, front-end web development, and server administration. By combining his IT and writing experience, Aris creates content that helps people easily understand complex technical topics to start their online journey. Follow him on LinkedIn.

Ariffud is a Technical Content Writer with an educational background in Informatics. He has extensive expertise in Linux and VPS, authoring over 200 articles on server management and web development. Follow him on LinkedIn.


