How to Update WordPress Theme In 4 Steps and Keep the Theme’s Customization
Dec 22, 2025
/
Will M.
/
10 min Read
Updating your WordPress theme is crucial for maintaining site security and performance. Plus, it gives you access to useful new features and security patches. However, some users may be unsure how to update a WordPress theme, especially once it’s been modified with custom code snippets.
Fortunately, it’s relatively straightforward to update your theme in WordPress. You’ll first need to create a backup and a staging site. Then, you’ll be able to update the theme from the WordPress dashboard, or manually using an FTP client or a File Manager.
In this guide, we’ll walk you through the safest ways to update your theme without losing your customizations in WordPress. Then, we’ll guide you through the steps to update a custom theme. Let’s get started.
Download all-in-one WordPress cheat sheet
How to Update a WordPress Theme
If you have a customized file or custom code inside your theme folders, you’ll want to skip ahead to the next section. Otherwise, you’ll lose any of the changes you made to the theme’s layout.
However, if you’re like many WordPress users, you might have only made changes to the theme using its built-in settings – for example, via the WordPress Customizer or the Full Site Editor (FSE). If this is the case, you can follow the steps below to update your current theme.
Suggested Reading
Check out our article on how to install WordPress themes using three different methods, complete with tips for switching between themes.
1. Create a Backup
Before commencing any major theme update, it’s important to create a fresh backup of your site.
Even if you already do regular automatic backups, it’s a good idea to make sure you have an up-to-date version of your site on hand. That way, if anything goes wrong with the theme update, you can quickly restore your site to its original state.
WordPress users can create a backup using a plugin or manually using FTP and phpMyAdmin. If you’re a Hostinger customer, it’s easiest to back up your WordPress site from hPanel.
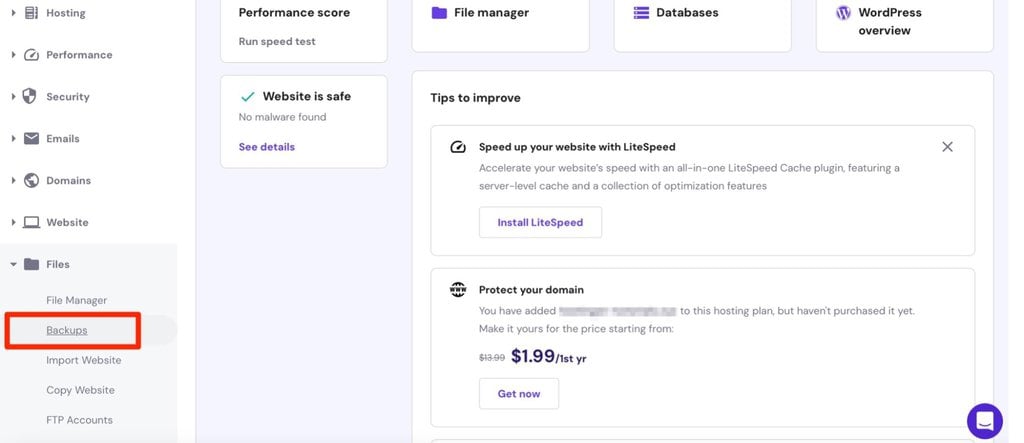
Simply log in to your hosting account and access the hPanel dashboard. Then, find the Files tab in the sidebar and click on Backups:
Where it says File Backups, click on Select:

Next, simply choose a date from the dropdown box and hit Next step. If you want to back up your entire site, select public_html. Alternatively, choose the specific files that you want to include in your backup:
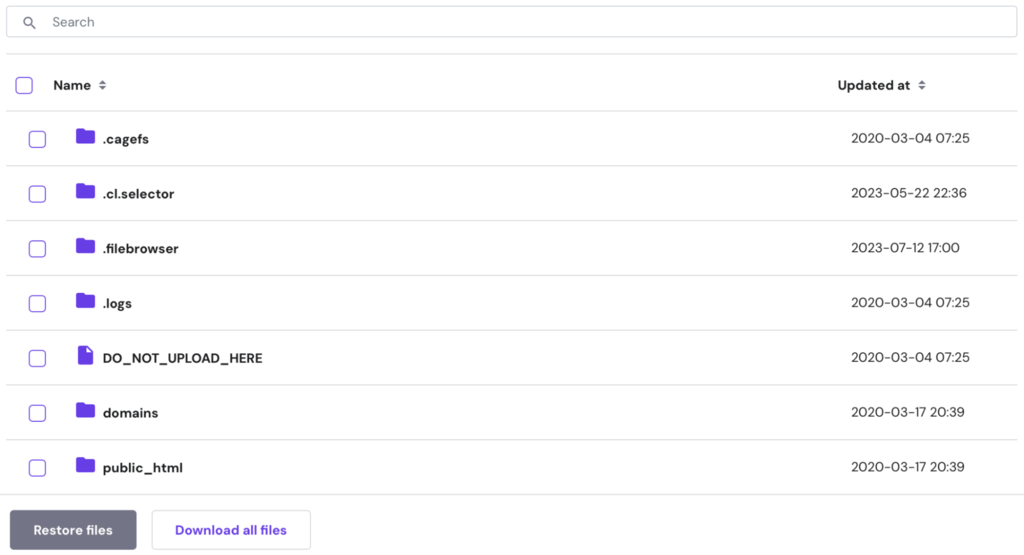
Then, click on Download all files.
2. Create a Staging Site
Next, you’ll want to create a staging site. This is a copy of your live website that isn’t accessible to the public.
A staging site is an ideal place for testing out new features or making changes to your website. It enables you to update your WordPress theme in a secure environment without worrying about having to troubleshoot your site.
This way, you can make sure that the updated version is safe and doesn’t conflict with any other code on your site. Most quality web hosts provide staging tools with hosting solutions. At Hostinger, it’s included when you purchase a Business web hosting plan, which starts at $3.99/month.

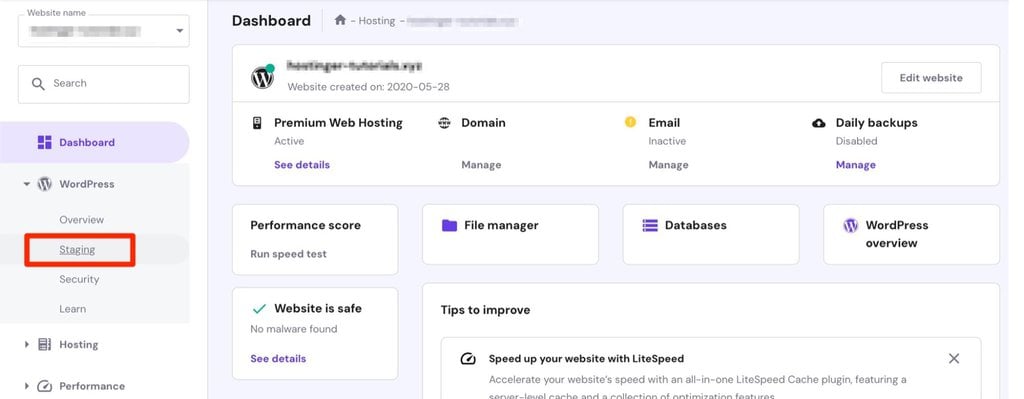
As a Hostinger customer, you can access the staging tool from hPanel. Start by logging in to your hosting account, then follow these steps:
- On the dashboard, go to WordPress → Staging:
- If the staging tool is included with your hosting plan, click on Create Staging.
- Enter the subdomain that you want to use for your staging site and click on Create.
- Wait until your staging environment is ready. Note that this process can take up to 15 minutes to set up.
If your plan doesn’t include staging tools or you are with another provider, you can set up a staging environment in WordPress manually or by contacting your web host. Another option is to use a staging plugin like WP Staging.
3. Update the WordPress Theme on the Staging Site and Test
Now, let’s cover how to update an existing theme. There are multiple options for this. First, you can update your theme from the WordPress admin panel. However, it’s also possible to update a WordPress theme manually using FTP or a File Manager.
How to Update a WordPress Theme from the Admin Panel
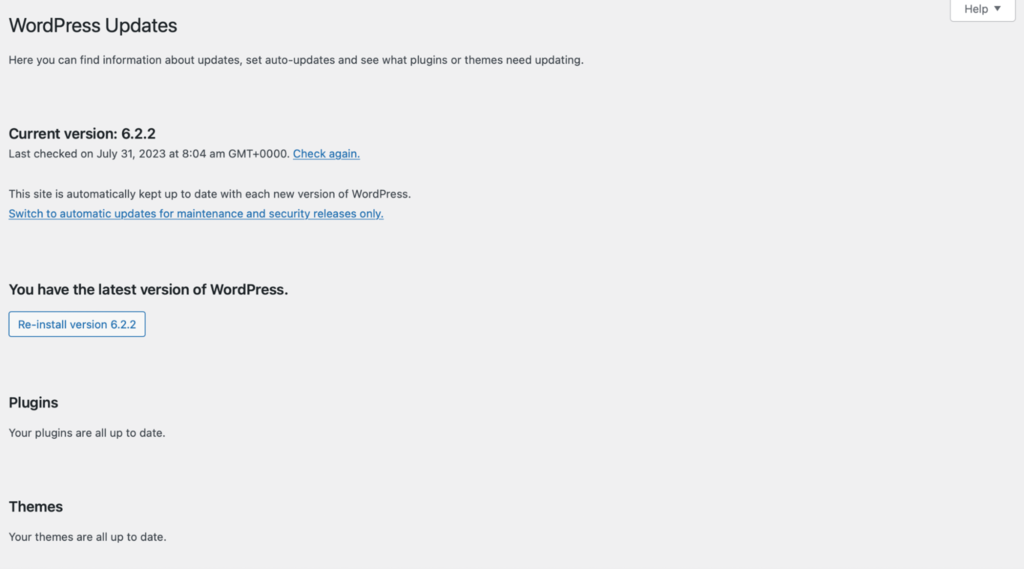
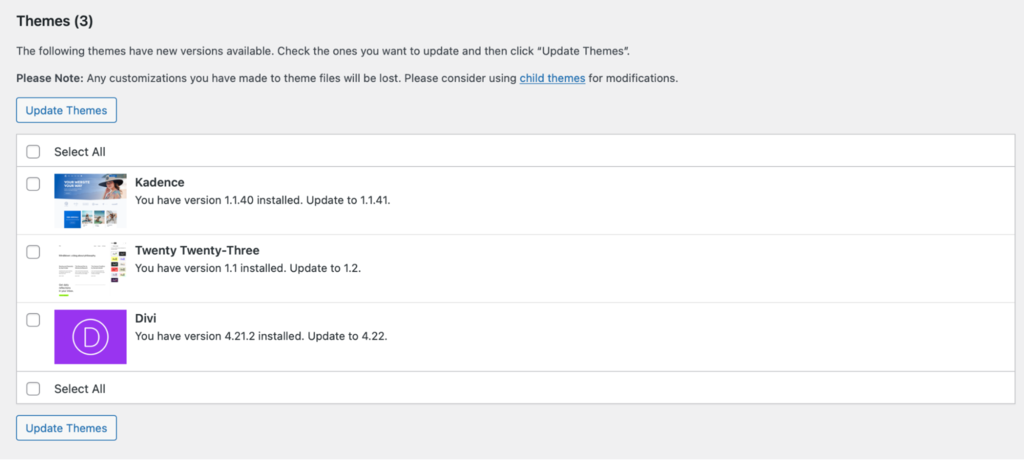
The simplest way to update your installed theme is to do it from the admin panel or WordPress dashboard. To begin, log in to your website and head to Dashboard → Updates. Then, scroll down until you reach the Themes section. You will see the list of whether there are any theme updates available. Simply check the box beside the active or inactive themes you want to update and click on Update Themes.
Additionally, you can update your WordPress theme version by going to Appearance → Themes within your WordPress dashboard:
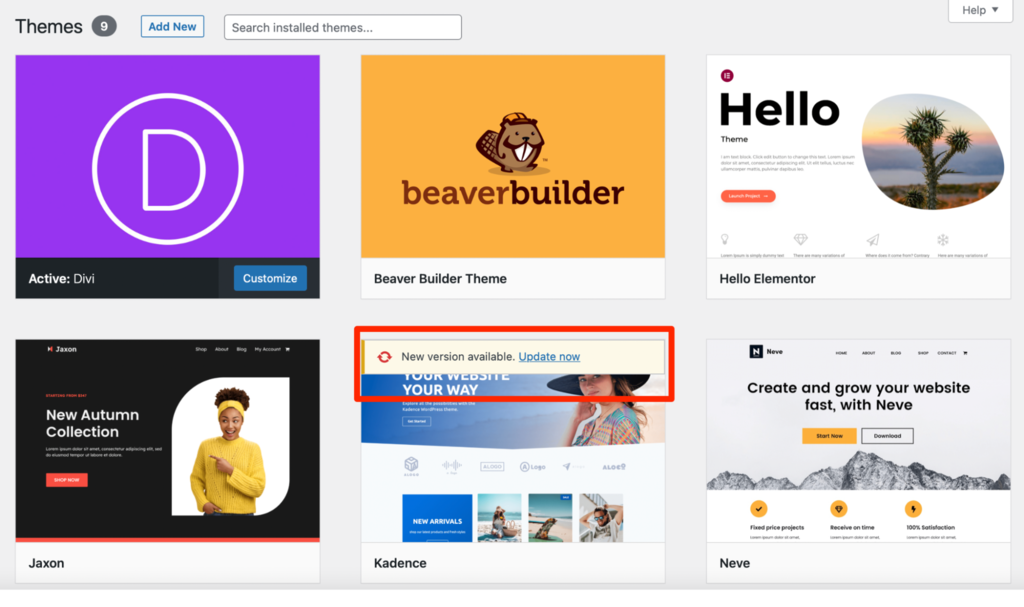
If updates are available, you’ll see a notification and a link on top of the theme that says Update now.
How to Update a WordPress Theme Using FTP
While the above method is certainly the simplest way to update your theme, you can also complete the task using a File Transfer Protocol (FTP). FTP enables you to connect to your website files remotely from a computer.
First, you’ll need to configure a secure FTP connection using an FTP client like FileZilla.
Once you’ve installed the program, open FileZilla and enter your FTP credentials at the top of the screen. You can find the FTP login details within your hosting account.
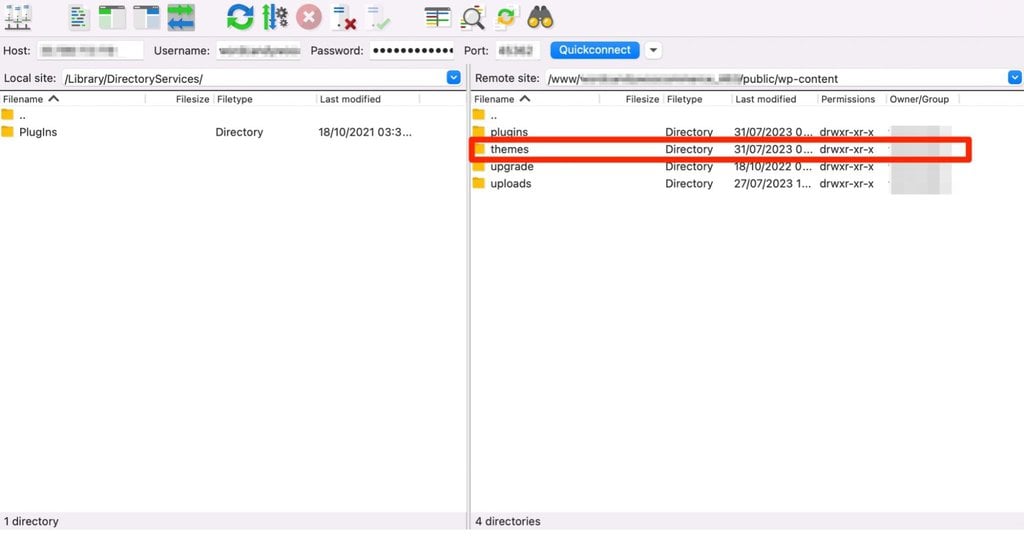
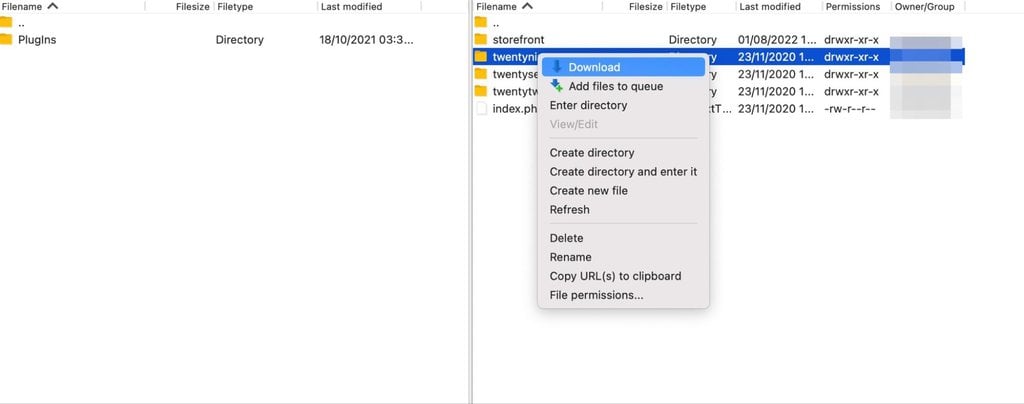
After connecting to your website, locate the root folder of your WordPress site – this is usually public_html. Then, click on wp-content and open your themes folder:
Find your active theme within the folder. You’ll need to rename the file and add “_old” to the end of the file name.
Then, right-click on the file and select Download:
Now, you need to download the new version of the theme package to your computer. So, head to the theme’s landing page either within the WordPress themes directory or its official website. Download the theme’s ZIP file so that it’s ready to upload to WordPress.
Then, head back to FileZilla and return to the themes folder to upload your new file. At this point, the updated theme will be installed on your WordPress site, but you’ll still need to activate it.
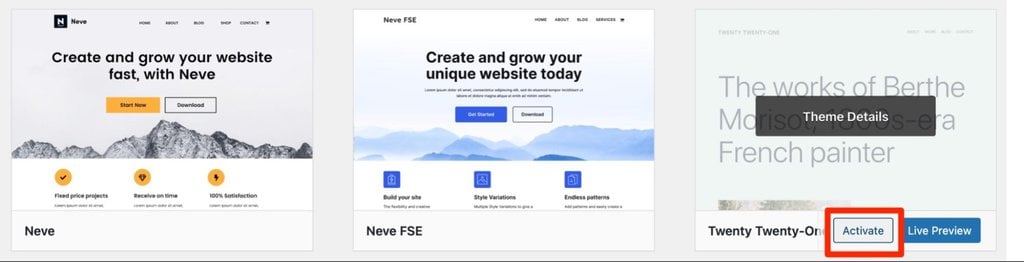
On your WordPress dashboard, you’ll likely see two themes – one with the older version of the theme (that you added “_old” to) and one with the updated theme.
Click on Activate next to the new updated version of your theme:
You may be prompted to overwrite the old theme files. In this case, proceed with the action. If you’re not asked to overwrite the theme, delete the old WordPress theme file once you’ve successfully activated the new theme.
How to Update a WordPress Theme with File Manager
If you don’t use FTP, you might be wondering how to update a theme with a File Manager. The process is similar to using FTP – the only difference is that you’ll be updating the theme directly through your hosting account.
As a Hostinger customer, it’s easy to update a theme through hPanel. Once you’re logged in to your account, access the website’s hPanel and click on WordPress in the sidebar.
Then, select Security and scroll down to the Installed themes section:
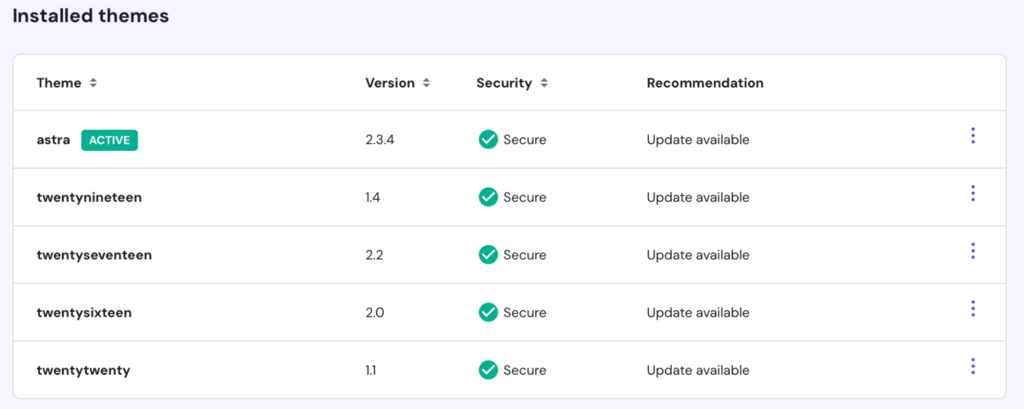
Here, you can view all the themes installed on your website. The Recommendation column will notify when a theme update is available.
To update a theme, click on the three dots to the right of it and select Update:
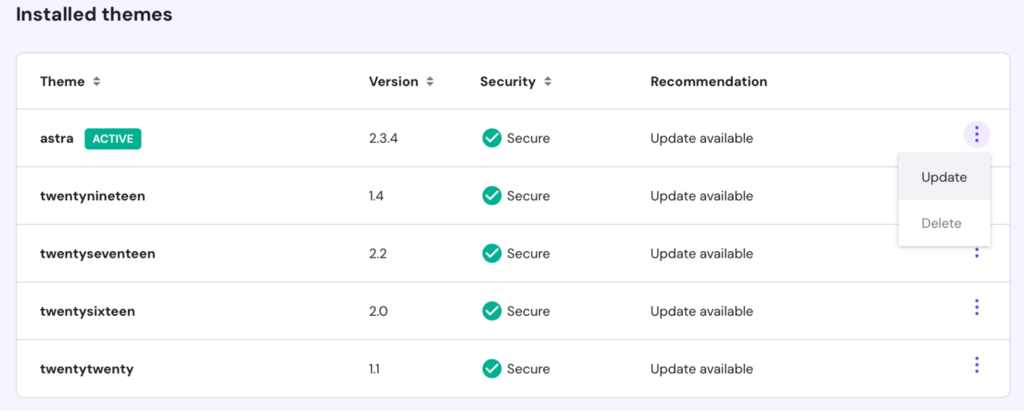
There will be a message warning you that the update might affect your website. To continue, click on Update. The process will begin instantly.
No matter which method you choose, it’s always a good idea to test the new theme by previewing your site on the front-end once the update is complete.
4. Publish the Update
After checking that the theme functions properly, you’re ready to publish the update from the staging site to the live site. To do this, go to WordPress → Staging on hPanel.
You should find your staging site listed here. Next to the Manage staging button, there are three vertical dots.
Click on the dots and select Publish. Then, hit the Publish button on the pop-up window to proceed. Keep in mind that it can take up to 15 minutes for the changes to apply to your live site.
How to Update a Customized WordPress Theme
Now you know how to update a standard theme using the most popular methods. However, if you’ve customized your WordPress theme, you’ll need to use a different approach to avoid losing the changes you’ve made.
Perhaps you’ve added code to your theme’s functions file or added CSS to its stylesheet file. Or, maybe you made changes to the theme’s index.php or footer.php templates.
If you update your WordPress theme in the usual way, the theme files will be overwritten and you’ll end up losing customization. However, you can still update the theme while keeping its old customized version using the steps below.
1. Create a Backup and a Staging Site
As we’ve discussed, it’s crucial to make a backup of your WordPress website in case anything goes wrong. However, it’s especially important when you’re updating a custom theme.
This is because you’ll need to use the backup theme files to apply the customizations to the new theme files or your child theme folder. To back up your WordPress site, you can utilize a backup plugin or hPanel. Visit step one of the previous section to find out how to do this.
Like updating a standard theme, it’s also a good idea to set up a staging site. This way, you can update your theme in a safe environment.
2. Create a Child Theme
To update a WordPress theme that you’ve customized, you’ll need to create a child theme. This is the main difference between updating a standard vs customized theme. Child themes inherit the style, features, and functionality of the main or parent theme.
Once you set up a child theme, you can apply changes directly to it, and the parent theme will remain unaffected. Then, since the changes are stored in the child theme files, you can update the parent theme without losing the customizations.
To create a child theme, you can use a plugin or build one manually using code.
It’s also a good idea to install WordPress locally to develop a child theme. This way, you can make changes without affecting the live site.
3. Add the Customized Theme Files to the Child Theme
Now, you might be wondering how to update your existing theme using a child theme. As we mentioned, you can create a child theme in various ways.
However, if you set up a child theme manually using a File Manager, you’ll need to add a stylesheet and functions file to your theme folder:

This will enable the child theme’s files to inherit the styles and functions from the parent theme.
Then, you’ll need to identify any customizations that you made to the following parent theme’s files:
- The functions.php file. Copy the functions that you added to your parent theme’s functions file and paste them into your child theme’s functions file.
- The style.css file. Copy any custom code that you added to your parent theme’s stylesheet and paste it into your child theme’s stylesheet file.
- Templates. Any modified template files like index.php or footer.php, or new theme files like custom templates, will need to be copied to the child theme.
Once you complete this stage, your child theme is all set up and ready to be activated.
4. Activate and Test the Child Theme
After storing all the customizations in your child theme, it’s time to activate the child theme on your website.
Simply head to Appearance → Themes on your WordPress dashboard. Then, locate the child theme and click on Activate.
Remember to test the theme to make sure it’s working properly. For example, check if your customizations are functioning as they should be. Additionally, check any pages that use the template files that you previously copied.
5. Update the Parent Theme
Once you verify that the child theme is active and working, you’ll need to update the parent theme. Be sure to use a staging environment where you can do this first.
If you installed your theme via the WordPress theme directory, go to Dashboard → Updates to update the parent theme:
Alternatively, head to Appearance → Themes to run the update there. If you downloaded a premium theme after purchasing it, you’ll need to upload it via the Themes tab.
Now, test your site again. Take a look over your content pages and test any interactive elements to make sure they’re working for site visitors. Then, push the changes from your staging site to the live site once you’re happy with the updates.
Why You Should Update Your WordPress Theme
While updating a theme may seem like a hassle, it’s an important maintenance task. Here are some key reasons why you should update your theme to the latest version.
Security
One of the main reasons to run an updated theme is to keep your WordPress website secure. Any outdated software on your site, whether it’s core software, WordPress plugins, or themes, can make your website more vulnerable to cyber attacks.
This is because old theme files can have vulnerabilities that are well-known to hackers. These security gaps make it easier for malicious actors to use the software as a backdoor to access your site.
Once breached, hackers can cause many more WordPress security issues, like infecting your site with malware. Additionally, most WordPress theme updates come with bug fixes that aren’t present in the previous version, which is useful for fortifying your WordPress site.
Performance
While security is a strong incentive to update your theme, you can also optimize your website performance by running the theme’s latest version. This is because theme updates often include enhanced, refined code that makes your website lighter and faster.
What’s more, theme updates ensure compatibility with the WordPress core software. For example, when a new version of WordPress is released, most developers will test the theme against the new version and make any necessary changes. So, it’s a good idea to update your site’s theme whenever you update WordPress.
New Features
Typically, developers release a theme update when there are new features available. This might be at the request of users, or a theme developer may introduce features to keep up with the latest version of WordPress.
For example, when WordPress released Gutenberg, some themes added a block-based theme builder to integrate smoothly with the new editor. Theme developers made similar adjustments for the Full Site Editor (FSE), which lets you use blocks to edit template parts like the header and footer.
Conclusion
One of the best ways to keep your website fast and secure is to update your WordPress theme. That way, you’ll be able to access the latest features to improve your website’s functionality and design.
Before updating a theme, it’s important to create a backup and a staging site. Then, you can update the theme from the admin panel or do it manually using FTP or a File Manager.
If you’ve customized your theme’s code, you’ll need to create a child theme to make sure you don’t lose any of the changes. Then, simply push the update from the staging environment to your live website and test it to ensure it works properly.
By following the steps in this article, you can ensure your WordPress website’s theme is always up to date.
How to Update WordPress Theme FAQ
If you still have some doubts about how to update themes, we’ve answered some of the most common questions below.
Can I Update a WordPress Theme Automatically?
Yes. To automatically update a theme, you’ll need to go to Appearance → Themes from your WordPress dashboard. Click on the theme that’s currently active on your site and select Enable auto-updates. You can always disable auto-updates at a later time.
How Do I Check for Updates for My WordPress Themes?
If you want to check for a theme update, log in to the WordPress admin panel. Then, go to Dashboard → Updates. Scroll down to the Themes section at the bottom of the screen. There will be a list of your installed themes with available updates.
How Do I Update My WordPress Theme Without Losing Settings?
If you’ve added any custom code to your theme files, you’ll lose the changes if you update it using standard methods. To avoid this, create a child theme first to store the customized files. Then, update the parent theme and re-add the customizations from your child theme to the updated theme folder.
Will Updating a WordPress Theme Break My Site?
When you update your theme in WordPress, there’s always some risk. You might experience a bad update, or the update might conflict with existing software on your site. That’s why it’s best to make a fresh website backup, just in case. We also recommend running the update in a staging environment first to ensure it’s safe.
All of the tutorial content on this website is subject to Hostinger's rigorous editorial standards and values.

Will Morris is a staff writer at WordCandy. When he's not writing about WordPress, he likes to gig his stand-up comedy routine on the local circuit.


