How to export WooCommerce products: A comprehensive guide for store owners
Jun 01, 2025
/
Dennis H.
/
7 min Read

As a WooCommerce store owner, you know the challenge of keeping your product data up to date. The WordPress dashboard offers plenty of tools to manage your products, but editing them one by one is often impractical.
In many cases, it’s easier to manage your inventory by exporting your product data. The export file can be used to back up your products, make bulk updates, or migrate your products to a new site. This method saves time and gives you more control over your catalog.
In this guide, you’ll learn how to export WooCommerce products using both the built-in export tool and a popular plugin. We’ll walk through each method step by step.
Understanding WooCommerce product exports
WooCommerce product export is the process of generating a downloadable file containing your store’s product data.
This file can be used to migrate your store, back up product information, manage your inventory, or operate a multi-store operation.
But most store owners use it to edit product data outside of WordPress. The data can then be uploaded to update the catalog in bulk.
What data is included in a WooCommerce product export?
When you export products from WooCommerce, the file typically includes all essential product details.
- Product ID, name, price, and SKU
- Short and long description
- Product categories and tags
- Custom attributes (like size, color, or material)
- Stock status and quantity
- Featured and gallery images
- Metadata and custom fields
You can choose to export all products or narrow it down to specific categories or product types. Product types include:
- Simple products. Straightforward items with no variations.
- Variable products. Products with multiple versions based on attributes like size or color.
- Grouped products. Collections of related simple products that are sold together.
- External (or affiliate) products. Products that are listed in your store but sold elsewhere. Instead of adding to the cart, customers are redirected to a third-party site to complete the purchase.
Both the built-in WooCommerce export tool and third-party plugins structure product data into rows and columns. You can open and edit the exported file in spreadsheet software like Excel or Google Sheets.
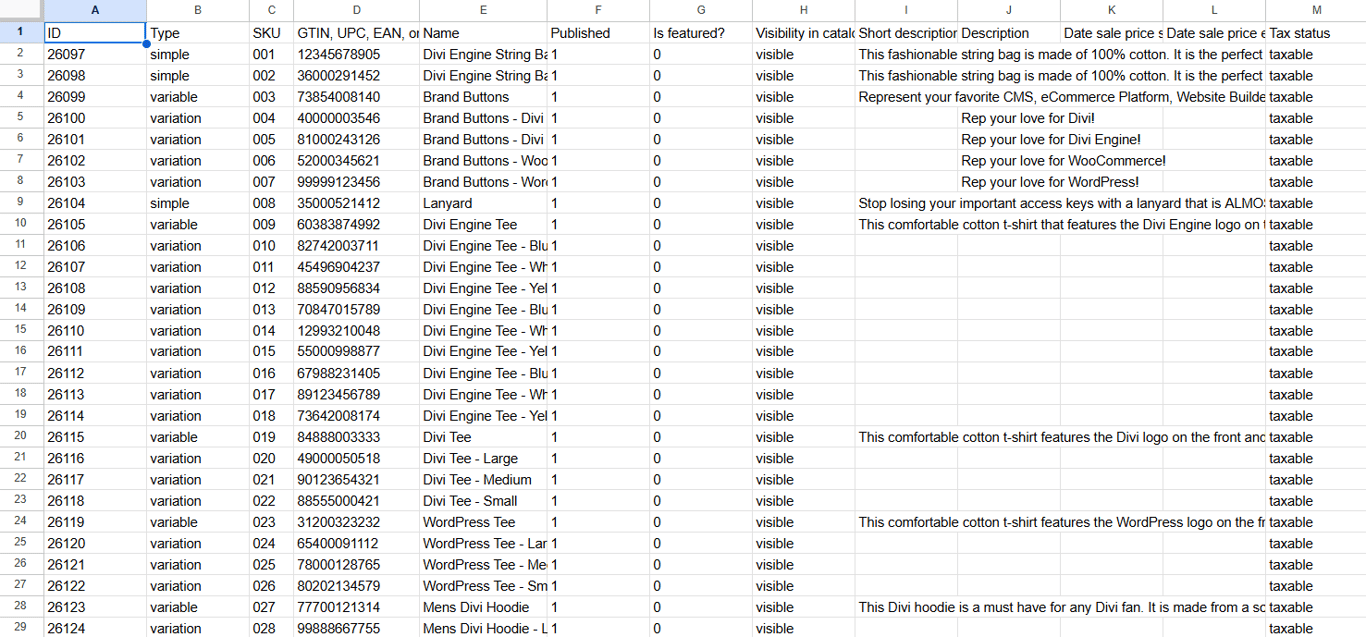
Each row in the spreadsheet represents a single product, and each column corresponds to a specific product field, such as product name, SKU, price, or stock status.
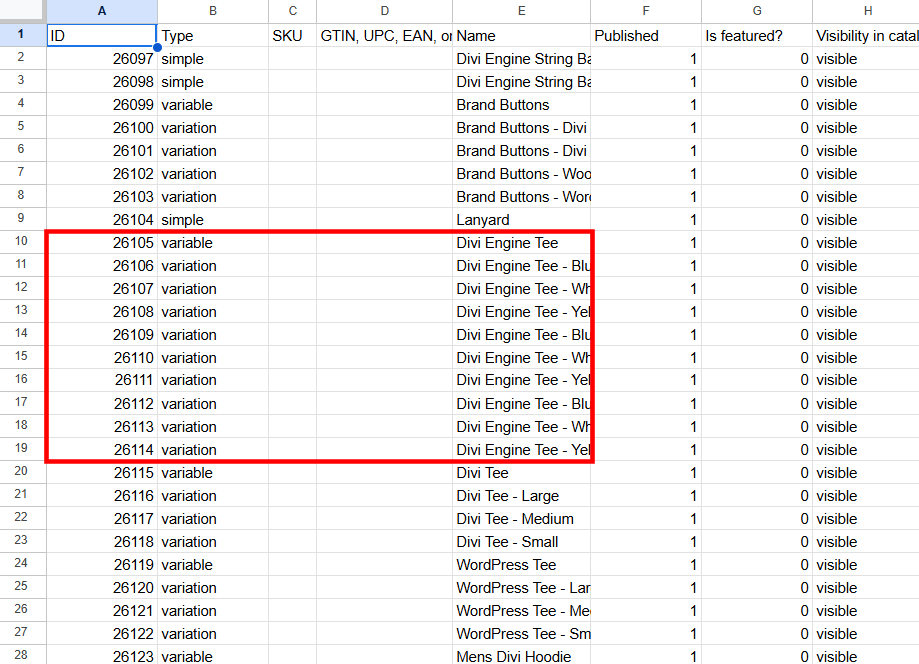
For simple products, you’ll see one row per product. For variable products, most export tools display each variation as its own row, but this can vary depending on the tool.
What file formats are available for WooCommerce product exports?
The most common export file formats are CSV, XML, and XLS.
CSV is the most widely used, ideal for editing in spreadsheets or importing to other platforms. XML works well for integrations and backups, while XLS is helpful if you prefer working in Excel.
| Format | Best For | Pros | Cons |
| CSV | Spreadsheet editing and platform imports | Widely supported by most ecommerce platforms and tools Easy to open and edit in Excel or Google Sheets Lightweight and fast to process | No built-in support for complex data hierarchies (like nested variations) Must be saved with the correct delimiter (commas or semicolons) to avoid issues |
| XML | System integrations and backups | Highly structured and machine-readable Ideal for storing hierarchical or nested data (like product variations with attributes) Good for automated workflows and API integrations | Not human-friendly to read or edit Requires technical knowledge to format or troubleshoot |
| XLS | Working in Microsoft Excel | Supports formatting, formulas, and macros Useful for internal teams already working in Excel | Not as widely accepted by import/export tools as CSV Potential compatibility issues with non-Microsoft tools |
Why you might need to export WooCommerce products
Exporting WooCommerce products is a practical method for store owners who need more control over their product data. It’s especially useful if your store has an extensive product catalog.
Here are the most common reasons to export your WooCommerce products:
- Migrating to a new platform. If you’re moving to another ecommerce solution like Shopify or BigCommerce, exporting lets you carry over your entire product catalog without starting from scratch.
- Creating data backups. A product export acts as a safety net in case of accidental deletion, plugin conflicts, or other site issues.
- Bulk edit WooCommerce products. It’s often faster to update prices, descriptions, or stock levels in Excel or Google Sheets. The exported data can then be used as an import file to update your products.
- Managing multiple WooCommerce stores. If you operate several stores, exports can help you sync inventory or duplicate product data quickly.
Analyzing product data offline. You can use exported files to generate reports, track pricing trends, or review sales performance without logging into WordPress. - Sharing product data with suppliers or partners. Exported files make it easy to provide manufacturers, distributors, or marketing teams with product information.
2 methods to export WooCommerce products
First, we’ll explain how to use the built-in WooCommerce exporter, which is easier to use and suitable for a quick and basic exporting function. If that doesn’t cover what you need, we’ll also look at a WooCommerce export plugin method that allows for more advanced product filtering and mapping.
Method #1: Using the built-in WooCommerce export tool
WooCommerce includes a simple export tool that lets you quickly download your product data as a CSV file. This is useful for backups, edits, or migrating products to another site.
The tool lets you export product types and categories, but not individual products. If you want to export a specific product or a group of specific products that don’t fit in a WooCommerce category, you can add them to a temporary category just for export.
- To access the export tool, log in to your WordPress dashboard. Navigate to Products → All Products.
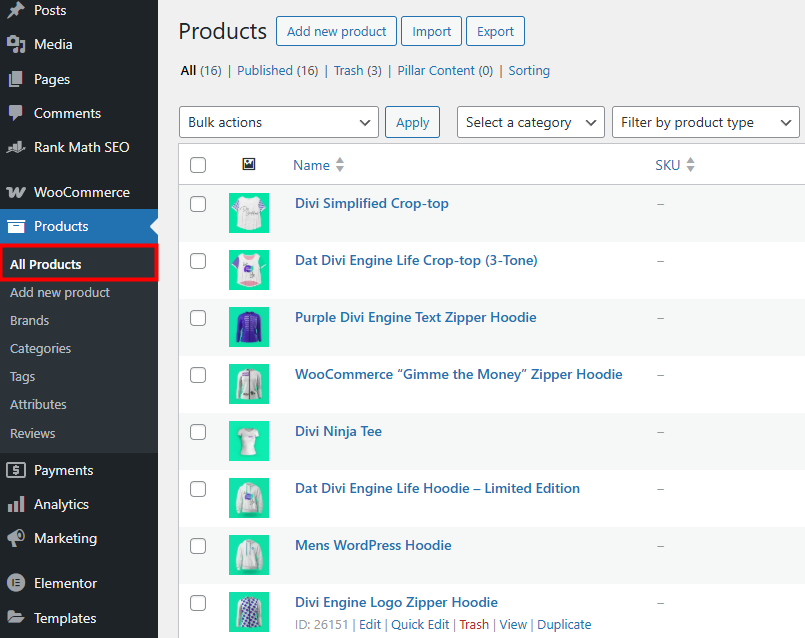
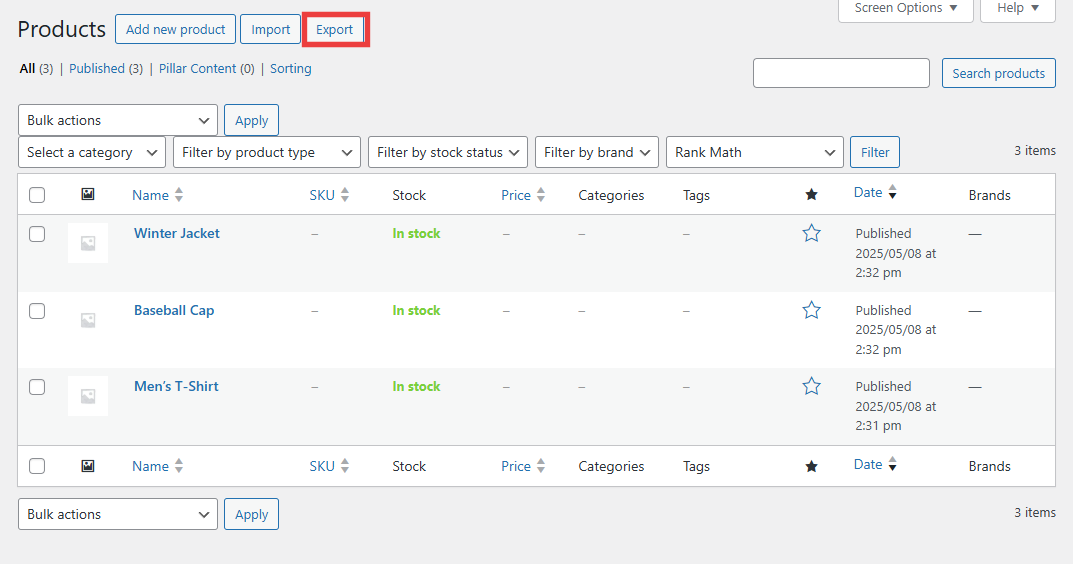
- Click the Export button at the top of the page.
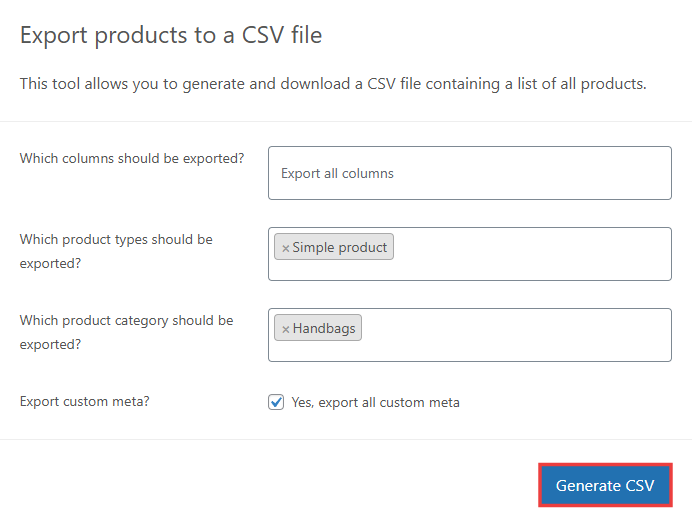
- You’ll see several options to customize your export:
- Which columns should be exported? Choose which fields to include, such as SKU, price, or stock status. Leave it blank to export all available columns.
- Which product types should be exported? Select from simple, variable, grouped, or external (affiliate) products.
- Which product categories should be exported? Limit the export to a specific category if needed.
- Custom meta? Enable this if you want to include custom fields or data added by plugins.
Let’s say you want to export a CSV file with all product fields and metadata, but only for simple products in the Handbags category. Your settings should look like the image below. Once configured, click the Generate CSV button to start the export.
WooCommerce will create the file and prompt you to download it to your computer.
CSV is the only format supported by the built-in tool. If you need more format options, advanced filtering, automatic exports, or automation tools, you’ll need to use a plugin. We cover this in the next section.
Important! In some cases, the export can time out. This interrupts the process and results in a partially formed file. If you have a large product catalog, consider exporting in smaller batches by category or product type to avoid performance issues.
Method #2: Using a WooCommerce export plugin
If WooCommerce’s native export tool doesn’t offer the features you need, you’ll need to download and install an export plugin.
You’ll find several free export plugins in the WordPress Plugin Directory. For more advanced functionality, popular premium plugins include WP All Import (which also supports exporting), CTX Feed Pro, and WooCommerce’s Product CSV Import Suite, all packed with features useful for store managers.
In this guide, we’ll use Product Import Export by WebToffee, one of the best WooCommerce plugins due to its simplicity and ease of use. The free version lets you export simple, grouped, and external/affiliate products. For variable products, you’ll need to upgrade to the premium version.
Unlike the native export feature, Product Import Export can export specific products and products based on stock status. It offers several more unique features:
- Control the pace of the export process by processing in custom batches.
- Organize and structure CSV columns in the export file with the drag-and-drop UI.
- Rename CSV column header names before exporting.
- Save frequently used export configurations as templates.
- Store past exports and re-run them at a later time.
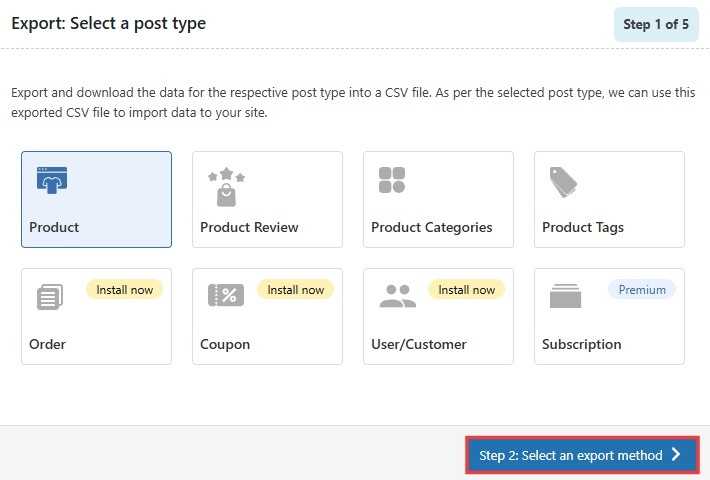
- After installing Product Import Export, navigate to WebToffee Import Export (Basic) → Export.
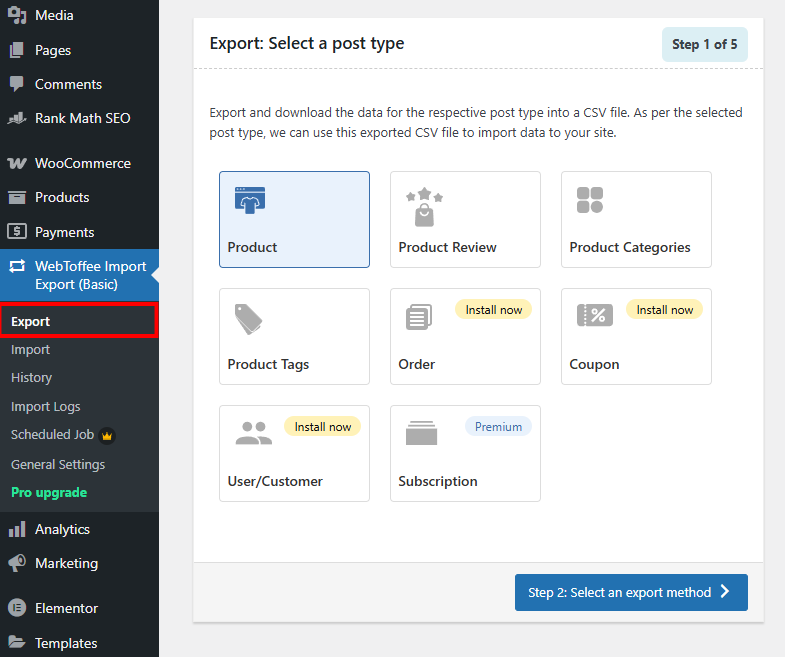
- Select the post type to export: products, reviews, categories, or tags. If you have the paid version of the plugin, you can also export orders, coupons, user/customer data, and subscriptions. After choosing a post type, click Select an export method.
- Next, select an export method. You can choose Quick export, which exports all the basic fields, or Advanced export, which offers several data filtering, column selection, and advanced options.
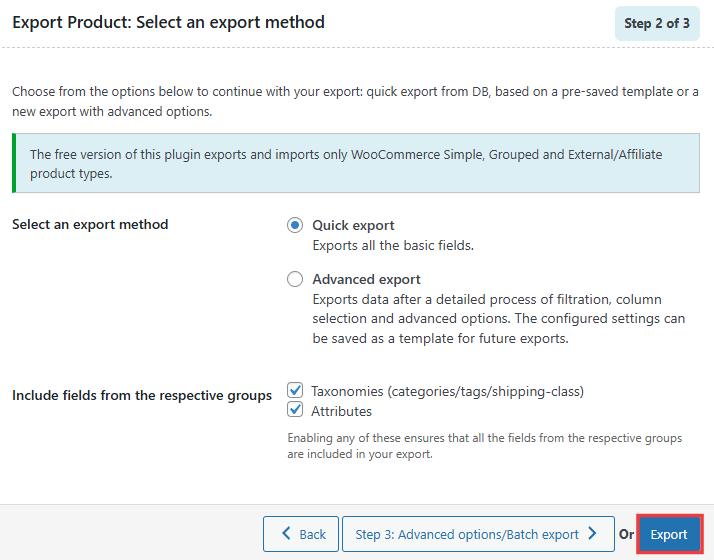
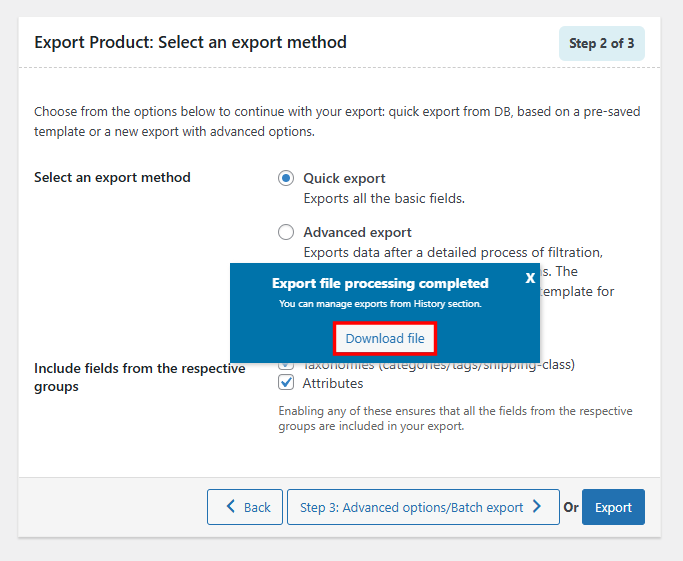
- If you select the Quick export option, click Export. A pop-up will appear when your file is ready. Click Download file to download the export to your device as a CSV or XML file.
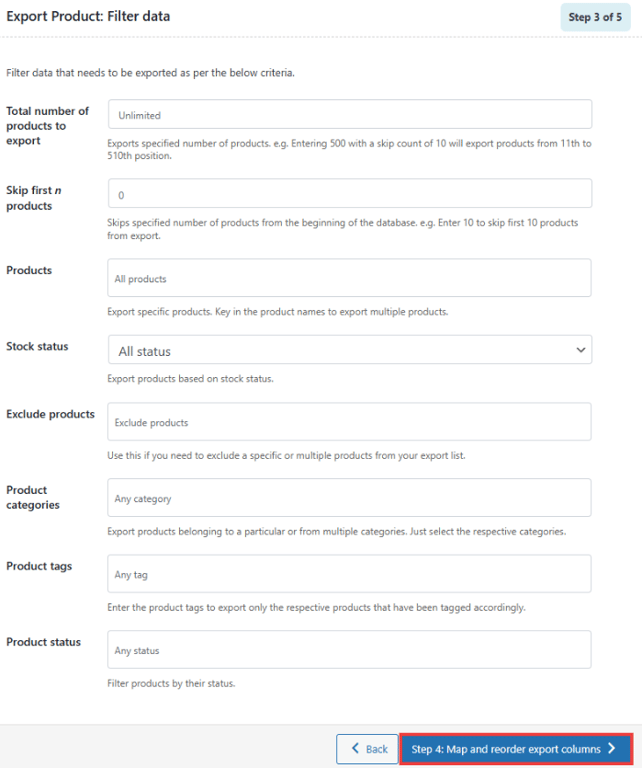
- If you prefer to use the advanced options, return to the second step and select Advanced export. Then click Filter data.

- Then, you can filter the data that the plugin includes in the export. You can customize it by product count, stock, categories, tags, and status, and choose to include or exclude specific products. You can even include or exclude specific products. Click Map and reorder export columns when you’re finished.
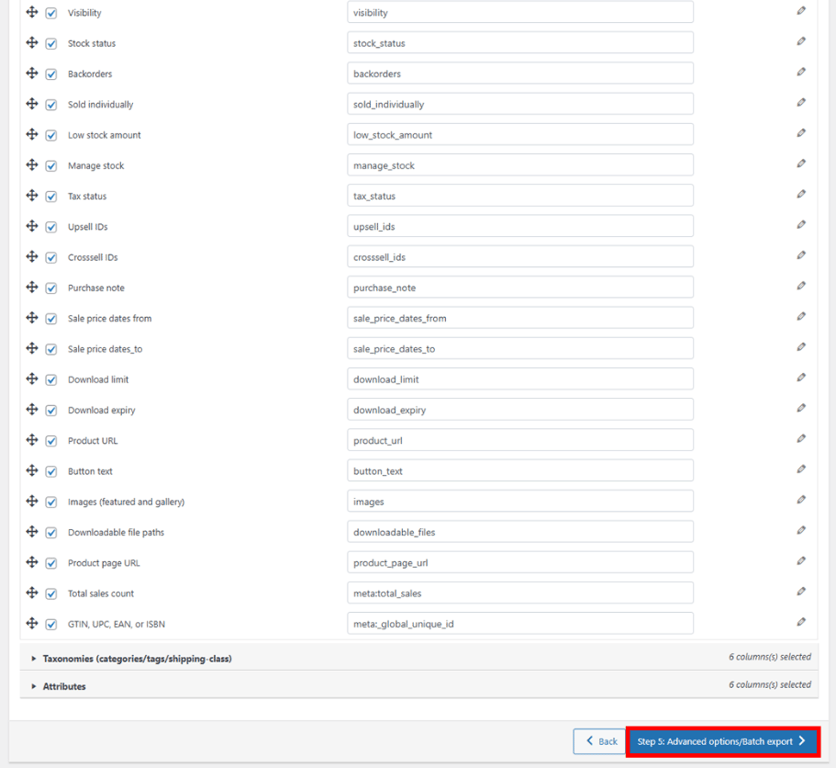
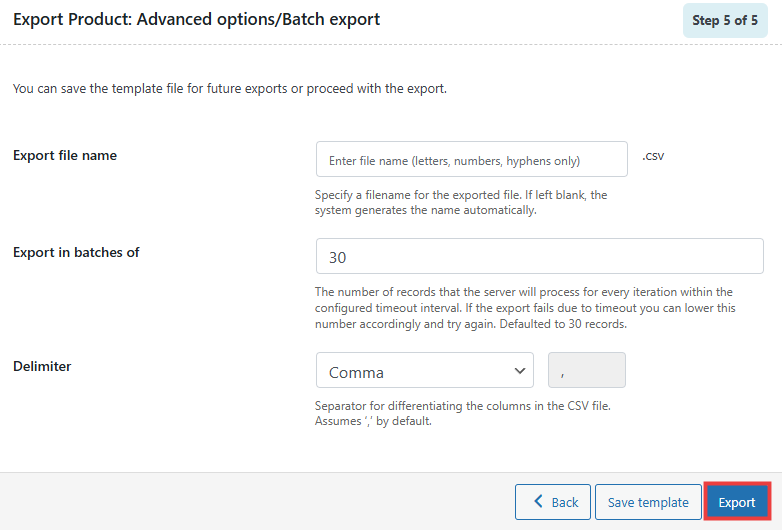
- Customize the export spreadsheet layout. Select which columns to include and drag and drop them into your preferred order. When you’re satisfied, click Advanced options/Batch export.
- Give the export file a name and decide how many records you want in each batch. Lowering the number of records will produce more batches, which reduces the chance of the export failing due to a timeout. Click Export to export your file.
- You’ll see a success message when the export is complete. Click Download file to download the CSV.


Conclusion
Exporting your WooCommerce products gives you complete control over your products. Whether you’re backing up your data, preparing for a migration, or updating products in bulk, having a clean export file gives you full control over your catalog.
The built-in WooCommerce tool is excellent for quick exports, but its features are limited. If you want complete control over the export file, you’ll need to use a third-party plugin with more advanced options like filtering, scheduling, and custom fields.
If you update your products regularly, exporting your product data can make the process easier and faster. Simply download the export file, make your changes in a spreadsheet, and then import it back to your WooCommerce store.
How to export WooCommerce products FAQ
How to export WooCommerce products from one website to another?
To export products from one WooCommerce site to another, use the built-in export tool to download your product data as a CSV file. Then go to the new site’s dashboard and use the WooCommerce import tool to upload the file. This transfers product details like titles, prices, SKUs, and categories.
What’s the difference between CSV and XML export formats?
CSV files are simple, spreadsheet-friendly formats made for bulk editing in tools like Excel or Google Sheets. XML files are more structured and are better suited for data exchange between platforms. CSV is easier to read and edit manually, while XML is often used for automated data processing.
Can I export customer data along with products from WooCommerce?
No, WooCommerce’s native export tool only handles product data. To export customer information, you’ll need a plugin designed for that purpose. WP All Export is a popular option that lets you export customer names, emails, purchase history, and more.
How do I export specific products from WooCommerce
?The built-in WooCommerce export tool doesn’t let you select individual products. To export specific items, you’ll need a plugin like WP All Import, CTX Feed Pro, Product CSV Import Suite, or Product Import Export. These tools let you apply advanced filters to choose individual products based on criteria like name, SKU, category, or stock status before generating the export file.
How do I back up my WooCommerce products?
You can back up your WooCommerce products by exporting them as a CSV file. Go to All Products → Export, select the data you want to include, and click Generate CSV. This gives you a downloadable copy of your product data that you can save and restore later if needed. You will also need to download all of the images from your WordPress Media Library.
All of the tutorial content on this website is subject to Hostinger's rigorous editorial standards and values.

Dennis Hammer is a content strategist, web developer, and WooCommerce store owner. He has extensive experience building and growing online stores for diverse audiences as well as crafting engaging and strategic storytelling content. Follow him on LinkedIn.


