Hostinger Mail allow and block lists control which senders each mailbox accepts incoming email from and which addresses it can send email to. Open Settings → Allow / Block Lists in Webmail, then add domains or email addresses to the allow list or block list in the Incoming mail or Outgoing mail section. The block list takes priority when an address appears on both lists.
Before you start
- Allow and block lists apply to each mailbox separately.
- In Webmail, you manage the lists of the mailbox you’re logged into. In Hostinger dashboard, you can manage the lists of any mailbox on your domain.
Open Allow / Block lists in Hostinger Mail Webmail
Hostinger Mail Webmail has a dedicated Allow / Block Lists page in its settings.
- Log in to Webmail for the mailbox you want to manage.
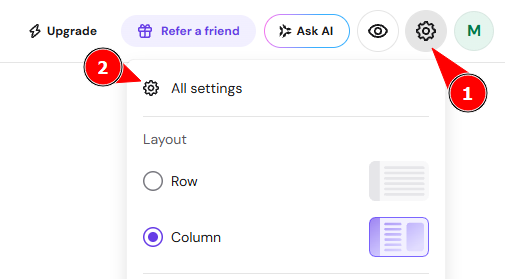
- Click Settings in the sidebar.
- Click All settings.

- Click Allow / Block Lists.
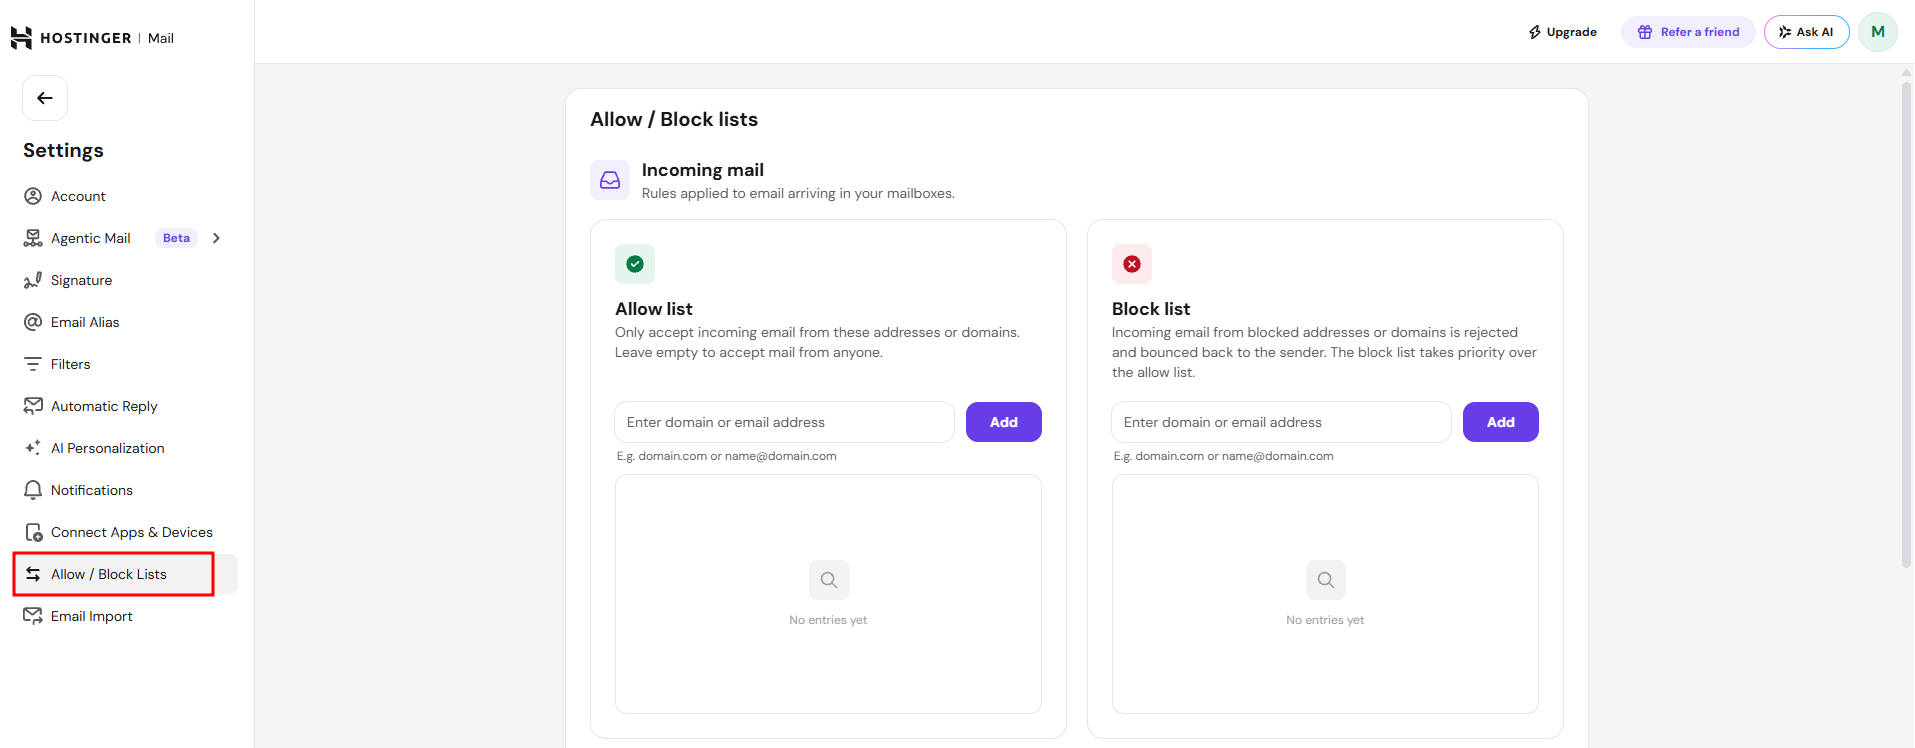
The Allow / Block lists page has two sections, Incoming mail and Outgoing mail. Each section has its own Allow list and Block list.
Allow or block incoming email in Hostinger Mail
The Incoming mail section controls which senders can deliver email to your Hostinger Mail mailbox. There are two incoming lists:
- Allow list – your mailbox only accepts incoming email from the addresses or domains on this list. Leave the list empty to accept email from anyone.
- Block list – incoming email from addresses or domains on this list is rejected and bounced back to the sender.
Adding even one entry to the incoming allow list stops your mailbox from accepting email from every sender that isn’t on the list.
To add a sender to an incoming list:
- In the Allow list or Block list field of the Incoming mail section, enter a domain, such as
domain.tld, or an email address, such asname.surname@email.tld. - Click Add.
The new entry appears in the list below the field.
Allow or block outgoing email in Hostinger Mail
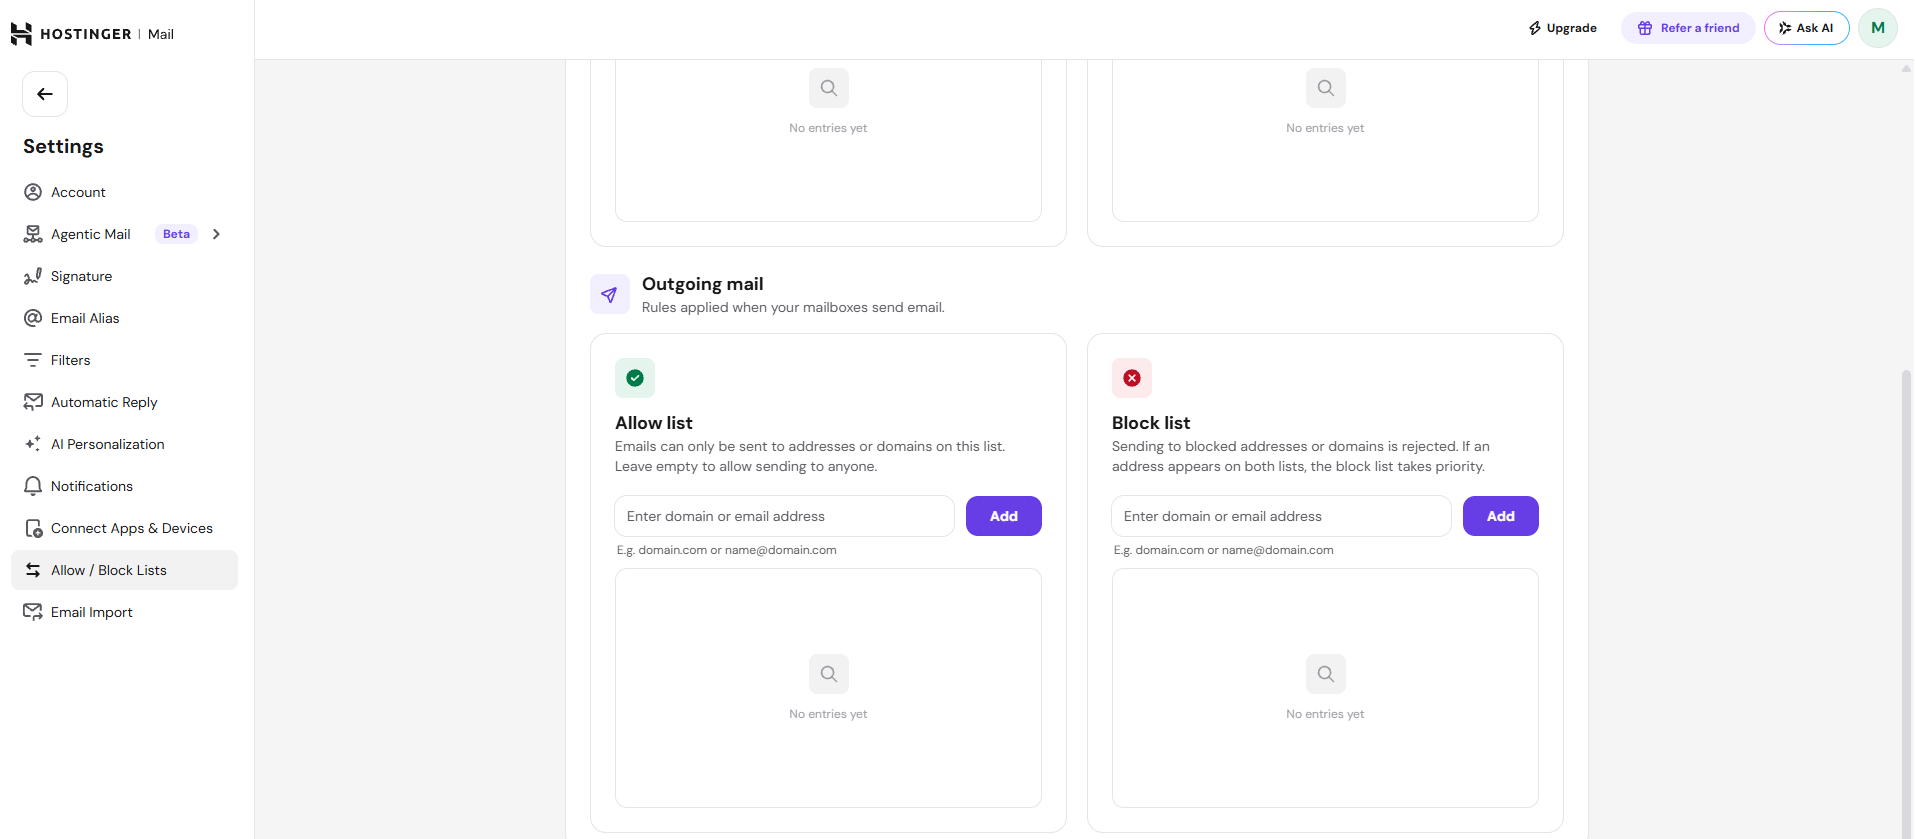
The Outgoing mail section controls which addresses your Hostinger Mail mailbox can send email to. There are two outgoing lists:
- Allow list – your mailbox can only send email to the addresses or domains on this list. Leave the list empty to send email to anyone.
- Block list – email sent to addresses or domains on this list is silently rejected. The recipient never receives it, and you don’t receive a bounce message.
To add a recipient to an outgoing list:
- In the Allow list or Block list field of the Outgoing mail section, enter a domain, such as
domain.tld, or an email address, such asname.surname@email.tld. - Click Add.
The new entry appears in the list below the field.
Block list priority in Hostinger Mail allow and block lists
The block list takes priority when an address or domain appears on both the allow list and the block list. Incoming email from that sender is rejected and bounced back. Outgoing email to that address is rejected.
With allow and block lists in place, you decide which senders reach your Hostinger Mail mailbox and which addresses your mailbox can send email to.
NOTE
- To move email from specific senders to the Spam folder instead of rejecting it, set up an email filter.