To set up a Hostinger GPU instance, follow a few simple configuration steps in Hostinger dashboard. The setup process involves selecting your hardware, configuring the instance details, adding account credits, and deploying the server.
Step 1 – Navigate to the GPU section
- Log in to your Hostinger dashboard and locate the Dev tools section on the side panel.
- Select the GPU option, which is located below the VPS menu.
- Click Get started in the overview area, or select a specific GPU directly from the available list.
Step 2 – Configure your GPU instance
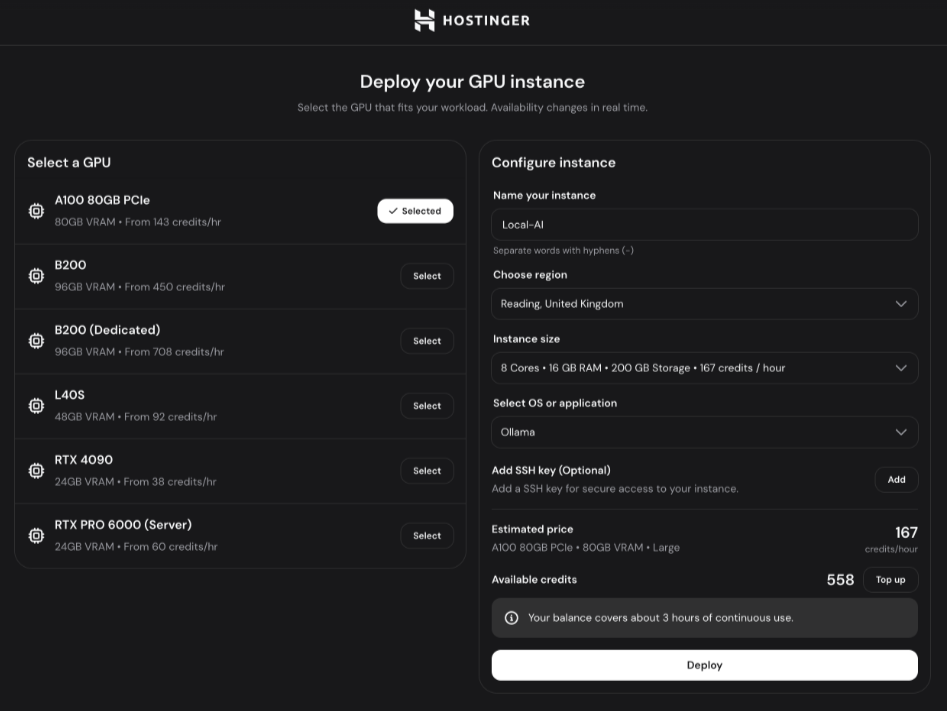
- Confirm that your desired GPU model is selected. If you’re not sure which one fits your workload, see how to choose the right GPU instance at Hostinger.
- Enter a descriptive name for your Hostinger GPU instance.
- Select your preferred region. Be aware that GPU availability may be limited in certain regions due to high demand.
- Choose the instance size that best fits your workload requirements.
- Select the operating system or application from the list. See how to choose a template for your Hostinger GPU instance for more on these options:
- Ubuntu 24.04
- Ollama
- JupyterLab
- Unsloth
- InvokeAI
Be aware that selection may be limited depending on your instance size.
- Add an SSH key if you prefer to use one for secure server access.
Step 3 – Top up your account credits
- Click Top up to add credits to your user account. One euro roughly equals 100 credits.
- Choose your required amount of Agent Credits and select a payment method.
- Follow the on-screen instructions to complete your purchase.
See how to manage billing and credits for your Hostinger GPU instance for more on how billing works.
Step 4 – Deploy the GPU
- Review the estimated continuous use time to ensure it meets your requirements.
- Click Deploy to initialize your new Hostinger GPU instance.

- A waiting screen appears to display the setup progress. The Hostinger GPU deployment process takes several minutes to complete.
- You can safely navigate away from the page while the GPU deploys.
Once the deployment finishes, a confirmation message appears on your screen. Click Manage to access your dashboard, connect to the GPU, and start your workload.
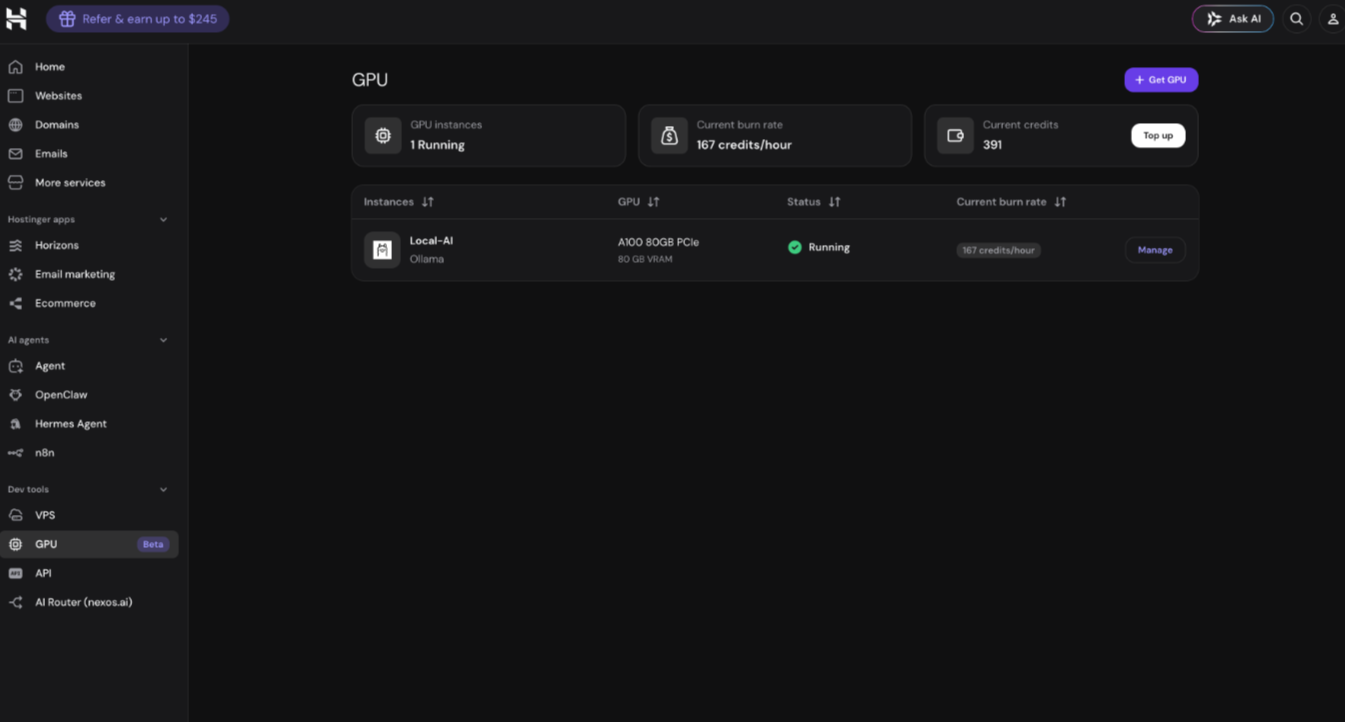
Unlike VPS plans, which run on a monthly contract, GPU instances are billed hourly on an on-demand basis using your account credits. If your credits run out, your GPU instance is destroyed. Make sure to keep enough credits topped up to avoid losing your instance and any data on it.
Once your GPU instance is running, see: