OpenClaw (formerly known as Moltbot/Clawdbot) is a personal AI assistant platform that runs on your own infrastructure. It allows you to interact with AI across multiple messaging channels, including WhatsApp, Telegram, Slack, and Discord. This guide explains how to deploy OpenClaw on a Hostinger VPS using the Docker template.
For a visual guide on the installation process, you can also watch the following video tutorial from the Hostinger Academy.
Choose the method that matches your current setup:
How to Deploy OpenClaw on a new Hostinger VPS
If you do not have a VPS yet, you can get a new Hostinger VPS one with OpenClaw pre-installed and follow the configuration steps after purchase.
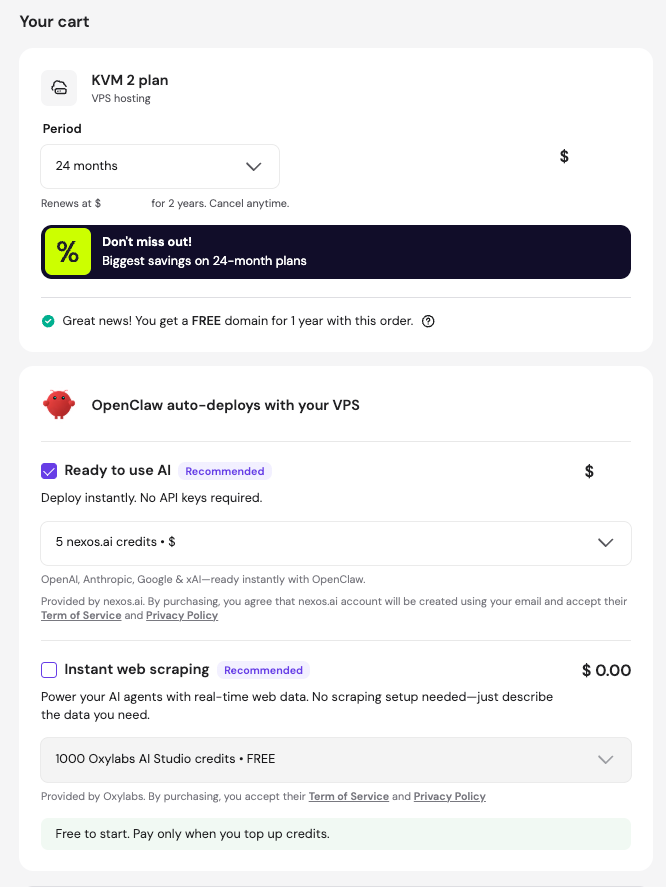
Step 1 – Get a new Hostinger VPS
- Go to the Hostinger VPS OpenClaw page.
- Select the VPS plan that fits your requirements. For OpenClaw, a KVM2 or greater is recommended.
- During checkout, the OpenClaw application will be pre-selected.
- Choose whether to include Nexos AI credits for easier model integration and Oxylabs credits for web search capabilities.
- Complete the purchase.
Step 2 – Configure environment variables
After completing the purchase, a configuration screen will appear for you to set up the environment variables. These are text-based configurations that define how your AI functions.
You have two options to set up the AI models: using Nexos AI credits or using your own API keys from supported third-party providers.
Option 1 – Using Nexos AI credits
If you have purchased Nexos AI credits, enter the following parameters:
- OPENCLAW_GATEWAY_TOKEN: This is auto-generated. Copy and save this token securely, as it is required to log in to your OpenClaw dashboard.
- WHATSAPP_NUMBER: Enter your WhatsApp number if you intend to use that channel.
Option 2 – Using third-party integrations
If you have your own API keys, enter the following parameters:
- OPENCLAW_GATEWAY_TOKEN: This is auto-generated. Copy and save this token securely, as it is required to log in to your OpenClaw dashboard.
- API Keys (Optional): Enter your keys for OpenAI, Anthropic, Gemini, or xAI in the corresponding fields.
- WHATSAPP_NUMBER: Enter your WhatsApp number if you intend to use that channel.
After entering the required parameters, click on Deploy to proceed with the installation. A Docker project is created automatically. This process may take several minutes. When finished, the OpenClaw application will appear with exposed ports available for access.
How to Deploy OpenClaw on an existing Hostinger VPS
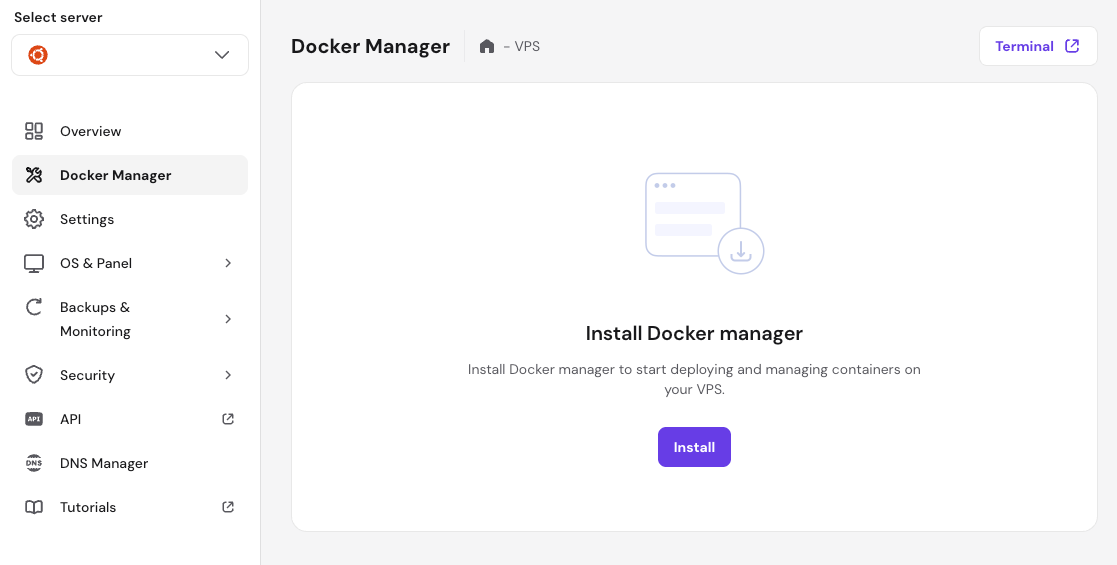
If you already have a Hostinger VPS, use the Docker Manager in hPanel.
Step 1 – Deploy OpenClaw from the Catalog
- Log in to hPanel and navigate to the VPS section.
- Click Manage next to your VPS server.
- Select Docker Manager from the left sidebar.
- If not already installed, click the Install button and wait 2–3 minutes.
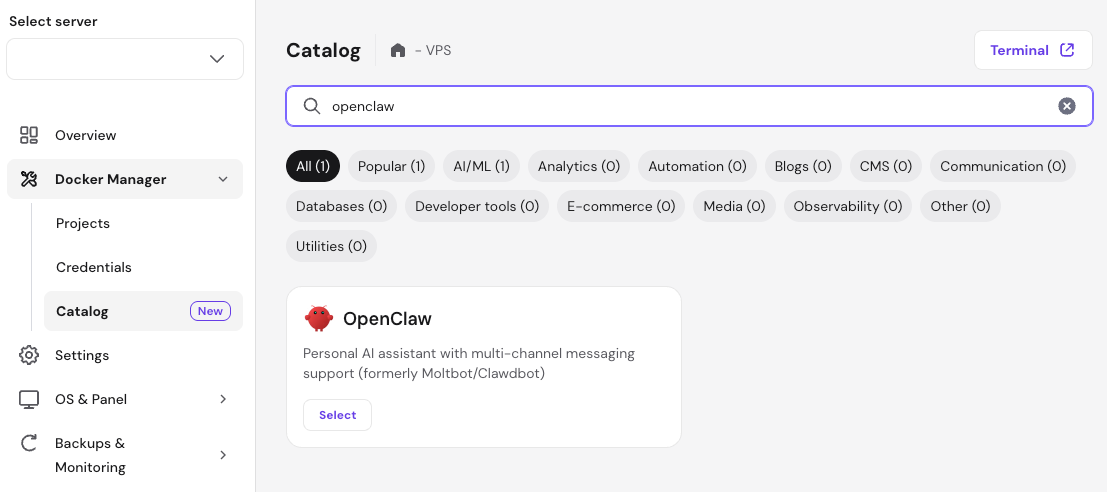
- Go to the Catalog tab and search for OpenClaw. Click Select.
Step 2 – Configure environment variables
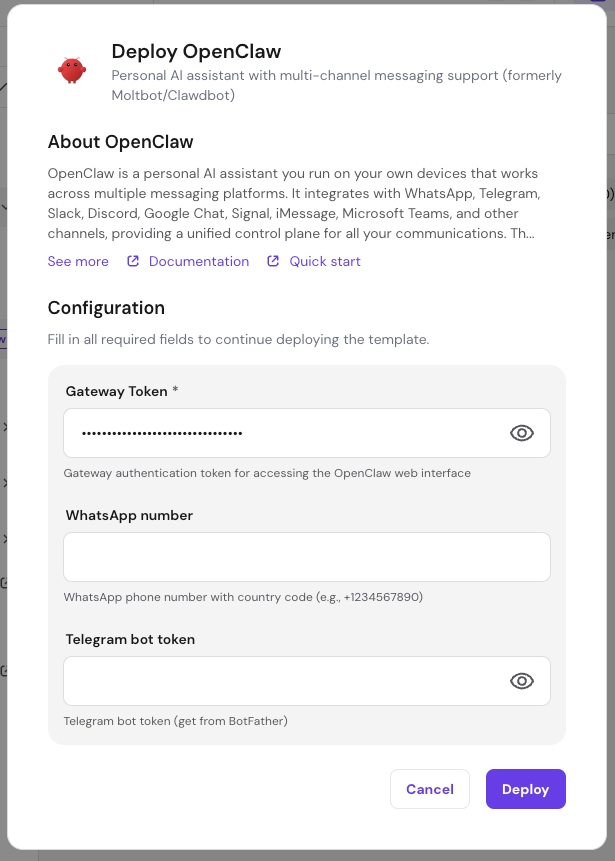
During deployment, you’ll be prompted to configure the following environment variables:
- Gateway token: This is auto-generated for you. This token will be used to access your OpenClaw web interface. Save this token securely for later use.
- WhatsApp number: Your WhatsApp number with country code to interact with OpenClaw.
- Telegram bot token (optional): The telegram bot token from BotFather.
- Additional API keys (optional)
- ANTHROPIC_API_KEY: Claude web session key for browser-based authentication
- OPENAI_API_KEY: Claude web cookie for session persistence
- GEMINI_API_KEY: Your Gemini API key for AI integration
- XAI_API_KEY: Your XAI API key for AI integration
You can leave the optional fields empty and configure them later if needed.
After adding these parameters, click on Deploy to continue. A Docker project is created automatically. This process may take several minutes. When finished, the OpenClaw application will appear with exposed ports available for access.
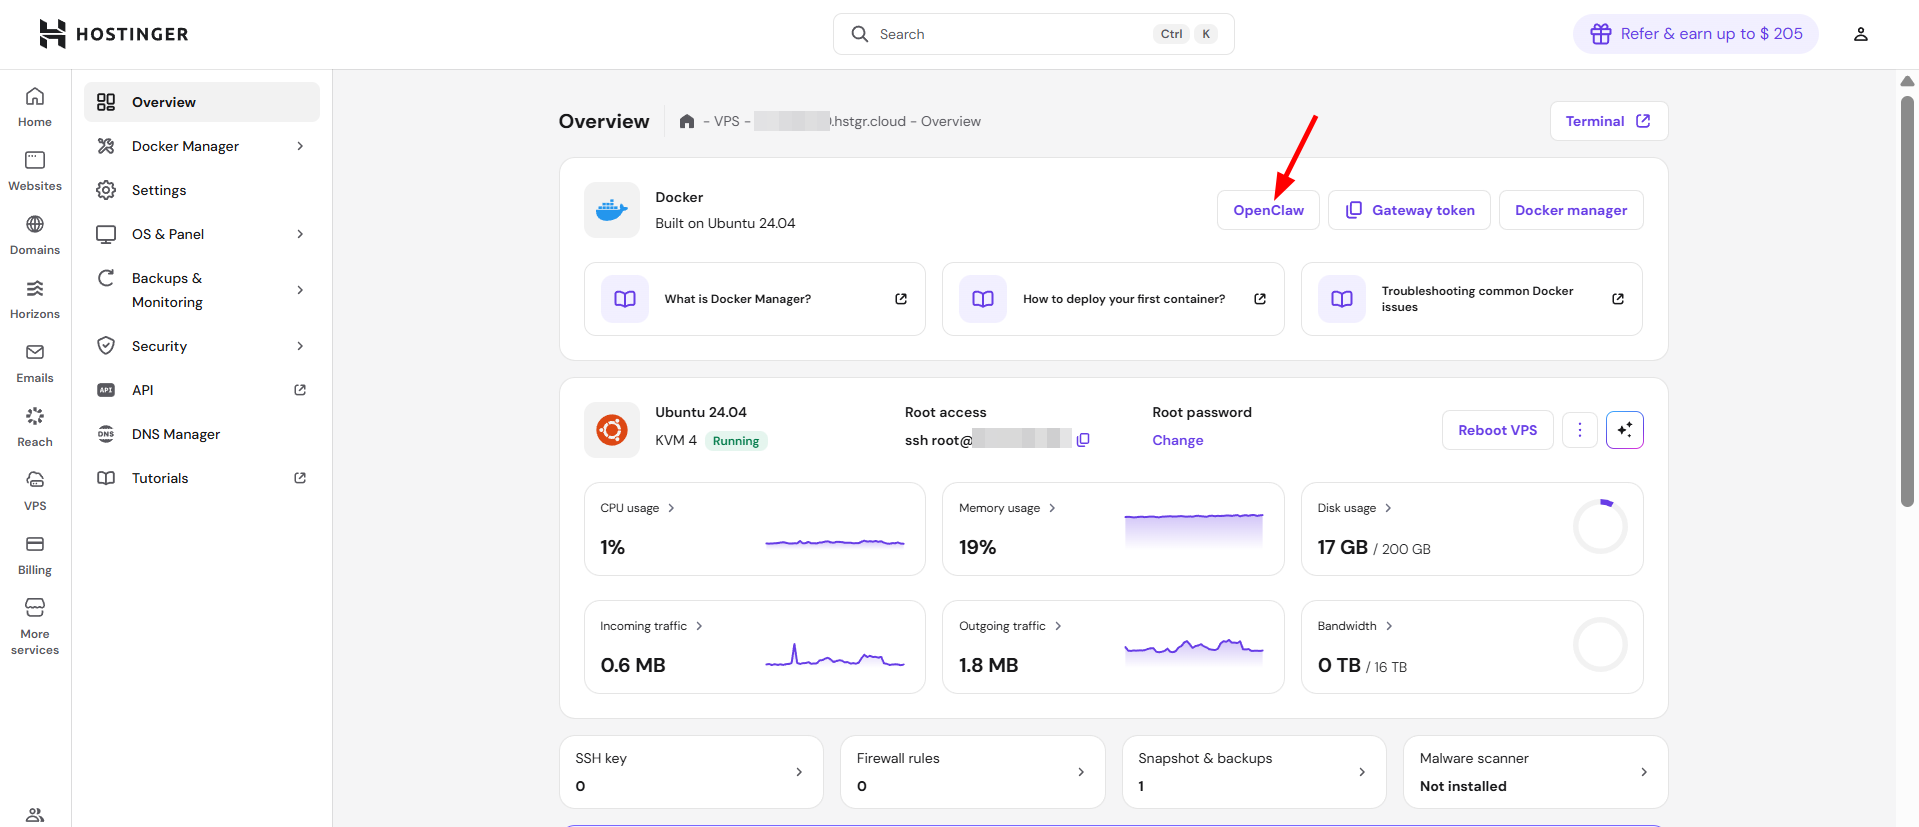
Accessing OpenClaw on your Hostinger VPS
Once deployed, there are two alternative methods to access your OpenClaw instance.
- From the Overview page of your VPS by clicking the OpenClaw button.
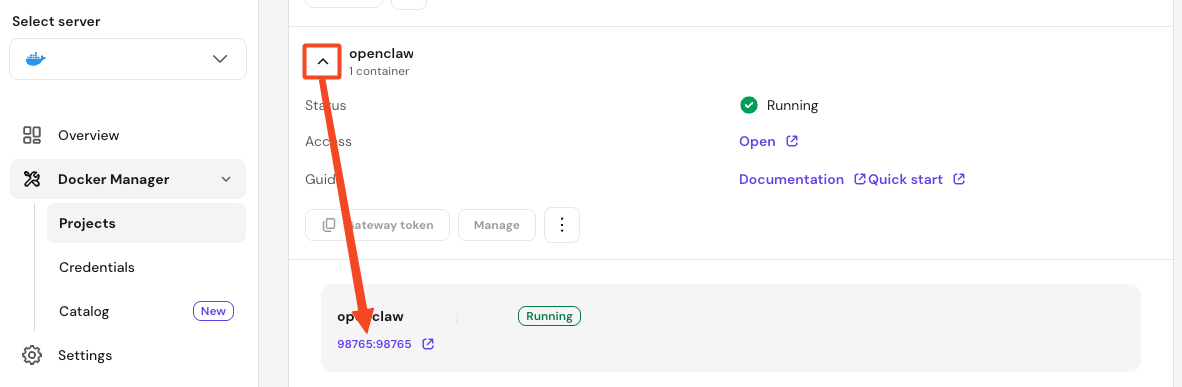
- From the Docker Manager Projects page, click on the arrow next to your OpenClaw project to show the assigned port number for the web interface. You can either use that port to open your project on a browser tab with the following URL:
http://your-vps-ip:port, or by pressing on the port in the project.
Once on the OpenClaw interface, enter your OPENCLAW_GATEWAY_TOKEN and click Login.
NOTES
-
If you lose your token, go to the Projects section, click Manage on your OpenClaw project, and find the value under Environment.
- To fix the
control ui requires device identity (use HTTPS or localhost secure context)message and access OpenClaw over HTTPS, refer to this guide: How to add SSL to OpenClaw on Hostinger.
Connect messaging channels
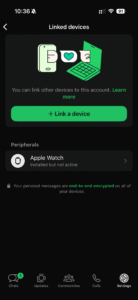
To link OpenClaw to WhatsApp:
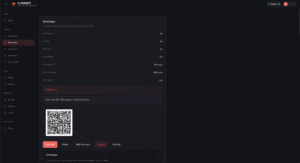
- In the OpenClaw dashboard, go to Channels and select Show QR.
- Open WhatsApp on your phone and navigate to Settings → Linked devices.
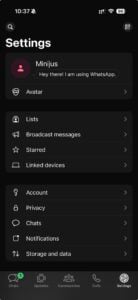
- Tap Link a device and scan the QR code displayed on your screen.
If you get a “WhatsApp login failed: status=515 Unknown Stream Errored (restart required)” error, go back to Settings → Config and press on Update on the right upper corner. Get back to the Channels page to confirm that the connection is successful.
Managing your OpenClaw VPS instance
You can manage your OpenClaw instance using the Docker Manager.
View Logs
- Go to Docker Manager → Projects.
- Select your OpenClaw project.
- Click on the options button (⋮) → View logs.
Update OpenClaw
- Navigate to your OpenClaw project in Docker Manager.
- Click on the options button (⋮) → Update.
- Docker will pull the latest image and restart your container.
After completing these steps, OpenClaw is now installed and running on your Hostinger VPS. Next, you can start interacting with your OpenClaw instance using WhatsApp, connect other messaging channels and set up automated workflows using the skills platform.
NOTES
- Always keep your API keys and Gateway Token private to ensure the security of your VPS. Never share these publicly or commit them to version control.
- For further details on securing your OpenClaw VPS, refer to this guide: How to secure and harden OpenClaw on a Hostinger VPS.
- If you prefer a faster OpenClaw implementation and a managed infrastructure, we recommend exploring our 1-Click OpenClaw option and the 1-Click OpenClaw setup guide.