Create a dynamic image gallery for your Hostinger AI Builder agentic mode website, managed directly from the Data tab. This setup works well for portfolios, product showcases, or event photos. New images you add in Test data appear on your live website when you publish. Edit images that are already on your live website in Live data.
Step 1 – Prompt AI Builder to create the gallery
In the Hostinger AI Builder chat, use a specific prompt to generate the gallery structure and the backend collection.
- Open the Hostinger AI Builder chat interface.
- Enter a prompt that defines both the design and the data source, such as: “Create a photo gallery section on my homepage. Store the gallery images in a data collection called “Gallery”. Each entry should have an image field and an optional caption field. Display the images in a grid layout. The gallery should automatically show all images added to the Gallery collection”
Step 2 – Access the Data tab
Once Hostinger AI Builder builds your gallery, you must access the data to manage the content.
- Open your project in Hostinger AI Builder.
- Click the Data toggle at the top of the preview screen.
- Locate the Gallery collection in the left panel.
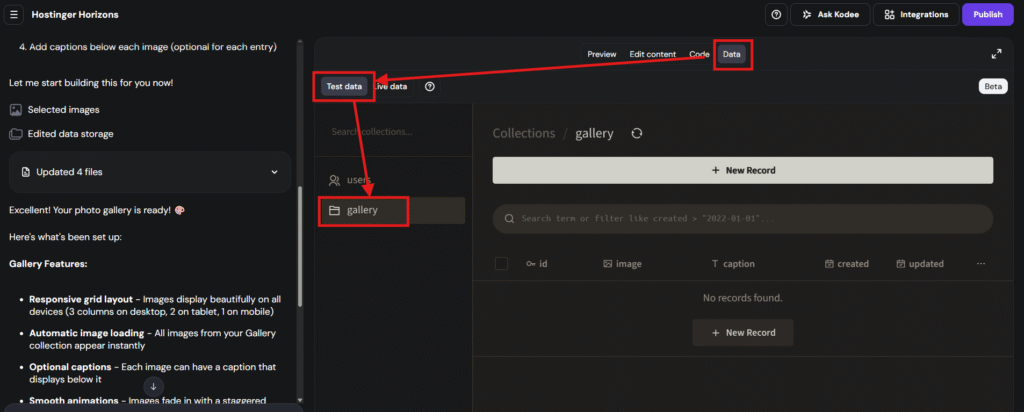
Step 3 – Add images to the gallery
You can now populate your gallery without editing the website design.
- Select the Gallery collection and click Add record.
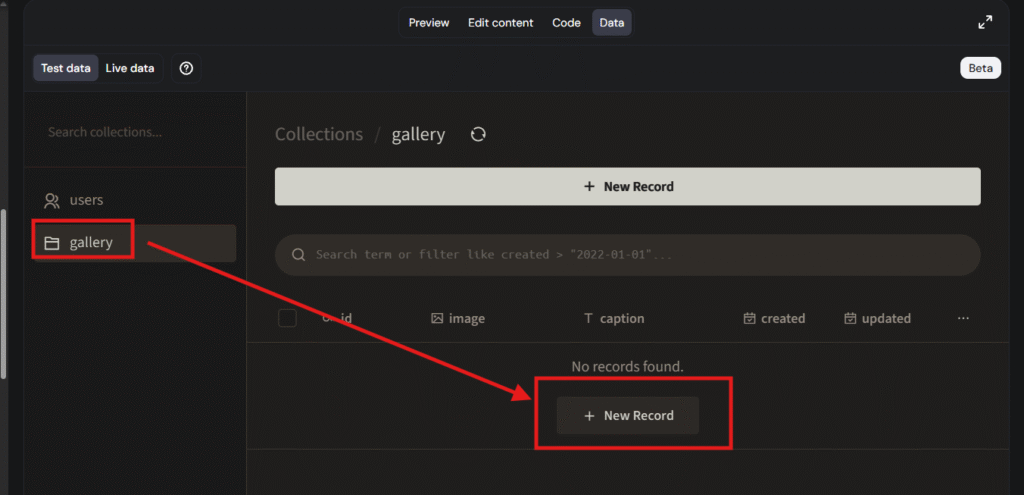
- Upload your file in the image field.
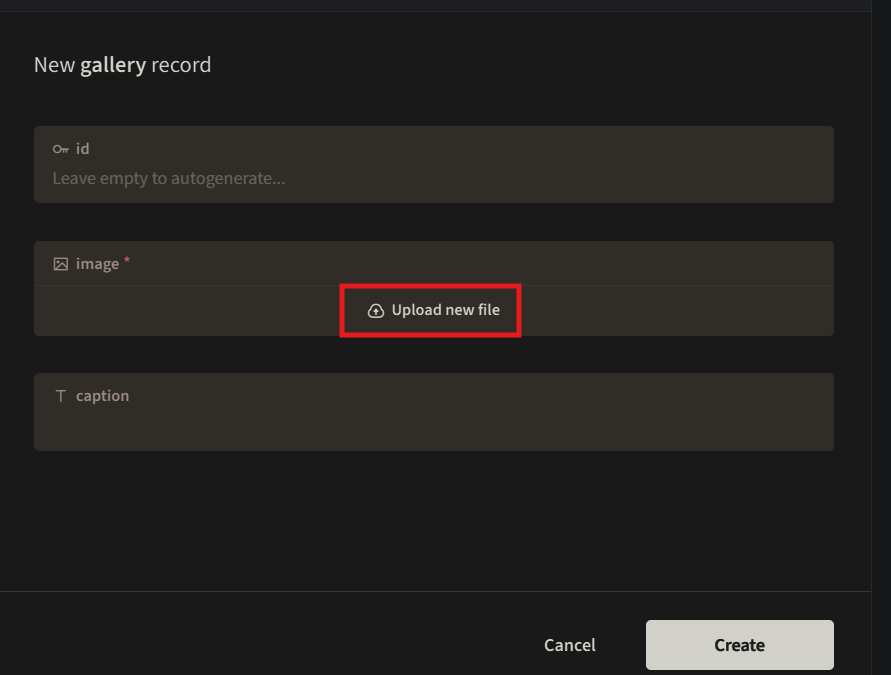
- Add a caption in the caption field if desired.
- Click Create.
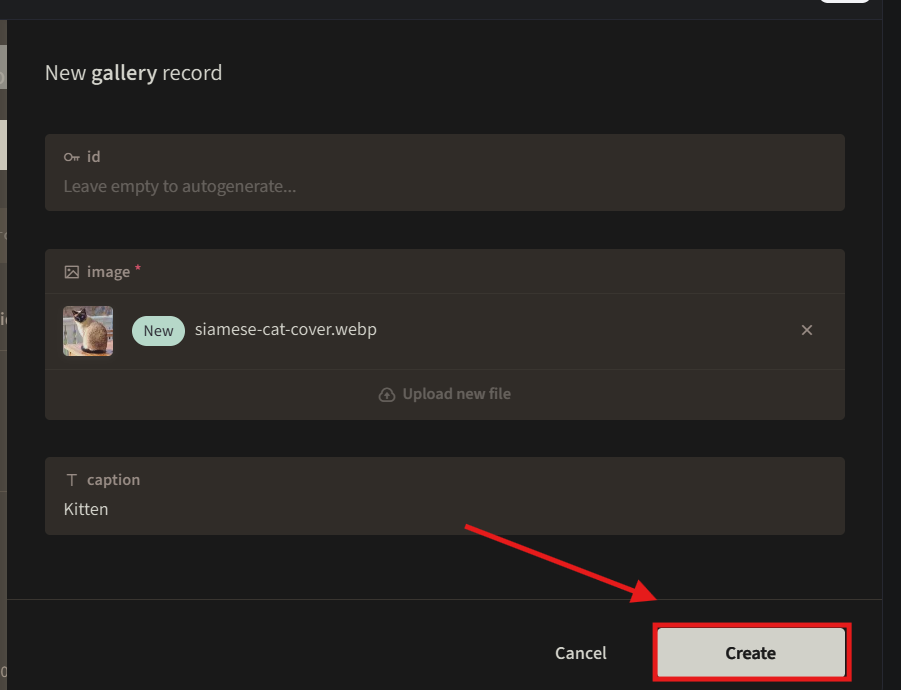
- Repeat these steps for each photo you wish to display.
Step 4 – Edit or remove gallery images
Manage your existing records to keep your gallery up to date.
- Replace an image: Click the specific record, update the image field, and save the changes.
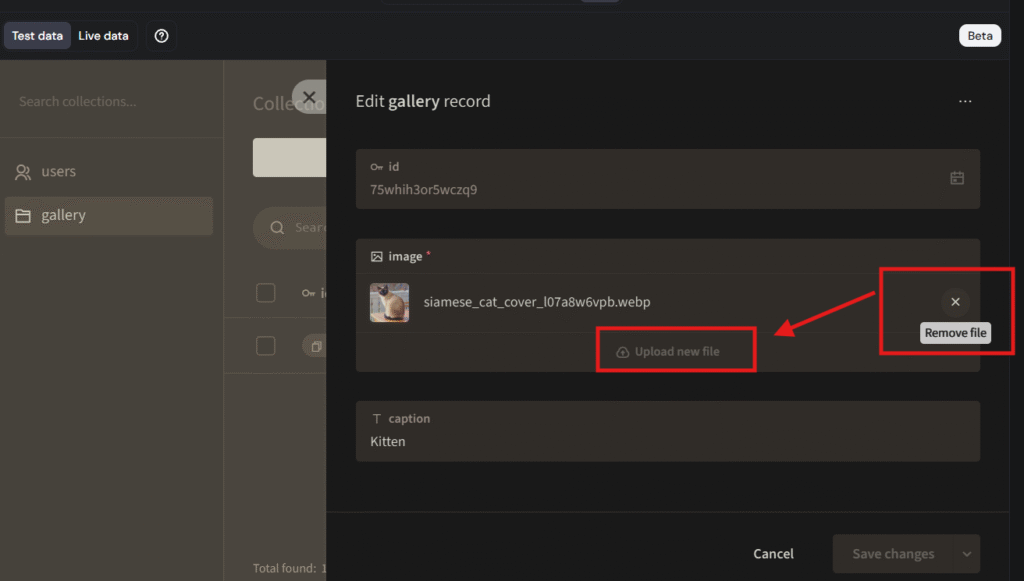
- Delete an image: Select the image and click “Delete selected”.
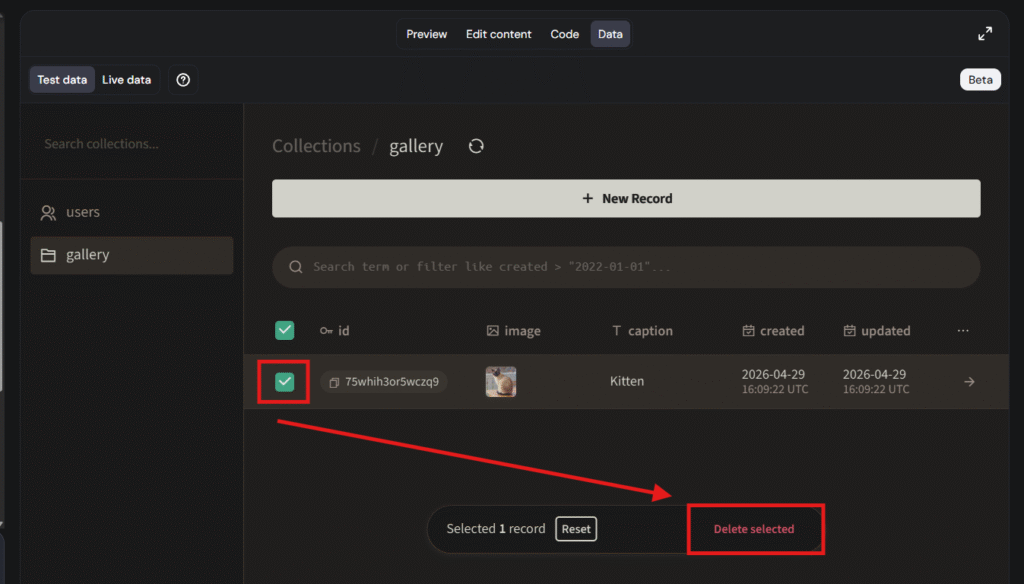
Publish your changes to add new gallery images to your live website. Your image gallery is now fully functional and easy to update.
NOTES
- Publishing copies new gallery images from Test data to Live data. Edits and deletions you make in Test data aren’t copied to Live data. To change an image that is already on your live website, edit the record in Live data. Learn more about how to use test and live data in agentic mode.
- If you also want to connect external services to your project, such as payment processors or APIs, see how to use integrations in agentic mode.