Custom contact fields in Reach allow you to store additional information about your contacts beyond the default fields. They help you organize your audience better, personalize campaigns, and create more targeted segments for your email marketing.
What are contact fields?
Reach includes several default contact fields:
- Email address
- First name
- Last name
- Phone number
- Note
However, sometimes you may want to store more information about your contacts, for instance:
- City or location
- Age
- Job title
- Newsletter preference
- Company name
This is where custom fields become useful.
Custom fields allow you to collect, import, and manage additional contact information inside Reach.
Why use custom fields?
Custom fields help you:
- Store more detailed customer information
- Import full contact data you have on your CSV file
- Collect additional information through Reach signup forms
- Create more advanced audience segments
- Send more personalized email campaigns
This can improve campaign relevance, reduce unsubscribe rates, and increase engagement.
How to create a custom field
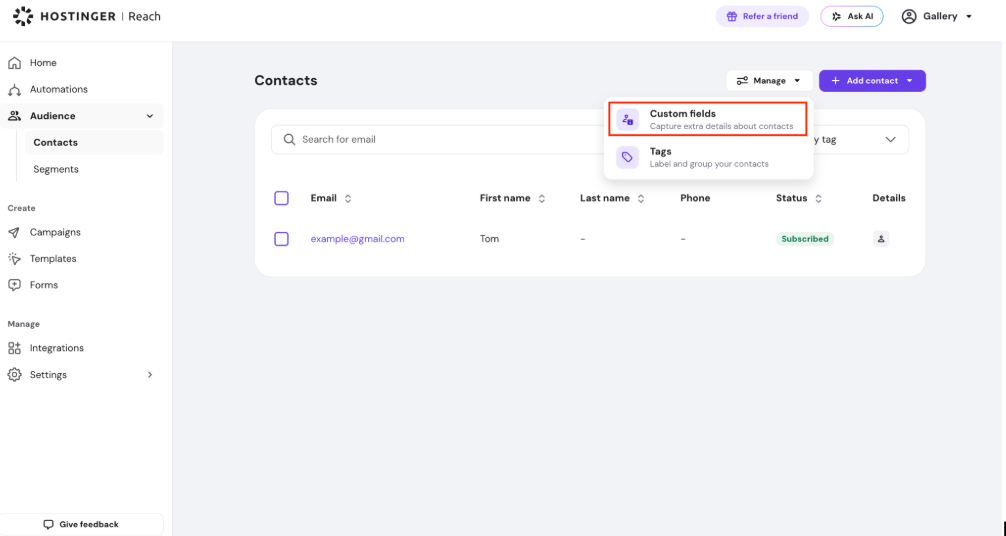
To navigate to custom fields management in Reach:
- Log in to your Reach dashboard
- Go to Audience
- Click Contacts
- Open Manage
- Select Custom fields
Then, to create a new field:
- Click to create a new custom field
- Enter a field name (for example: Job Title)
- Choose a field type
Tip: Field types help ensure that the data collected is consistent and accurate. For example, choosing the number field type for age helps avoid text data saved and have consistently formatted information.
- Save the custom field

Managing custom fields
After creating a custom field, you can:
- Edit the field name
- Delete the field if no longer needed

Created custom fields are also visible in contact details and can be updated manually at any time.

[Coming Soon] How custom fields can be used in your signup forms?
Custom fields you create can also be added to Reach forms.
For example, you may want subscribers to choose how often they want to receive newsletters:
- Weekly
- Monthly
You can create a single choice custom field called Newsletter Preference and add it to your signup form. Once subscribers submit the form, their preference is automatically saved to their contact profile in Reach.
To collect custom field data automatically through forms:
- Go to Forms in your Reach dashboard
- Create or edit a form

- Select your custom field from the form fields in the Manual editor

- Publish the form on your website

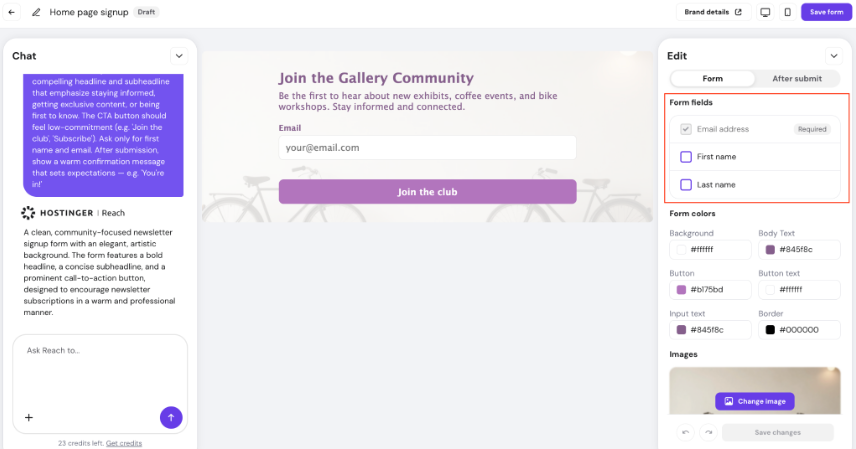
When users submit the form, the information is automatically synced in Reach.
How custom fields can be imported from CSV file?
When uploading a contact list via CSV, you may already have extra information about your contacts apart from default contact fields in Reach.
During the CSV import process, Reach allows you to:
- Map existing columns to Reach fields
- Create new custom fields directly during import
- Import all additional data together with your contacts
After importing, you can use this information for segmentation and campaign targeting.
Example
If you import a Country custom field, you can later:
- Create segments for contacts from different countries
- Send localized campaigns
- Promote region-specific offers
Creating custom fields during CSV import
You can also create custom fields directly while importing contacts.
To do this:
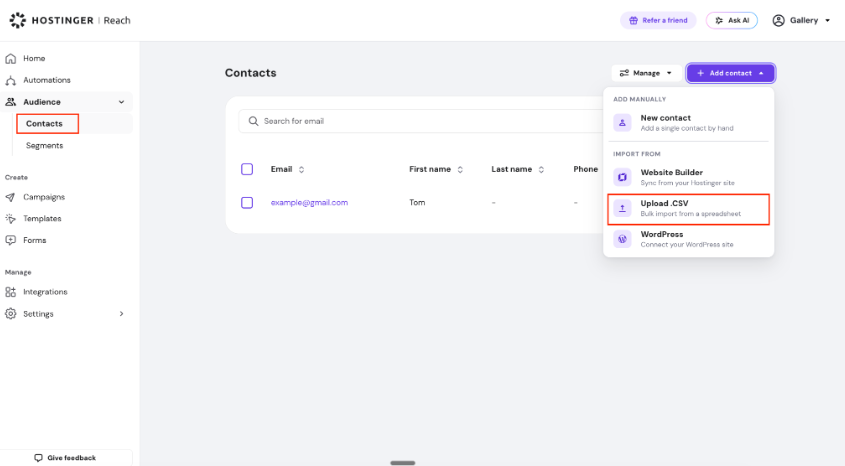
- Go to Audience
- Select Contacts
- Click Add contact
- Choose Upload .CSV

- Select your file

- In the Map columns step, identify which fields can already be mapped

- In Map Columns step for custom field, select Create custom field

- When the columns are mapped, move to the next steps and upload your contacts.


Segmenting contacts using custom fields
Once custom field data is collected, you can create advanced audience segments.
To create a segment:
- Go to Audience
- Select Segments
- Create a new segment
You can then:
- Use AI-generated segment rules
- Create conditions manually
- Filter contacts based on any custom field


Examples include:
- Contacts from a specific country
- Subscribers with weekly newsletter preference
- Contacts whose job title contains certain keywords
You can also combine multiple conditions to create highly targeted audiences.
Summary
Custom fields help you enrich your contact database and create more personalized marketing experiences.
With custom fields, you can:
- Store additional customer information
- Import detailed contact data from CSV files
- Collect more data through forms
- Build smarter audience segments
- Send more targeted campaigns
Using custom fields effectively can improve engagement, campaign performance, and overall email marketing results.