OpenClaw supports custom AI providers beyond the default options. This article explains how to add OpenRouter and Kimi (Moonshot) models to your OpenClaw installation on Hostinger VPS.
NOTE
- You need an API key from your chosen provider before starting.
- OpenClaw must already be installed on your VPS.
Adding OpenRouter models
OpenRouter gives you access to multiple AI models through a single API.
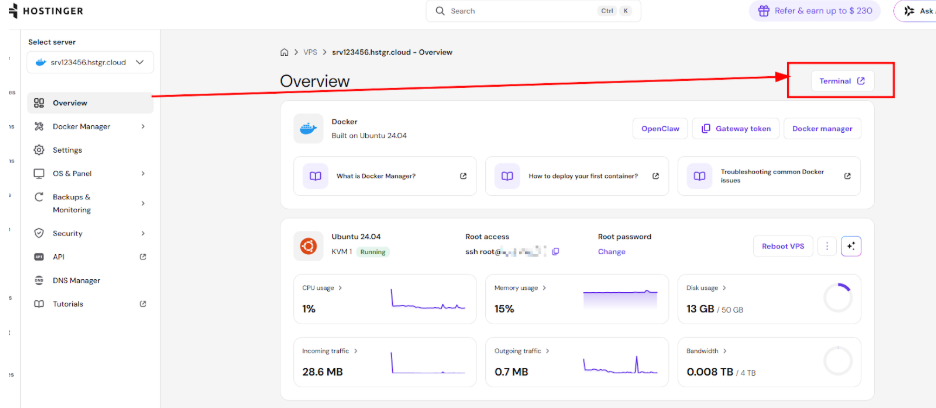
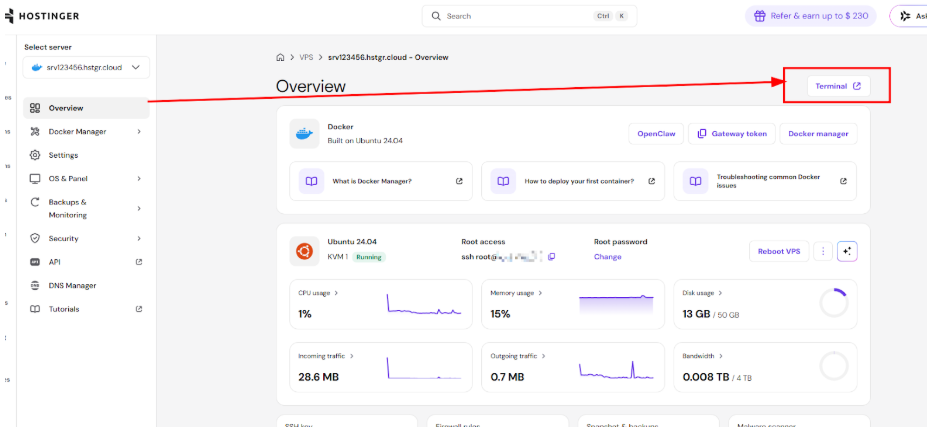
Step 1 – Connect to your VPS
Access your VPS via SSH or use Browser terminal in hPanel.
Step 2 – Enter the OpenClaw container
Run the following command, replacing openclaw-XXXX-openclaw-1 with your actual container name:
docker exec -it openclaw-XXXX-openclaw-1 bashStep 3 – Run the onboard command
Inside the container, run:
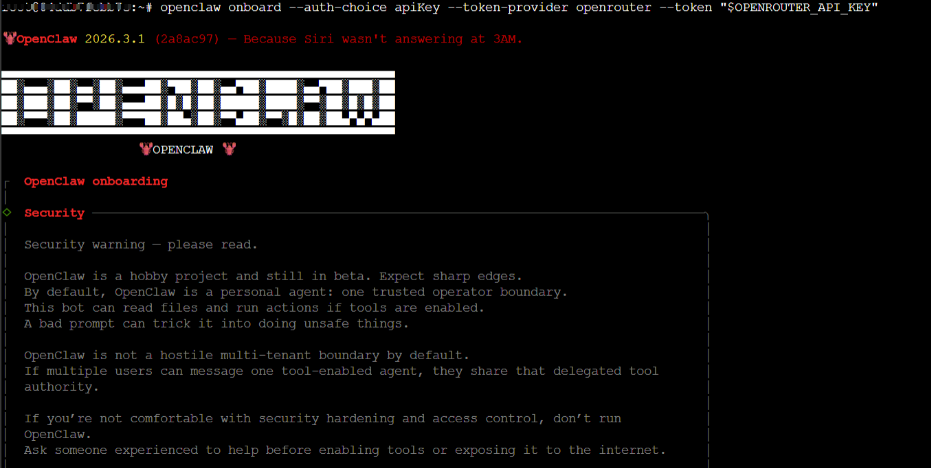
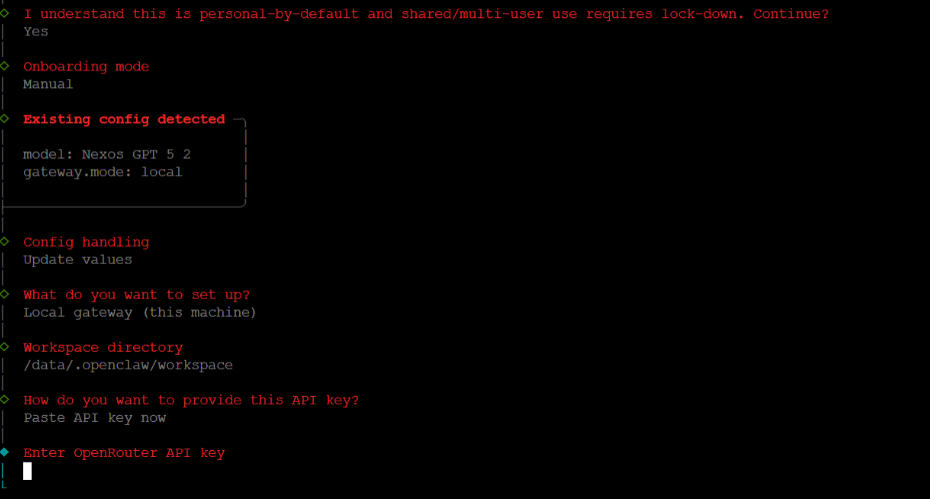
openclaw onboard --auth-choice apiKey --token-provider openrouter --token "$OPENROUTER_API_KEY"Replace $OPENROUTER_API_KEY with your actual OpenRouter API key.
Step 4 – Exit and restart the container
Exit the container:
exitRestart the container to apply changes:
docker restart openclaw-XXXX-openclaw-1Step 5 – Select the model in OpenClaw
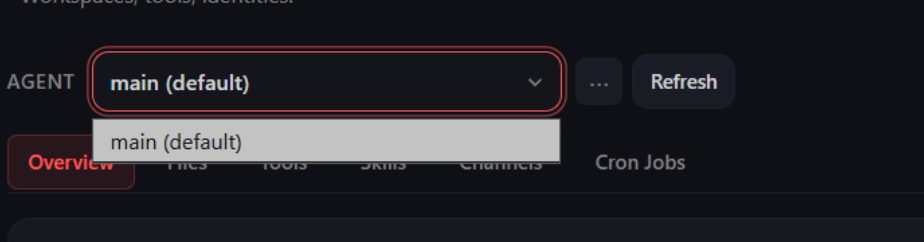
- Open the OpenClaw dashboard.
- Go to Agents in the left sidebar.
- Select your agent (for example, main).
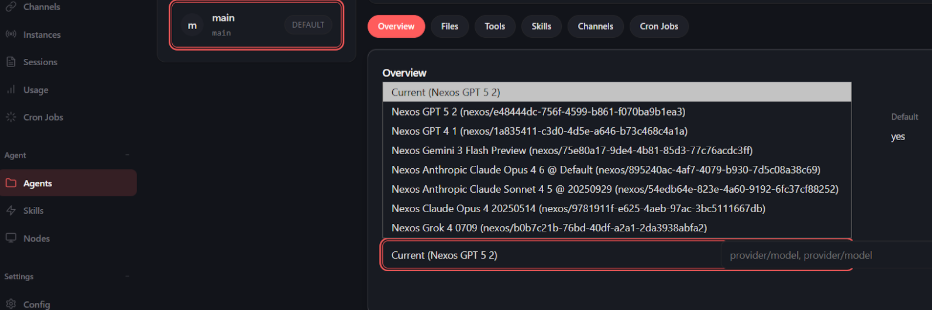
- In the Overview tab, find Model Selection.
- Click the Primary model (default) dropdown and select your OpenRouter model.
Adding Kimi (Moonshot) models
Kimi is an AI model from Moonshot AI.
Step 1 – Connect to your VPS
Access your VPS via SSH or use Browser terminal in hPanel.
Step 2 – Enter the OpenClaw container
Run the following command, replacing openclaw-XXXX-openclaw-1 with your actual container name:
docker exec -it openclaw-XXXX-openclaw-1 bashStep 3 – Run the onboard command
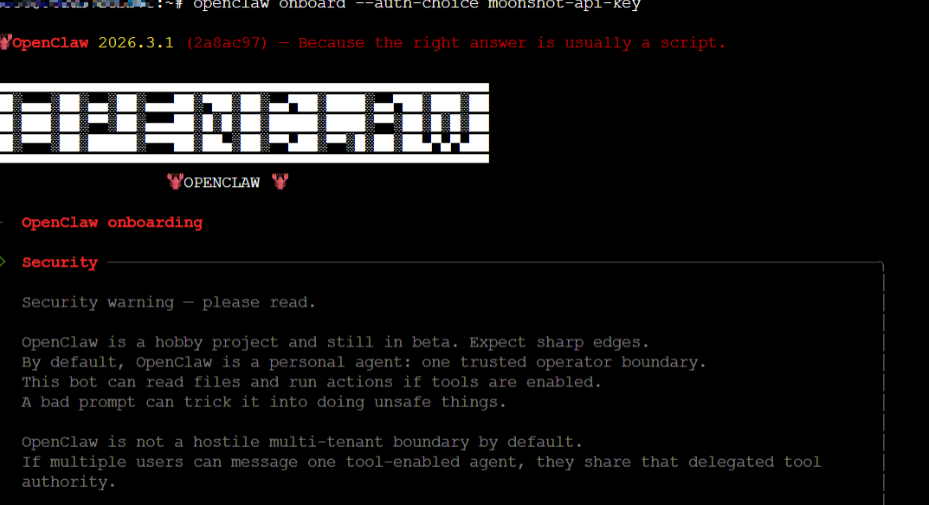
Inside the container, run:
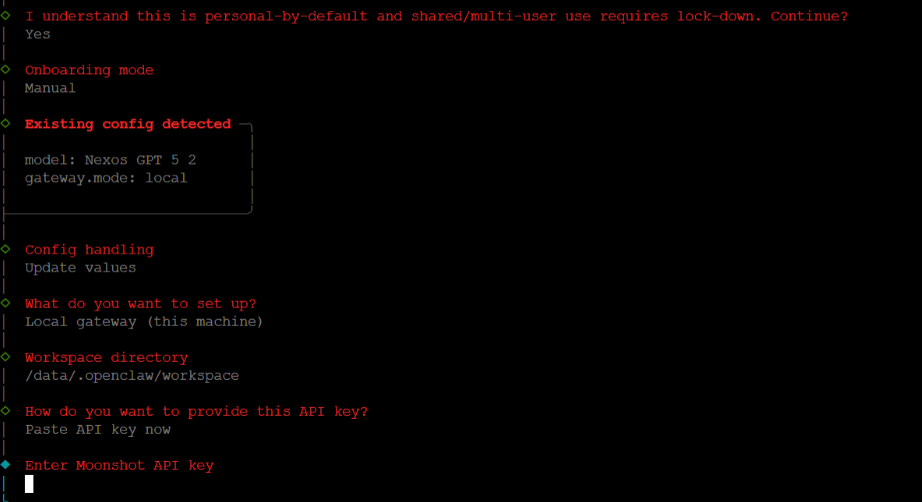
openclaw onboard --auth-choice moonshot-api-keyFollow the prompts to enter your Moonshot API key.
Step 4 – Exit and restart the container
Exit the container:
exitRestart the container to apply changes:
docker restart openclaw-XXXX-openclaw-1Step 5 – Select the model in OpenClaw
- Open the OpenClaw dashboard.
- Go to Agents in the left sidebar.
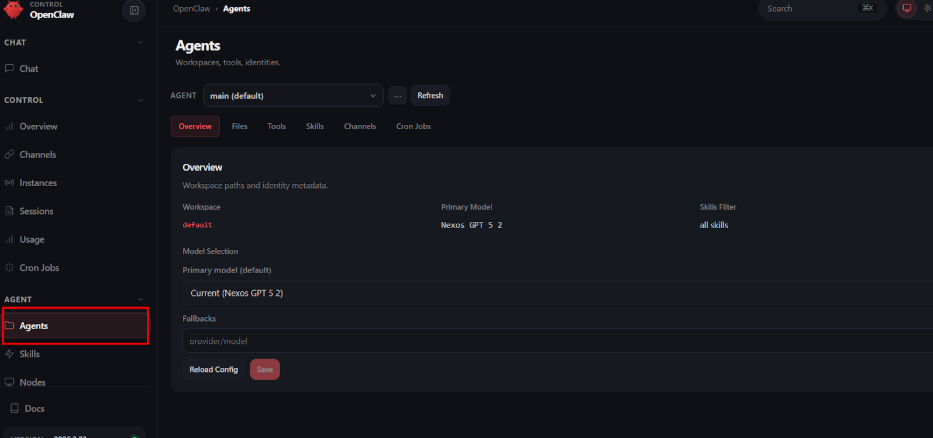
- Select your agent (for example, main).
- In the Overview tab, find Model Selection.
- Click the Primary model (default) dropdown and select your Kimi model.
You have successfully added a custom provider to OpenClaw. Your new models are now available for use with your agents.
Adding other providers
OpenClaw supports additional providers such as Ollama, OpenAI, Anthropic, Google Gemini, and more. Each provider has its own onboard command and configuration options. For the full list of supported providers and their setup instructions, refer to the OpenClaw providers documentation.