With the Hostinger AI Website Builder for WordPress, you can launch a fully functional, customized website in minutes. This tool uses a conversational interface to understand your brand and automatically configures your theme, colors, and content.
See how to build a WordPress website using Hostinger’s AI tools:
Step 1 — Choose the AI Generation Flow
When adding a new WordPress website to your hosting plan, the AI Website Builder launches automatically. You’ll be taken directly to the setup where you can describe your site idea and choose your editor.
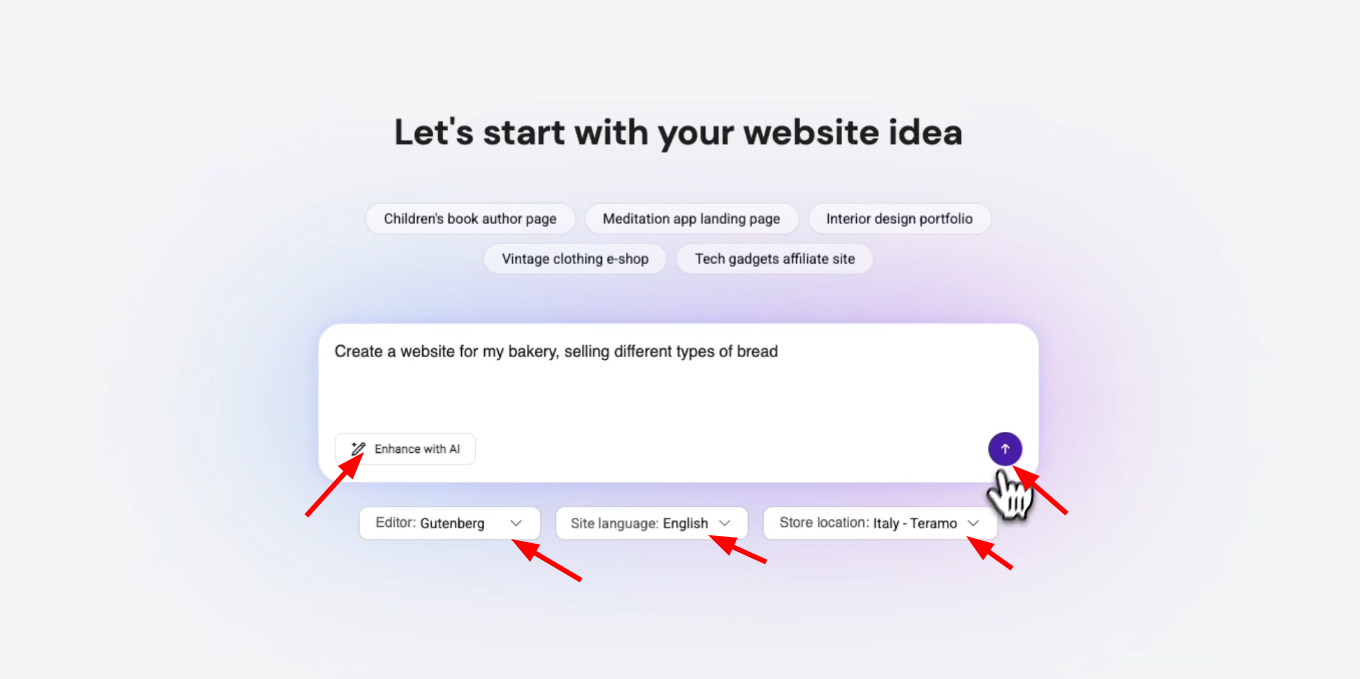
Step 2 — Provide Your Website Idea
Once the AI flow is active, you need to define the purpose of your site:
- Describe your idea: Enter a description of what you want your website to be (e.g., “A bakery website selling different types of bread”).
- Enhance with AI (Optional): Click the Enhance with AI button to automatically expand your prompt into a more detailed description for higher-quality results.
- Choose your Editor: Select Gutenberg or Elementor as your preferred page builder from the dropdown menu.
- Set Language and Location: Select your Site language — all WordPress-supported languages are available for the generated site. Store location (only needed for online stores) is now automatically detected from your billing country, though you can still change it manually.
- Submit: Click the arrow icon to proceed.
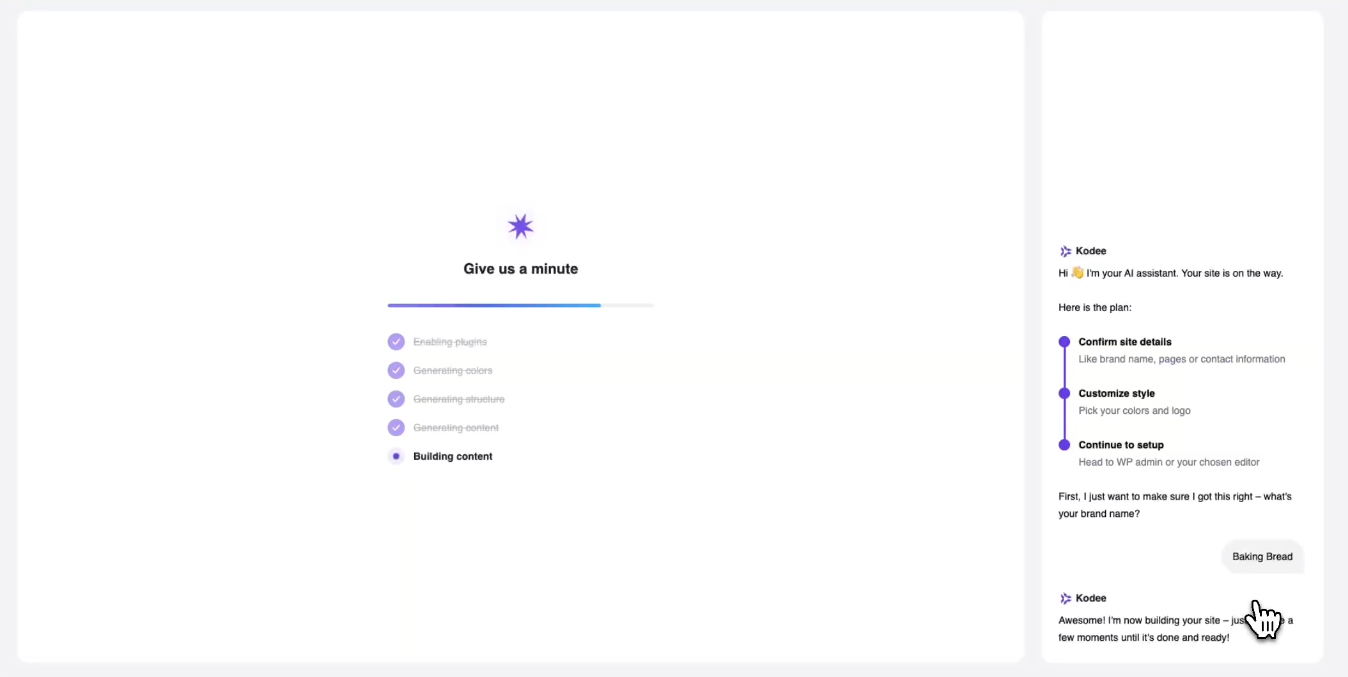
Step 3 — Chat with Kodee (AI Assistant)
A conversational interface will open to collect your brand requirements.
- Confirm Brand Name: Kodee will ask for your brand name. Type it in the chat box and send.
- Wait for Generation: The AI will begin enabling plugins and generating your site structure, colors, and content. You can track the progress on the “Give us a minute” screen.
Step 3b — Review Page Structure (optional)
Before generation begins, Kodee presents the AI-suggested page list for your review.
You can:
- Add pages you need
- Remove pages you don’t want
- Rename any page
- Reorder pages to match your preferred structure
Once satisfied with the page list, confirm to proceed with generation. This step reduces the need to restructure the site after it is built.
Step 3c — Add Contact Info and Social Links (optional)
Kodee will then optionally ask for your contact details and social media presence:
- Contact information: Provide an email address, phone number, and physical address.
- Social media links: Add your Facebook, Instagram, and TikTok, using either a username or a full URL.
- WhatsApp button: Choose whether to add a WhatsApp chat button to your site.
All fields here are optional, you can skip any of them. Whatever you provide is automatically used to populate the footer and relevant contact/location blocks across your site, so there’s no need to manually edit these sections in WordPress afterward.
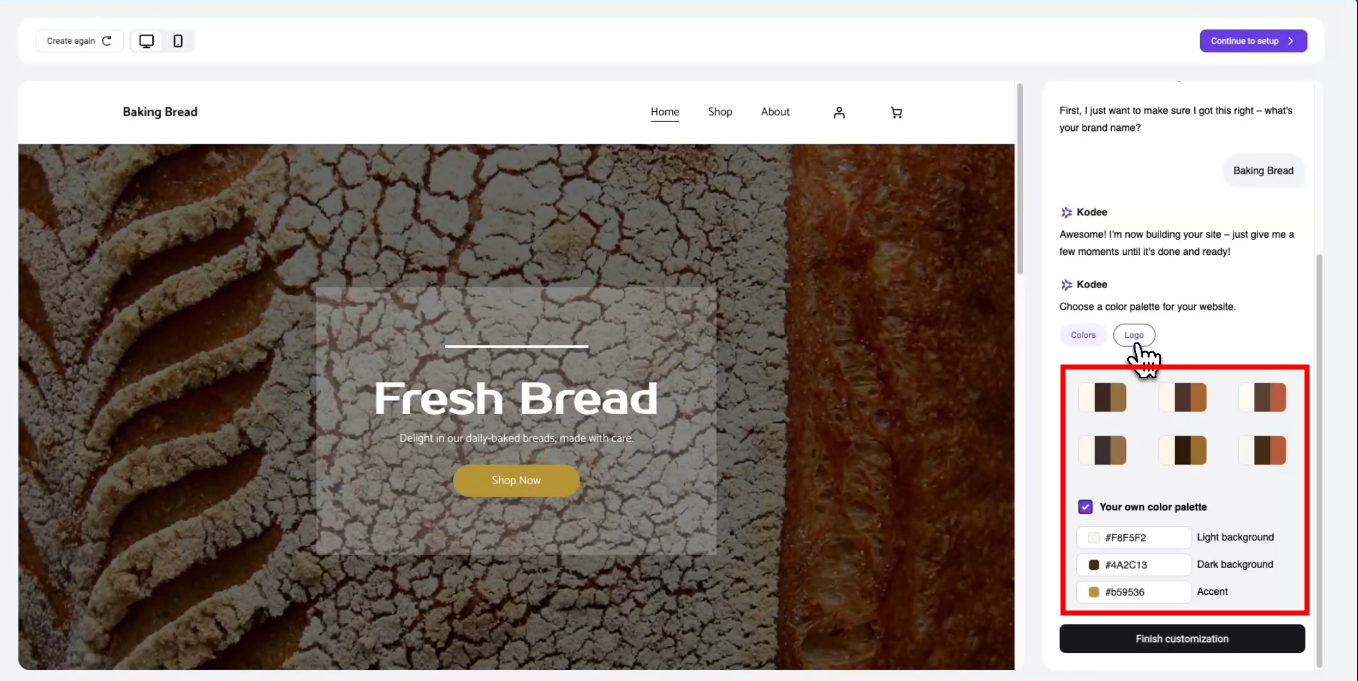
Step 4 — Customize Your Style
Once the initial site preview loads, you can fine-tune your visual identity:
- Color Palettes: Choose from several AI-generated color schemes. Selecting a palette applies it globally across your theme to ensure visual uniformity.
- Custom Colors: If you have specific brand colors, check the Your own color palette box to use a hex code color picker for light, dark, and accent colors.
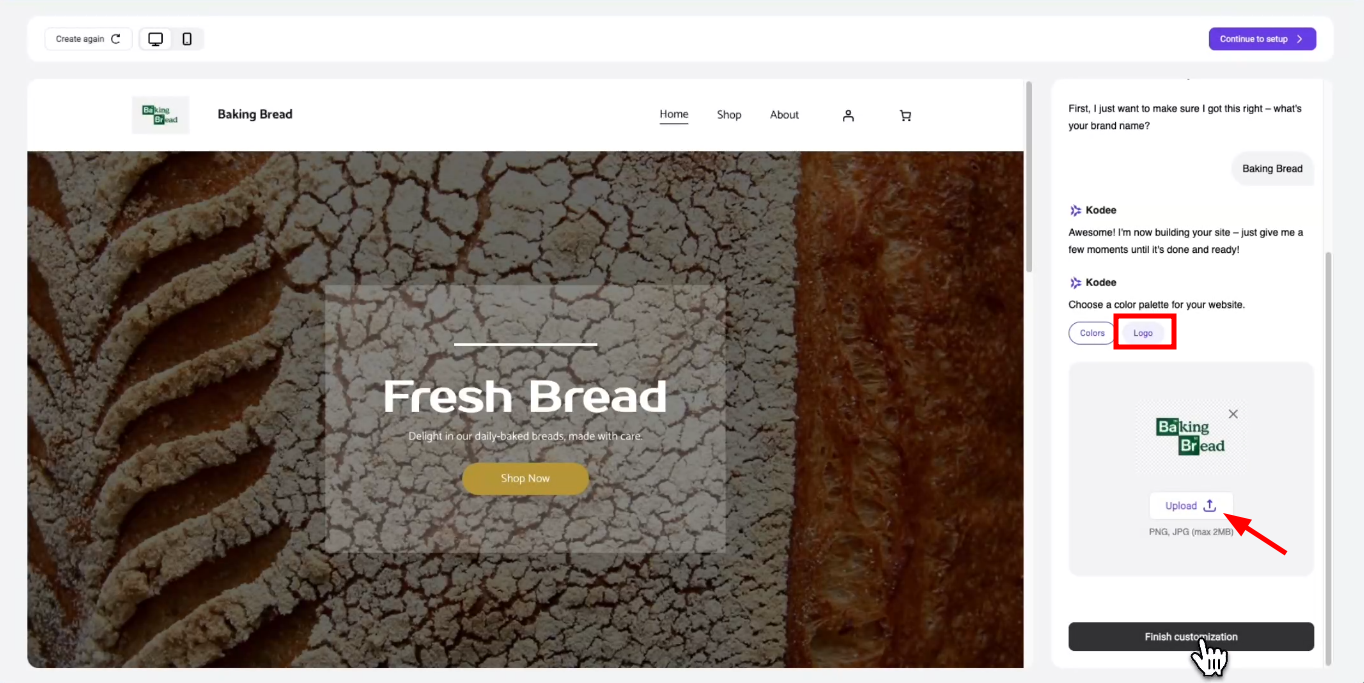
- Logo Upload: Switch to the Logo tab in the customization panel to upload your brand logo (PNG, JPG, max 5MB). This is automatically injected into your WordPress site title and header.
- Font Pairing: The AI suggests font combinations tailored to your website type. You can also select your own fonts manually during the building process.
Step 5 — Preview and Finish
Before finalizing, ensure the site looks great on all screens:
- Viewport Toggle: Use the viewport icons at the top-left of the preview window to switch between Desktop, Tablet, and Mobile views — so you can check responsiveness across all three breakpoints.

- Zoom In/Out: Use the zoom controls in the preview to get a closer look at specific sections or a full-page overview of how your site looks.
- Finalize: If you are happy with the preview, click Finish customization.
- Setup WordPress: Click Setup in WP admin to be redirected to your WordPress dashboard, where your new site is ready for management.
- AI-powered font pairing — the AI suggests font combinations tailored to your site type; you can also pick fonts manually.
- Zoom in preview — zoom in and out of the site preview for a detailed or full-page view.
- Tablet preview — tablet size is now available alongside desktop and mobile in the preview.
- New Elementor sections — new pre-built sections available: hero for online stores (×6), hero for portfolio (×5), services (×2), projects (×1), contact us (×1), product categories (×3), and newsletter subscription (×1).
Improvements
- Mobile-optimized builder UI — the builder works smoothly from a mobile device.
- Auto-detection of store location — your WooCommerce store location is automatically detected from your billing country, reducing setup friction.
- Expanded language support — all WordPress-supported languages are now available for generated sites, not just those supported in hPanel.
- Localized date/time format — generated sites automatically apply the correct date and time format based on your selected locale.
- Smarter image & video selection — improved media selection logic with better contextual awareness for more relevant visuals per site.