At Hostinger, all our hosting plans include free SSL certificates for all of your websites. Lifetime SSL is automatically installed as soon as you add a website, create a subdomain, or park a domain.
If you have purchased an SSL certificate from another provider, you can easily use it by following the steps below.
The below-given instructions don’t apply to sites created with Hostinger Website Builder because it doesn’t support custom SSL 💡
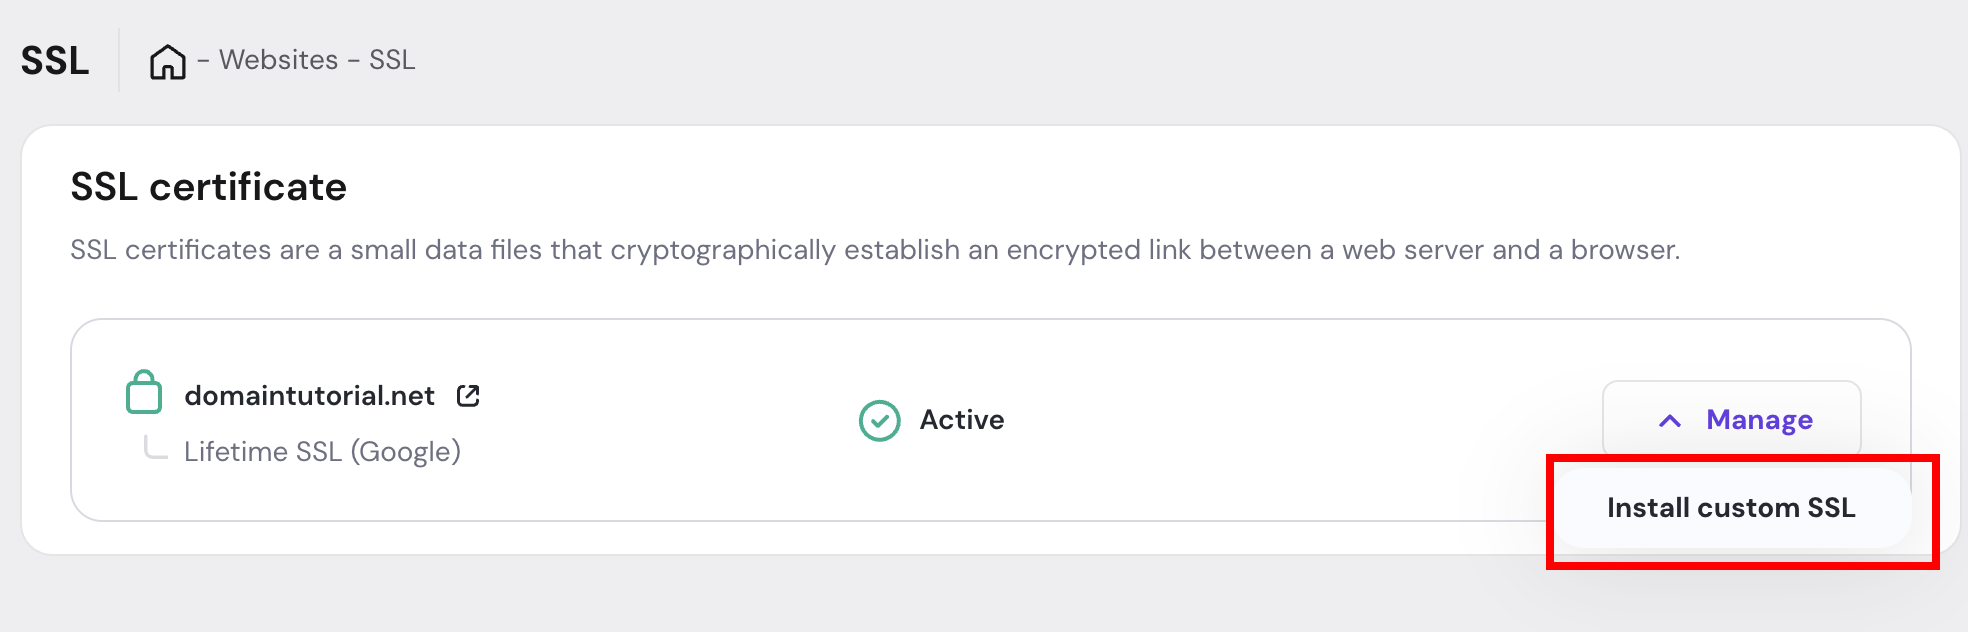
- Go to your website dashboard
- Locate Security section on the left side menu
- Select SSL
- Click Manage and then select “Install custom SSL”

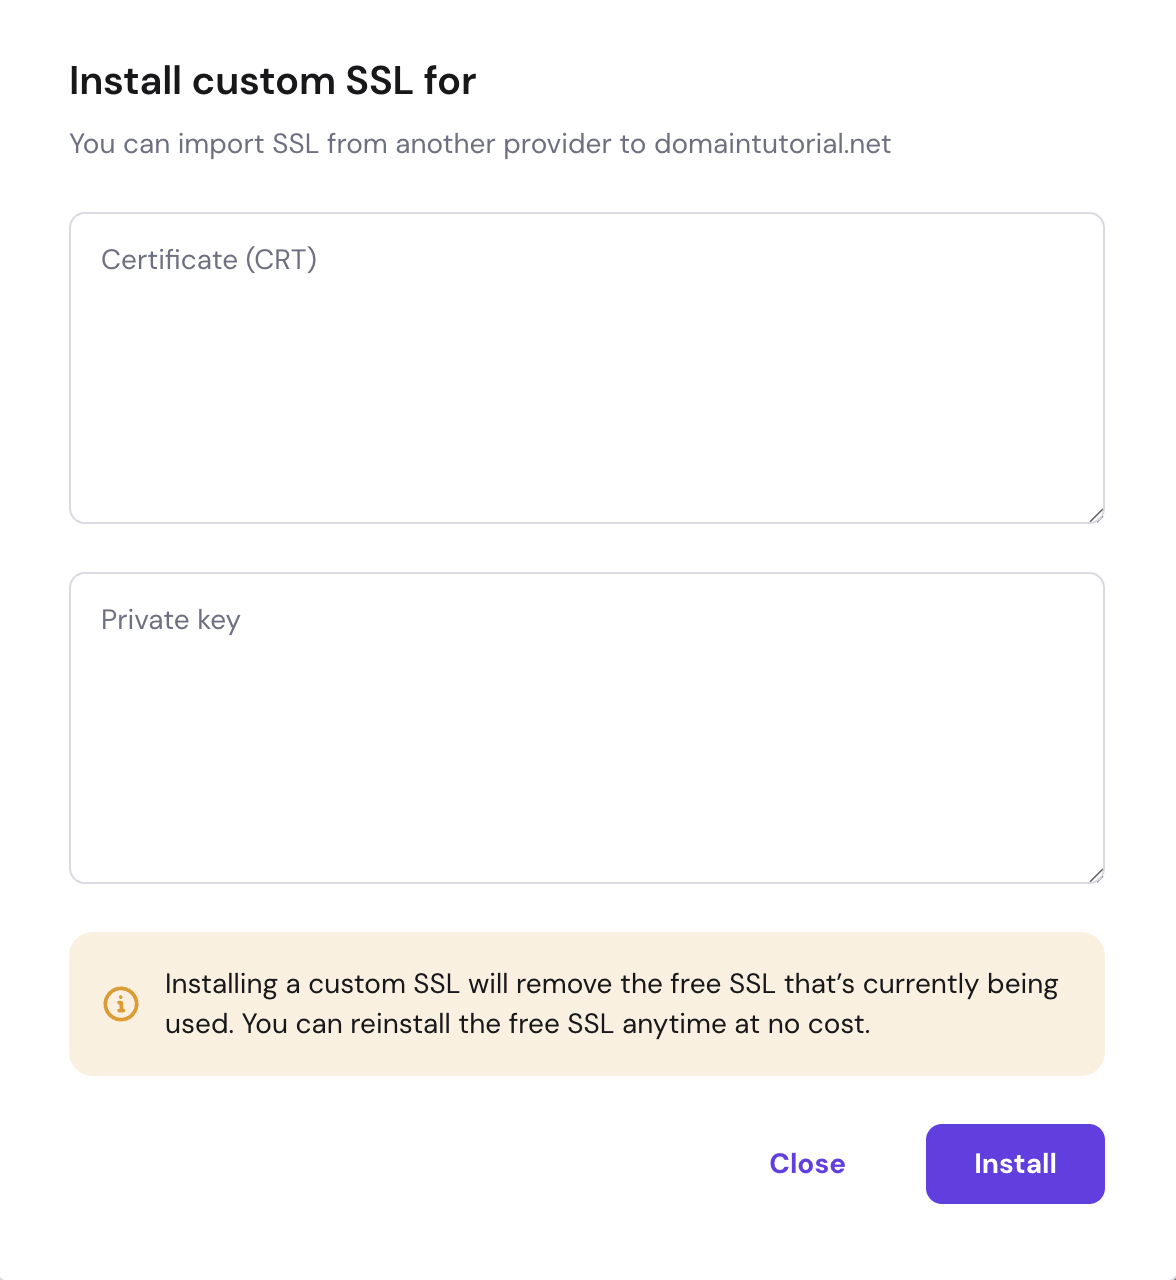
- Import your custom SSL
A custom certificate is usually a compressed folder (e.g., a .zip) of the following files:
- Certificate — the certificate’s public key, usually a file named domain.crt
where the domain is your actual domain - Private Key — the certificate’s private key, usually the only file with the ending .key
- Certificate authority bundle (CABUNDLE) — the file that contains root and intermediate certificates
Open each one in a text editor such as Notepad, copy the content, and paste it into its corresponding section. Next, click on Install, and your certificate will be installed.