The security of your email data is extremely important to us, and we take this responsibility very seriously. For security reasons, Hostinger’s support team cannot access or download your email data. All data transfers must be done by you from your Hostinger account.
You can migrate Hostinger email accounts from an existing hosting plan or Business email plan into a new plan on the same or a different Hostinger user account whenever needed. Since a domain can only be associated with one email service at a time, and for privacy and security reasons, this process must be done on your side.
Just follow the steps below:
Step 1 – Exporting your email data
Since you are migrating your Hostinger Email to a different Hostinger account, the email data must be exported and imported back via Webmail.
-
Log in to Hostinger Webmail
-
Select the desired messages and export them. The result will be a ZIP file containing the selected emails in the chosen format.
Step 2 – Deleting email plan
After ensuring you have downloaded your messages backup in the previous step, you can safely release the domain from the current plan so it can be used in the new one. You have the following options according to your case:
-
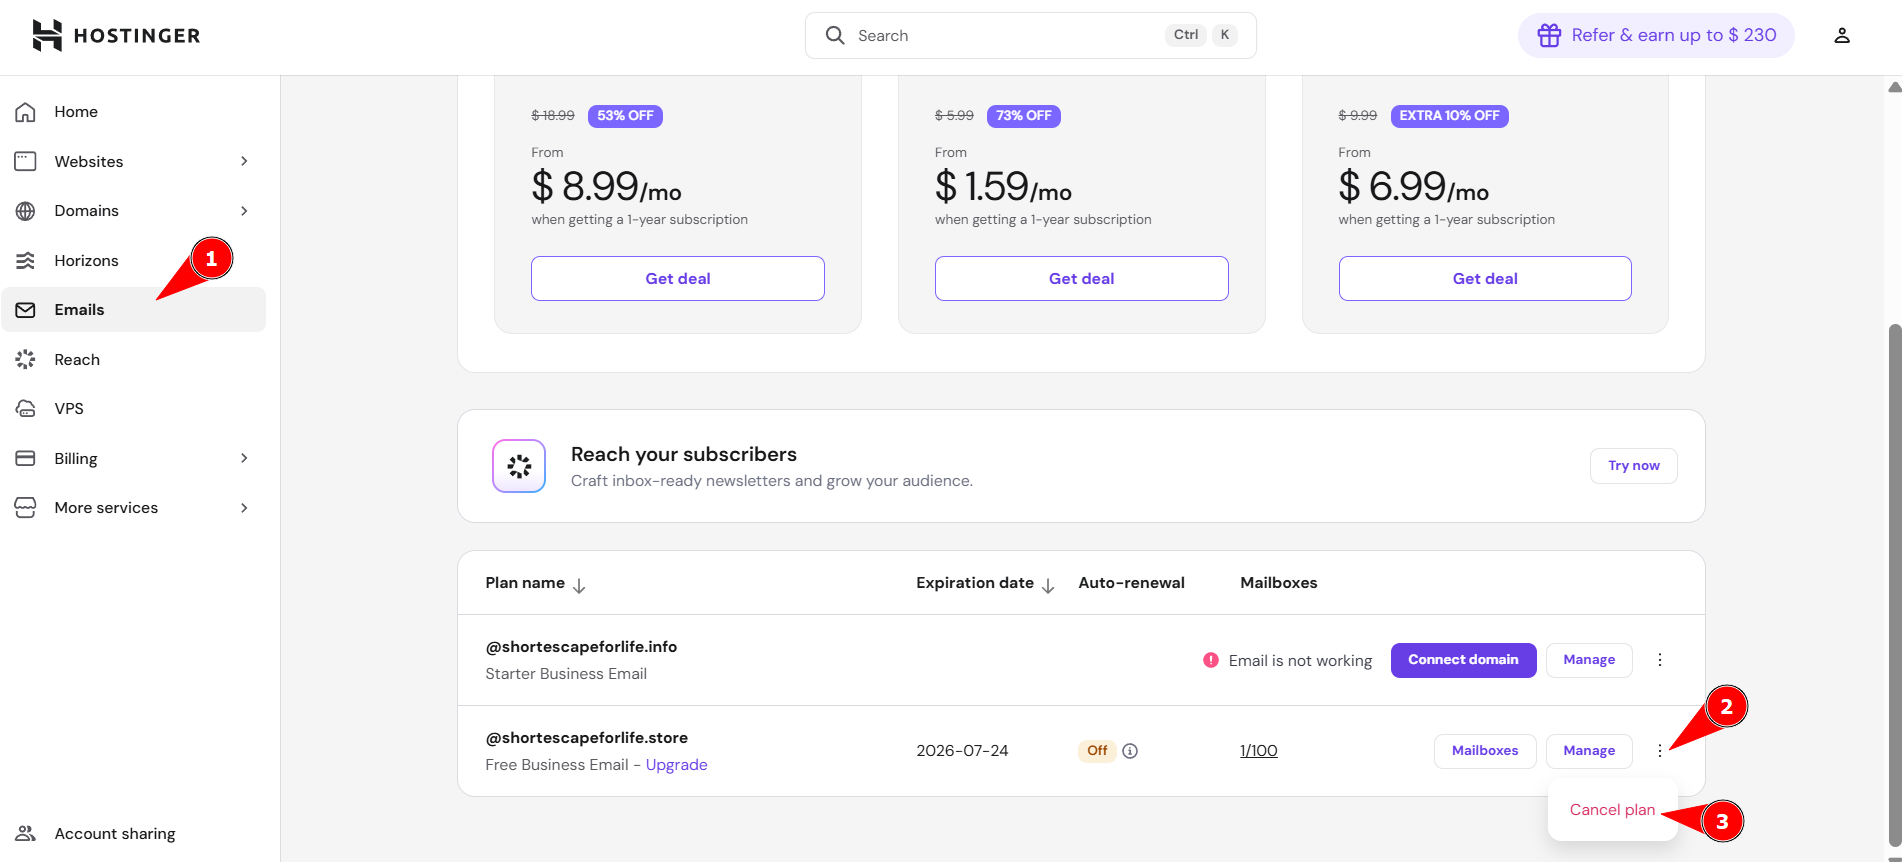
Delete email by going to Hostinger dashboard → Emails, select the plan, and choose Cancel plan.
-
To cancel a Hostinger Business email plan – reach out to us.
Step 3 – Recreating email on the new Hostinger account
With your email data secured and the original email plan deleted, it’s time to recreate the email account on your new Hostinger account.
- Create the Email Accounts on your Hostinger Email.
If you are not using our free email option, you must purchase a new email plan on the designated Hostinger account and recreate the emails as they were.
Step 4 – Importing the data
1. Log in to the source email account via our old Webmail.
2. Follow the steps in our Import Emails to Hostinger Email via Webmail guide.
Option B: Import via an Email Client
Alternatively, you can connect the account to an email client and transfer the emails directly. To get started, follow our guide on setting up Hostinger Email on your applications and devices.
If you have used an email client to export your data, the best way to import the data back is through the same email client via an IMAP connection, as it will sync all data through the server and connected devices.