You can import emails to Hostinger Email in two ways: upload a backup file in EML, MIME, or Mbox format through the old Webmail, or import directly from another mailbox, including another Hostinger Email account, using the new Webmail.
Import from a file
If you have a backup of your emails as .eml files, you can import them directly through Webmail. Pack multiple .eml files into a single .zip archive to import them together.
- Log in to Webmail.
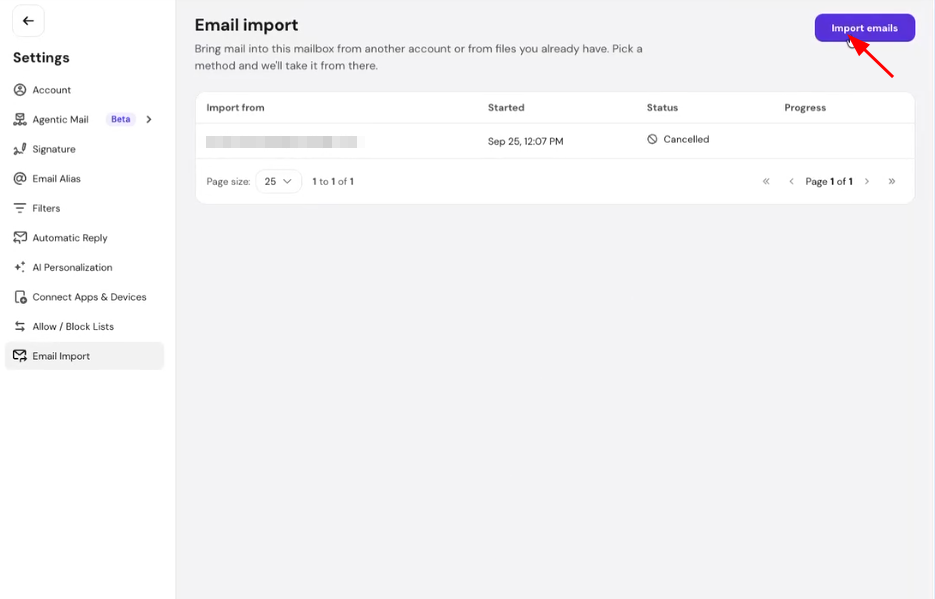
- Go to Settings, then Email Import.
- Click Import emails.
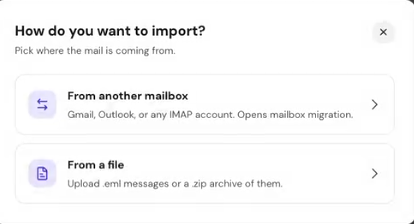
- Then select From a file.
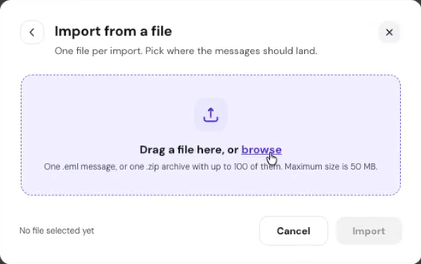
- Upload one .eml message, or a .zip archive containing up to 100 .eml files.

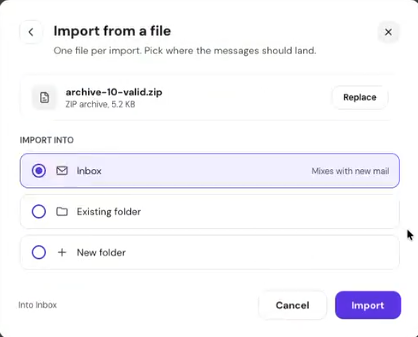
- Choose where the imported messages should land: the Inbox, an existing folder, or a new folder.
- Click Import.

The import runs in the background. Once it completes, a confirmation screen shows how many emails were imported, with a link to open the destination folder directly.
NOTES
- Maximum file size is 50 MB.
- A .zip archive can contain up to 100 .eml files.
- The file must fit within your mailbox’s available storage.
- Messages that can’t be read are skipped; the rest of the file still imports.
Import using IMAP
Instead of uploading a backup file, you can also import mail directly from another mailbox, including another Hostinger Email account or a mailbox with a different provider. This option is available in the new Webmail.
- Log in to Webmail.
- Go to Settings, then Email Import.
- Click Import emails.

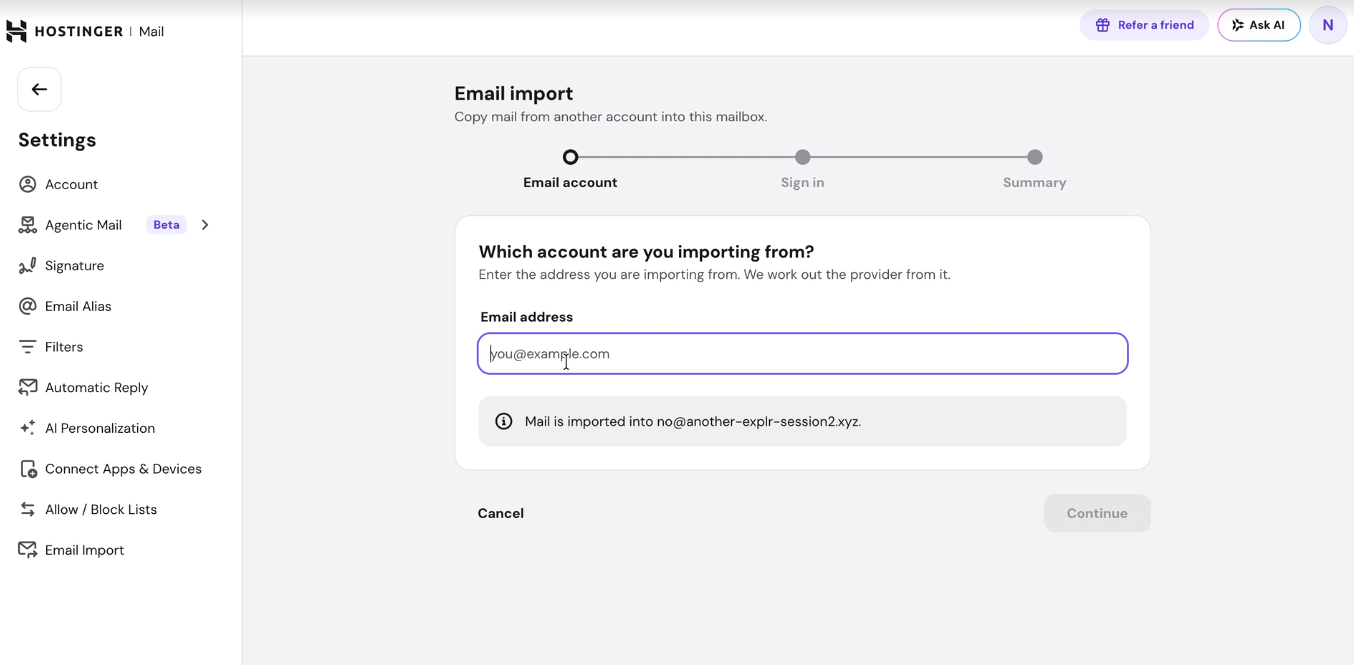
- Select From another mailbox.
- Enter the email address you’re importing from and click Continue.

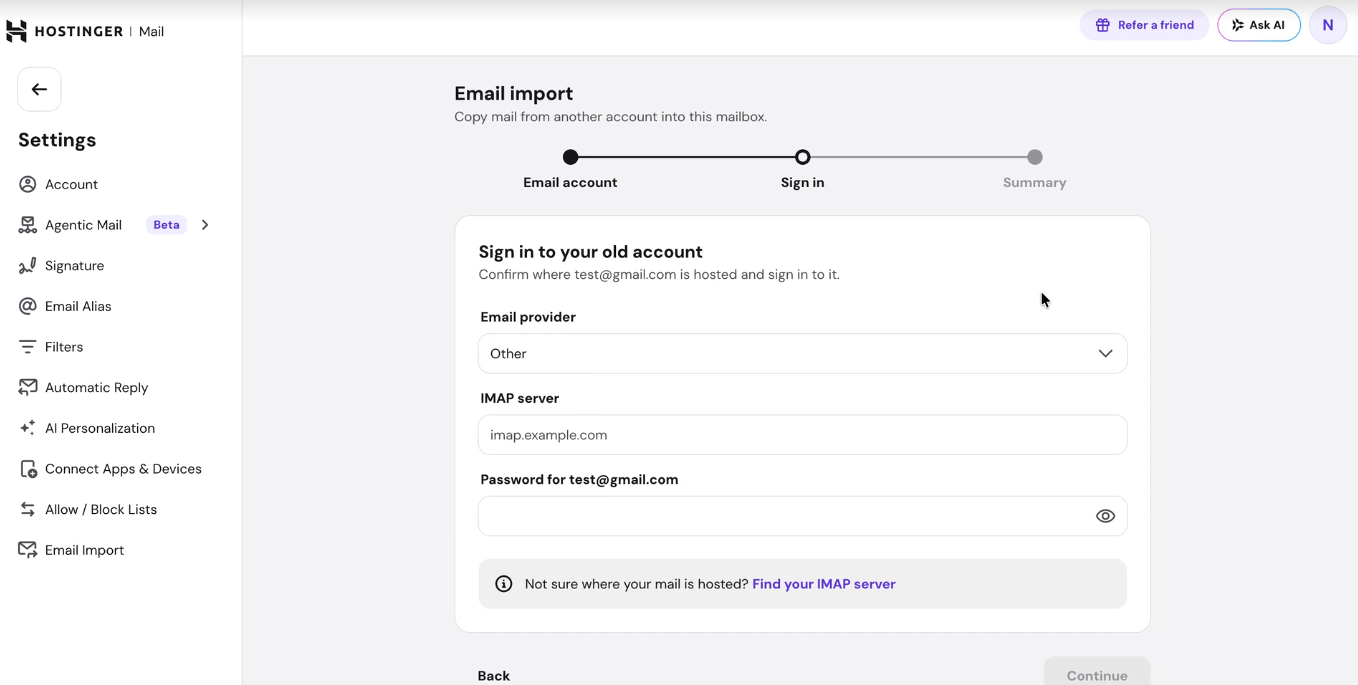
- Select the email provider the account is hosted with, or choose Other and enter the IMAP server manually. Enter the account’s password, then click Continue.

- Review the accounts shown under Import from and Import to, then click Start import.

- To bring over your contacts as well, use Import contacts from the confirmation screen after starting the import.

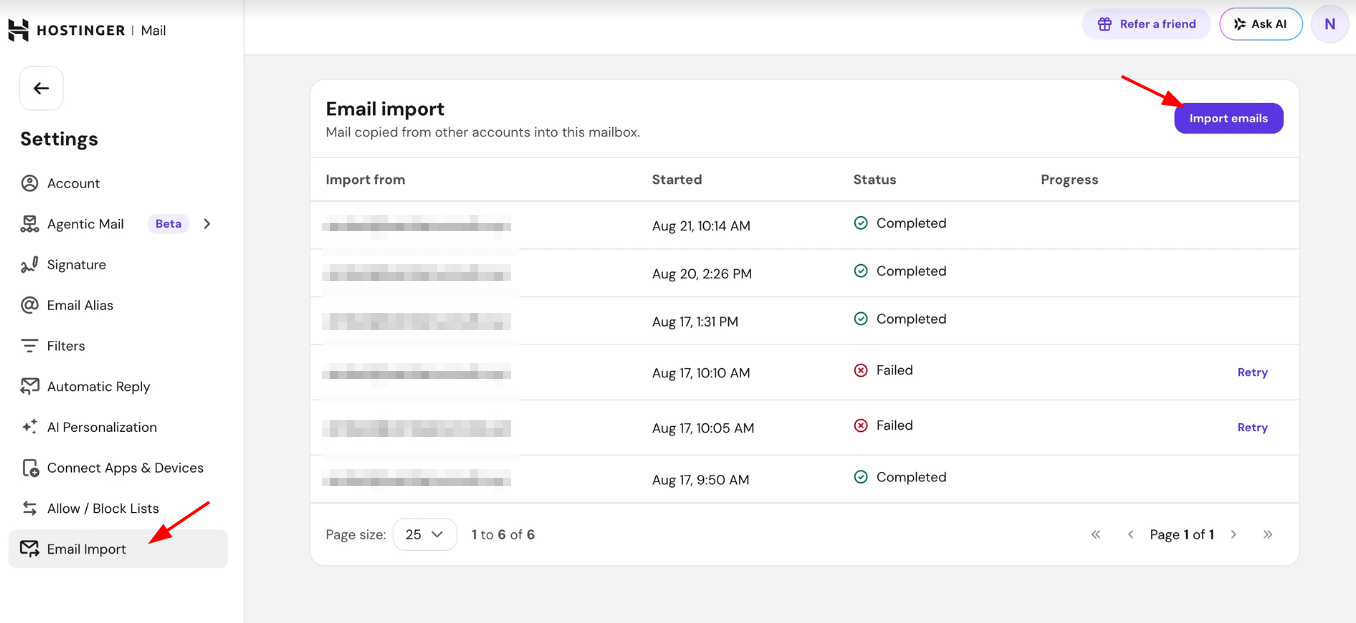
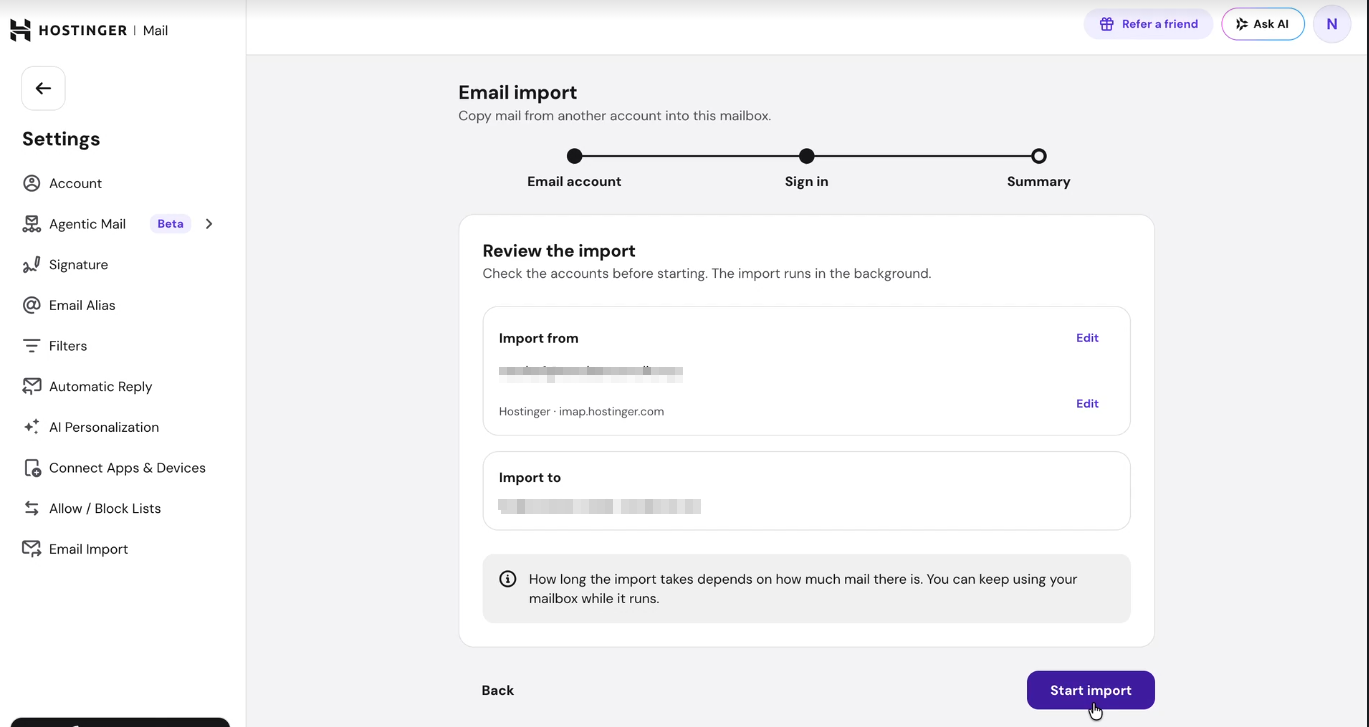
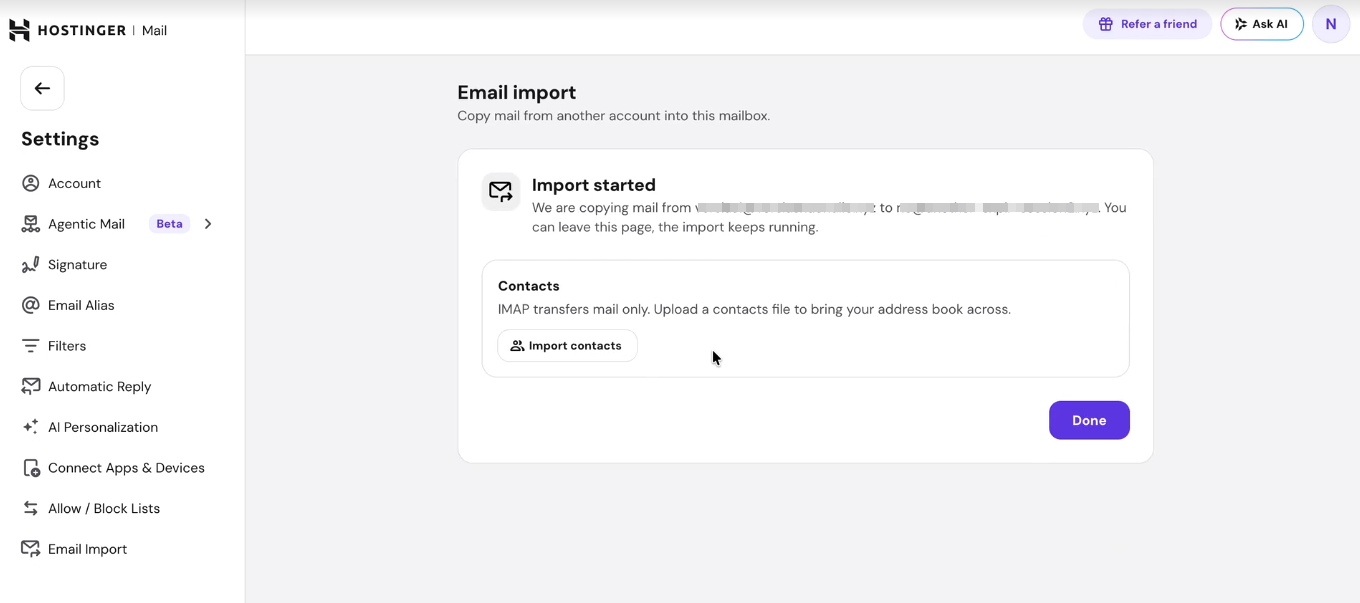
The import runs in the background, so you can continue using your mailbox while it completes. To check the status of a past or ongoing import, go to Settings → Email Import.