Hostinger Managed Paperclip instances can be monitored and managed directly from Hostinger dashboard. This guide covers the Dashboard, AI provider, Environment, and Logs sections available for your Paperclip application.
Before you start
- An active Managed Paperclip instance. See Hostinger Managed Paperclip: Overview and setup if you haven’t deployed one yet.
Access your Paperclip dashboard
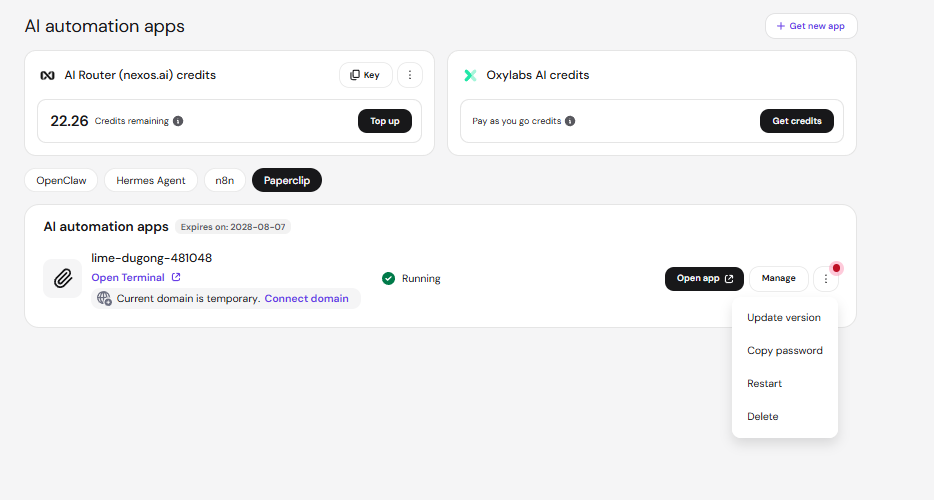
Log in to Hostinger dashboard and click Paperclip under AI agents in the sidebar. Each of your AI automation app plans is listed on a separate card with the following details:
- Expires on: Displays the next renewal date for your plan.
- Instance name: An automatically generated name associated with your application URL.
- Status: Indicates if your instance is online.
- Quick access: Click Open app to open your Paperclip interface, or Open Terminal to access a web-based terminal for your instance. For apps with Error status, click Ask Agent instead. Both Open app and Open Terminal you to log in — copy the instance password beforehand from Copy password in the Options (⋮) menu, or from App details in the Managed Paperclip dashboard.
- Manage: Access the Managed Paperclip dashboard.
- Options (⋮): Click this button to update to the latest Paperclip version, copy your instance password, reboot, or delete your application.
Dashboard overview
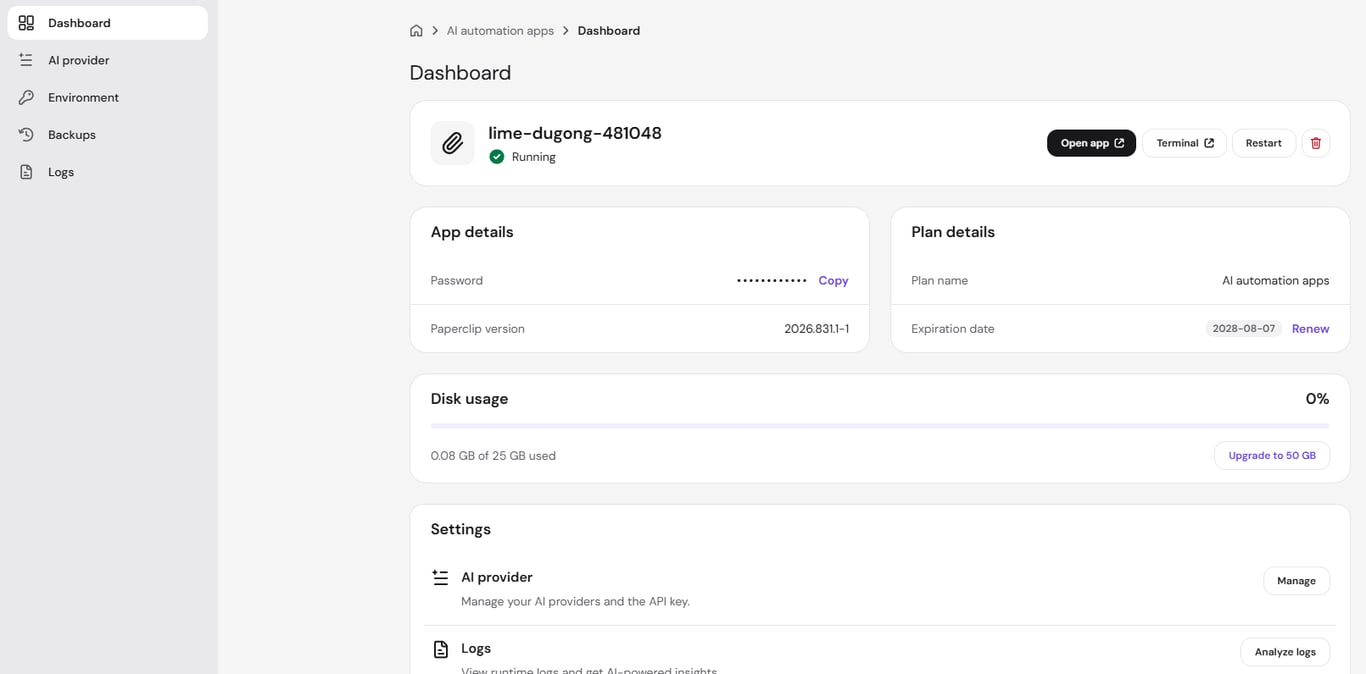
The Dashboard section shows:
- Application status, along with Open app, Terminal, Restart, and delete controls for your instance. Both Open app and Terminal prompt you to log in — copy the instance password from App details beforehand.
- App details, including the instance password (masked, with a Copy option) and the installed Paperclip version.
- Plan details, including the plan name and expiration date. Click Renew to extend your plan before it expires.
- Disk usage, showing how much storage your instance has used. Click Upgrade to 50 GB if you need more space.
- Settings, with shortcuts to AI provider and Logs.
Manage your AI provider
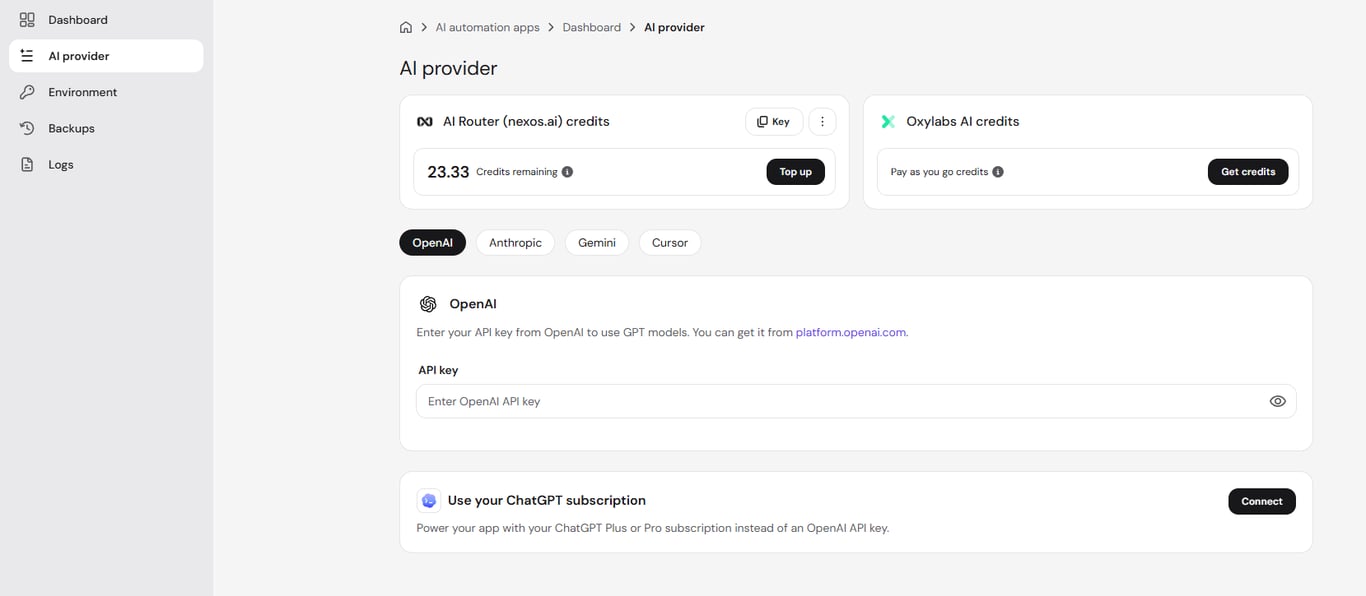
The AI provider section controls which model your Paperclip agents use.
- In the sidebar, click AI provider.
- Select a provider tab — OpenAI, Anthropic, Gemini, or Cursor — and enter its API key.
- Alternatively, click Connect under Use your ChatGPT subscription to power your app with your ChatGPT Plus or Pro subscription instead of an API key.
Manage environment variables
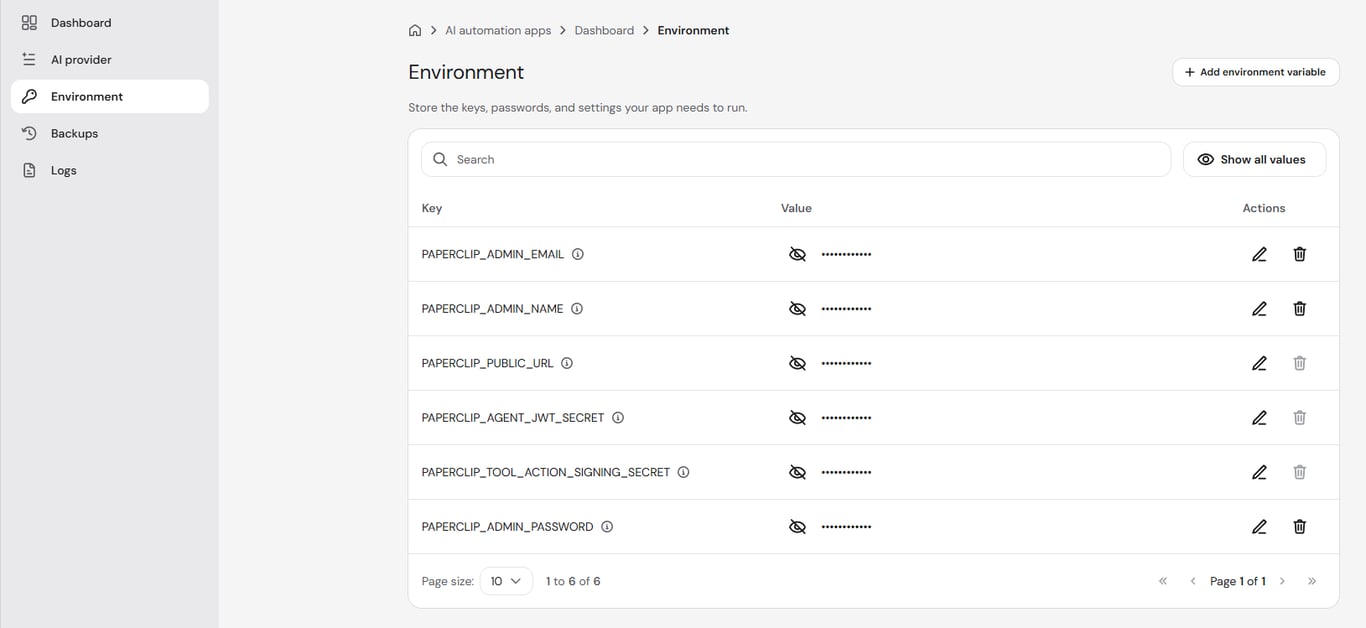
The Environment section stores the keys, passwords, and settings your Paperclip instance needs to run, including PAPERCLIP_ADMIN_EMAIL, PAPERCLIP_ADMIN_NAME, PAPERCLIP_PUBLIC_URL, PAPERCLIP_AGENT_JWT_SECRET, PAPERCLIP_TOOL_ACTION_SIGNING_SECRET, and PAPERCLIP_ADMIN_PASSWORD.
- In the sidebar, click Environment.
- Use the search bar to find a specific variable, or click Show all values to reveal them.
- Click the pencil icon next to a variable to edit its value, or the trash icon to delete it.
- To add a new variable, click Add environment variable.
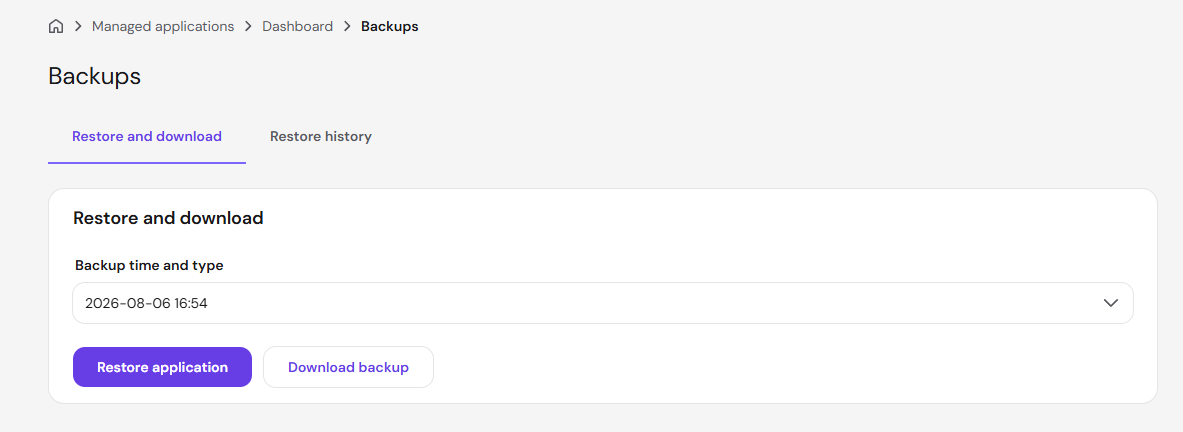
Restore or download a backup
- In the sidebar, click Backups.
- Under Restore and download, select a backup by date and time, then click Restore application or Download backup.
- Click Restore history to view past restore actions.
Review logs
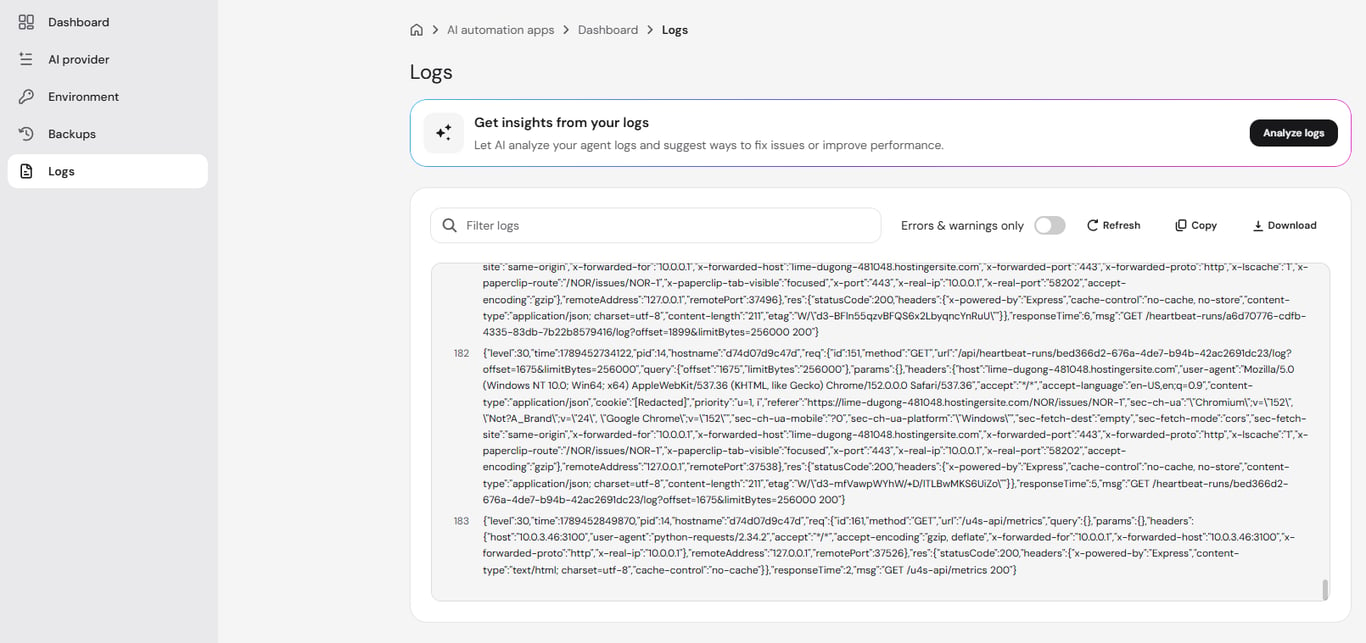
- In the sidebar, click Logs.
- Use Filter logs to search for specific entries, or enable Errors & warnings only to narrow the view.
- Click Refresh to load the latest entries, Copy to copy the visible logs, or Download to save them as a file.
- Click Analyze logs to let AI review your logs and suggest fixes for issues or performance improvements.
Once you’re familiar with these sections, you can keep your Managed Paperclip instance running smoothly and troubleshoot issues directly from Hostinger dashboard.