When you delete a website that used a randomly assigned temporary domain name, you cannot simply recreate that exact same domain string. However, if your hosting plan has unexpired backups available, you can restore your website files into a new temporary domain and point them to your original data.
Pre-requisites
- Access to your Hostinger dashboard.
- Available unexpired backups from the deleted website.
Step 1 – Generate a new temporary domain
Since you cannot reuse the old automatically assigned string, you must start fresh with a clean slate:
- Log in to your Hostinger dashboard and navigate to the Websites section.
- Click on the Add website button.

- Select PHP/HTML from the application type options.
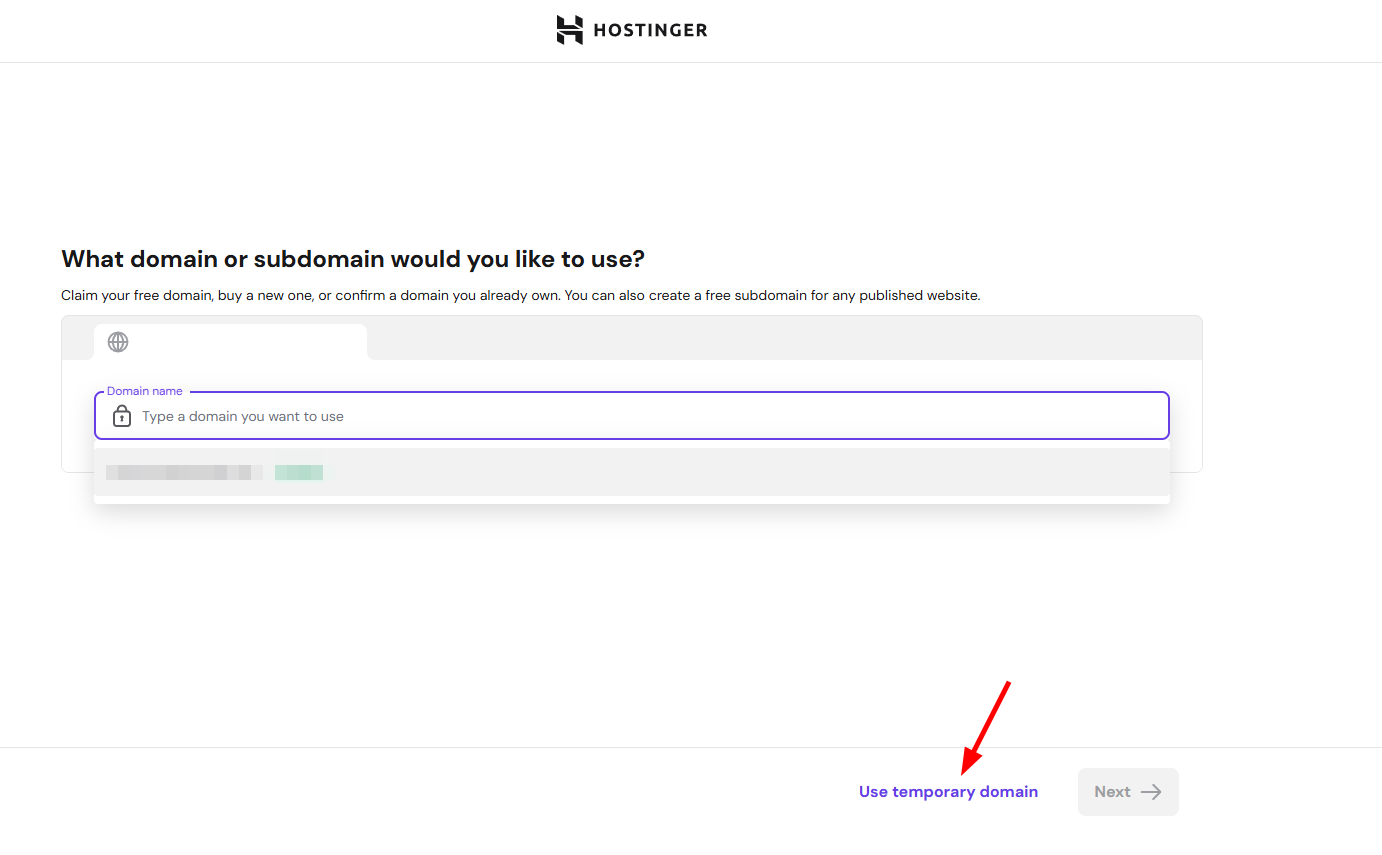
- Choose the option to Use a temporary domain name.

- Continue through the remaining setup screens until a new, empty website is active on your dashboard.

Step 2 – Restore your deleted website’s files
Next, you need to pull your old website’s folder structure out of the system backups and into your server directory.
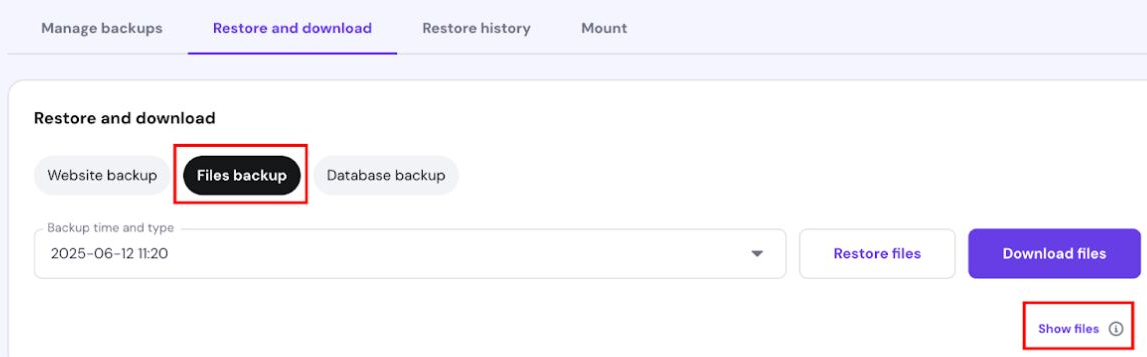
- Go to the Files section in Hostinger dashboard and select Backups.
- Click on File backups and choose a backup date from before the website was deleted.
- Select the Show files toggle option.

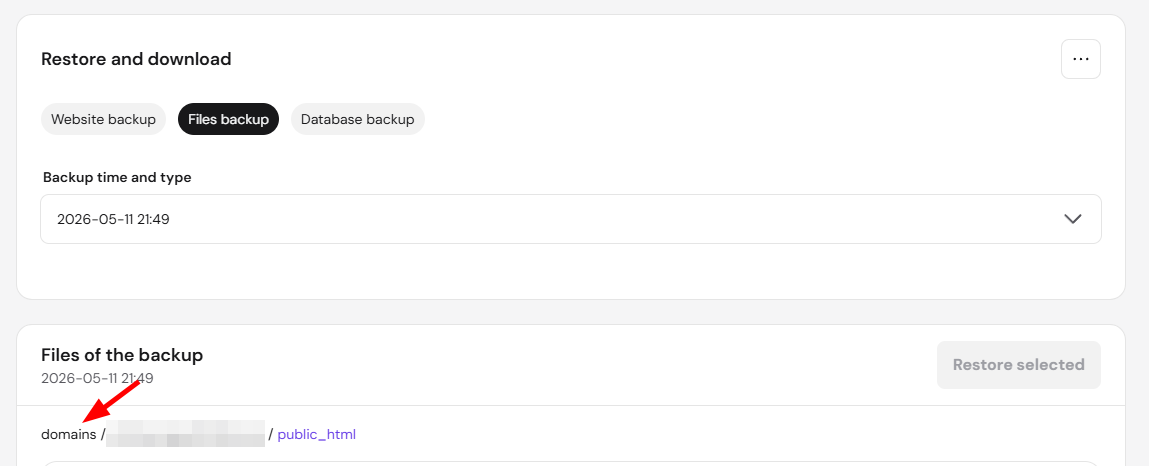
- When the list of files shows up, click on
domains.

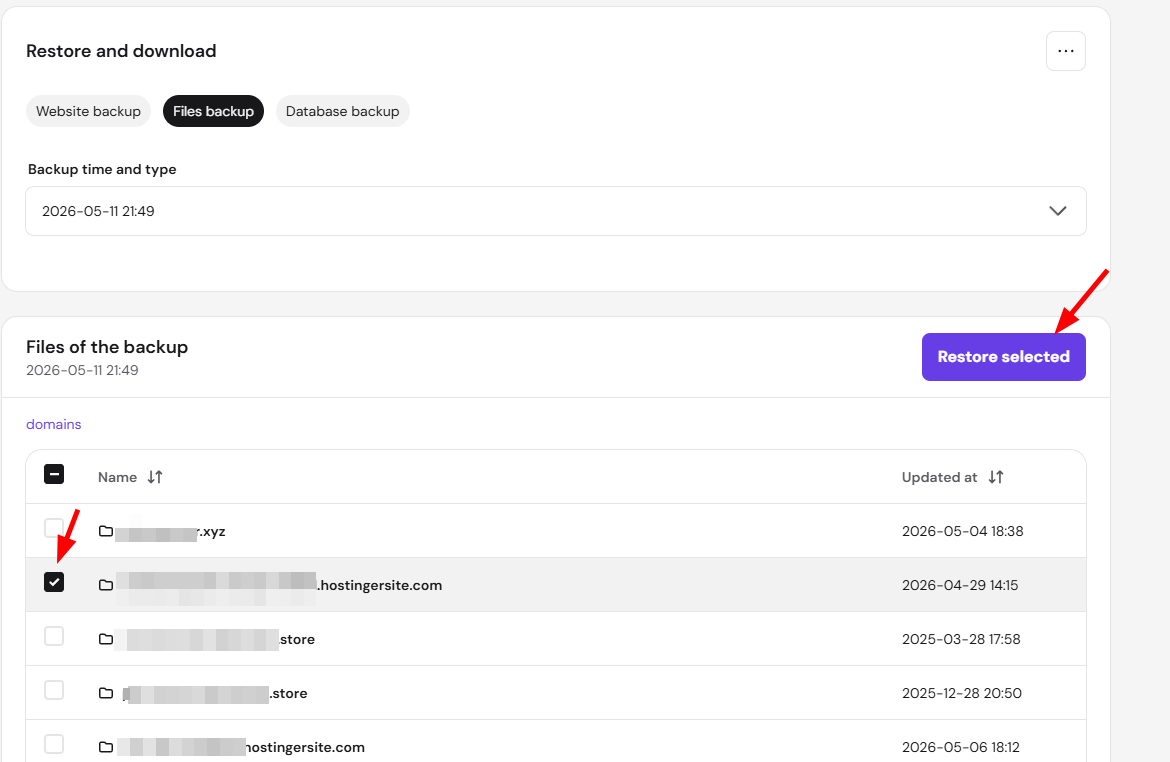
- Check the box directly next to the folder named after your deleted temporary domain.
- Confirm and click Restore selected. Wait for the system to complete the recovery.

Step 3 – Remap the directories via File Manager
Once restored, you will have two folders inside your server: your newly created empty temporary site and your old recovered site data. You must swap their identities so the new domain points to the old data.
- Open the File Manager, ensuring you select the option to see the files for your entire hosting plan (the root directory), rather than a single site environment.
- Navigate into the domains folder.
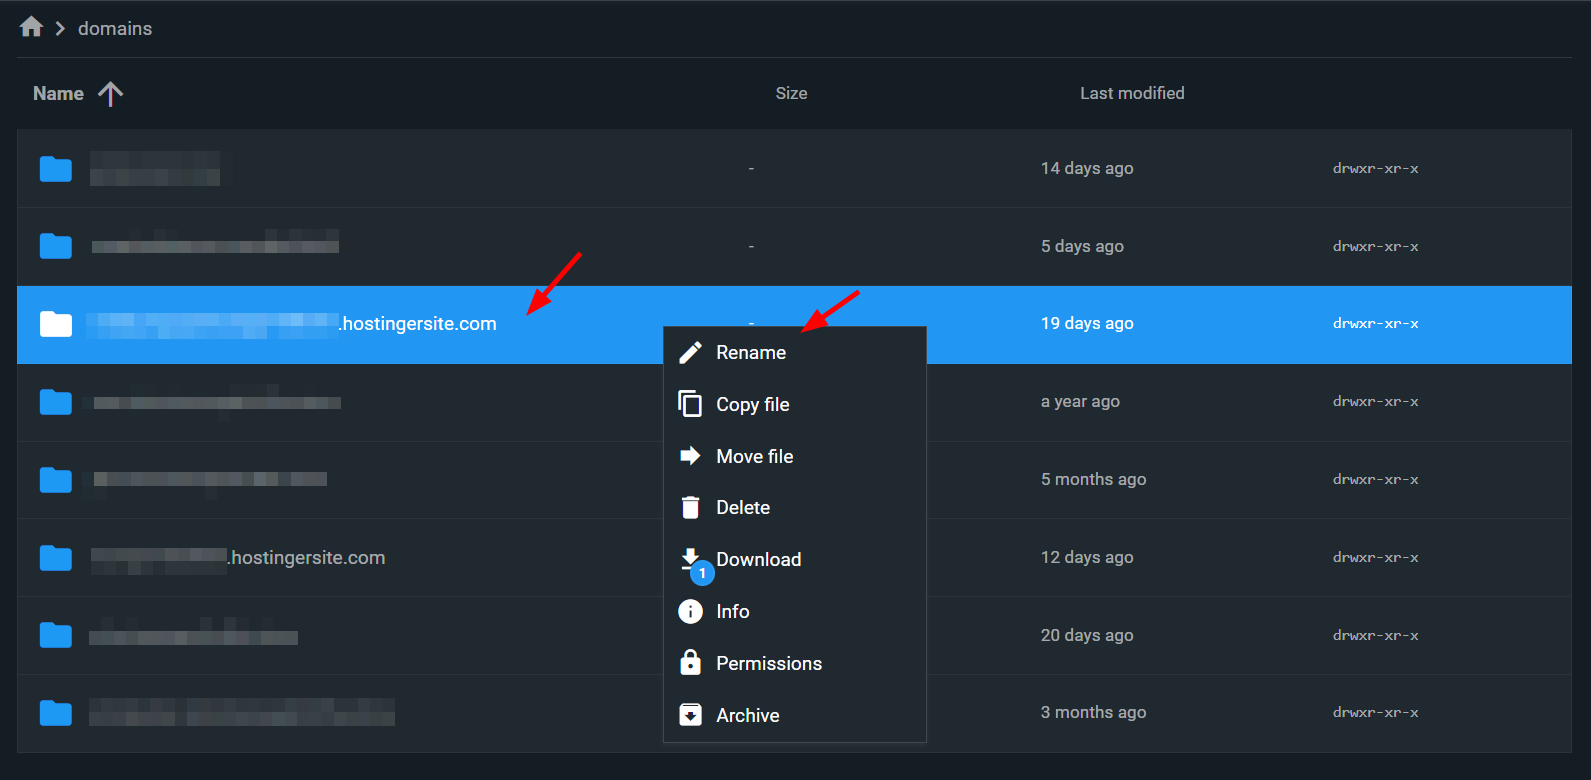
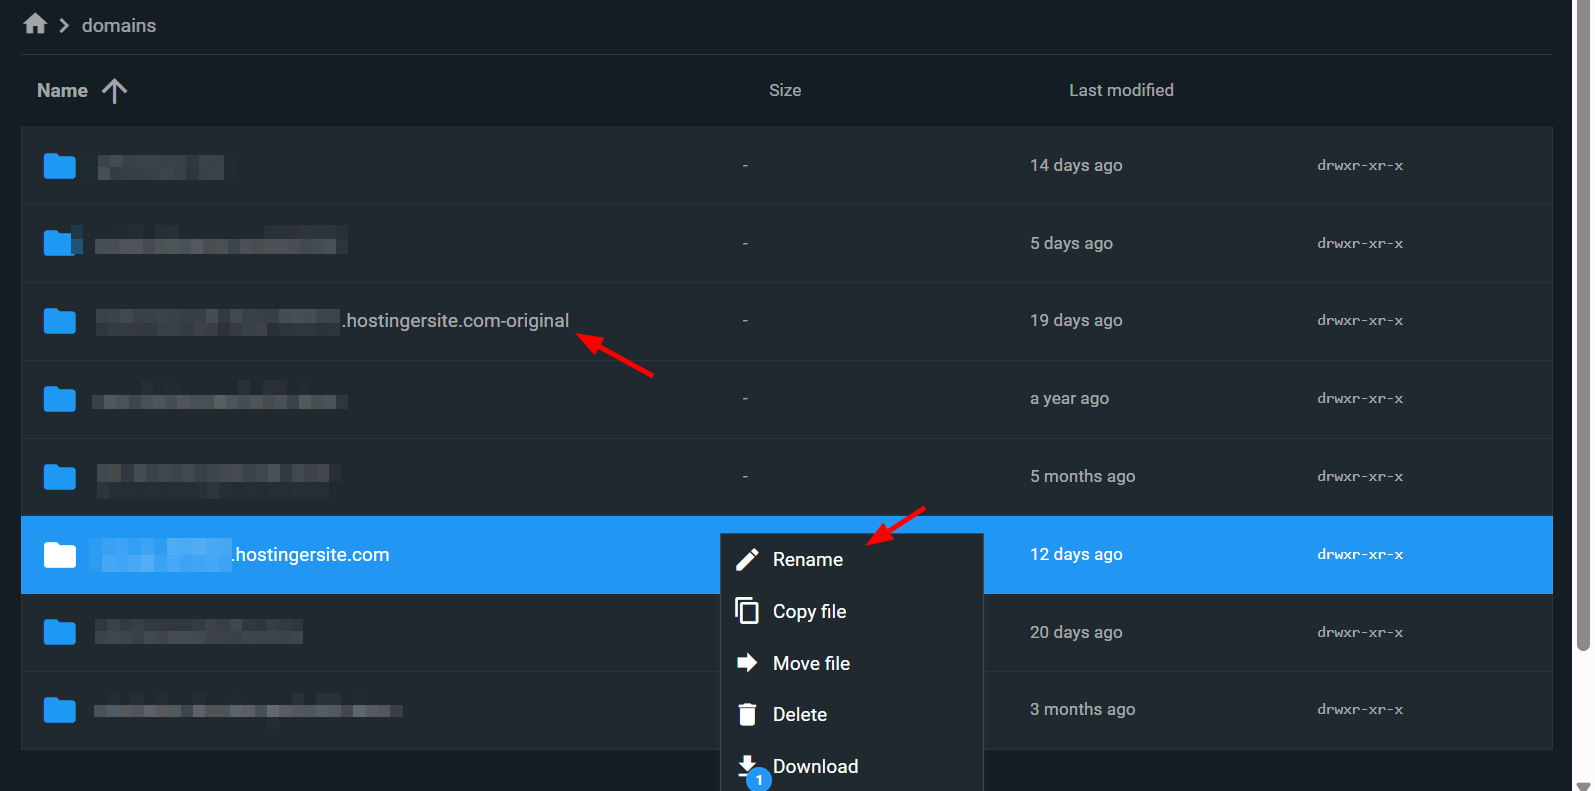
- Locate the folder belonging to your newly generated temporary domain and rename it by appending a suffix (e.g., rename newsite.hostinger-site.com to newsite.hostinger-site.com-original).

- Locate the recovered folder belonging to your deleted website (e.g., oldsite.hostinger-site.com).
- Rename that old folder to match your new temporary domain exactly (e.g., newsite.hostinger-site.com).

Step 4 – Database configuration and adjustments
If your temporary website was a dynamic application (like WordPress) or used configuration variables, you must wrap up the setup:
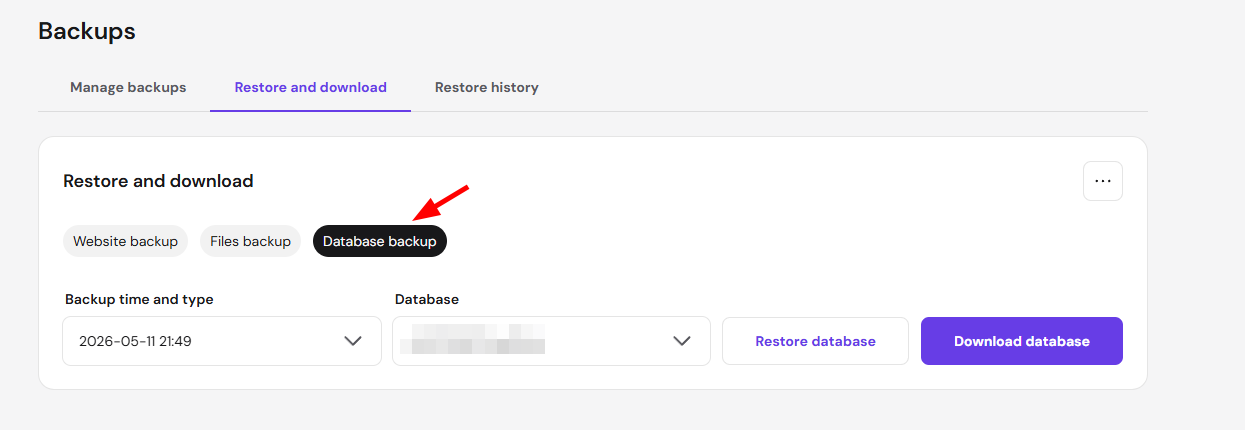
- Navigate to Backups to restore the database associated with your old site if needed.

- Open your configuration files (such as wp-config.php or .env) using the File Manager.
- Update any hardcoded entries of your old temporary domain to reflect your new temporary domain string so styles and links load correctly.
After migrating the website from a temporary domain to another, it’s crucial to update the site URL throughout the whole website. If it’s a WordPress website, you can use the Search and Replace function by following this tutorial: How to Perform a WordPress Search and Replace in the Database
By shifting your restored backup files under the identity of a new temporary domain, you can fully salvage your work. Your site files will now load seamlessly through the newly generated link.
NOTES
- Empty Directory: The folder you appended -original to can be safely deleted via the File Manager once you verify the restored site works, as it contains no data.
- Database Links: Remember to update URLs inside your database using a plugin or script if your restored site relies on absolute links matching the old temporary URL.
- Backup Lifetime: Temporary site backups follow standard hosting retention policies. If no backups appear in the dashboard, the data can no longer be recovered.