Re-engagement automations help you reconnect with subscribers who interacted partially with your campaigns but did not complete the action you expected. Instead of manually checking who opened or clicked your emails, Reach can automatically send timely follow-up emails based on subscriber behavior.
These automations are especially useful for:
- Increasing campaign engagement rates
- Improving click-through rates
- Giving subscribers another chance to interact with your content
- Testing better subject lines for subscribers who did not open emails
- Nudging interested subscribers toward a specific action if they opened but did not click
- Saving time by automating repetitive follow-up communication
For example:
- If a subscriber did not open your email, you can automatically resend a similar email with a different subject line to improve visibility.
- If a subscriber opened but did not click, you can send a more action-focused follow-up email that encourages them to complete the intended action.
Using follow-up automations ensures that your campaigns continue working even after the initial send, helping you maximize engagement and conversions with minimal manual effort.
How to set up a re-engagement automation in Reach
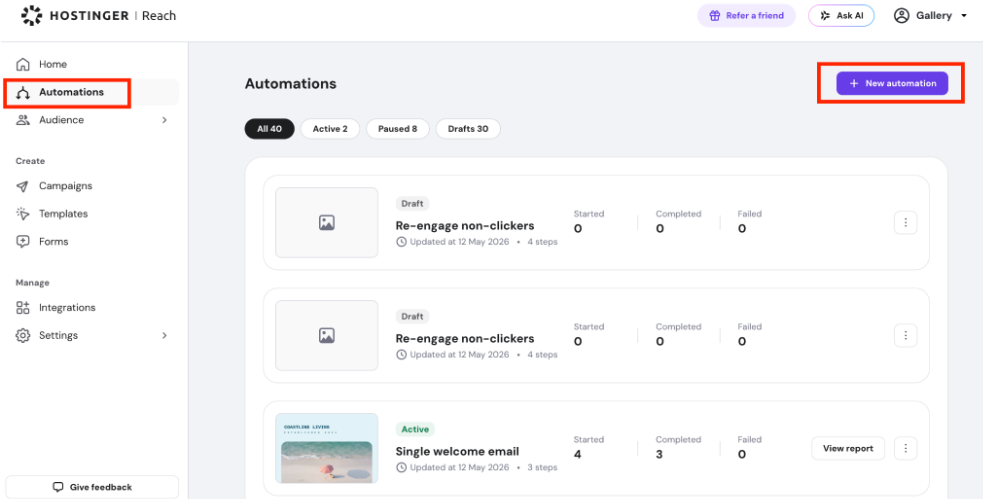
Step 1: Open Automations
- Log in to your Reach dashboard.
- From the left-side menu, click Automations.
- Click New Automation.
Step 2: Select the Follow-Up automation type
- Choose Follow-up automation.
- You will see different workflow templates based on subscriber behavior.
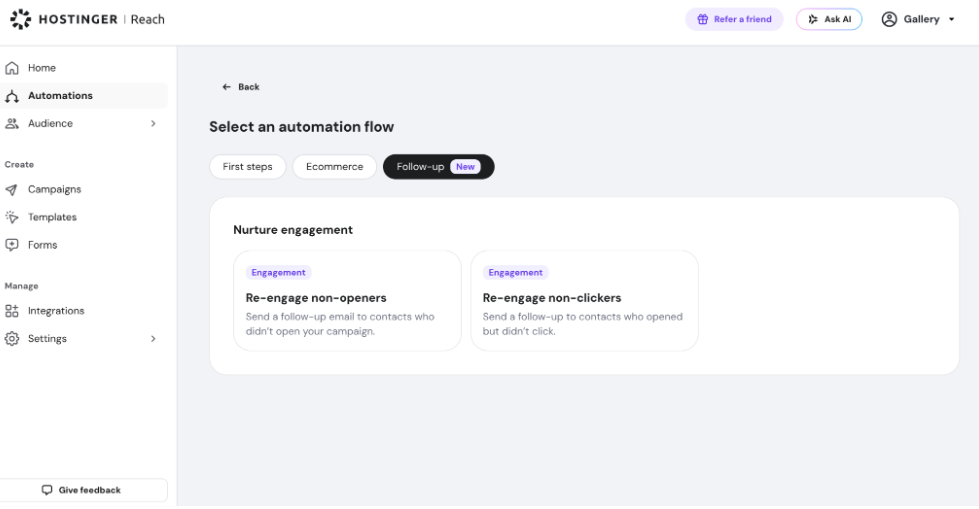
You can choose whether to re-engage subscribers who:
- Did not open your email
- Opened the email but did not click
For this guide, we will use the Non-Clickers Engagement workflow template.
- Click Non-Clickers Engagement.
- You will see an overview of the automation workflow.
- Click Use this flow to continue.
You will now be redirected to the full automation workflow editor.
Step 3: Select the trigger campaign
The first step of the workflow is selecting the campaign draft that will trigger the automation as soon as you’ll send it.
This campaign acts as the starting point for the follow-up process.
Important
You must choose a campaign that is currently in Draft status.
The workflow works in the following order:
- Select a draft campaign in the automation
- Activate the automation
- Go to Campaigns and send the draft campaign
- Once the campaign is sent, the automation starts automatically
This means the automation will only begin after the selected draft campaign has been sent.
To select the trigger campaign:
- Click the campaign selection field
- Choose your draft campaign
- Confirm your selection
Step 4: Add a delay
Another step is configuring a delay before the follow-up email is evaluated and sent.
This delay gives subscribers enough time to interact with your original campaign.
The Delay step supports two options:
- Delay for — pauses the automation for a set duration before evaluating the condition.
- Choose from hours, days, or weeks
- Recommended: wait 2–3 days, since this is the most common period during which subscribers check new emails
- Until specific date and time — pauses the automation until a fixed date and time you select using the date picker.
- Best for time-sensitive campaigns tied to a specific event, like sending a reminder before a webinar or holding a follow-up until a promotion goes live
To configure the delay:
- Open the Delay step.
- Choose Delay for or Until specific date and time.
- Set the duration or select the target date and time.
- Save the step.
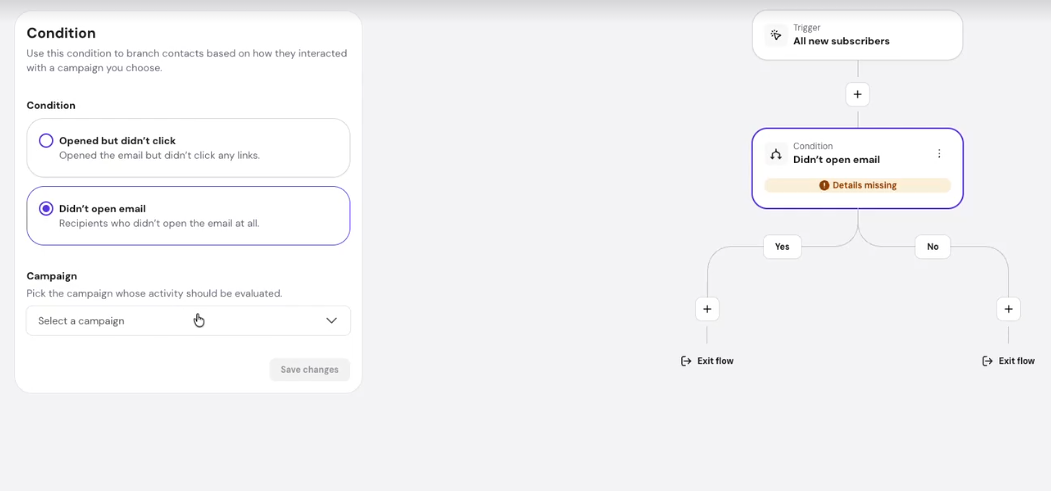
Step 5: Configure the condition
The third step is setting the engagement condition that determines who receives the follow-up email.
You can choose conditions such as:
- Subscriber did not open the email
- Subscriber opened the email but did not click
For this example, we will use:
Email was opened, but no links were clicked
This means:
Subscribers who opened the email but did not click any links within the selected delay period will receive the follow-up email automatically.
To configure the condition:
- Open the Condition step
- Select preferred option
- A campaign selector lets you choose which campaign the condition evaluates — by default it auto-populates with the trigger campaign, but you can change it to any campaign
- Save the condition
If the condition is met, the workflow continues and sends the follow-up email.
Step 6: Customize the Follow-Up email
After the condition step, you can customize the follow-up email that subscribers will receive.
This is a great opportunity to:
- Add a stronger call-to-action
- Highlight benefits more clearly
- Remind subscribers what they may have missed
- Encourage a specific next step
For non-openers, you may also consider:
- Changing the subject line
- Adjusting preview text
- Testing a different sending approach
You can further edit and expand the workflow as needed.
Final step: Activate and send
Once your automation setup is complete:
- Start the automation workflow
- Go to Campaigns
- Send the selected draft campaign
After the campaign is sent, the automation will automatically begin monitoring subscriber engagement and sending follow-up emails based on the conditions you configured.
Best practices for re-Engagement campaigns
- Wait at least 1 day before sending follow-ups
- Use different subject lines for non-openers as they haven’t seen your email content yet
- Keep follow-up emails shorter and action-focused
- Avoid sending too many reminders
Re-engagement automations are one of the most effective ways to improve campaign performance while keeping communication personalized and relevant to subscriber behavior.