In Hostinger’s hPanel, you may create a preset of a WordPress website that could be re-used multiple times to create new websites for your clients. This way, you can set up a website with just a few clicks without the need to install and activate the same plugins and themes for each new website again and again.
Before you start
- An active web hosting, cloud hosting, or agency hosting plan with a WordPress website installed.
- Access to your hPanel account.
The following will give you a step by step guide you how to create a new preset using WordPress Add-on:
Step 1 – Log in to hPanel and navigate to Websites
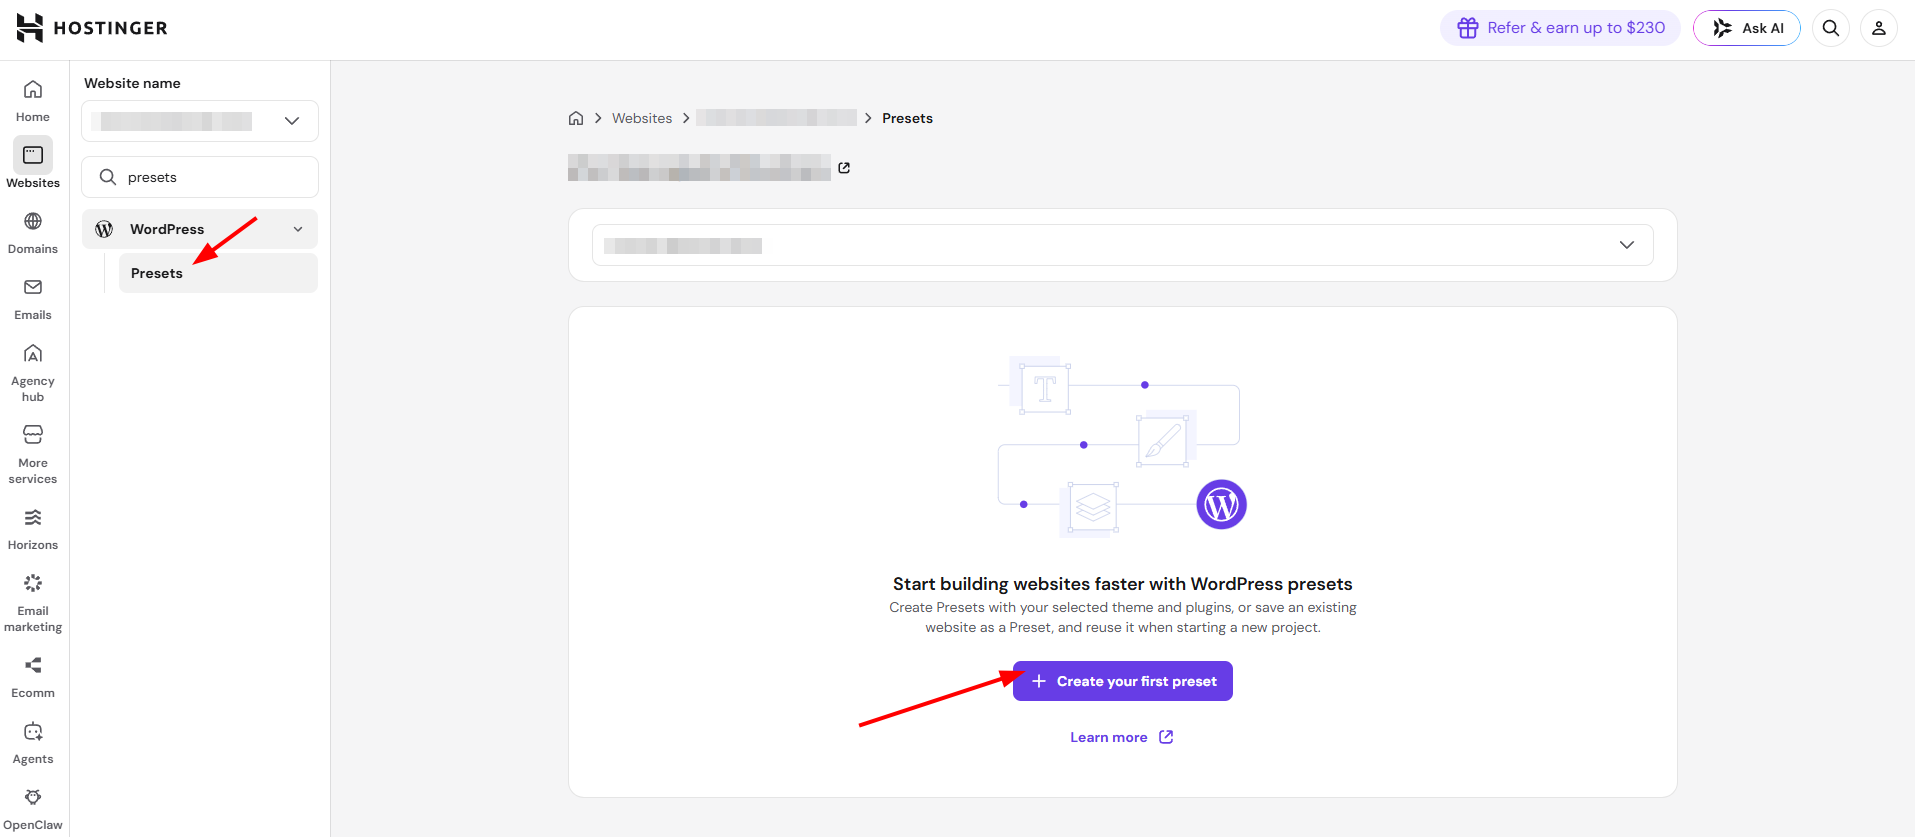
Login to hPanel. Go to Websites, then click Dashboard on your website that you want to edit. Look for Presets in the search bar.
Step 2 – Create a preset
You will see below screen with Create your first preset button. Click on the button to proceed.
Step 3 – Fill and save the preset
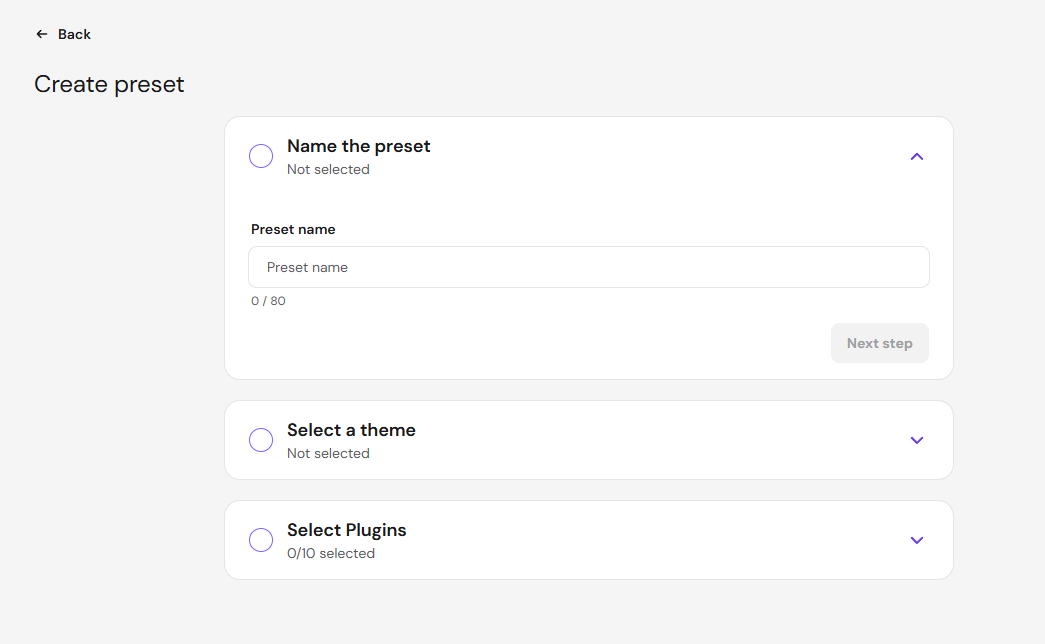
Now you will need to fill in the name of the Preset, select a theme and plugins you want to add to it. Once you have filled all the details, click on Save Presets to save your selection.
The saved configuration appears in your presets list and becomes available for selection whenever you install a new WordPress website.