Add images to your Hostinger AI Builder manual mode website using the image element.
Add an image
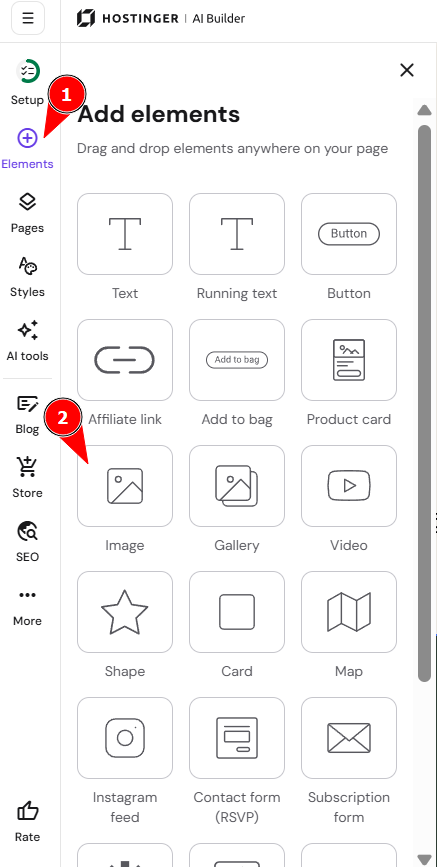
- Open the builder and expand the Add elements panel on the left.
- Select the image element, and drag and drop it to the preferred section of your site:
- Click on the element to see more options (edit, generate, change, crop & position, duplicate, hide/show, delete, resize, etc.):
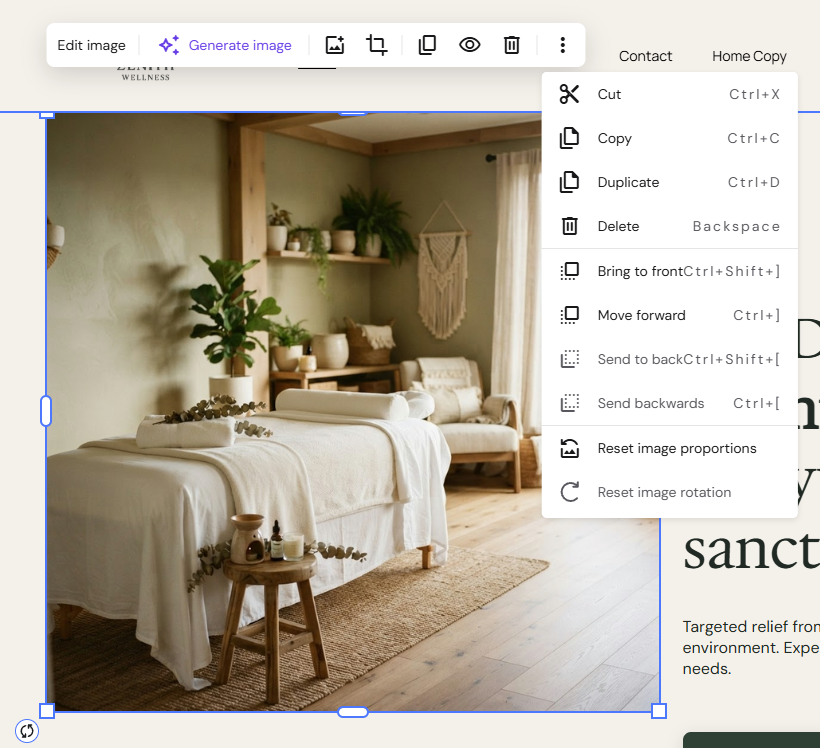
To add your own image, click on Edit image → Replace image, and select a file from your media library, browse free images, or upload your own.
Customize your image
Click on Edit image to see more options:
|
Image |
|
|
Style |
|
|
Action |
|
|
Shape |
|
|
Animation |
|
NOTES
-
The maximum image file size is 15 MB; see Responsive web design and image size for more details.
-
You can use any image format or size
-
Images are automatically optimized behind the scenes for the best website performance
-
Image cropping is not supported for free (Unsplash) images and images in .SVG and .GIF formats
-
Learn how to add link preview images
- See image gallery for other details about displaying multiple images together.