Manage your DNS zone on Cloudflare to update the DNS records (NS, TXT, MX, A, etc.) for your domain.
Access your DNS zone on Cloudflare
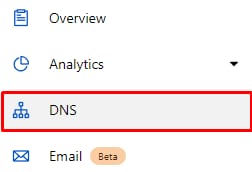
If you have an active Cloudflare account, you can manage your domain’s DNS zone via Cloudflare Dashboard. Log in there, select your domain and open the DNS section:
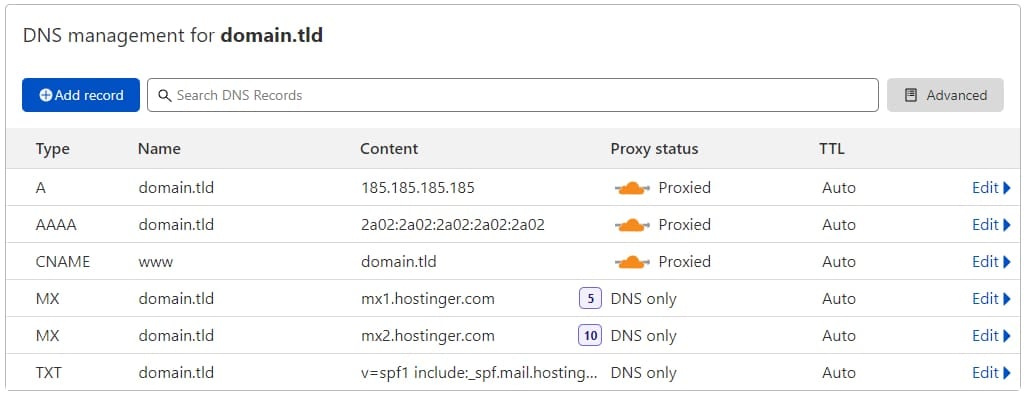
Once there, you will be presented with a DNS Zone:
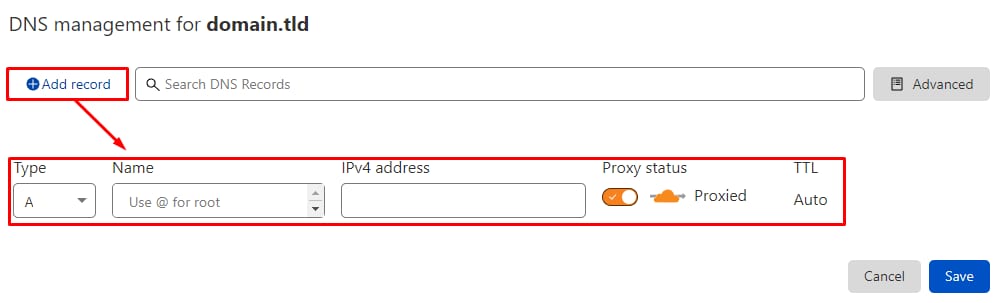
To create a new record simply click on Add record, there you will be able to specify record type as well as other required fields:
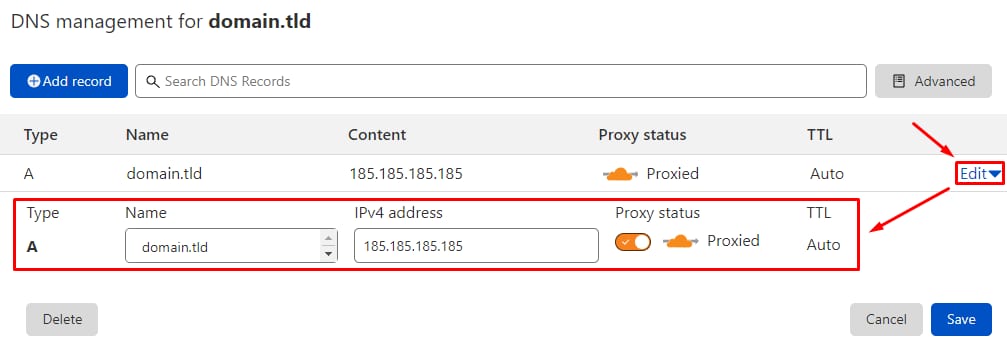
To edit an existing record, click on the Edit button near the preferred record:
It’s worth noting that some records can be Proxied. It means whenever you check that record, e.g., on DNSchecker, it won’t display your actual specified value. This is extra useful if you don’t want other people to see your records 🔐
Hostinger default DNS records
Hostinger default DNS records:
If you face any difficulties while managing DNS Zone at your domain provider, it’s best to contact Hover directly. Alternatively, you can transfer your domain to Hostinger so your hosting and domain will be managed from one place.