MX (Mail Exchange) records are like postal addresses for emails. They tell email servers where to deliver emails for a domain, helping to ensure that emails reach the correct destination.
Before you start
- This article is part of setting up a domain for Hostinger Email manually. If you haven’t gone through that guide yet, start there for full context on adding DNS records to your domain.
Required MX records for Hostinger Email
If you use Hostinger Email with your domain, the following MX records should be present in your domain’s DNS zone:
|
Name |
Priority |
Value (Mail server) |
TTL |
|
@ |
5 |
mx1.hostinger.com |
default |
|
@ |
10 |
mx2.hostinger.com |
default |
MX records for subdomains
For subdomains, instead of the @ in the name field, enter the name of your subdomain, e.g., the subdomain example.domain.tld, will require the following records:
|
Name |
Priority |
Value (Mail server) |
TTL |
|
example |
5 |
mx1.hostinger.com |
default |
|
example |
10 |
mx2.hostinger.com |
default |
Find your MX records in Hostinger dashboard
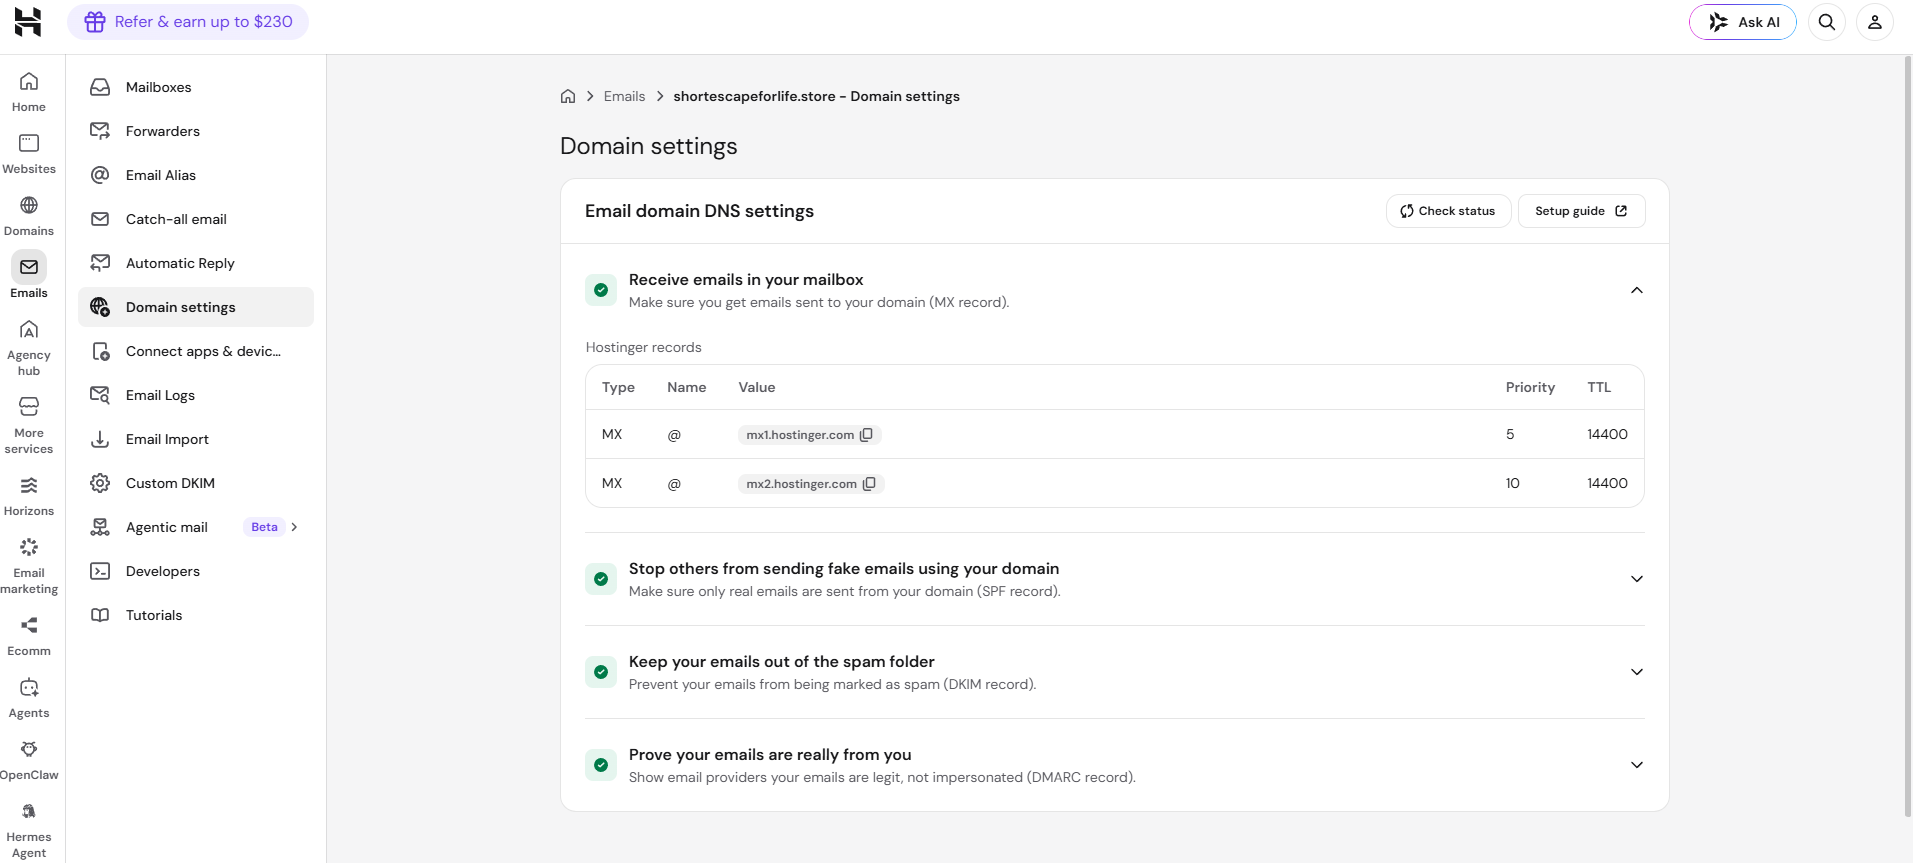
You can also find the values Hostinger Email MX records in the Emails section of your Hostinger dashboard:
-
Click on the Mailboxes button next to the preferred email account.
-
Select Domain settings on the left sidebar.
Add MX records to your domain
To add these records to your domain, follow the steps depending on which service (Hostinger or else) your domain is pointing to via nameservers.
-
If your domain is pointing to Hostinger by nameservers, click on Connect automatically.
-
If your domain is pointing elsewhere by nameservers, you must manually add these records to your domain’s DNS zone. Make sure to delete any existing MX records before adding the new values. Check our guides for some popular domain registrars here: How to Change DNS Records in Other Registrars.
After making any changes to your domain’s DNS zone, DNS propagation may require a few hours, during which your email service may be temporarily out of service. Once completed, your email service will be up and running smoothly 💡