Account Sharing allows you to securely grant access to your account to another person, for example, a developer or collaborator.
Granting access
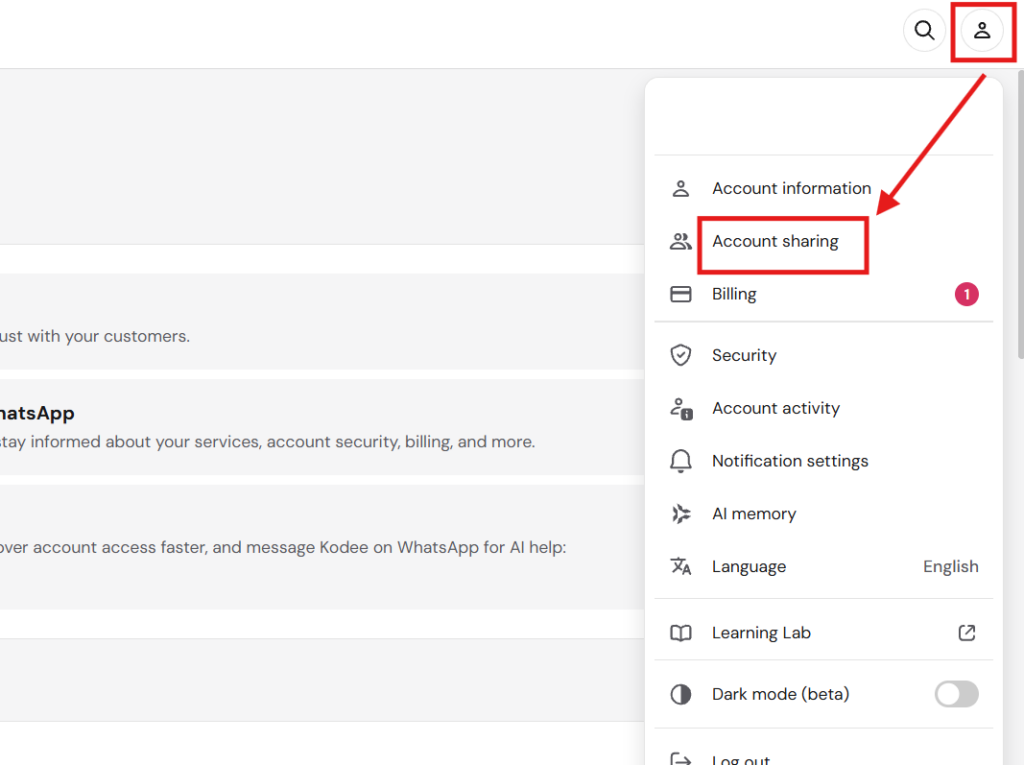
To grant access, click on your profile icon on the top left of hPanel and click the Account Sharing button:
Now, on the Account Sharing page, click on the Give Access button:

Then, you will be presented with further options:
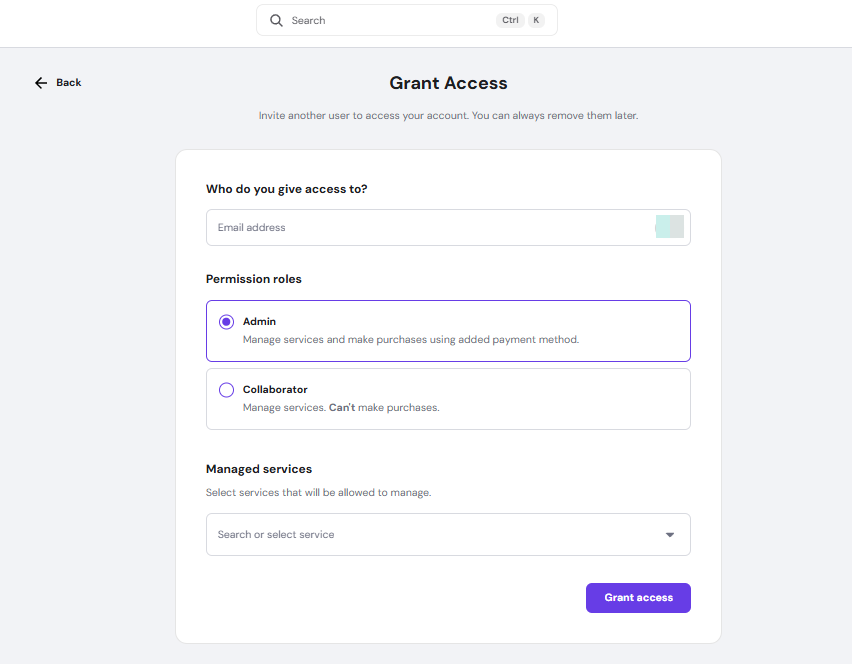
Here, you can determine an access level, select the services you wish to share, and determine if the user can set up pending orders by filling out the form.
When everything is good to go, click on Give Access. A confirmation message will be sent to the user; they must click on the link to be granted access to your account.
A confirmation email will be sent to the user; they must click on the link to be granted access to your account.
NOTE
-
If the new user does not have a Hostinger account yet, they will be prompted to create one
What actions can the user with granted access perform on the account?
A user with granted access will be able to make changes to your websites, such as modify files and databases, as well as change hosting-related settings in your control panel ✅
What actions cannot be done?
To ensure your account’s privacy and security, a user with granted actions cannot perform the following actions 👇 ❌
- Manage or add payment methods to your account
- Invite others to access the account
- View or change profile information (for example, change email, name, phone, address, and password)
- Do the following tasks with domains: transfer or unlock domains, change domain’s contact details, manage auto-renewals, sell domains in the aftermarket, respond to a domain buying service, or manage backorders
- Create separate access for free email plans. It is now only possible for paid email plans.
- Delete your account
- Set up new hosting or email plans
- Claim a free domain and a free email
Due to these restrictions, the Panel for an account with granted access will show fewer options than the owner account.
Managing shared access
For the current users with granted access, check the Users that have access to your account list on the Grant access tab, where the email addresses, access type, and status will be listed.
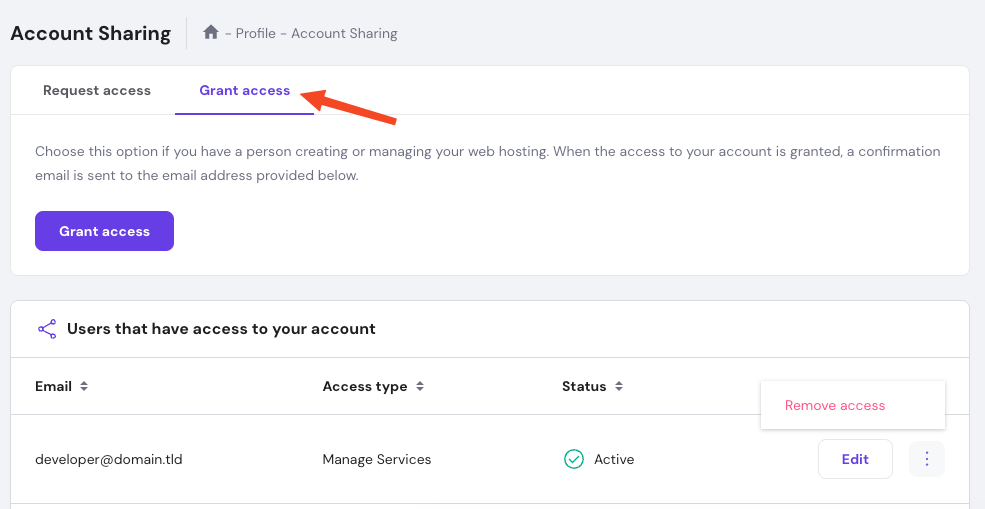
To revoke any access to your account, click on ⋮ → Remove access next to the email address.
Share access via SSH (VPS Only)
If you are using a Hostinger VPS, you can provide access to a developer or team member by creating a separate SSH user. This allows them to manage the server via a terminal without needing access to your Hostinger account.
- Log in to your VPS terminal as root.
- Create a new user by running: adduser username (replace “username” with your choice).
- Set a secure password for the new user.
- To allow the user to execute administrative commands, add them to the sudo group: usermod -aG sudo username.
- Provide the new user with your VPS IP address and their specific credentials.
That’s it! Now you know how to grant access to your account with other users without sharing your login credentials.
Notes
- hPanel Access: Using the Access Management feature is best for users who need to manage billing, domains, or website settings via the hPanel interface.
- SSH Access: Creating an SSH user is recommended for technical tasks or development work directly on a VPS, as it keeps your hPanel account fully private.
- Security: Always use the “Change permissions” option in the Access Management tab to revoke access once the collaboration is finished.