Hostinger Reach is a beginner-friendly, AI-enhanced email marketing platform fully integrated into the Hostinger ecosystem.
To improve deliverability and build trust regarding your email campaigns inside Reach, connect a domain first. You only have to do this once.
How to connect domain
Inside Reach, you can use your Hostinger domain or an external domain you already own. However, you can create campaign and automation drafts in Hostinger Reach before connecting a sending domain. This lets you explore the product, build templates, and set up flows in advance. A verified sending domain is required only when you are ready to send campaigns or activate automations.
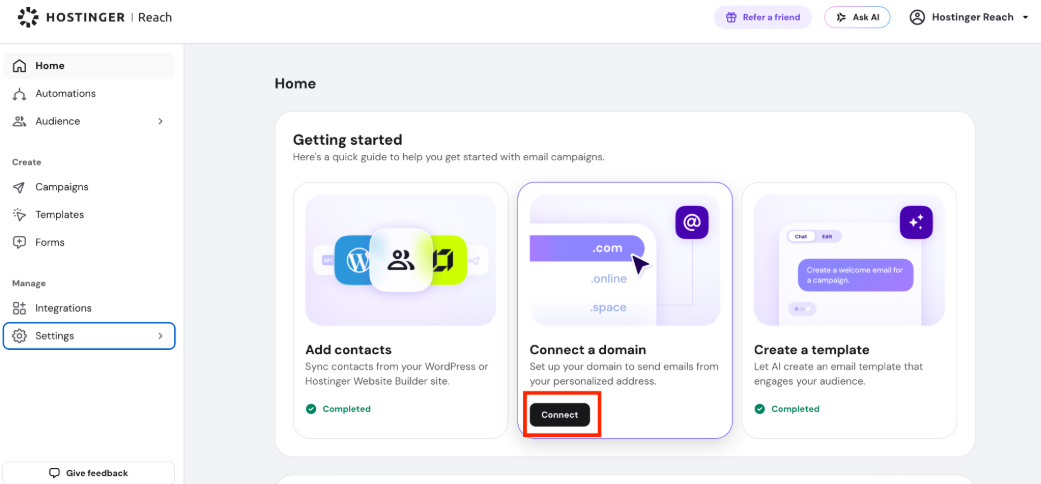
If you still haven’t connected your domain, it will be displayed right once you access the Reach dashboard, you simply need to click on the “Connect Domain” purple button and proceed from there.
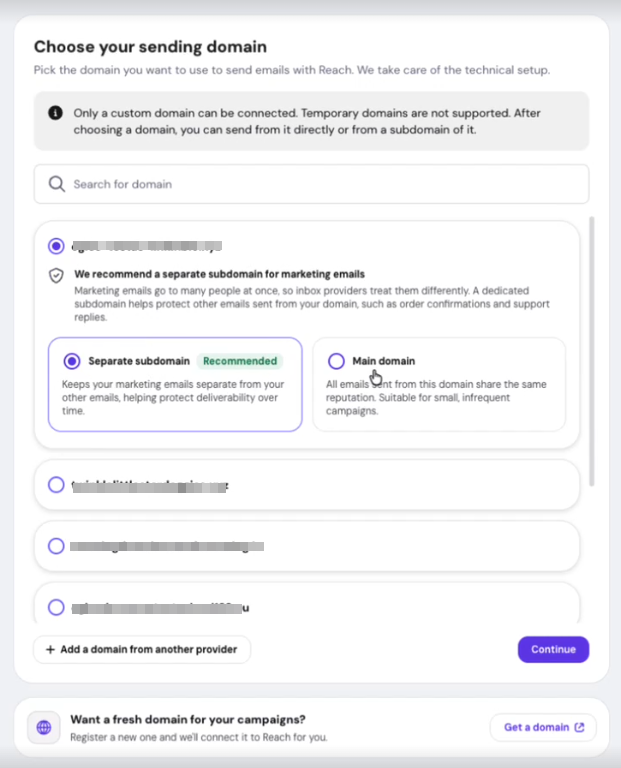
On first login, it lets you connect a domain to Reach. After selecting your domain, choose whether to send from the domain directly or from a separate subdomain of it, such as mail.yourdomain.com.
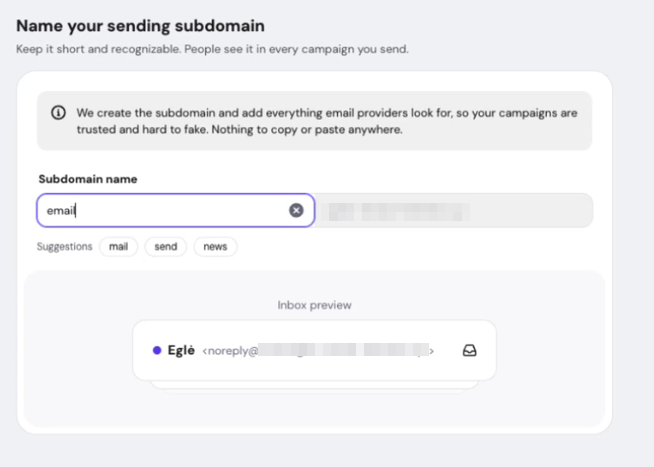
If you choose a separate subdomain, name it on the next screen. Reach suggests common subdomain names, such as mail, send, or news, and shows a preview of how your sending address will look. Select Set up automatically to let Reach configure the required DNS records, or select I’ll set up records myself to add them manually at your provider.
One-click connection automatically:
- Connects your Hostinger domain to Reach
- Configures SPF, DKIM, and DMARC DNS records
- Connects your Hostinger website
- Optionally auto-fills your brand details
If you have an external domain (hosted outside Hostinger), enter it directly on the first setup. Reach will trigger domain ownership verification, attempt to scrape your brand details, and guide you to complete DNS verification. You can choose a subdomain for an external domain only after ownership verification is complete.
After the connection completes, a summary modal confirms what was set up. If you skip the first setup, you can connect your domain manually via Settings → Domain settings at any time.
Connecting an external domain to Hostinger Reach
Enter your external domain directly on the first setup. Reach will:
- Trigger domain ownership verification.
- Attempt to scrape brand details from the domain.
- Guide you to the domain settings page (via an onboarding toast) to complete DNS verification.
If you skip the first setup, connect your domain later via Settings → Domain settings.
In case you already have your domain connected with Hostinger Reach
-
Click on Settings → Domain
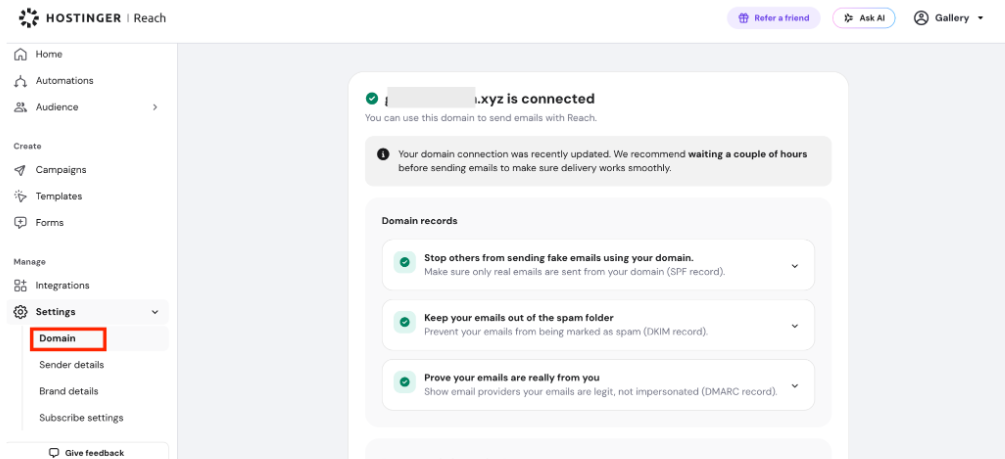
- All of your DNS records (SPF, DMARC, DKIM) will be handled automatically if your domain is at Hostinger, and it’s usually pretty fast, 10-15 minutes. In some cases, however, it can take up to 24 hours. We recommend sending your first email campaign only after this time has passed. If your domain is managed at another provider, you’ll get instructions to log into your domain provider and add each DNS record to yourself manually.
- Add a sender name that matches your personal or business brand.
- Update the sender’s email address, if needed.
If you’d like to get replies from your subscribers, use a sender email that has a mailbox. You can get an email plan and set up an email at Hostinger.
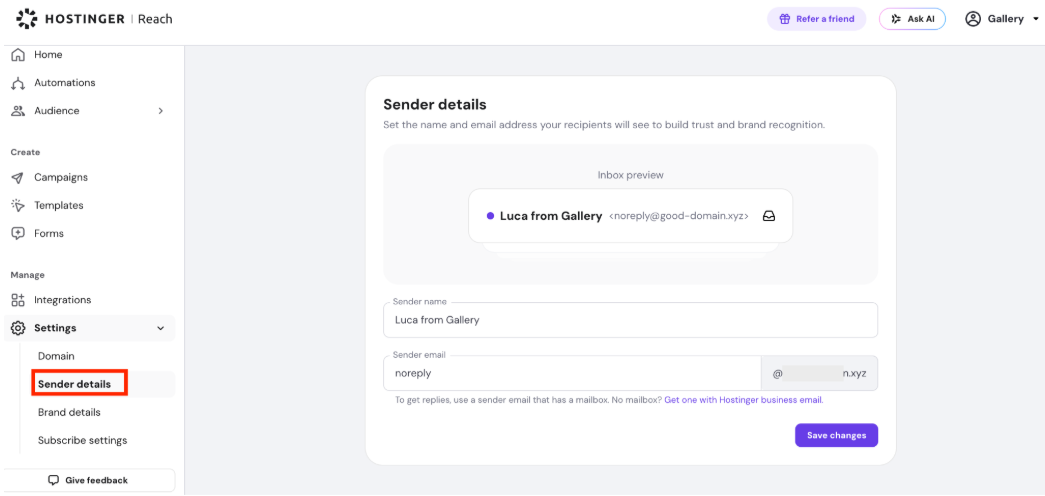
- Click Save Changes.
If you do not have a professional mailbox, you can get an email plan and set up an email at Hostinger. Mailbox is completely optional, but it enables your subscribers to reply to your campaigns and strengthens your sender reputation, especially if your domain does not have a website.
If your connected domain does not have MX records configured, a setup banner will appear on the Sender Details settings page prompting you to set up a mailbox. Once MX records are configured for your domain, the banner will no longer appear.
Switching to a subdomain
If your domain is already connected to Reach as a main domain, you can switch to sending from a subdomain instead.
- Go to Settings → Domain.
- Select Use a subdomain instead, next to your connected domain.
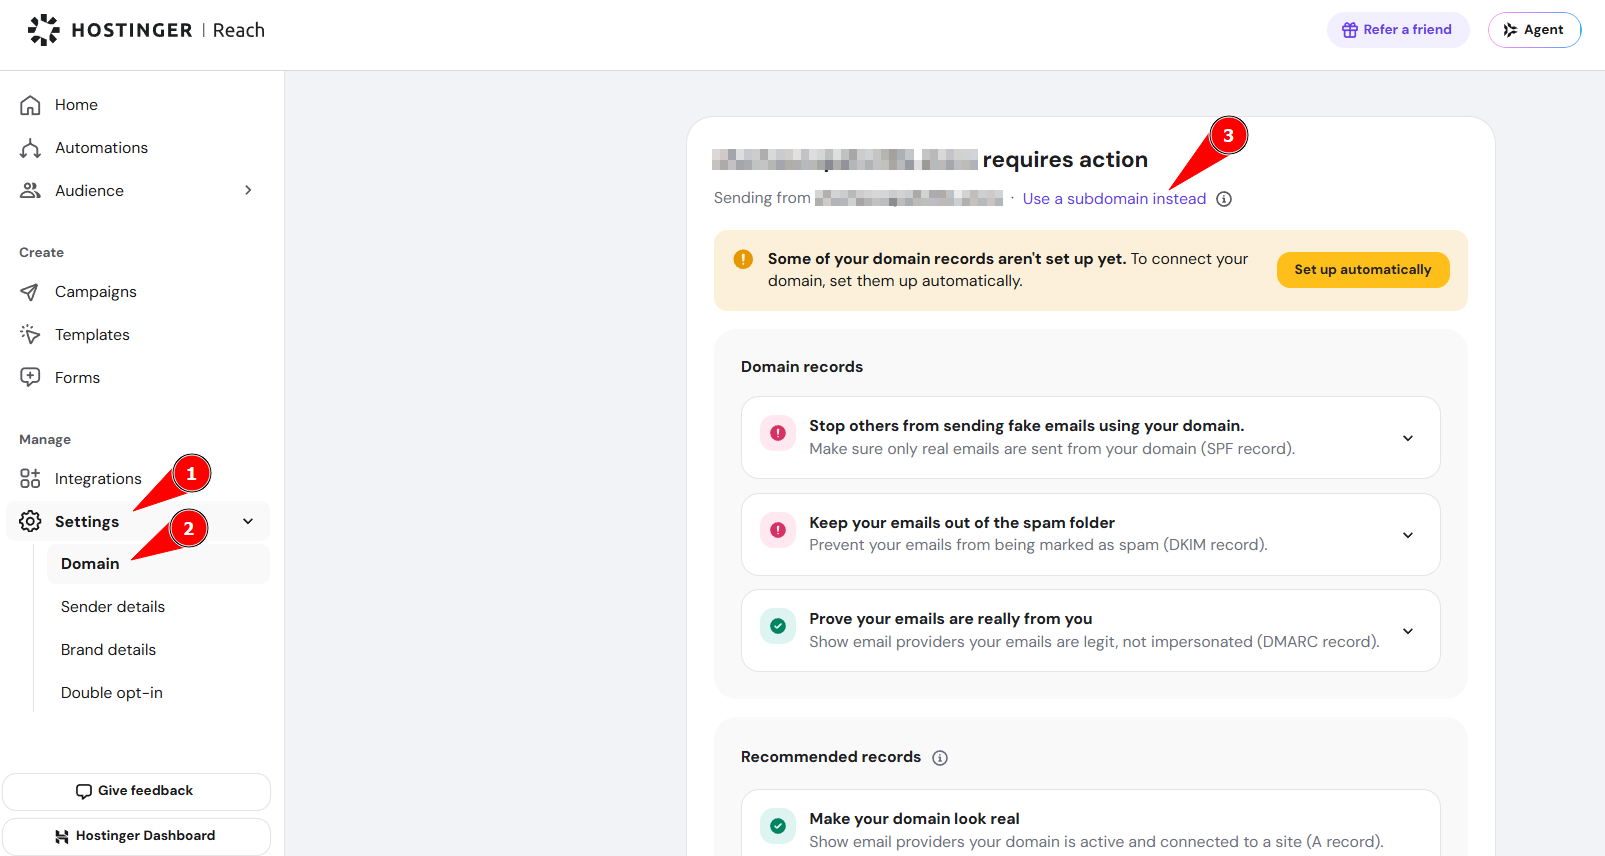
- Name your subdomain, then select Save subdomain.
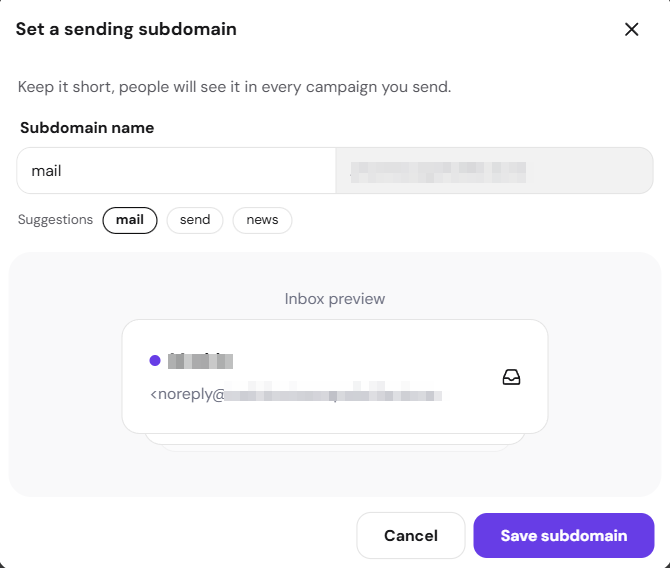
Reach configures the required DNS records for the new subdomain automatically if your domain is at Hostinger. If your domain is managed at another provider, add the DNS records manually as instructed on the page.
NOTE
- For external domains, you can switch to a subdomain only after your domain ownership has been verified.