If you run a Hostinger Ecommerce store, consider enabling Paysera. It’s a convenient and trustworthy online payment provider that supports a variety of payment methods. Hostinger AI Builder websites use the same Paysera connection when they’re connected to Hostinger Ecommerce.
Enable Paysera
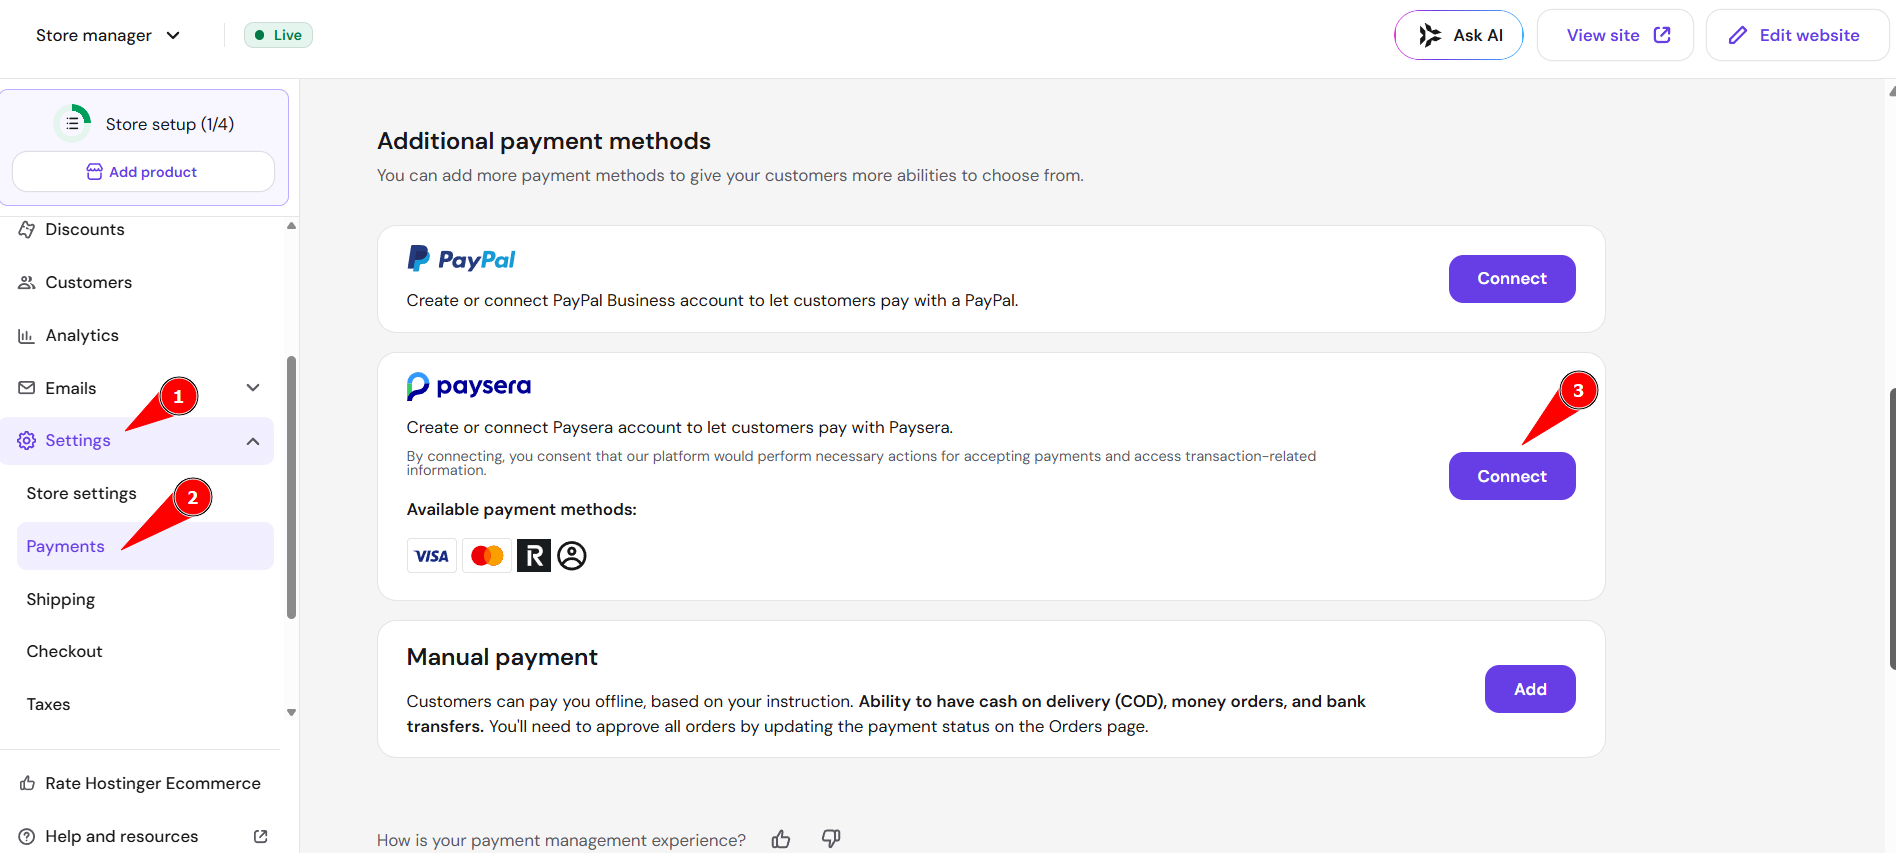
To enable Paysera, go to Settings → Payments in your Hostinger Ecommerce Store Manager and click on Connect next to Paysera. In Hostinger AI Builder, open the store management area first:
Create a Paysera account
Further steps vary depending on whether you have a Paysera account or not. If you don’t have a Paysera account yet, create one by following the steps outlined in the store management area.
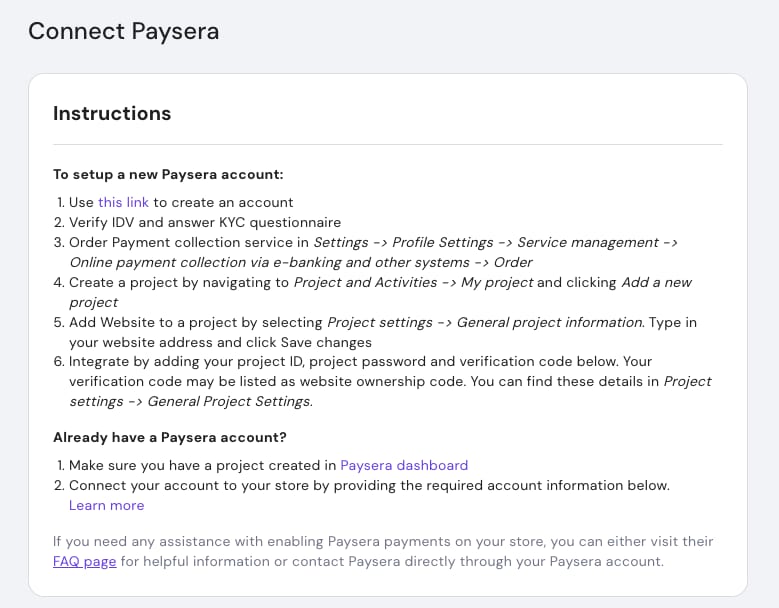
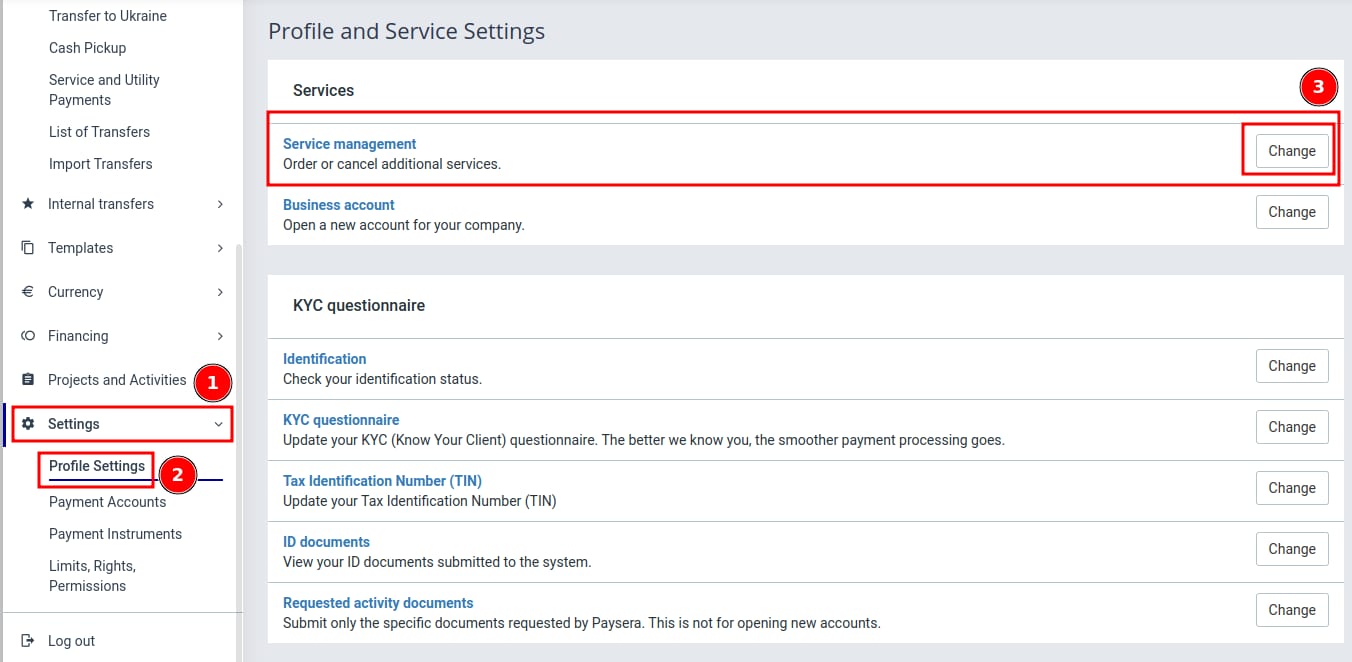
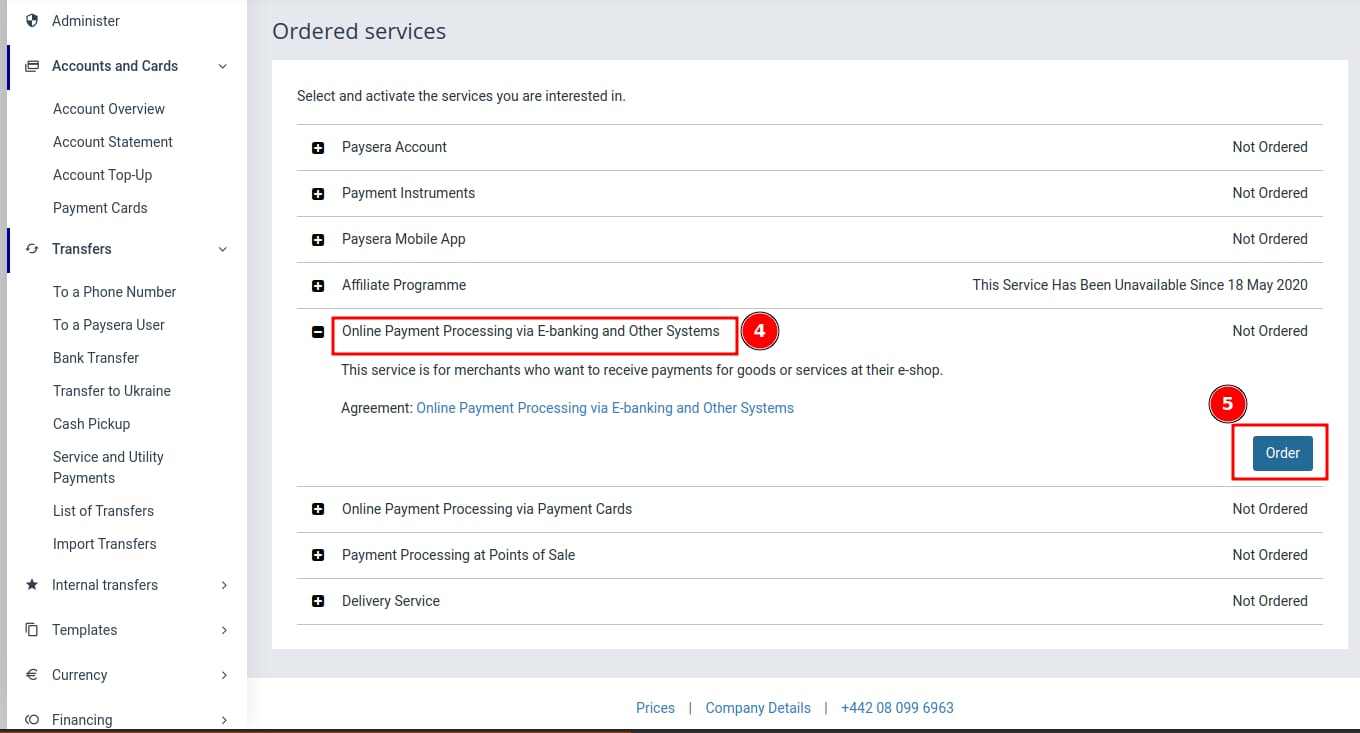
Then, log in to your created account and follow these steps: Settings -> Profile Settings -> Service management -> Online payment collection via e-banking and other systems -> Order.
Enable payment collection with credit cards
If you are interested in payment collection with credit cards, you should order Online payment collection via payment cards.
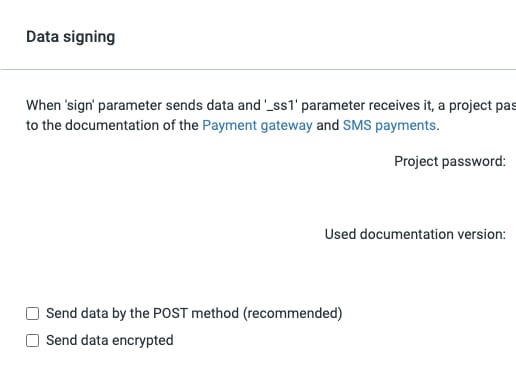
Make sure that these two checkboxes are left unchecked, otherwise the payments will not work:
Create a project inside your Paysera Account
If you already have a Paysera account, make sure you have a project created. If not, in the left-hand menu, select Project and Activities -> My projects. If this section is not visible, reload the page. To create a new project, click Add new project. You can find a video showcasing this.

Connect your project to Online Store
You’ll need three main things to connect your Paysera project to your Hostinger Ecommerce store:
-
Project ID
-
Project password
-
Verification code (can also be called website ownership code or project confirmation tag)
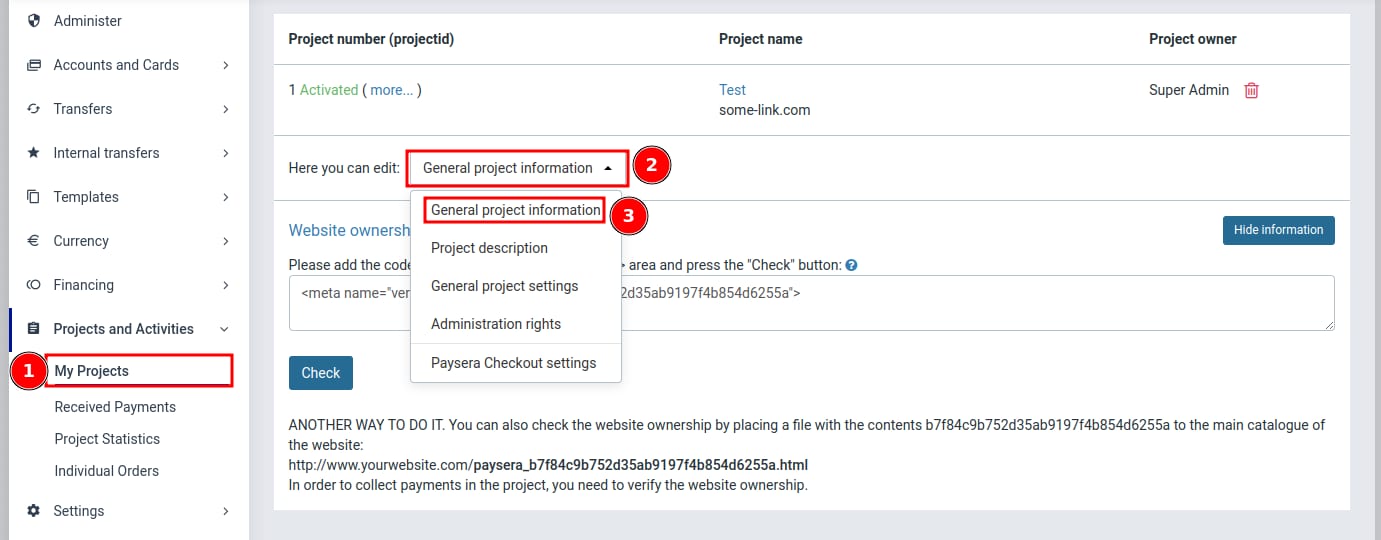
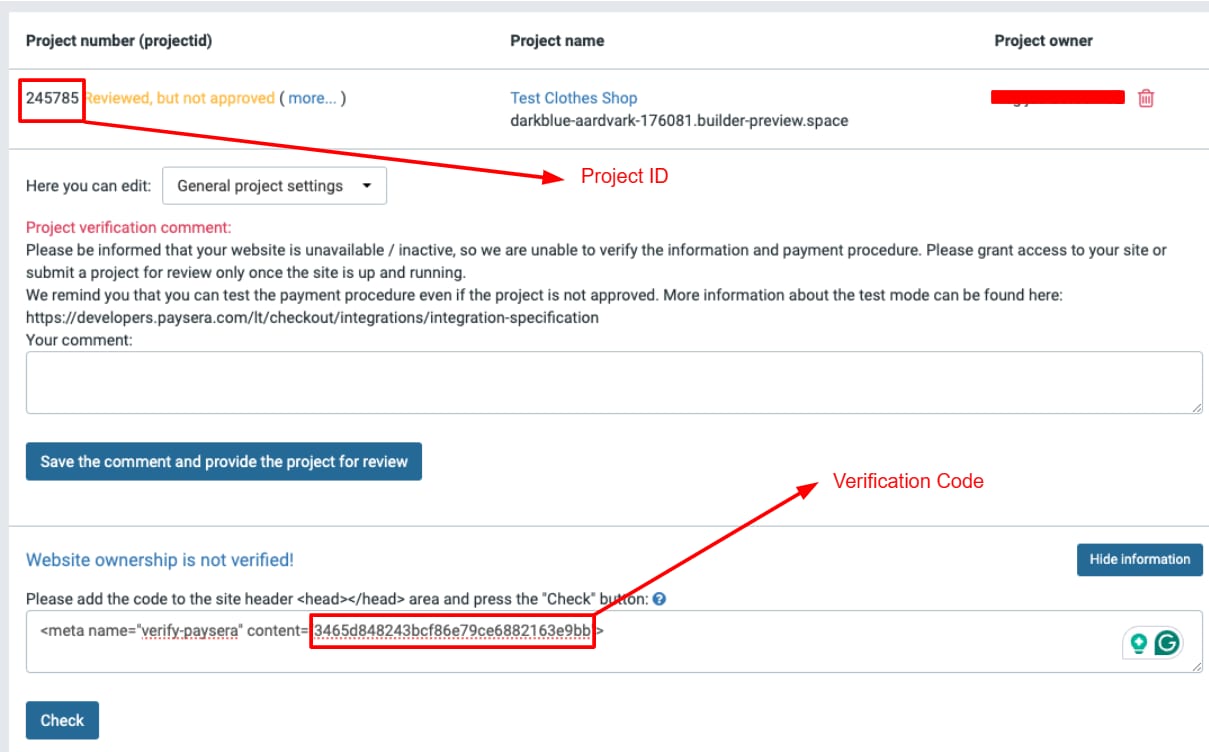
The project ID is visible in your project list. The password and the verification code (or the website ownership code) can be found by clicking on Project settings → General Project Settings. Then, you will add the website to your project. Select Project settings -> General project information. Type in your website address and press Save changes.
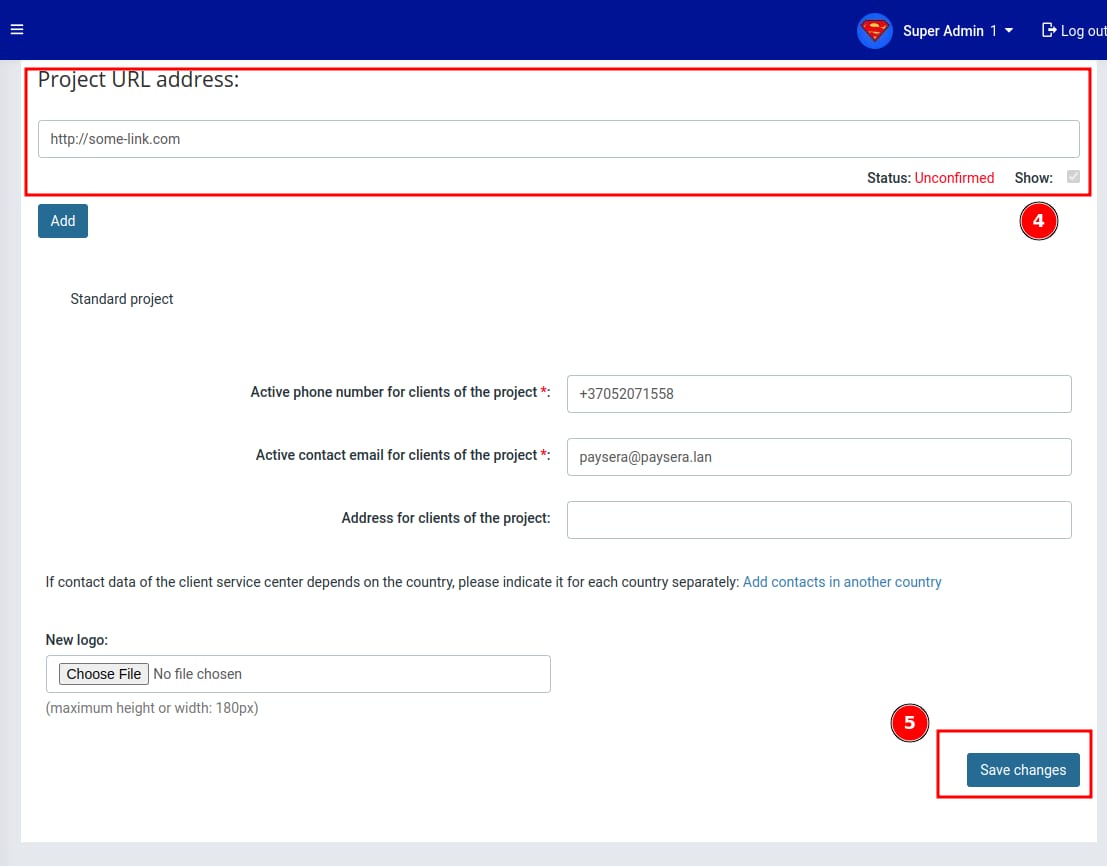
Make sure that the domain of the project matches exactly the website domain, with https:// added to it.
Once the project is created, copy over the project ID, project password and verification code values to be added in Settings → Payments in your Hostinger Ecommerce Store Manager.
After these values are saved in our system, access your editor and publish the website so that Paysera could verify the ownership of the website. You will find these project details in the image below:
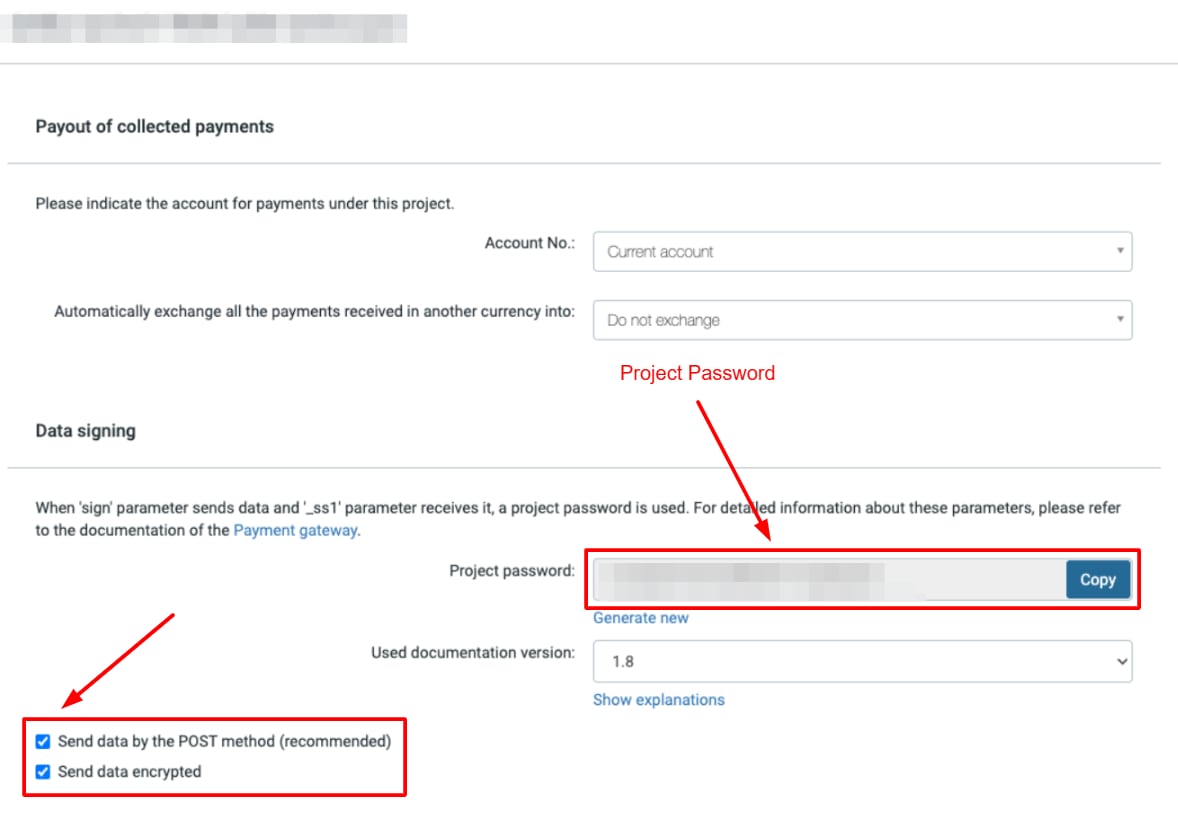
Once the ownership is verified and the project is approved from Paysera side, the payment should be active and working.