How to use WordPress: A complete guide to building a WordPress website
Mar 10, 2026
/
Jordana A. & Marco C.
/
21 min Read
You’ve chosen WordPress to build your website because it’s free, versatile, and highly flexible, thanks to its open-source nature.
But there’s a catch: WordPress is known for its steep learning curve.
I’ve been there, so now I’m here to show you how to use WordPress without technical expertise. In this guide, I’ll walk you through nine steps to create your site, starting from choosing hosting and installing WordPress to optimizing it for performance.
Choosing between WordPress.org and WordPress.com
If you’re new to WordPress, there are two versions: WordPress.com and WordPress.org. Most tutorials focus on WordPress.org, but let’s quickly go over both options, so you understand the difference.
WordPress.com is a hosted website builder. With a free plan, you can jump right in and start creating ‒ no setup needed. WordPress and the tools for your site come pre-installed, making this option beginner-friendly. Once you’re ready to scale up, simply buy one of the plans starting at $4/month to access more resources and features.
The downside is that storage and features depend on the plan you choose. For example, to install plugins and themes, you’d need the Business plan, which costs $25/month. It’s like buying a prefabricated home ‒ easy to set up but with limited customization options.
WordPress.org, commonly known as WordPress, is more like building a house on your own land. It’s software, so you’ll need to get separate hosting and install WordPress yourself.
Sure, it takes a bit more work at the beginning, but you can choose a hosting provider that fits your budget. Plus, this WordPress version lets you start customizing right away with free plugins and themes to make your site exactly how you want it.
If you have big plans, like creating an eCommerce website or a professional portfolio, I’d recommend starting with WordPress.org right from the start.
How to build a website using WordPress
Here, I’ll show you how to build a WordPress website using the self-hosted version. If you decide to go with WordPress.com, you can jump straight to step 3.
1. Get a hosting plan and a domain name
WordPress needs web hosting and a domain name to be accessible online. Your hosting company stores all your site’s files, images, and data, while the domain name directs visitors to your website.
To run WordPress optimally, choose a web hosting provider that supports:
- PHP version 7.4 or higher.
- MySQL version 8.0 or higher, or MariaDB version 10.5 or higher.
- HTTPS Support for secure connections.
- Apache or Nginx servers, though other web servers that support PHP and MySQL will also work.
Sounds complicated? Go with a reputable hosting provider that offers WordPress hosting, and you’ll be all set! WordPress hosting servers and resources are optimized for websites using that software, guaranteeing your site performs at its best.
Alternatively, you can explore other various types of web hosting and pick an option that best fits your needs and budget. Just make sure the one you get meets the system requirements mentioned above.
For this tutorial, I will use Hostinger’s Managed WordPress hosting. It’s fully optimized for WordPress, and the starting cost is less than a cup of coffee at CA$ 4.19/month. Plus, all hosting plans include an SSL certificate and other handy tools that make building and managing a WordPress site easier.
Annual plans also come with a free one-year domain name, saving you the trouble of buying one from another registrar. All you need to do is choose the right domain name and register it when setting up your web hosting ‒ I’ll cover this in the next step.
2. Install WordPress
There are various ways to install WordPress, with many hosting providers claiming auto-installer software like Softaculous as the easiest option.
While this method avoids the hassle of manually downloading and uploading WordPress installation files to the server, it’s not entirely beginner-friendly. Depending on the software, you may still need to configure HTTPS, database name, and other basic settings.
This is why I recommend Hostinger’s WordPress hosting services.
Hostinger goes further with a custom onboarding flow that eliminates manual setup, making the process easy for non-technical users. It even helps with installing essential plugins and creating web content ‒ all before you even log into the WordPress dashboard.
Let me show you just how easy it is to set up WordPress with Hostinger:
- Buy one of Hostinger’s annual Managed WordPress hosting plans and start the onboarding process.
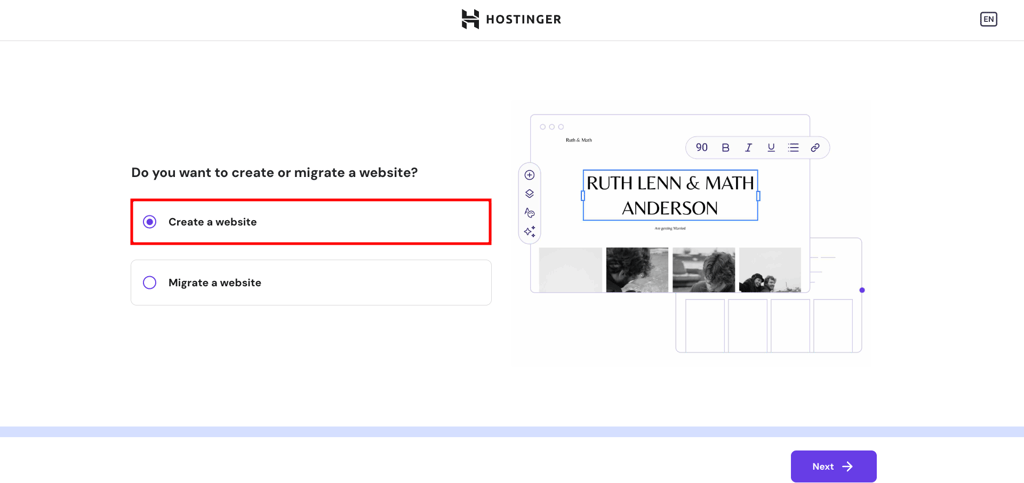
- I’d assume this is your first rodeo with WordPress, so pick Create a website and click Next.
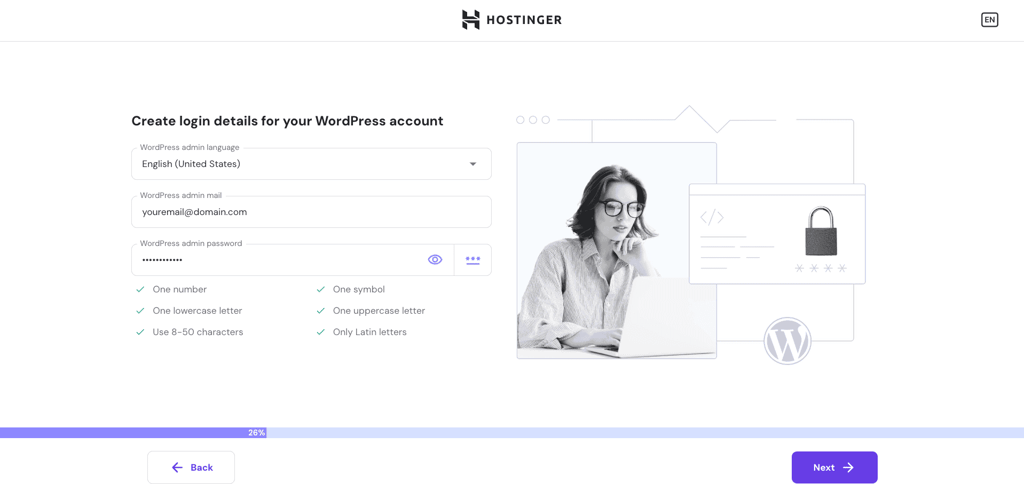
- Choose your language and create login details for your new WordPress account. They don’t need to match your hosting details, but make sure to use a strong password for security. Click Next when you’re ready.
- Pick the type of website you want to build to get tool recommendations from Hostinger or opt for a blank site. In this tutorial, I will build a blog.

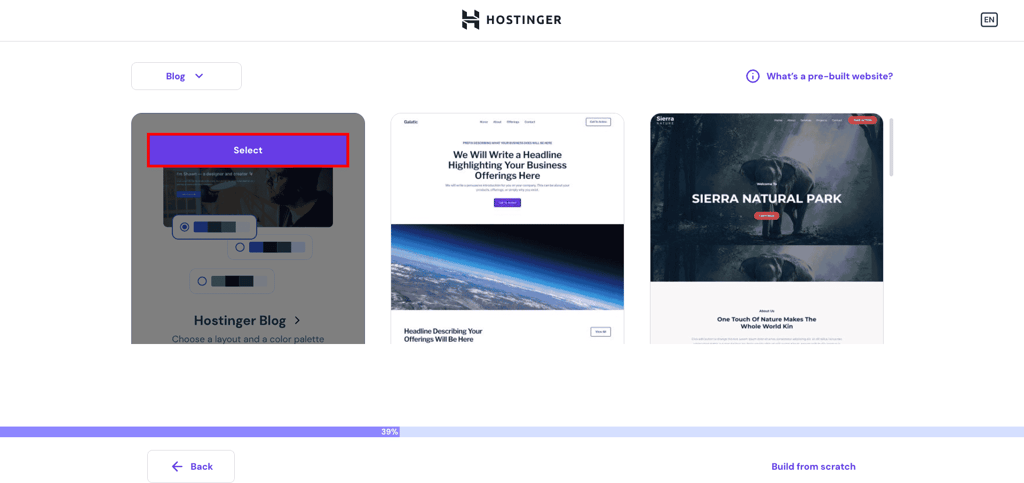
- Hover over one of the available pre-built websites for blogs and click Select. This step determines the look and feel of your website. Don’t worry, you can switch to another theme later. I’ll go ahead with the Hostinger Blog Theme, as this template offers multiple page layouts and color palettes.
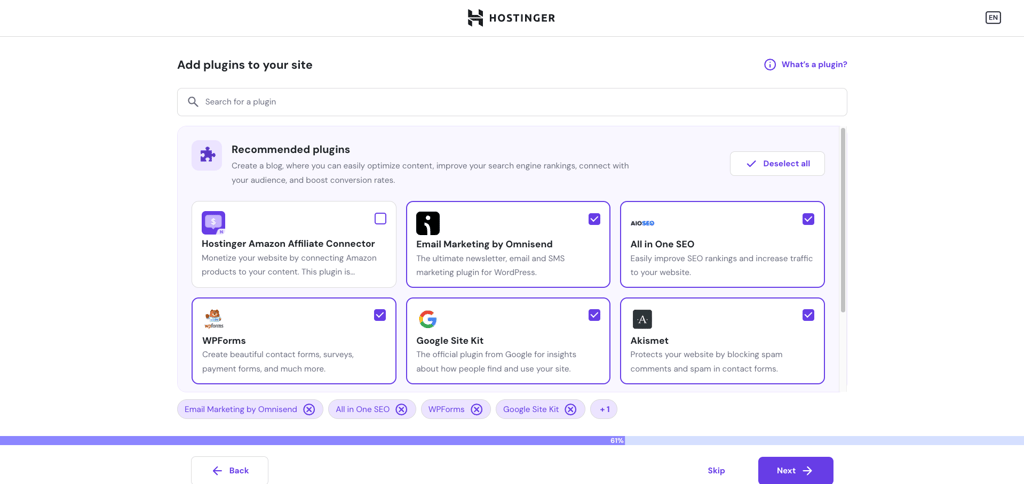
- Already know which plugins to install? Use the search bar to find them and check their boxes. Hostinger also suggests a few plugins based on your website type, but feel free to uncheck any you don’t need. You can add or remove plugins later, just like your theme.
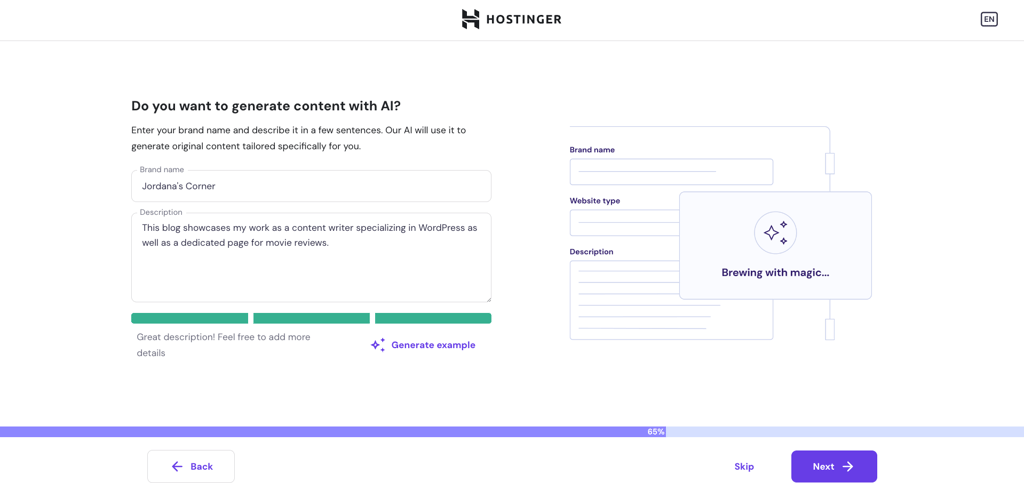
- Hostinger offers an AI Content Creator for populating your website with original content based on your brand name and description. This feature helps you quickly prepare the website for visitors, which is ideal if you’re short on time. Enter your prompt and click Next or Skip to do it later.
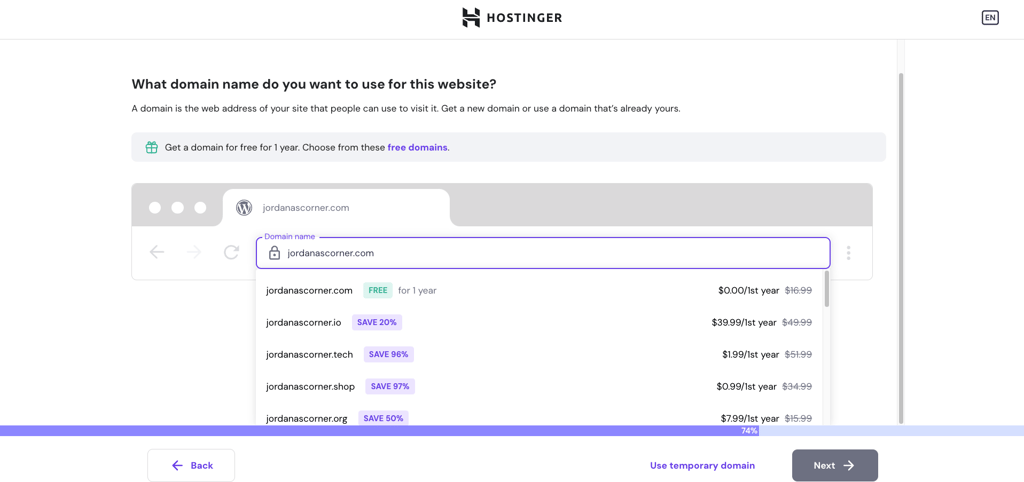
- Enter your domain name into the field to check its availability and price. Users on annual hosting plans should be able to register for free. If your preferred domain name extension isn’t available, scroll down to see other options. Otherwise, go with a temporary domain for now.
- If you claim your free domain now, Hostinger will ask you to verify your domain details. Remember to verify your email address through an email confirmation later.
- Select the data server closest to your target audience for optimized speed. Hostinger offers data servers in the US, UK, Brazil, France, Germany, Lithuania, India, and Indonesia.
- That’s it! Wait a minute or two for Hostinger to set up your WordPress website.
3. Understand the WordPress dashboard interface
The WordPress dashboard is your site’s control panel, where you manage posts, pages, design, plugins, and other website aspects in one place. The layout varies depending on the plugins you install, but here’s the default look:
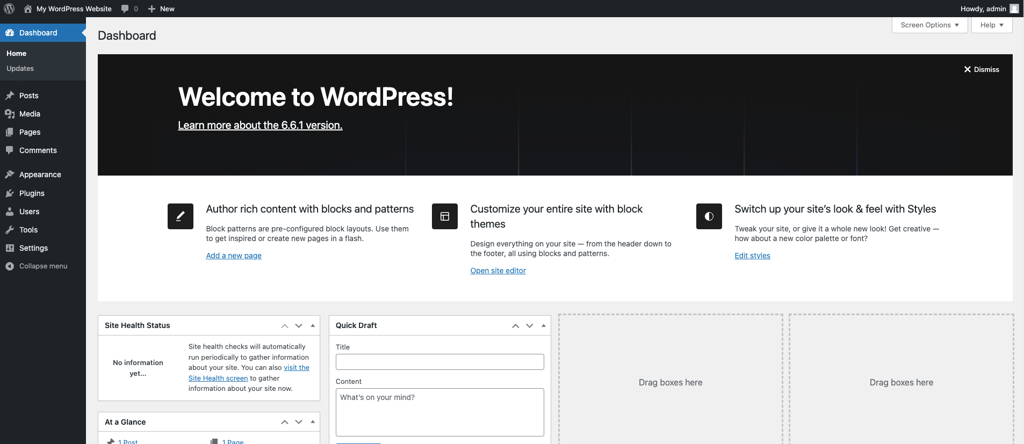
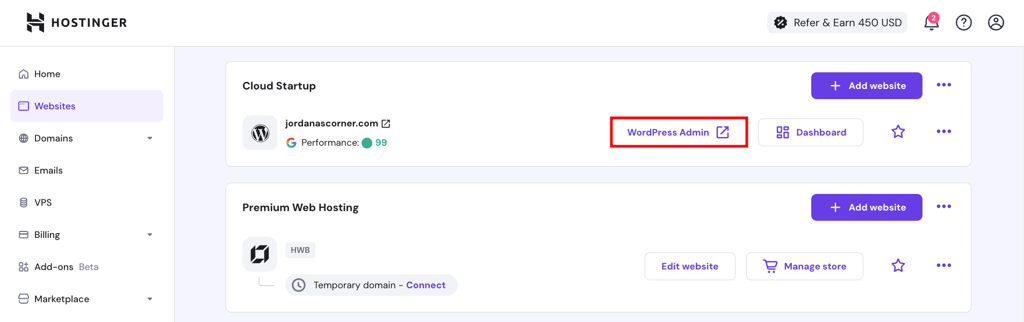
After completing Hostinger’s onboarding, it’ll take you to the dashboard to make adjustments and start publishing content. You can access it anytime by navigating to the Websites section on the hPanel dashboard and clicking WordPress Admin.
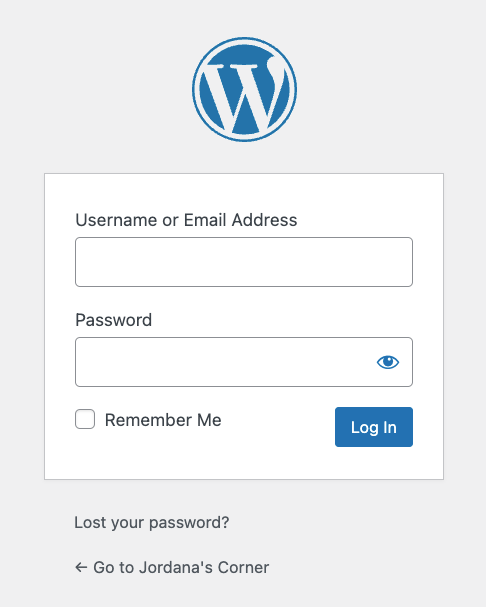
Alternatively, log into your WordPress admin dashboard at www.yourwebsitename.com/wp-admin using the login credentials created during onboarding. This method also works for those setting up WordPress manually or on non-Hostinger servers.
Let’s go through the menus in the WordPress admin dashboard:
- Dashboard. The starting point that provides a quick overview of your site, including stats, activities, and shortcuts to common tasks. It has an Updates submenu showing the latest releases for WordPress, plugins, and themes.
- Posts. This is the most visited menu item for many WordPress users. Here, you can create, edit, and manage blog posts, organizing them with categories and tags.
- Media. Your library of uploaded images, videos, and other files. You can add, edit, or delete media here.
- Pages. Access this menu to create and manage static pages on your site, such as the homepage or the Contact Me page.
- Comments. If you let visitors comment on your blog posts, you can approve, reply to, or delete their messages here.
- Appearance. This is where you’ll customize your site’s look, including managing themes, menus, and widgets. You can also access the site editor here.
- Plugins. Lets you scale your website’s functionality by installing, activating, or deactivating plugins.
- Users. Go here to add user accounts and assign roles to manage access to your website.
- Tools: This menu showcases extra features like importing or exporting content or checking your site health.
- Settings. The control center for your site, where you can adjust various aspects like site title, URL, time zone, and reading preferences.
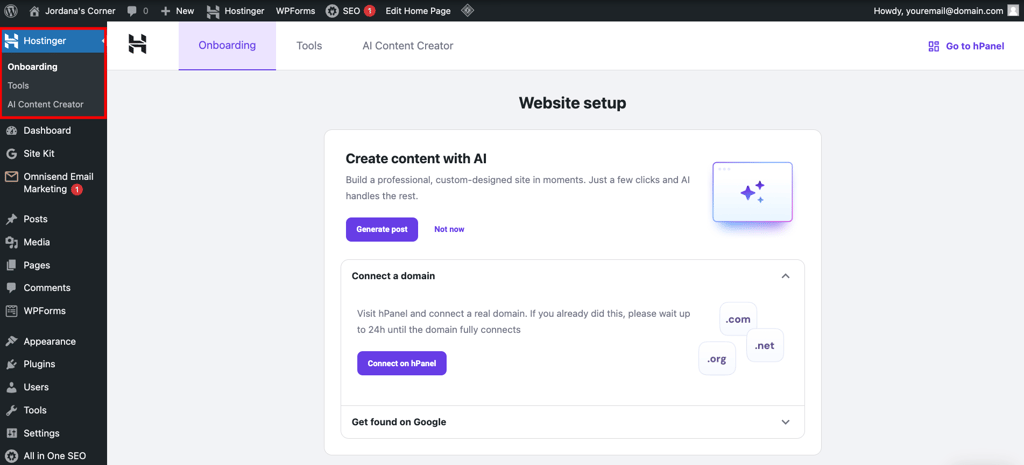
Hostinger users have an extra menu called Hostinger to access tools pre-installed with their hosting plan. Here’s the overview of its three submenus:
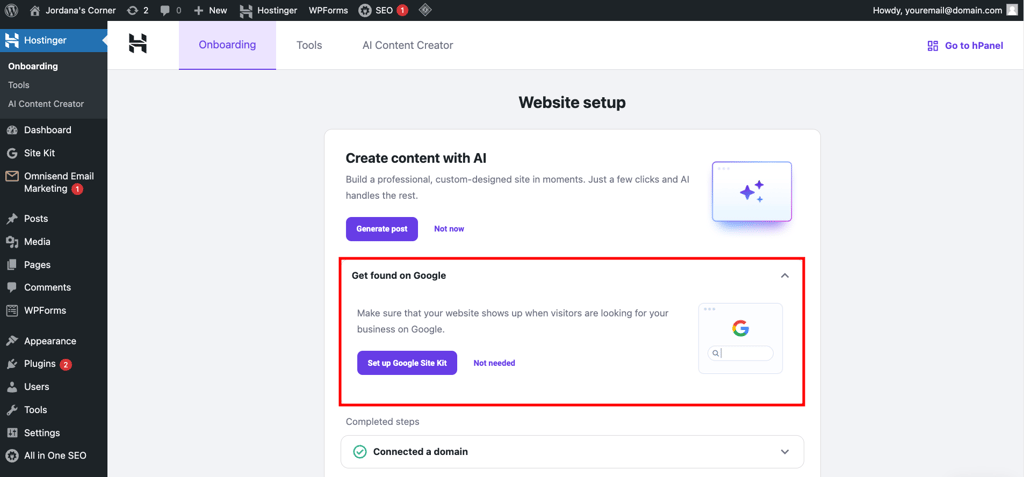
- Onboarding. This submenu shows a to-do list for completing your website setup, such as connecting a domain name and submitting the site to Google for better rankings. You can also find Hostinger’s tutorials and knowledge base here.
- Tools. The Hostinger Tools plugin interface contains shortcuts for management tasks. Here, you can enable maintenance mode to temporarily prevent visitors from accessing your site without going to the hPanel dashboard or installing a separate plugin.
- AI Content Creator. A built-in AI tool for creating unique content from your prompt, perfect for streamlining your content production or brainstorming ideas. This feature is also available in the WordPress post editor as a block ‒ I’ll show you how to use it later.
4. Choose a WordPress theme and design your website
A WordPress theme is like your website’s outfit, controlling how your site looks and feels. It comes with pre-designed layouts, colors, and styles, so you don’t have to start from scratch.
Installing a WordPress theme
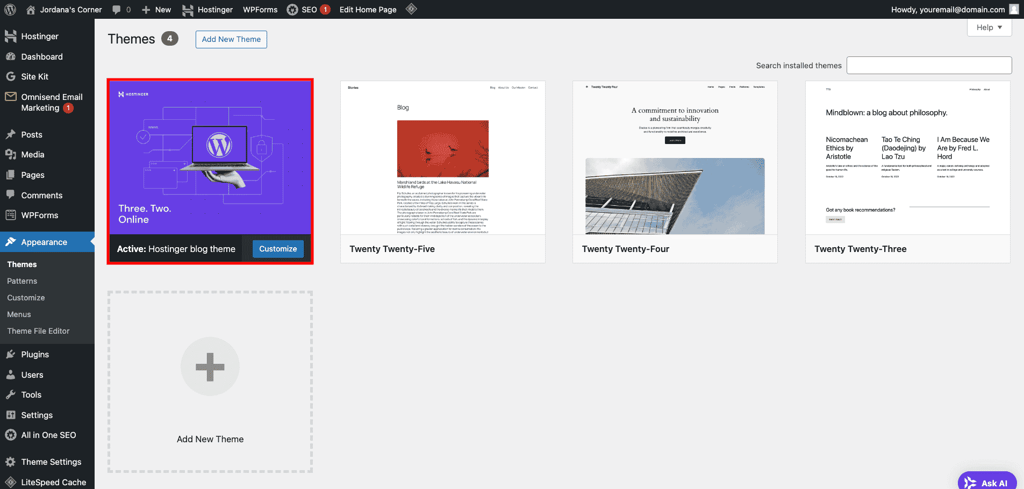
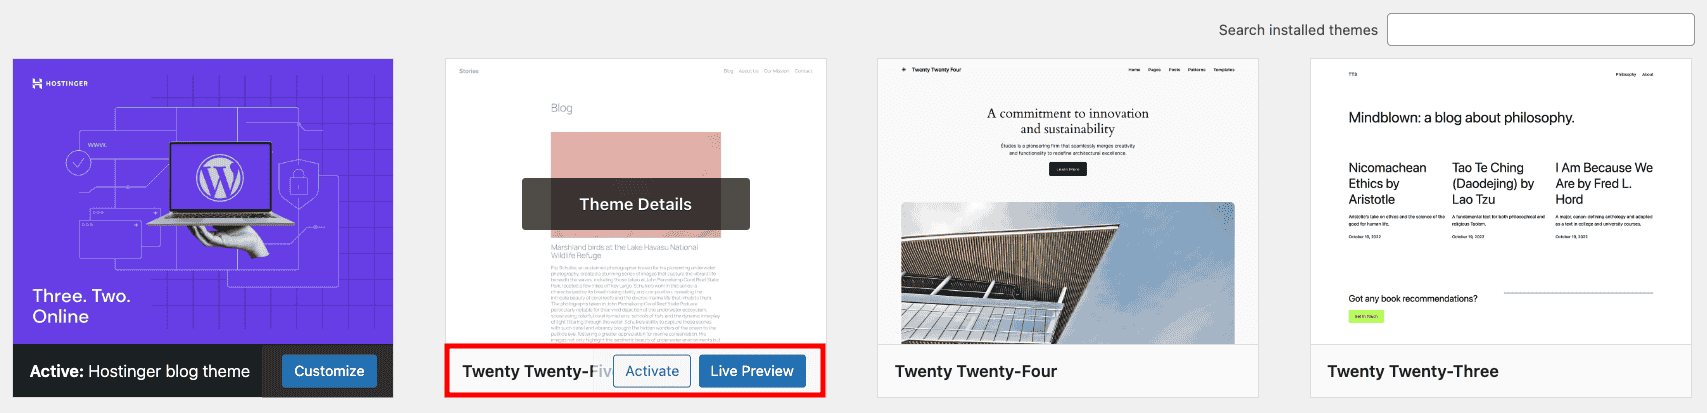
You can install multiple WordPress themes, but only one can be active at a time. To check your current theme, go to Appearance → Themes in the admin dashboard and find the one labeled Active. In my case, I’m using the Hostinger Blog Theme from onboarding.
Activating an already existing theme requires only one click. Just hover over your chosen theme and select Activate. I usually Live Preview it first to see whether it’s the right fit for my site.
If there’s no suitable theme in your library, you can install a new one from the theme directory. Here’s how:
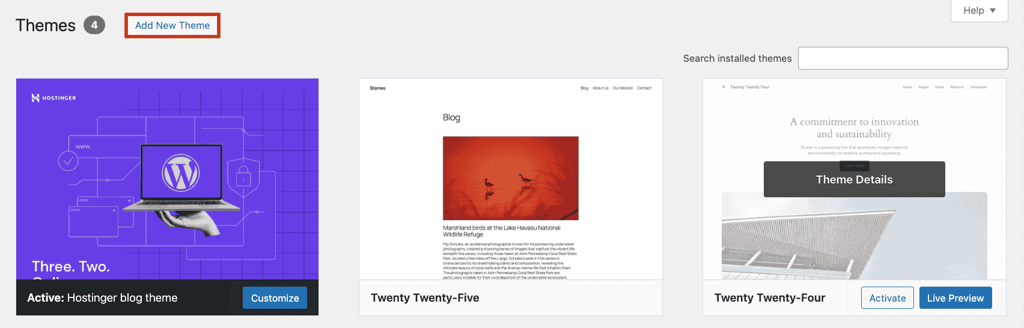
- Click the Add New Theme button at the top of the Themes page.
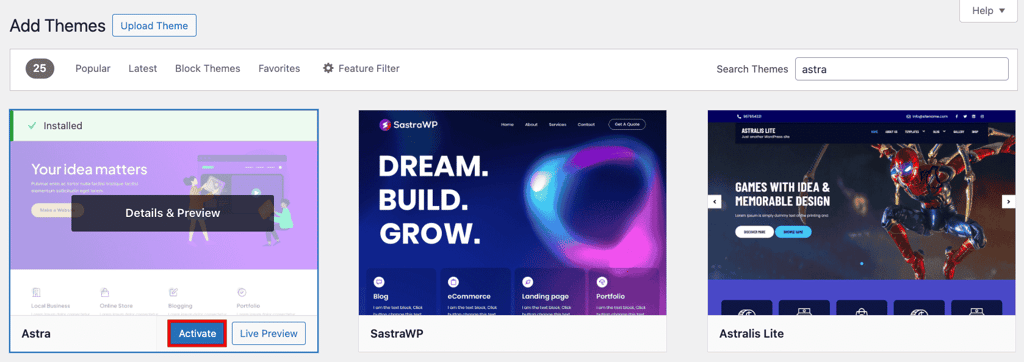
- Use the filters and search bar to find your ideal theme. When I don’t have a specific theme in mind, I tend to use Feature Filter and narrow the choices based on my website’s niche. For now, I’m searching for Astra, one of the best free WordPress blog themes.
- Once you choose the WordPress theme you want, hover over it and click Install. Wait a few seconds until it’s done, then select the Activate button.
This installation method only works for free themes on the official WordPress theme directory. To use a theme from a third-party website or marketplace, you must manually upload its files to the site.
Don’t worry, the process is less complicated than it sounds. After downloading the theme’s .zip file, head to Themes → Add New Theme and click Upload Theme. Select the compressed file from your local storage and hit Install Now. Remember to activate it once the process is complete.
There are thousands of WordPress themes in the official WordPress directory and third-party marketplaces. To save you the hassle, Hostinger has put together a list of the best free WordPress themes for you to check out.
Customizing a WordPress theme
There are several ways to personalize your theme. The easiest way is to use the native WordPress editor, accessible via Appearance → Customize.

Your Customizer’s layout might be different from mine since each theme has its own settings. The menus are pretty self-explanatory, so don’t be afraid to tinker with them and see what works for you.
Not sure where to start? Here are some settings I usually change when working with a freshly installed WordPress theme:
- Site Identity. Add your site’s title and logo to strengthen your brand.
- Colors. Most themes provide color palettes, but I sometimes choose specific colors for elements like links and headings to make them pop. A good rule of thumb is making sure the color scheme aligns with your brand.
- Typography. Change fonts and text sizes for better readability.
- Header and Footer. Adjust this setting to show extra widgets at the top or bottom of each page or modify the layout.
- Sidebar. Not all themes have this option, but I prefer showing my sidebar on the left side whenever possible.
- Homepage Settings. I’ll cover this in detail in step 6.
- Menus. Organize your site’s navigation to help visitors find content. Check out Hostinger’s guide on creating a WordPress dropdown menu to keep your layout clean.
- Widgets: Extra widgets like a search bar and embeds that I don’t place in the header and footer go to other widget areas, such as the sidebar.
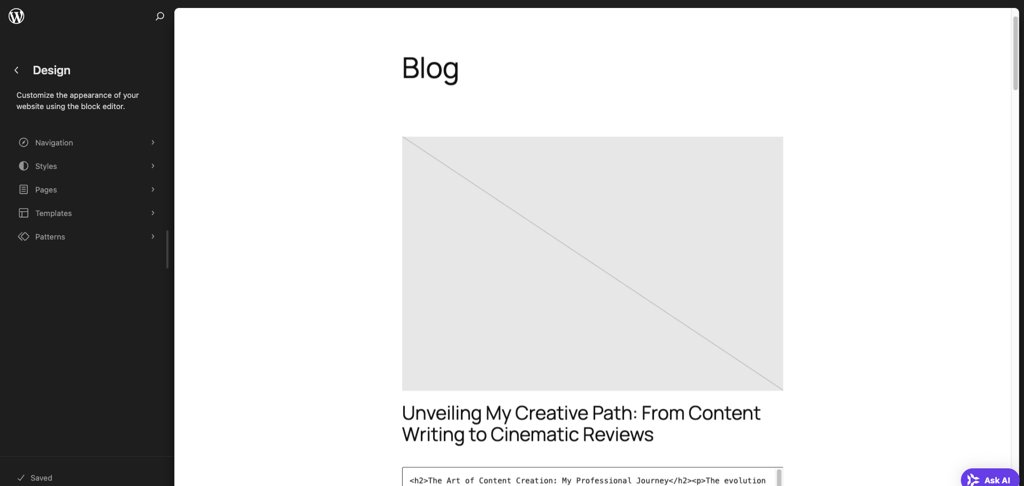
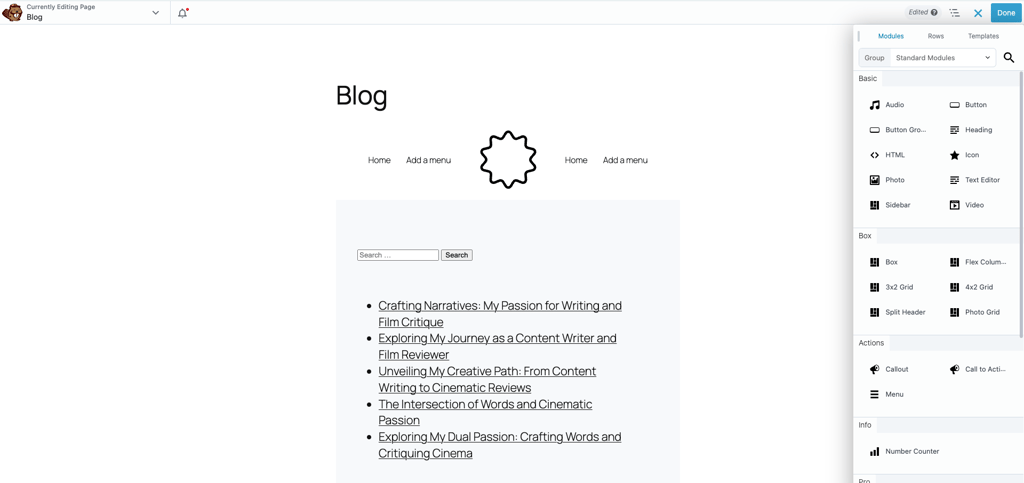
If you can’t find the Customizer, you’re likely using a block theme and need the Site Editor for customization. Accessible via Appearance → Editor from the admin dashboard, this built-in theme editor functions like its counterpart but offers more customization options in block format, similar to the Gutenberg editor.
When working with certain themes, I find both Customizer and Site Editor limiting in terms of design options and flexibility. If you feel the same, consider installing a page builder plugin.
Popular WordPress page builder plugins like Elementor and Beaver Builder include drag-and-drop functionality and unique pre-built blocks and page templates, giving you more creative control over each page’s design. In step 7, I’ll show you how to install a plugin.
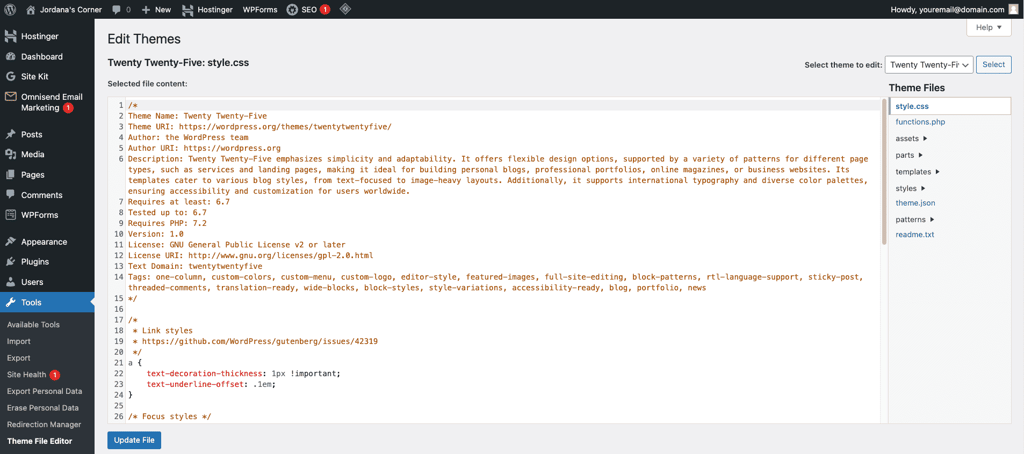
The last method for customizing your theme is to use the Theme File Editor, which is also accessible through the Appearance menu or Tools for block-based themes.
As the name suggests, it lets you tweak the theme file’s code to apply advanced changes that previous methods can’t do. It’s the least beginner-friendly option since it involves coding and requires caution to avoid errors. I recommend trying it only after learning some HTML, CSS, and PHP.
5. Publish content on posts and pages
In WordPress, posts and pages both add content to your site but have different purposes.
Posts are great for blog-style content. They appear in reverse chronological order by publication time, making them ideal for news, updates, or articles.
Pages, on the other hand, are static and timeless. They’re for content that rarely changes, like About and Contact pages, helping structure your site and provide key information to visitors.
Creating a post or a page follows a similar process, so I’ll share some tips and pointers based on what I usually do for each.
Publishing and optimizing a WordPress post
Follow these steps to create a WordPress post and optimize it for search engines:
- Head to Posts → Add New Post from your admin dashboard.
- In the post editor, add the post title and content. You can start writing on the editor or add other elements using blocks. Click the (+) icon at the top left of the page or the body and drag the blocks you want into the workspace.
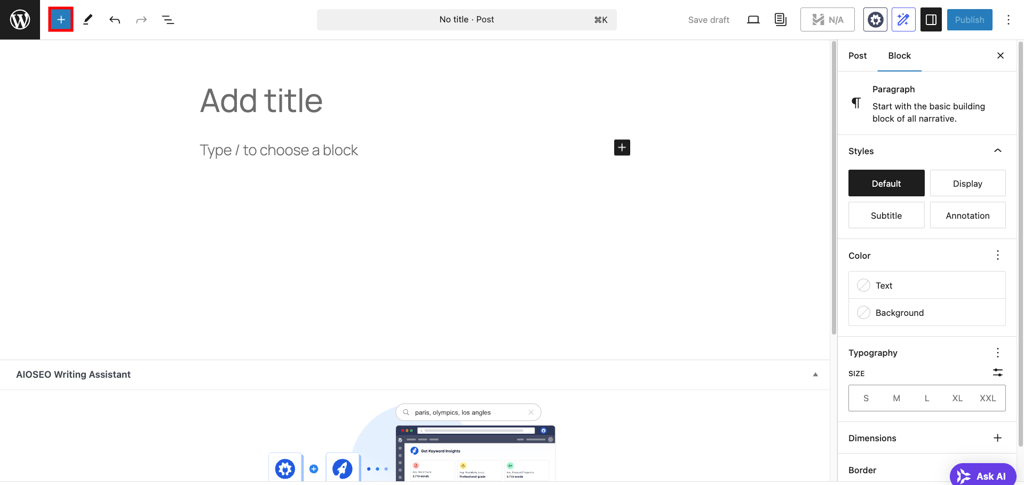
The blocks directory offers a ton of options for various website types. Here are the ones I use most for blogs:
- Paragraph. For adding and formatting text. The editor pre-adds this block by default.
- Image. Lets you upload or select an image to add visuals to your post. Use the Gallery block to showcase multiple images.
- Heading. Creates headings to structure your content and improve its readability. Choose from H1 to H6 based on the importance of each section.
- Quote. Highlights text as a quote and styles it to stand out.
- List. Perfect for creating numbered or bulleted lists to make content easier to skim.
- Once you’re happy with the content, take care of the publishing tasks to keep your WordPress content organized, user-friendly, and effective. Open the Post tab in the right sidebar and adjust these settings:
- Status. Leave it as a Draft if you want to publish the post immediately. Otherwise, set it to Pending for review or Private to limit access.
- Publish. Choose a date and time to schedule the post’s publication. Changing the post status to Scheduled will override this setting.
- Link. Set the post’s permalink or URL so visitors can access it from a browser. Since this topic is a bit technical, I recommend checking out our dedicated tutorial about permalinks. For now, you can keep the slug ‒ the part after the last slash identifying this specific post ‒ just like your post title.
- Discussion. Leave it Open to allow comments on your post. Otherwise, set it to Closed.

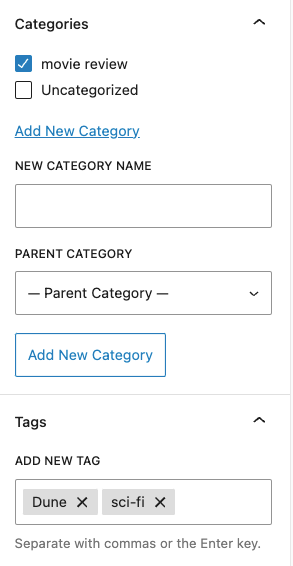
- Still focusing on the right sidebar, you’ll see Categories and Tags dropdown menus. Also known as WordPress taxonomy, they simplify content organization and website navigation. Categories group your post into a hierarchical structure, while tags assign parameters to combine similar posts.
For example, if the post covers the Dune: Part Two movie review, I’d categorize it as a “movie review” with “Dune” and “sci-fi” as tags. You can manage both in Posts → Categories and Tags later.
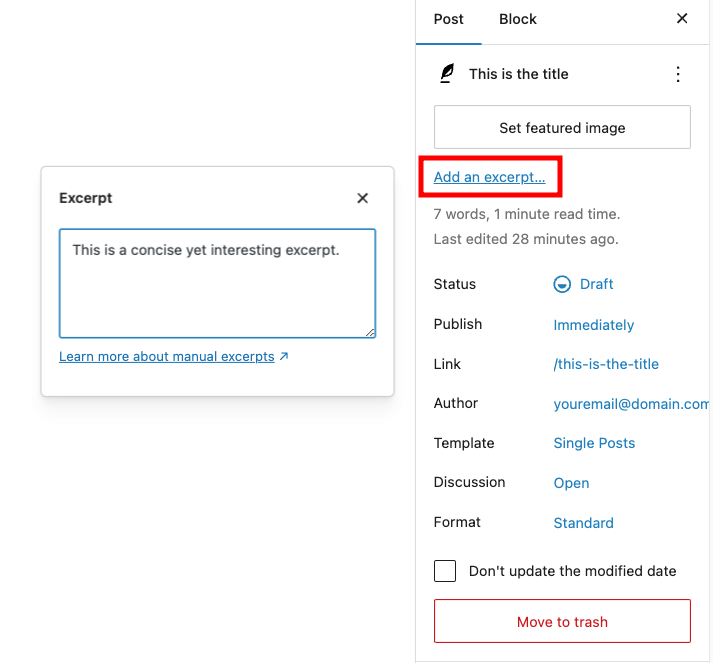
- The final thing to do is to add an excerpt or your post’s summary. It helps attract users to click on the post, so don’t underestimate this element. Click Add an excerpt and write the summary in the box.
- Click the View button right next to Save draft to preview the post. Once you’re ready, hit Publish.
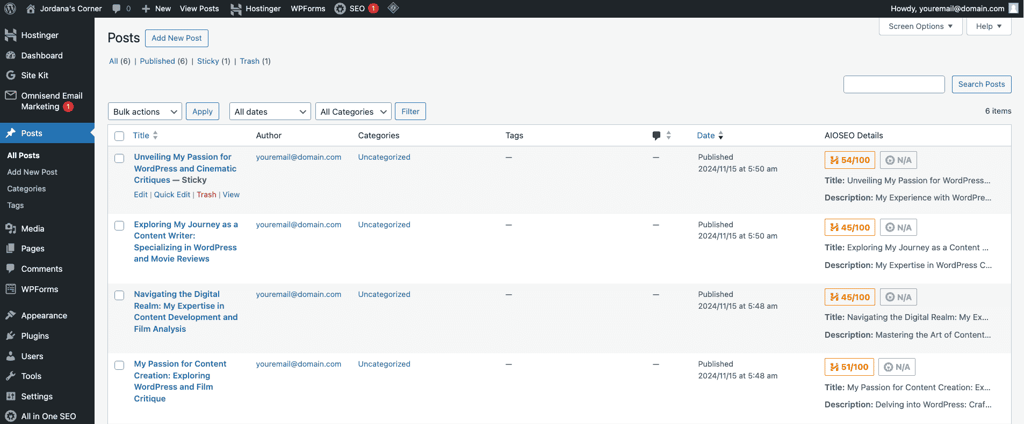
Congratulations on publishing your first post! You can manage all the published and drafted posts in Posts → All Posts.
Creating a WordPress page
This process uses the same block editor as when publishing a post. To get started, go to Pages → Add New in your WordPress dashboard.
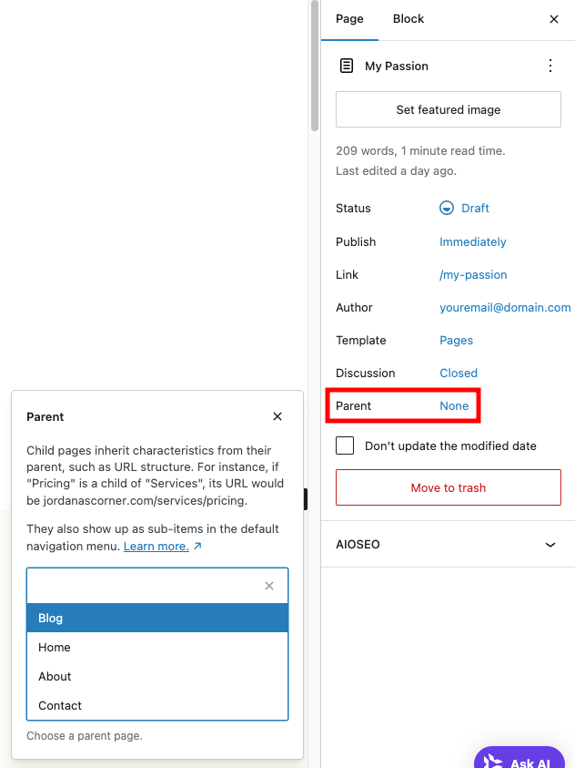
This time, there are no Categories and Tags menus. Instead, the Page tab in the sidebar has an option called Parent.
A parent page in WordPress is a top-level page that can have child pages grouped under it. This helps organize your site’s structure, especially if you have related content. For example, I can make a parent page titled “Movies” and assign “Coming Soon” and “Movie Reviews” as its child pages.
If you want to create a parent page, leave this option as None. Otherwise, click on it and pick an existing parent page from the dropdown field.
Since creating a page is similar to a post, I’ll list essential pages to have instead of naming the steps (if you skipped the previous section, please refer to it now):
- Homepage. I’m going to cover this in the next step.
- About. This page tells your story, such as who you are, your mission, and why visitors should trust you. It’s a great place to introduce your brand to your audience.
- Contact. Provide ways for visitors to reach you, like a contact form, email address, phone number, or social media links. Include your physical address if relevant.
- Services or Products. Create this page if you want to sell something on your website. Better yet, check out Hostinger’s guide on creating an online store with WordPress to get started on the right foot.
- Privacy Policy. Outline how you collect, use, and protect user data. It’s a legal requirement in many regions, especially if your WordPress website collects personal information.
- Terms and Conditions. Outline the rules for using your site, such as intellectual property, liability limits, and refund policies for online stores.
- FAQ. Another must-have page for online stores and business websites. Address common questions visitors might have about your business, products, or services to save time and improve user experience.
- 404 Error. A custom page that appears when a visitor lands on a broken or non-existent link. Use it to guide them back to key areas of your site.
6. Set up your homepage
Now that you’ve got all your pages and posts ready, it’s time to set up your homepage. The homepage is the first thing visitors see when they land on your website, so it’s your chance to make a great first impression and encourage people to explore your site.
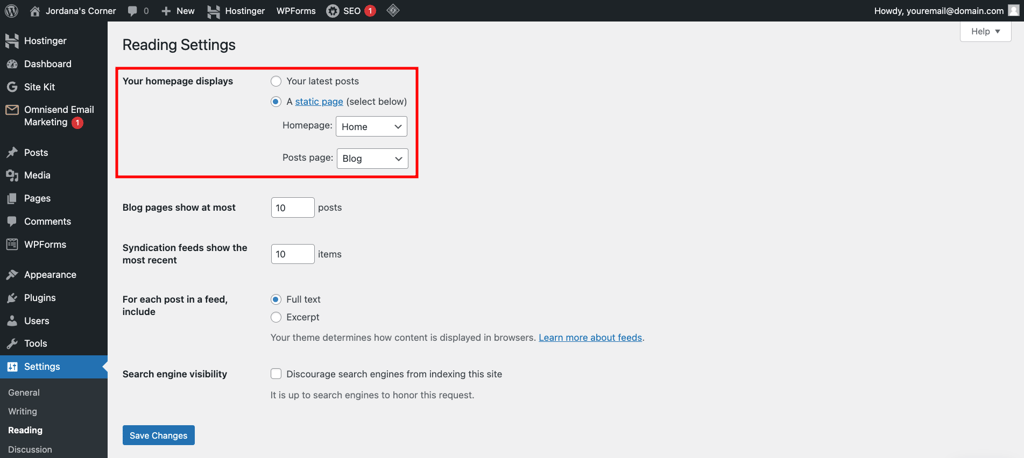
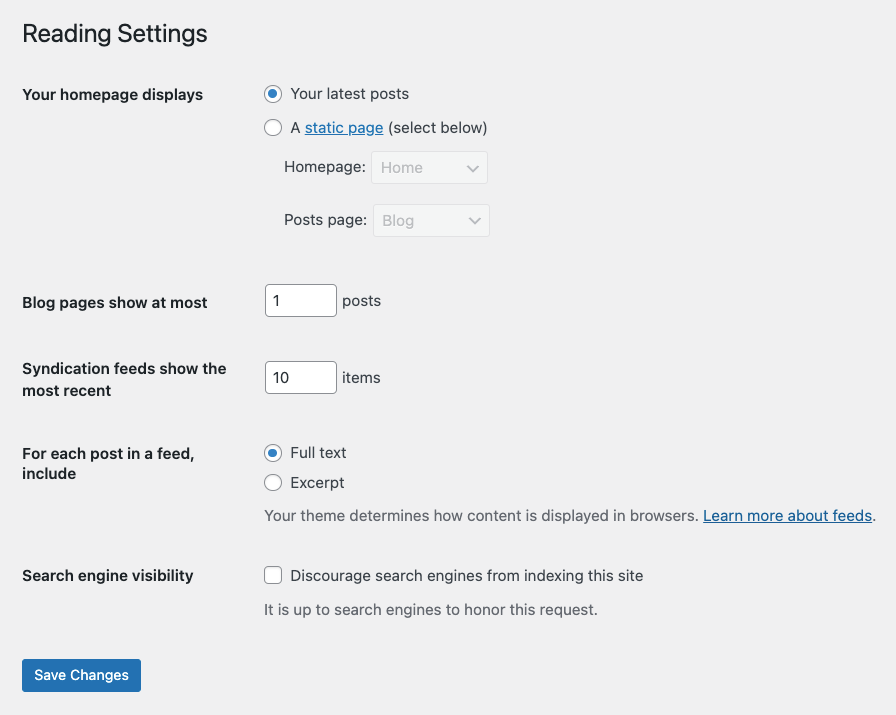
WordPress provides a quick way to create a homepage using either your latest posts or an existing page or post. Go to Settings → Reading and select your preference for Your homepage displays setting. Remember to hit Save Changes once you’re done.
If you have a key post and want it to be the first thing visitors see, set it as your homepage with these steps:
- Go to Posts → All Posts and click Quick Edit on the post you want as your homepage. Check the Make this post sticky box and hit Update to save the change.
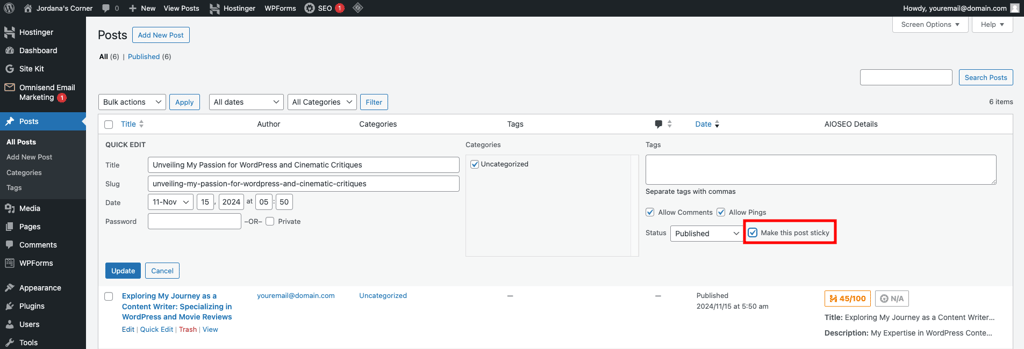
- Head to Settings → Reading and set your homepage to display the latest posts. This time, change the number of Blog pages show at most to 1 and make it show the full text.
- Click Save Changes to apply the new settings.
You can also create a custom WordPress template for your homepage. This method lets you change the page’s content and design, giving it a dynamic feel without the hassle of starting from scratch. Here’s how:
- Open Site Editor → Templates and click Add New Template.
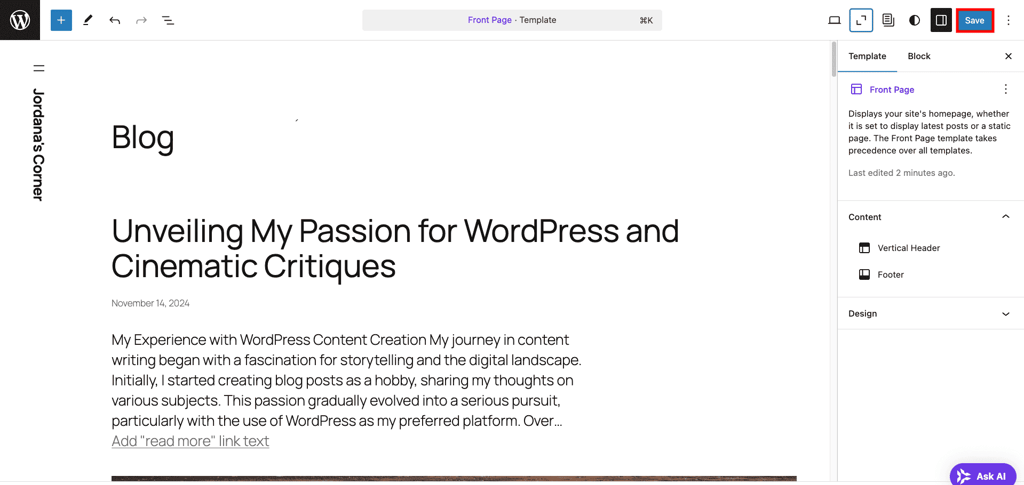
- Select the Front Page option and pick one of the available patterns. Hit Skip if you want to design it from scratch.
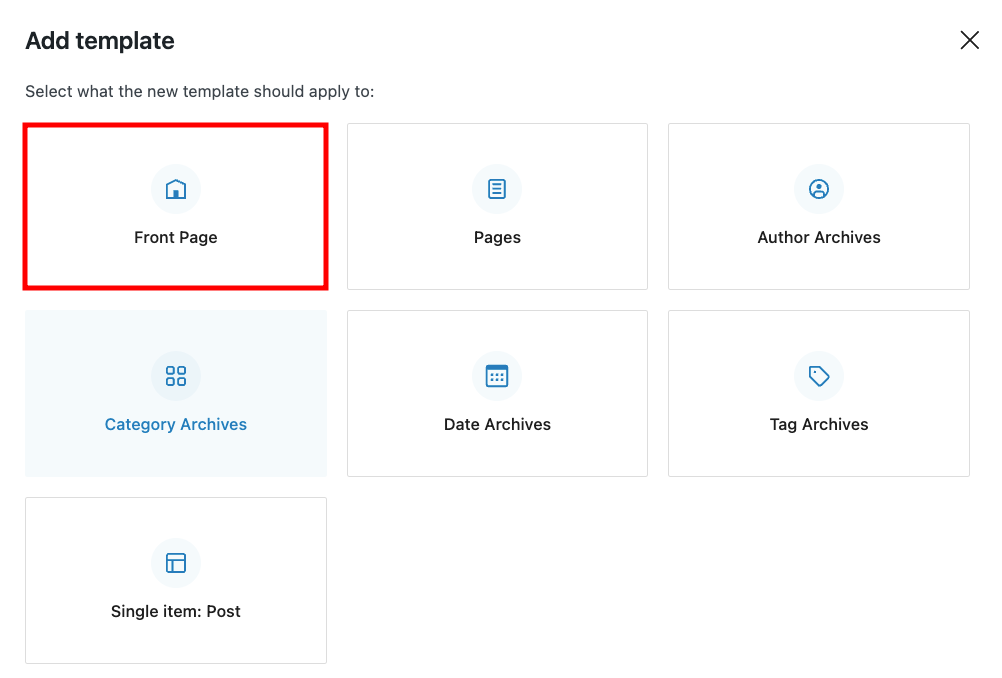
- Design the homepage as you like, then click Save once you’re happy with it.
7. Install essential WordPress plugins
A WordPress plugin is like an add-on for your website that gives it extra features. It lets you scale your website’s functionality without coding, allowing it to perform tasks that the default WordPress setup doesn’t support.
Follow these three easy steps to install a WordPress plugin:
- Go to Plugins → Add New Plugin in your admin dashboard.
- Use the search bar to find the plugin you want to install, then click Install Now.
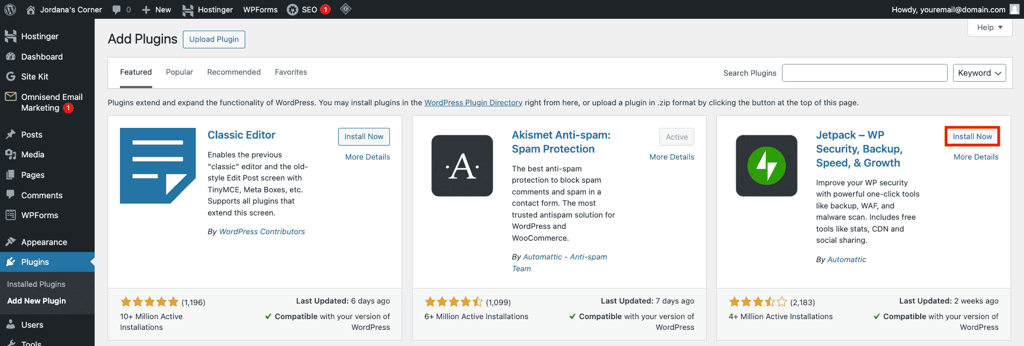
- Once it’s done, the button will turn into Activate. Click on it to start using the plugin.
Your installed plugins are listed in Plugins → Installed Plugins. You can deactivate and uninstall plugins there, which I recommend once you no longer need them to keep your website lightweight.
Just like themes, there are a ton of plugins to choose from. Here are some of the best WordPress plugins for all types of website:
- Akismet. Keeps your site clean by filtering out spam comments automatically.
- All in One SEO (AIOSEO). Helps improve your site’s search engine optimization (SEO) with simple tools to optimize content and settings.
- WPForms. Makes it easy to create contact forms, surveys, and more with a drag-and-drop builder.
- Google Site Kit. Integrates Google services into your WordPress site, letting you monitor traffic, search rankings, and ad revenue from your dashboard.
- Wordfence. Protects your site with security features like firewalls and malware scans.
- Omnisend. Simplifies email and SMS marketing to help you connect with your audience.
- All-In-One WP Migration and Backup. Offers website backup, migration, and restoration in just a few clicks.
8. Optimize your website
WordPress is a powerful content management system by default, but it won’t do you any good unless you configure its settings for optimal performance.
There are many WordPress SEO practices you can use to boost your website’s visibility and traffic. In fact, you have already implemented one by using a fast WordPress hosting provider that offers an SSL certificate.
I’ll walk you through some basic yet important WordPress settings and recommend useful tools to help you along the way.
Check WordPress visibility settings
The visibility setting in the Reading menu controls whether your site is visible to search engines. It’s enabled by default, encouraging search engines like Google to crawl and index your website.
To turn it off, head to Settings → Reading from your admin dashboard and check the Discourage search engines from indexing this site option.
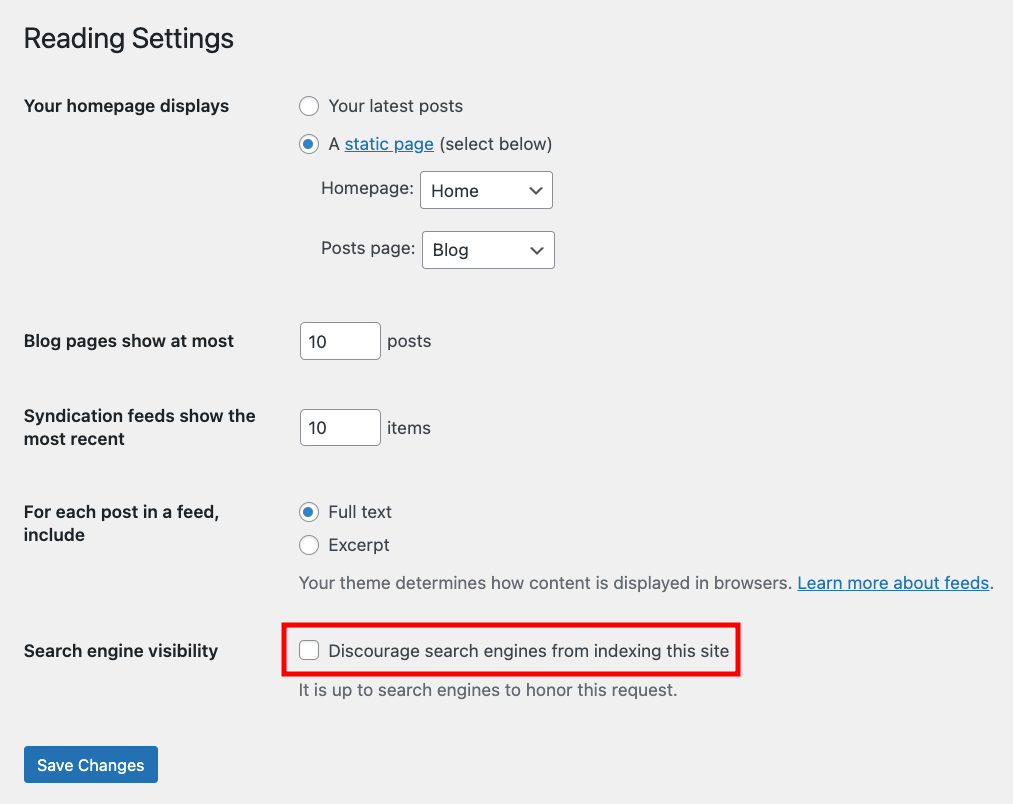
Avoid disabling this setting after publishing content, as it can cause your website to lose search engine rankings.
Submit your sitemap to search engines
A sitemap is like a roadmap for your website, listing all your important pages in a way that search engines can easily understand. It helps search engines like Google find and index your content more efficiently, boosting your site’s visibility in search results.
There are two types of WordPress sitemaps ‒ XML and HTML. XML focuses on search engines, providing context for each URL, while HTML improves website navigation for visitors.
Creating a WordPress sitemap for both purposes is easy with plugins. I’ll use AIOSEO to make the XML type as it’s included with Hostinger onboarding, but feel free to use other WordPress SEO plugins like Yoast SEO.
Here’s how:
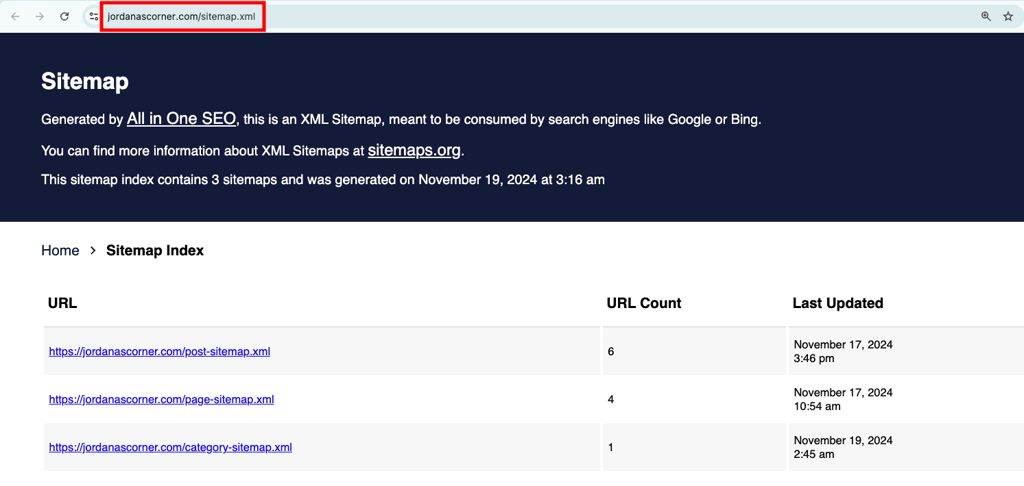
- Go to All In One SEO → Sitemaps in your WordPress dashboard.
- Open the General Sitemap tab and click Open Sitemap.

- The plugin will open the XML sitemap in a new tab. Copy the URL.
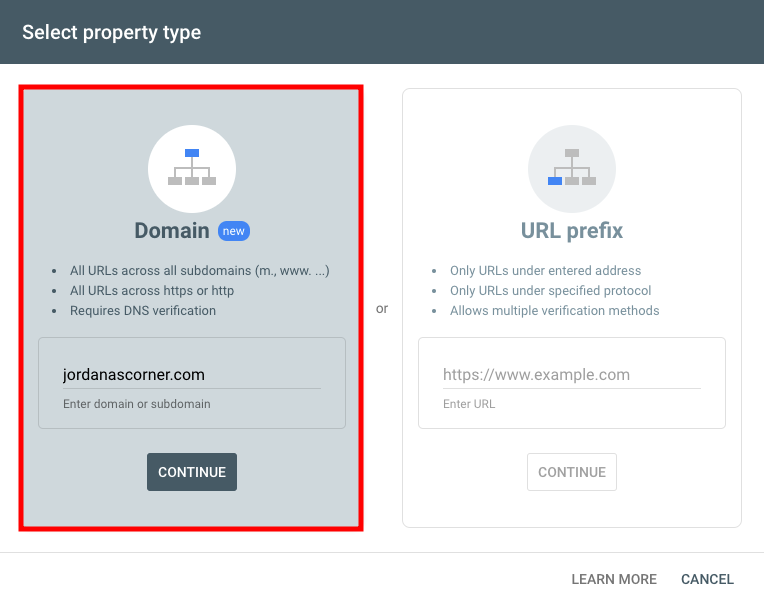
- We’re now going to submit the sitemap to Google. Head to Google Search Console, enter your domain into the Domain property type, and then hit Continue.
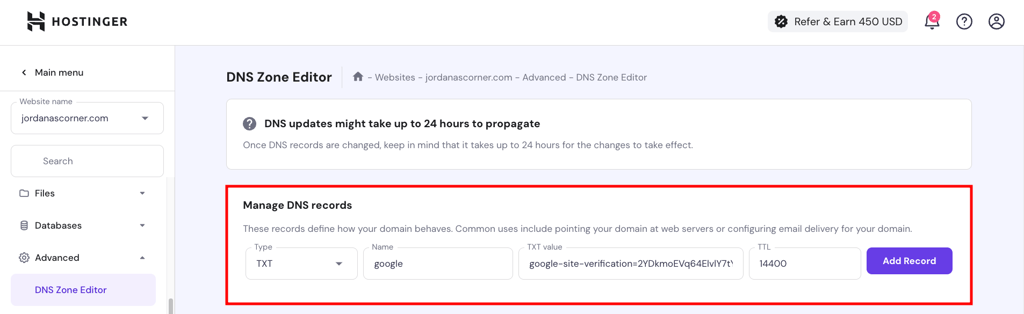
- Verify your domain by adding the TXT record from Google Search Console to your DNS server. If you’re using Hostinger, go to Advanced → DNS Zone Editor from your hPanel dashboard and add the record under the Manage DNS records box. Keep in mind that new DNS records can take up to 24 hours to take effect.
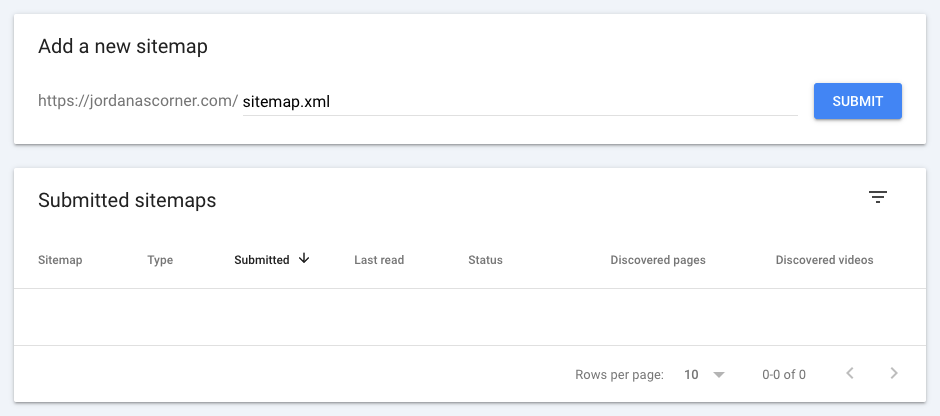
- After verifying your domain, open Indexing → Sitemaps in the left sidebar and enter your sitemap URL within the Add a new sitemap box. If the process is successful, it’ll appear under Submitted sitemaps.
If this seems complicated, you’ll love what Hostinger has to offer. Paired with the Hostinger Easy Onboarding plugin, Google Site Kit lets you submit your website to the search engine in just a few clicks without leaving WordPress. Just make sure to check Google Site Kit during onboarding.
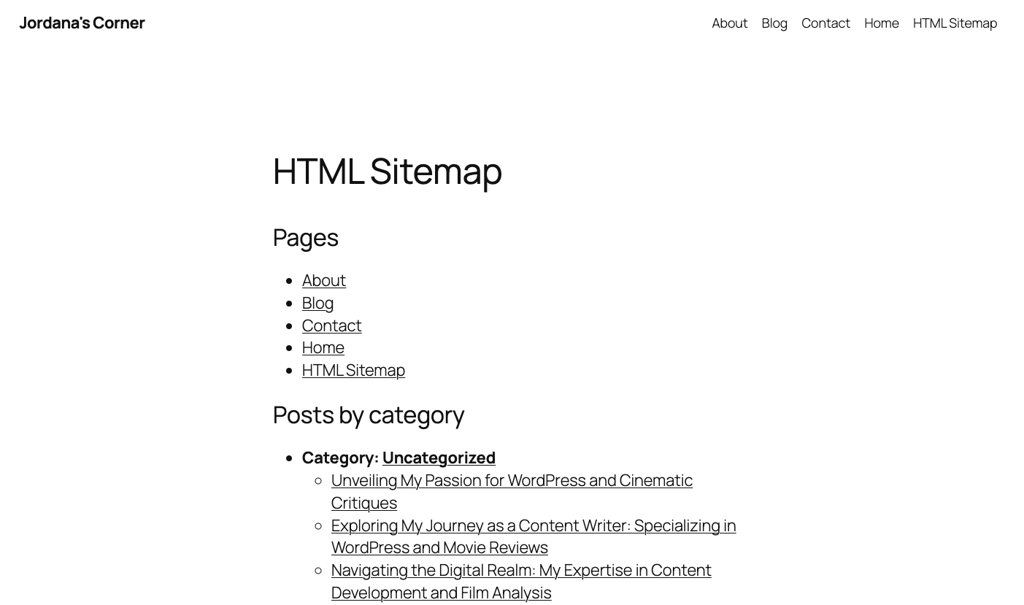
As for the HTML sitemap, you can create one using WP Sitemap Page. Here’s how:
- Install and activate the WP Sitemap Page plugin.
- Go to Pages → Add New Page to create a new page. Add a title and insert a shortcode block into the body.
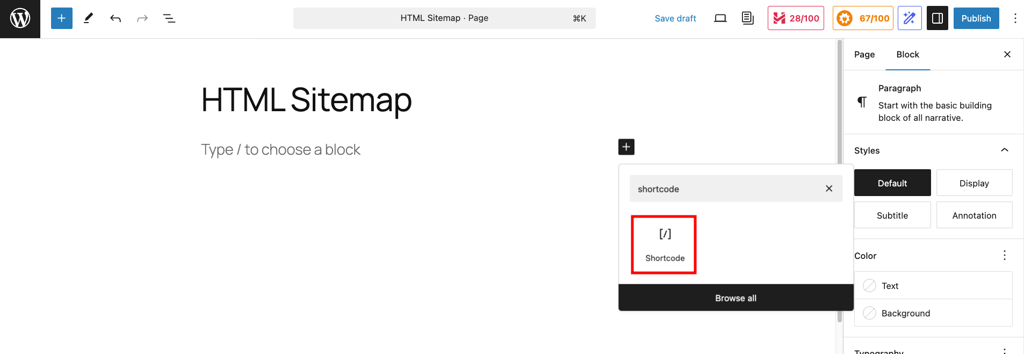
- Insert [wp_sitemap_page] code into the shortcode box, then hit Publish.
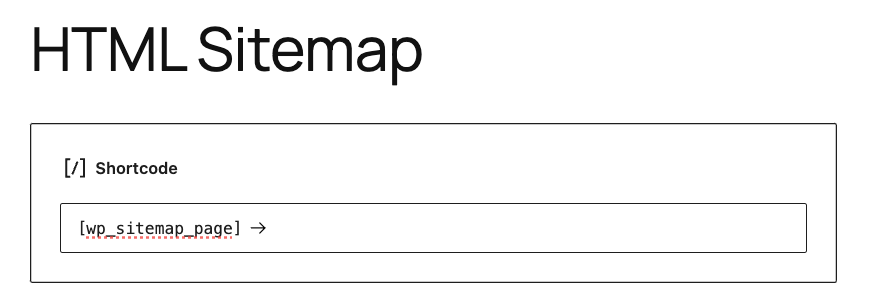
- That’s it! Visitors can now access your WordPress sitemap on a dedicated page.
Set up a permalink structure
There’s nothing wrong with using the default WordPress permalink, but customizing the structure can make your web pages even more SEO-friendly.
Luckily, the process is quite simple. Go to Settings → Permalinks and select the Custom Structure option. Pick one or several tags based on your website type or preference.
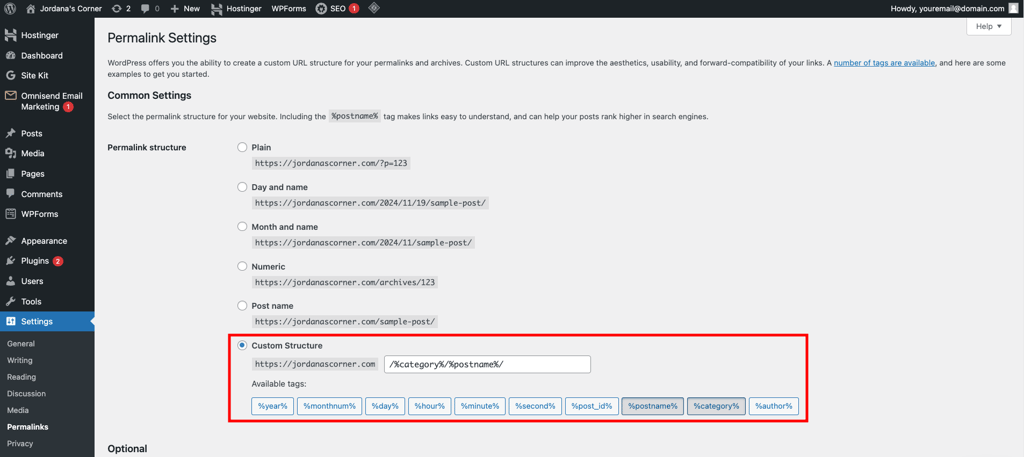
For example, I usually use categories and post names for blogs. If I were to run a movie review website and publish a review titled “The Substance: When Body Horror Meets Self-Hatred” under the “Movie Review” category, the URL would look like this:
https://jordanasmoviecorner.com/movie-review/the-substance
Don’t forget to save the change once you’re done.
Optimize meta titles and meta descriptions
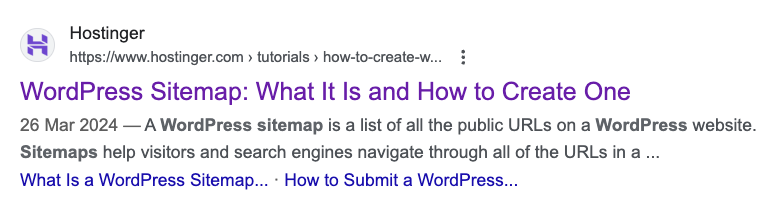
Ever clicked on a search result because the title and description instantly grabbed your attention? That’s the power of a meta title and description ‒ they give a quick snapshot of what a page offers and make people want to click and explore.
Most WordPress SEO plugins can help you add metadata to your pages and posts. Here’s how to do it using AIOSEO:
- Create a new post or page or edit an existing one. This should direct you to the WordPress block editor.
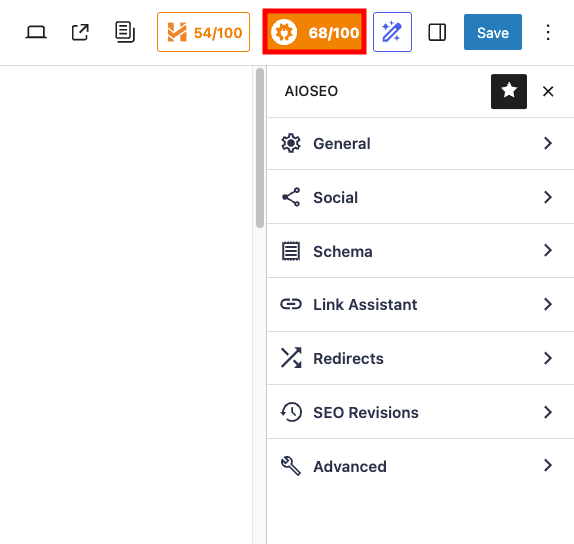
- Click on the AIOSEO button at the top and expand the General menu. Click Edit Snippet.
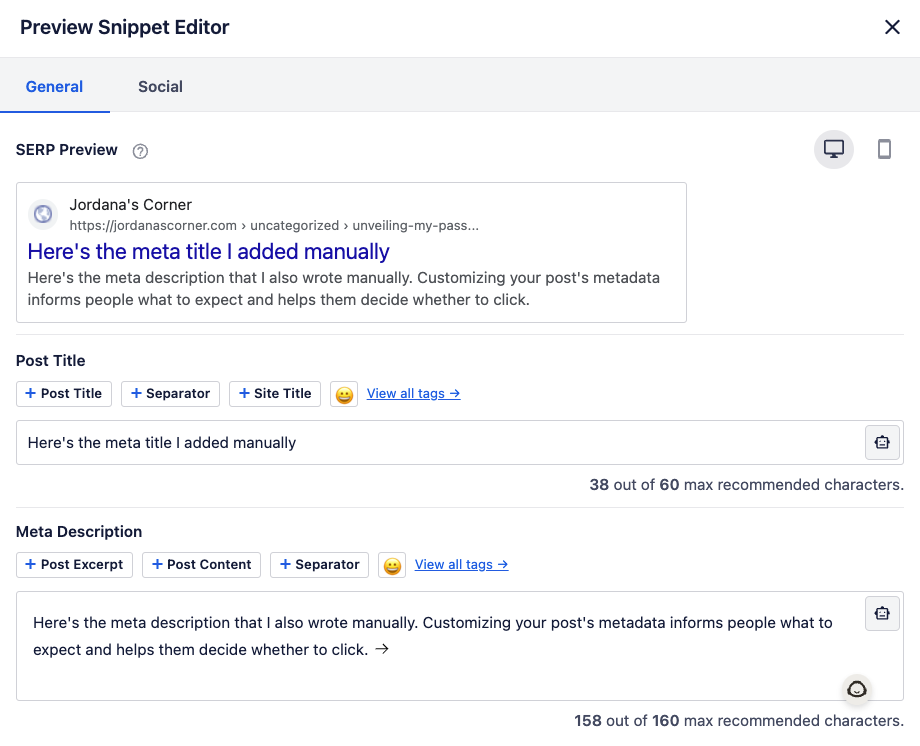
- In the Preview Snippet Editor, add the post title and meta description. You can use tags to auto-add them, but I suggest typing the text yourself to keep both metadata within the character limit and include relevant keywords to boost its ranking effort.
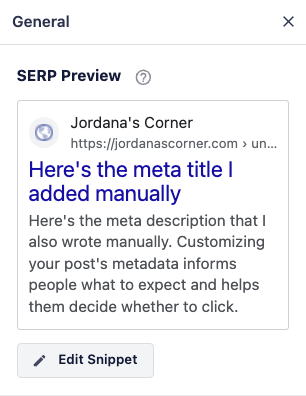
- Once you’re done editing, close the snippet editor and check its preview in the sidebar. Hit Save or Publish to push the changes live.
Optimize visual content
Images can make your website more attractive and engaging, enhancing the user experience. But if you don’t optimize them, they can slow everything down and hurt your site’s performance and SEO.
Hostinger has a dedicated tutorial covering everything you need to know about image compression, including tips and best practices. But I’ll still show you the basics to keep your images lightweight and SEO-friendly.
Compress your images
This practice reduces your image’s file size without hurting its quality. There are two types of image compression ‒ lossy and lossless.
Lossy compression is ideal for JPEG files, which are commonly used on eCommerce sites and blogs due to their smaller file size. On the other hand, lossless compression works better for PNG files ‒ perfect for photography or design websites where maintaining image quality is a top priority.
Use image optimization tools like Kraken.io and Imagify to apply both compression methods. I recommend finding a tool with bulk compression if you have many images to process.
Add alt text to images
Alt text, or alternative text, is a short description of an image that helps explain its content. It makes your site accessible for visitors using screen readers and helps search engines understand your images, boosting your SEO efforts.
You can add alt text to images already on your website via the Media Library. However, to save time, it’s best to do this in the WordPress block editor before publishing.
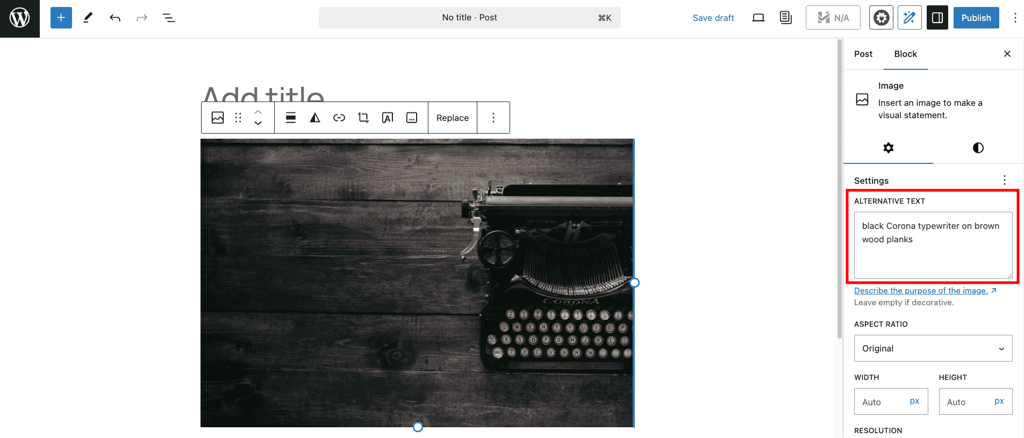
In the block editor, drag the Image block into the workspace and upload your image from local storage, the Media Library, or via a URL. Click on the image you just uploaded and open the Block tab in the right sidebar. Add the image description to the Alternative Text box, and you’re set!
Make sure to describe the image accurately and how it relates to the page content. Keep it between 80 and 125 characters, using correct grammar, spelling, and structure.
Enable breadcrumbs
Breadcrumbs are like a trail of links that show how visitors got to the current page, usually found at the top of a page. They make it easier for visitors to navigate your site and help search engines understand your site’s structure, which is especially important for websites with lots of pages and posts.
Hostinger users who installed AIOSEO during onboarding will have this feature enabled by default. To add breadcrumbs navigation, open the Pages template in the Site Editor and insert the Breadcrumbs block between the featured image and page title or your preferred area.
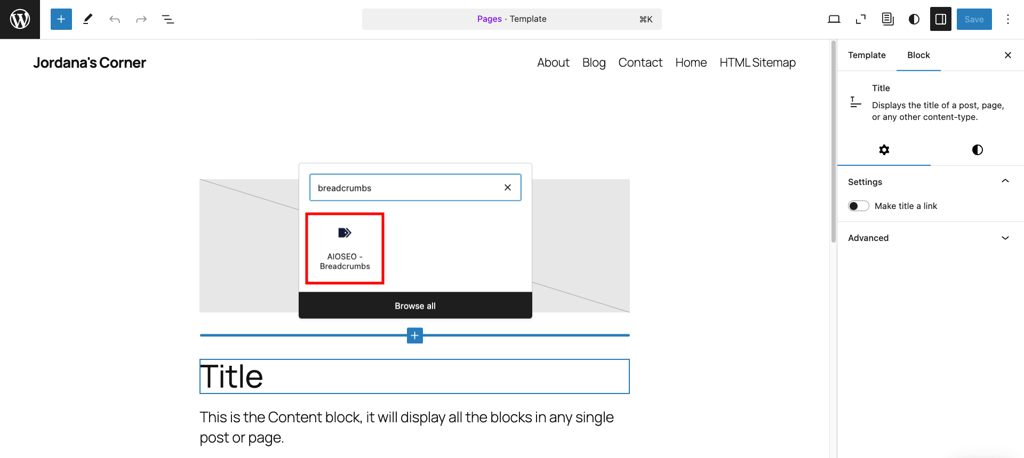
Do the same to the Single Posts template. The end result will look similar to this:

9. Maintain your WordPress website
Your WordPress website is now ready for visitors. However, just because it’s live it doesn’t mean the work is over. To keep the site running smoothly and securely, you’ll need to make constant improvements on key aspects like security, performance, and design.
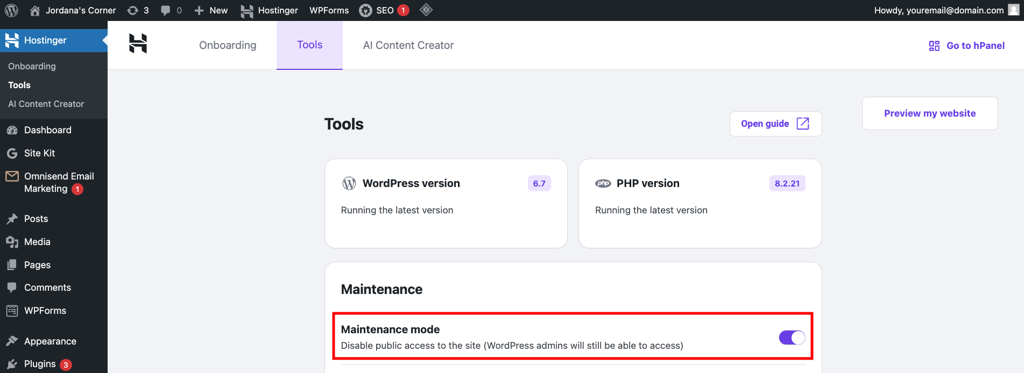
When performing maintenance, your website might look broken or not work properly. To prevent your visitors from running into issues, turn on maintenance mode before you start.
Hostinger users can easily enable this mode from their WordPress admin dashboard. Just head to Hostinger → Tools and toggle on the Maintenance mode setting. Remember to disable it once you’re done.
Alternatively, you can use a WordPress maintenance plugin like SeedProd or LightStart. For detailed instructions and other methods, check out Hostinger’s guide on WordPress maintenance mode.
Let’s explore basic maintenance tasks you can perform to keep your website running smoothly.
Update WordPress core software, themes, and plugins
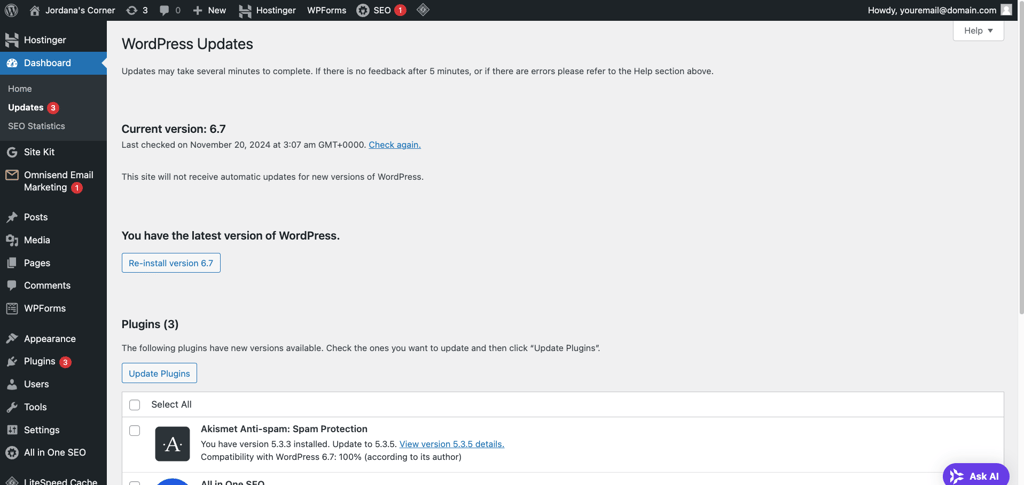
One of the biggest mistakes new WordPress users make is not taking updates seriously. New updates not only bring new features and improvements but also fix security vulnerabilities and bugs ‒ a crucial step to securing your WordPress website.
Since plugins receive frequent updates, WordPress alerts you with a red notification on the dashboard. However, you can check for all software updates in Dashboard → Updates.
Sometimes, keeping up with updates can be challenging. That’s why I always enable Hostinger’s Smart WordPress auto updates.
To do so, head to WordPress overview from the hPanel dashboard and open the Security tab. Select Smart auto updates and choose the update types you want for WordPress core, themes, and plugins. I usually choose Security updates only, but if you’re new to WordPress, I recommend All updates for convenience.

Non-Hostinger users can use plugins like Easy Updates Manager to automate the process. Hostinger’s tutorial about WordPress auto update covers different methods and best practices in case you need pointers.
Flush cache
Caching is like storing a snapshot of your website so it loads faster for visitors. Instead of pulling all the data from scratch every time someone visits, it shows them a saved version, reducing load times and server work.
Hostinger includes object caching on Managed WordPress Business hosting plans and higher. You can also enable other types of website caching using WordPress caching plugins like WP Rockets and WP Fastest Cache.
While caches are beneficial, storing them for too long can prevent visitors from seeing the updated version. Therefore, it’s important to clear your site’s caches periodically.
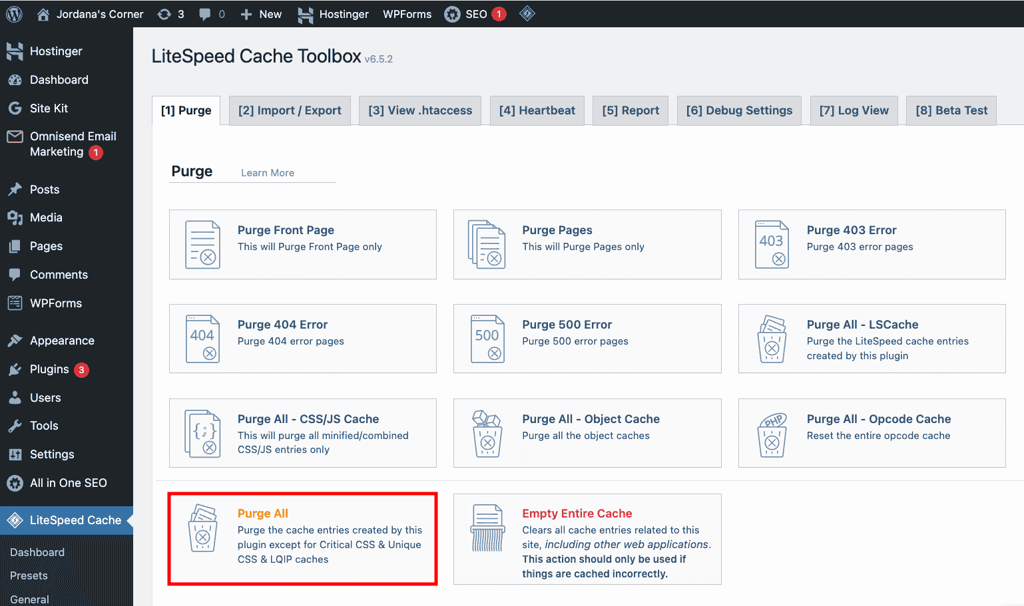
Follow these steps to flush your website caches using LiteSpeed Cache:
- Install and activate the LiteSpeed Cache plugin. Hostinger users should have it pre-installed from the start.
- Go to LiteSpeed Cache → Toolbox and open the Purge tab.
- Select Purge All to clear your WordPress caches completely. To flush specific caches, choose a suitable method or list them in the Purge List.
You don’t need to flush your cache on a strict schedule. Just make sure to do it after updates, when fixing issues, and when troubleshooting errors on your site.
Back up your WordPress website
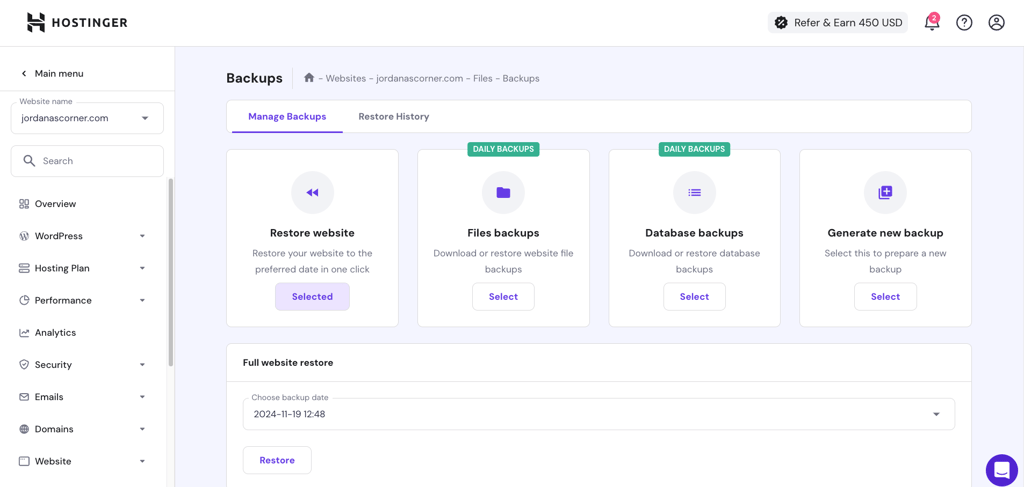
Backing up your website is a smart way to protect your data. If something goes wrong, like a security issue or a misconfiguration that breaks your site, you can easily roll back to the previous data. It’s always better to be safe than sorry!
All Hostinger’s Managed WordPress hosting plans include automatic backup, with frequency depending on the tier. Go to Backup in the hPanel dashboard to manage and restore backups as needed. Check out our guide on WordPress backup to learn how to use it.
Like other maintenance tasks, you can tackle this using a WordPress plugin. Some of the best options include UpdraftPlus, All-In-One WP Migration, and Duplicator.
Use a CDN
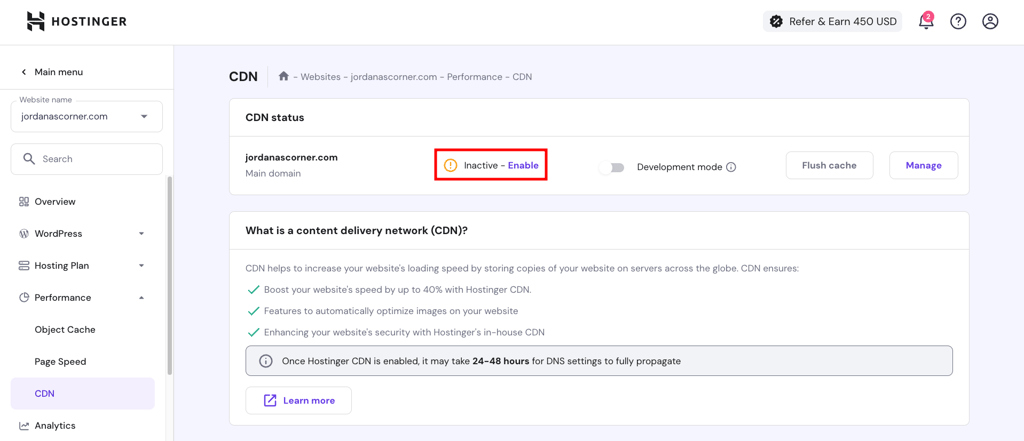
A Content Delivery Network (CDN) is a network of servers spread worldwide that stores copies of your website’s files. When someone visits your site, the CDN delivers content from the server closest to them, helping your site load faster.
Hostinger includes an in-house CDN on Managed WordPress Business hosting plans. To activate it, go to Performance → CDN in the hPanel dashboard and hit Enable.
If you’re not on Hostinger, check out our list of top WordPress CDNs to enhance your site performance.
Monitor site speed
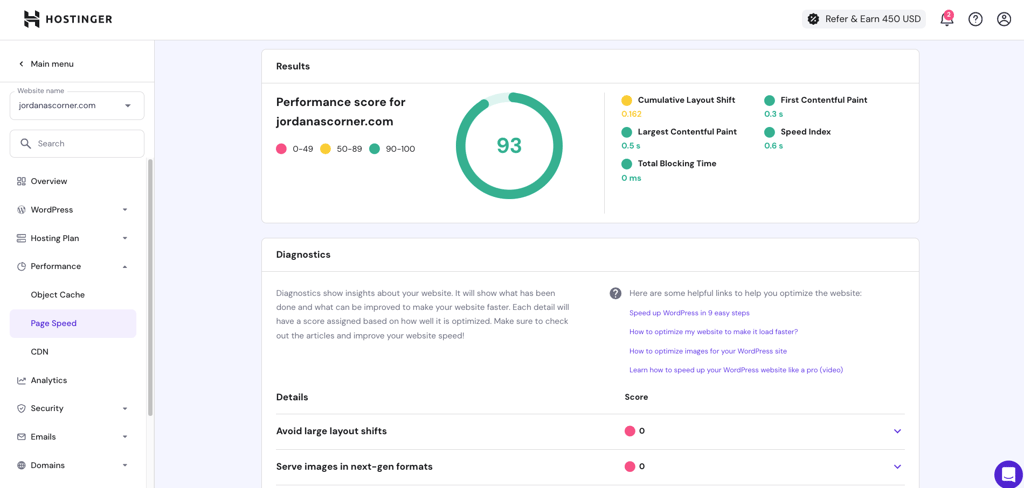
You probably don’t like slow websites, and your visitors don’t either. Google’s statistics show that people are more likely to leave a site as page load time increases from one to three seconds. This makes monitoring your website speed a crucial maintenance task.
Hostinger offers a handy page speed test feature you can use to assess website performance, along with suggestions to optimize it. Navigate to Performance → Page Speed in the hPanel dashboard and choose a device type for speed testing. Try to keep the score in the green and address issues addressed under Diagnostics.
For non-Hostinger users, I recommend my go-to third-party website speed test tools ‒ Pingdom and GTmetrix.
This article on WordPress speed optimization covers this topic in great detail, including the metrics to track and best practices. Here’s a checklist to make sure your WordPress site runs at optimal speed:

Conclusion
Getting the hang of WordPress might take some time and a bit of trial and error. But once you get the basics down, you can use it to create any type of website with the exact features and design you want. That’s what kept me motivated to learn, and now I’m here to help you take that first step too.
Here’s a recap of using WordPress to build your website:
- Get a hosting plan and a domain name.
- Install WordPress.
- Familiarize yourself with the WordPress dashboard interface.
- Choose a WordPress theme and customize your site’s look as needed.
- Publish posts and pages.
- Set up your homepage.
- Install WordPress plugins to add necessary features.
- Optimize your website for security, performance, and search engines.
- Perform maintenance tasks.
Do you find this article helpful? Which step do you find the most challenging? Let’s start a discussion below!
How to use WordPress FAQ
Can I learn WordPress on my own?
Absolutely! WordPress is an extremely popular content management system, so abundant resources are available for self-learning. Check out Hostinger’s article on the best WordPress courses for beginners if you’re not sure where to start.
Is WordPress hard for beginners?
WordPress can feel tricky at first, but it’s beginner-friendly once you get the basics down. With accommodating web hosting, tons of tutorials, and a large library of plugins to customize your site, WordPress is manageable for anyone, even if you’re new to website building.
Do professionals use WordPress?
Yes! There are many reasons to use WordPress, regardless of your skill level. It provides professionals full control, flexibility, and powerful tools to make advanced customizations, manage content, and optimize sites for search engines. Being open-source, it’s easy to modify and integrate with other tools, so you can create the exact site you need.

Jordana is a Senior Content Writer with a background in Information Systems. She has over five years of experience in WordPress and is casually dabbling with PHP and MySQL. Her passion for writing and technology drives her to create tutorials for anyone wanting to build their online presence. Follow her on LinkedIn.

Marco Chiesi is the Head of WordPress at Hostinger, with over 20 years of experience as a software engineer in the web industry. He specializes in open-source technologies and the WordPress ecosystem, where he has contributed in different areas: Plugin Developer (with over 10 million downloads), WordCamp speaker and organizer, Meetup organizer, Translator, and Core Contributor. He is passionate about leading his team to create innovative solutions for Hostinger's web hosting product, which hosts over 5 million WordPress installations. Follow him on LinkedIn.
Comments
0 responses