How to Edit a WordPress Header Using Site Editor and Customizer
Dec 22, 2025
/
Larassatti D.
/
8 min Read
WordPress headers help to make a first impression on visitors. Therefore, knowing how to edit a WordPress header can enhance brand identity, optimize navigation, or refresh the look and feel of your site.
WordPress lets users easily edit their site headers using the Customizer and Site Editor. Both options are quick and beginner-friendly, so you should choose based on your personal preferences and WordPress theme.
Let’s discuss how you can access these tools and try out some tips for creating effective headers.
How to Edit a WordPress Header
The steps to customize your header in WordPress will depend on the theme and core software version you’re using. They affect the features and tools available for creating a custom header.
That said, the two common methods to create custom headers are using the Site Editor and Customizer. For this tutorial, we will use the latest WordPress 6.5 version.
How to Edit the Header in WordPress Using the Site Editor
The WordPress default editor is integrated with Gutenberg from version 5.0 and above. It utilizes blocks for adding website elements, such as headings, paragraphs, lists, and images.
Note that not all themes are compatible with the Gutenberg Editor, as it can only work with a block theme.
Important! If you don’t see the Editor menu on the dashboard, your chosen WordPress theme doesn’t support the full site editor. Use the Customizer instead.
Here’s how to customize your header with the Site Editor:
- Navigate to Appearance → Editor on your WordPress dashboard.
- Once the Site Editor is launched, choose Patterns on the left sidebar menu.
- Scroll down to the Template Parts section, select Header. The number of header template parts depends on your chosen block theme.

- Pick the header you want to customize, then click the Edit button to open the header’s full site editing mode.
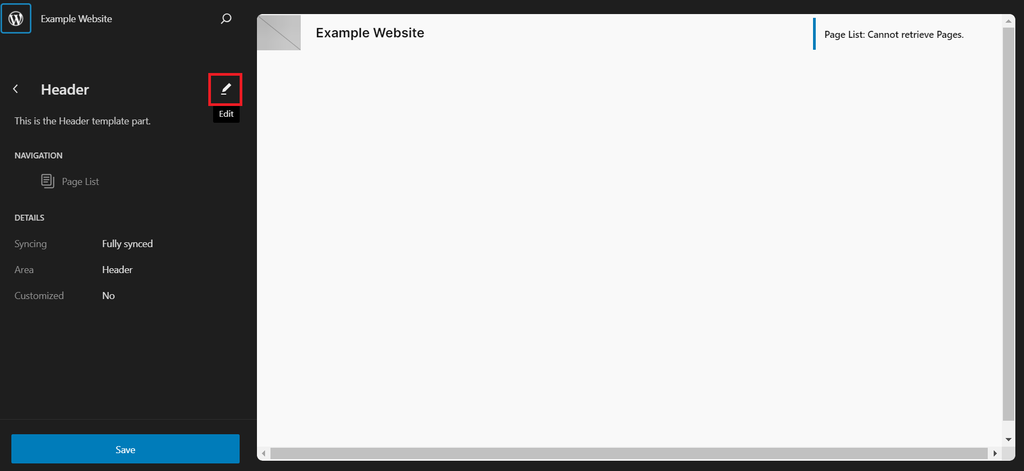
- In the header editor interface, tweak, replace, or add new blocks to the header template part.

Every Gutenberg-compatible theme uses different default elements on the header template parts. Click the List View button to see all blocks on the one you’re editing.
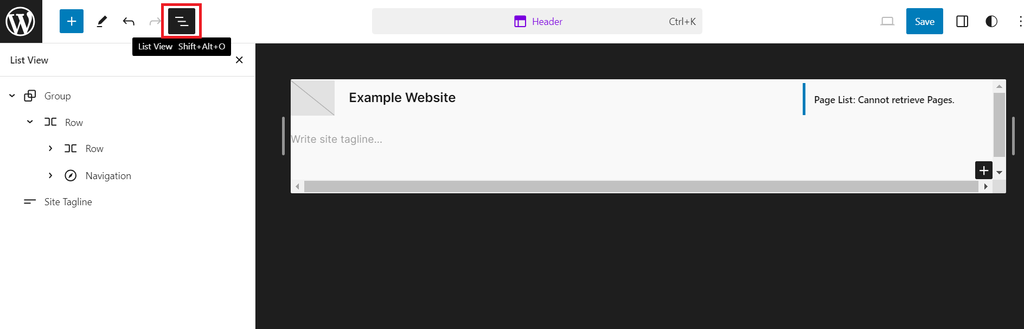
In this example, we use the Twenty Twenty-Four block theme, which utilizes a group of blocks on the default header. If your chosen template part also uses it, clicking the arrow will show all the grouped blocks.
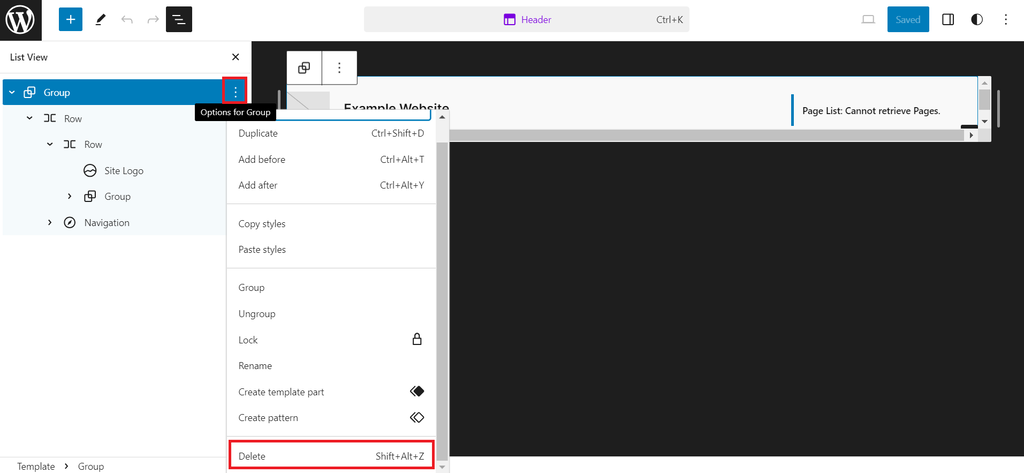
If you want to delete the header entirely, you can erase it by picking Group from the list and clicking the Options for Group button. Choose Delete afterward.
Use the Block inserter to add new elements, such as a site tagline or a search bar to the header. Find the plus sign button by hovering over the header template or within the Site Editor’s top toolbar.
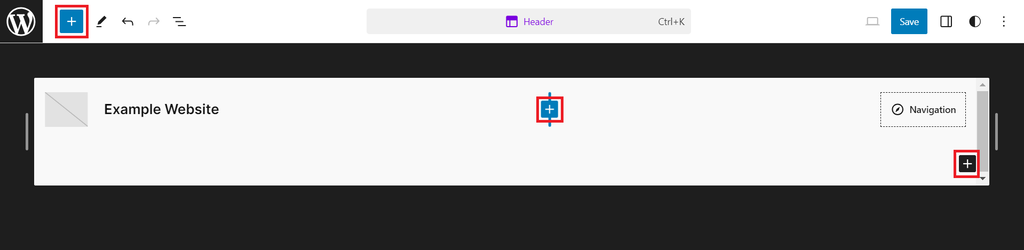
Then, search for any available blocks to add to your header. Drag and drop the newly added elements to the position you want. You can also do so through the List View panel while previewing the changes directly on the right side of the screen.
Since the Twenty Twenty-Four theme already has the essential header elements, we’ll keep them as they are. In the following steps, we’ll personalize the website title, logo, and navigation menu in the full site editor.
Changing the Site Title
Tweak the default site’s title on the header template’s full site editing mode by selecting the Site Title block.
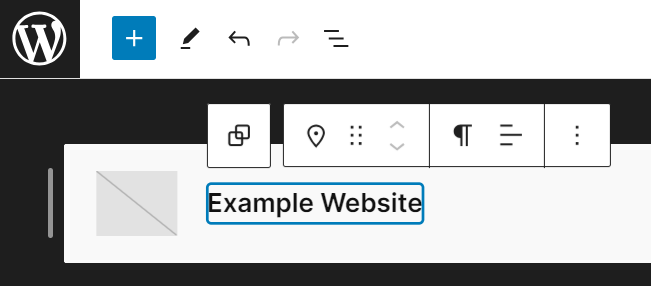
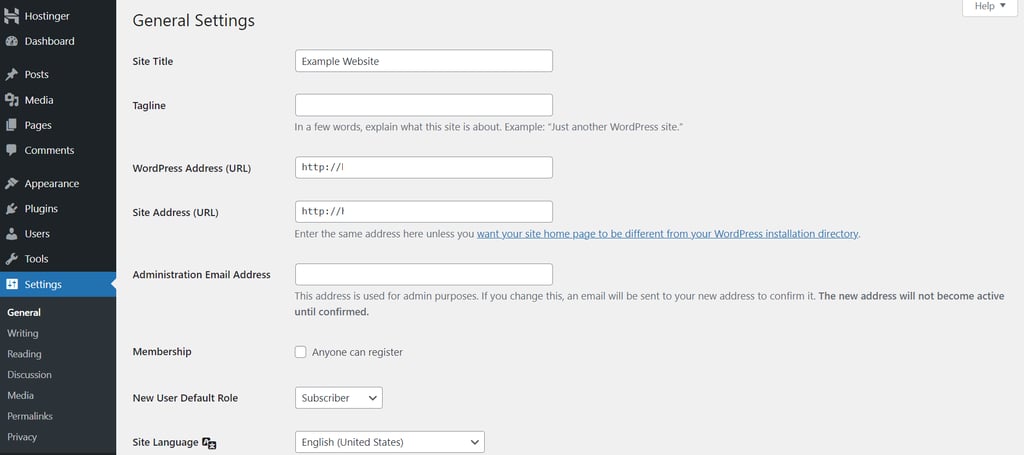
Alternatively, you can change it via the Settings menu on your WordPress dashboard, which will also automatically adjust the header block.
Adding the Site Logo
There are multiple ways to change your logo in WordPress, including using the Site Editor. Since this theme displays a logo by default, simply replace the placeholder by selecting the Site Logo block on the header.
Click the Add a site logo button at the center of the block.
Then, a popup window to the media library will appear. Upload the new image file, and don’t forget to add the alt text before clicking Select.
You’ll see the site’s logo on your custom header. Change its size by dragging the selection points in and out until you see fit. If you want to reposition your logo, use the directional keys in the block editor toolbar.
Adding the Navigation Menu
Your chosen WordPress theme may display a designated navigational menu on the header area. For example, the Twenty Twenty-Four theme utilizes the Navigation block, which lets you edit the menu’s structure and design directly.
Select the Navigation block on the header to edit the menu entry and click the Add block button.
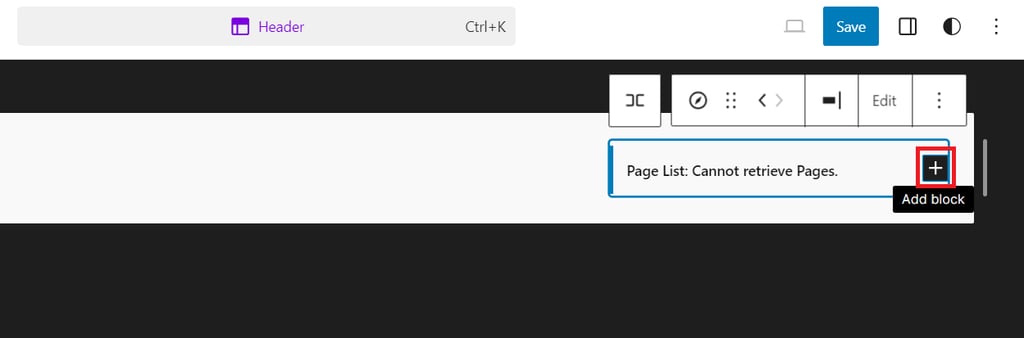
Doing so will automatically create a link placeholder you can connect with any page on your site.
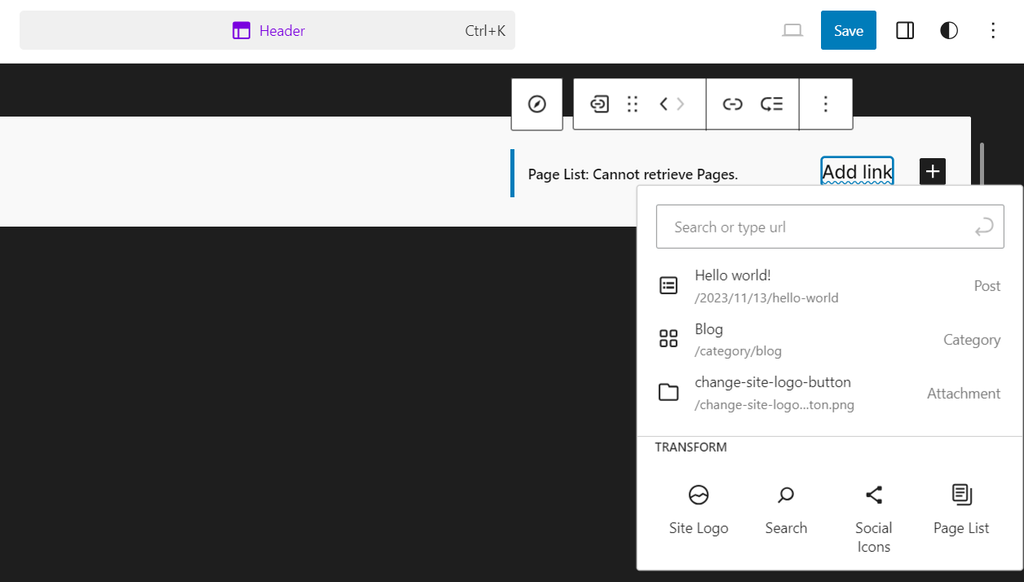
For easier navigation menu editing, select the block and click the Settings button to launch the configuration panel.
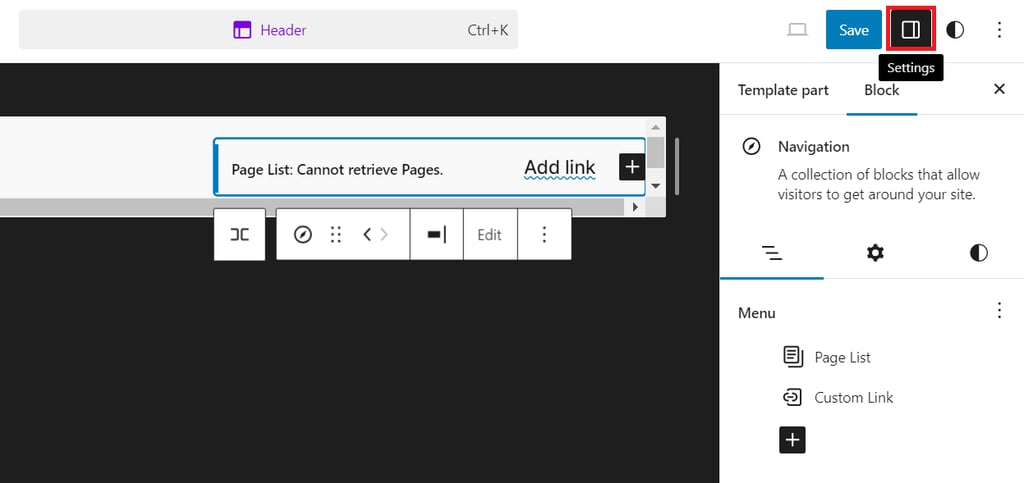
There, you can change the link settings, which include editing the label, URL, attribute, and design. If you have a custom CSS to style the menu, you can also add it.
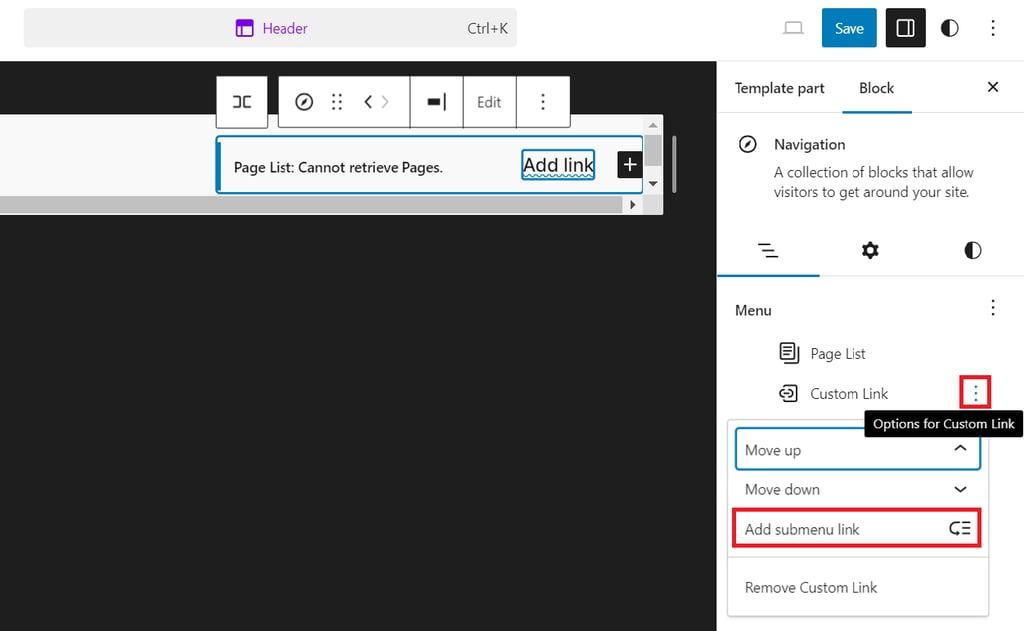
If you want to create a dropdown menu, navigate to the Custom Link options, then choose Add submenu link. Alternatively, add a Submenu from the block inserter.
Once you’re done making changes, don’t forget to hit Save before closing the header editor.
Suggested Reading
If you prefer another method to customize your navigational menu, check out our tutorial on how to add a page to the navigation menu in WordPress.
How to Edit a WordPress Header Using the Customizer
If you’re using an older WordPress version or a classic theme, use Customizer to change the header template. Depending on the theme you activate, the steps to access WordPress Customizer may differ.
For example, the default Twenty Twenty-One theme and older ones only have the Site Identity option to customize the site logo and title on the header.
On the other hand, the most popular third-party themes like Astra and Neve have dedicated header options that offer more flexibility for tweaking website elements, like adding social icons, if you upgrade to the premium plan.
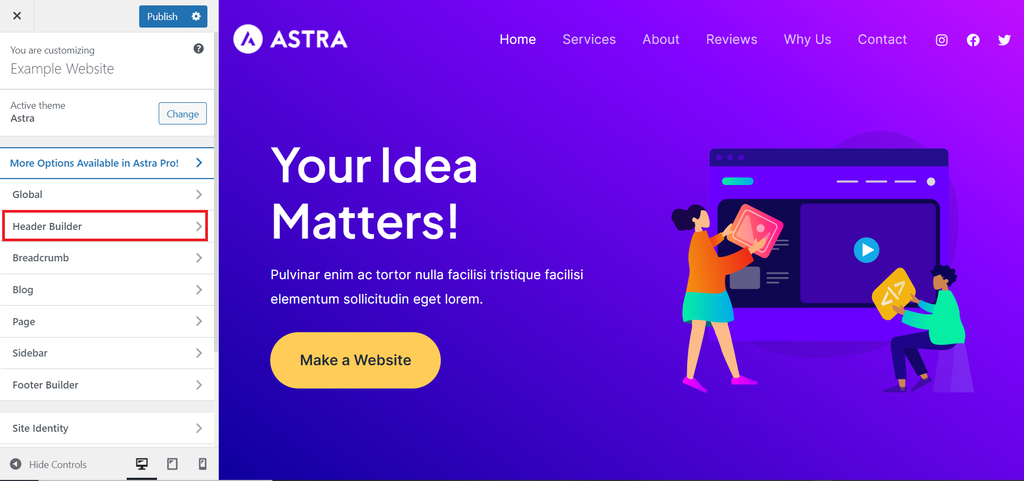
For this tutorial, we’ll use the Astra theme. However, the steps to access WordPress Customizer are the same – navigate to Appearance → Customize.
The Astra theme’s customizer has a drag-and-drop theme builder with a user-friendly interface. On the left panel, you can choose the website elements to edit. Meanwhile, you can preview the changes on the right side of the screen.
To begin editing your website header, choose Header Builder from the list.
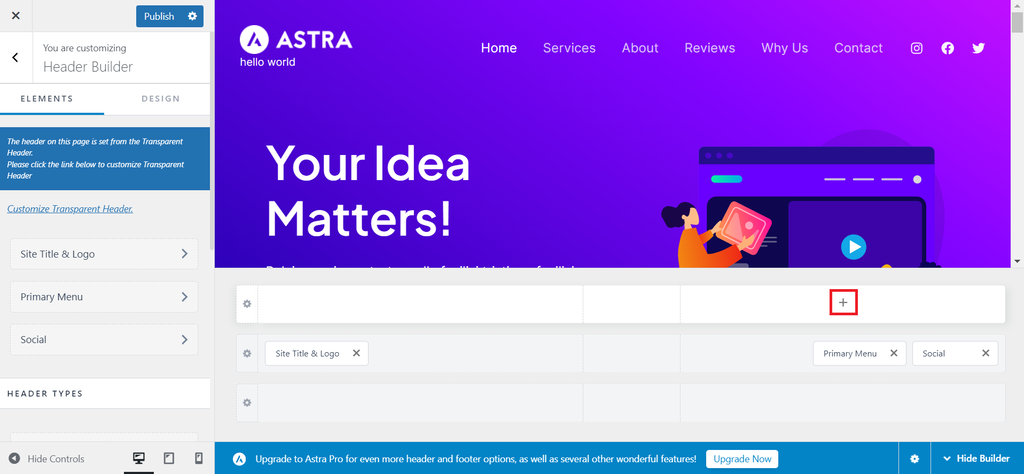
You’ll see the header patterns to edit on the left panel and the header builder on the bottom right side of the screen.
There are three header rows available by default. You can add a new header element by hovering over the blank space and clicking the plus button that appears.
You can also move the existing header elements by dragging and dropping them to your preferred position. Once you place everything as you want, start personalizing them.
Changing the Site Title and Logo
To open the General settings tab, click the Site Title & Logo menu from the header configuration panel.
Press the Change Logo button to show the WordPress media library and upload your site’s logo. Then, adjust the header image width as you like.
You can also remove the image placeholder if you don’t want to add any logo on your header.
Pro Tip
The Astra theme lets you upload a different logo to display on a retina screen. It’s often used for high-end devices like Apple products. To use this feature, you should provide a logo file that’s two times larger in resolution than the original one.
As you scroll down the panel, you’ll see the Site Title general configuration. There, you can edit the text, manage its visibility on different devices, add a tagline, and choose to display both elements on the header or hide them.
At the bottom of the configuration panel, you can edit the site icon. Visitors will see this image on their browsers when navigating your website.
You can configure how the site’s title, logo, and tagline look by switching to the Design tab in the configuration panel.
Adding the Navigation Menu
To change the navigation menu on your new header, click the Primary Menu option from the configuration panel. As for the site title and logo, you can customize the General and Design settings of the menu.
If you want to change the menu entries on the header, click Configure Menu from Here to open the Menus settings directly on the panel. This way, you can modify the menu while previewing the changes on the live site simultaneously.
Alternatively, your configuration via Appearance → Menus will also be automatically adjusted to the theme’s header.
Be sure to hit Publish before quitting the theme builder so that all changes to the header will be applied.
Pro Tip
Each classic theme's default navigation menu configuration may differ. If needed, read your chosen theme’s documentation to find out its navigation menu customization method.
Why WordPress Header Is Important
As a WordPress website’s header is located at the top, it plays a central role in setting the tone for user experience.
Namely, a custom WordPress header can bring the following benefits to your website:
- Navigation hub. The header area often houses the navigation menu, guiding visitors to find what they’re looking for efficiently.
- Branding showcase. Whether it’s your logo, tagline, or color scheme, the header is where your brand identity takes center stage.
- Aesthetic appeal. Beyond the functionality, custom headers contribute to your site’s visual appeal. A well-designed header enhances user engagement and makes your website look more professional.
In simple words, your WordPress header will impact your site’s user experience (UX), as it will influence how people navigate your website. Moreover, it will affect your search engine optimization (SEO) by providing necessary indexing information for the bot crawlers.
Tips for an Effective WordPress Header
Keep your WordPress header functional and visually appealing with the following tips:
Make It Consistent
Your header plays an integral role in helping people navigate your website. That’s why you should ensure its appearance’s consistency aligns with the best web design practices.
Whether visitors navigate to your homepage, blog post, or product page, maintaining a consistent header across all pages provides a seamless user experience. Keeping it uniform helps people recognize and trust your website more.
Moreover, remember to edit the header if your new website content affects its element. For example, if you create a new page, don’t forget to edit the navigational menu.
Some WordPress themes automatically adjust the header section after any update on your website. While some others don’t, it’s important to double-check the header modification afterward.
Keep the Header Area Simple
While the header section is an essential aspect of your website, overcrowding it can be counterproductive. Therefore, one of the best header design practices is to keep it minimalistic.
Streamlining the header area ensures your site’s user-friendliness. That way, it’ll be easier for visitors to focus on pivotal elements – like your site logo, title, tagline, and navigation menus.
Once you think a website element will take up quite a lot of space, place it on another website area. For instance, adding a bulky search block to a header with a large navigation menu isn’t ideal.
Use High-Quality Images
We recommend displaying a logo on your WordPress header image section. It will serve as a visual anchor for boosting your brand recognition.
Opt for high-resolution images to ensure a professional appearance, as a blurry logo can detract from your site’s overall visual appeal. Use high-quality image files to leave a memorable first impression on the visitors.
Getting your logo professionally designed or using an AI logo maker tool can help you with that.
Be Mindful With Mobile Responsiveness
Almost 60% of internet searches are conducted using a mobile device. Ideally, mobile users shouldn’t have to zoom out their screens to scour a website. Therefore, your website’s mobile version should be easy to read and navigate.
A mobile-responsive header provides a seamless experience across different screen sizes. Maintaining a mobile-friendly website is also one of the SEO-improving factors.
Ensure to choose responsive WordPress themes or page builders to build your website. This way, keeping your custom header responsiveness can be simpler.
If you want to check your website’s responsiveness, use tools like Google Search Console’s Mobile-Friendly Test.

Conclusion
Learning how to change your header in WordPress helps improve the website’s look and functionality. Fortunately, modifying it with the Site Editor and Customizer only requires several easy steps.
Aside from covering the steps to edit your header with both tools, we’ve also explained how to keep your WordPress header effective. Here’s a little recap:
- Keep your site header consistent to have a professional-looking website.
- Create a clean header area that focuses on the pivotal elements – like your site logo, title, tagline, and navigation menus.
- Upload high-quality header images to enhance your site’s branding.
- Use a mobile-responsive WordPress theme for your header to fit multiple screen sizes.
Finally, use reliable WordPress hosting services to make sure your website is always available and loads quickly.
How to Edit a WordPress Header FAQ
Read the most frequently asked questions to learn more about WordPress header customization.
Can I Edit a WordPress Header Without Coding Skills?
Absolutely. Editing your site’s header using WordPress Site Editor and Customizer doesn’t require coding skills. Even if you want to add a custom CSS code to change the header style, you can do it easily using the Theme File Editor or a plugin.
Can I Edit the WordPress header.php File Directly?
Yes, header.php is among the editable theme files in WordPress, but be sure to create a backup beforehand. All changes you make will directly impact your site’s appearance and functionality. Therefore, be extra cautious when editing the header file and consider using a WordPress child theme.
Is There Any Plugin to Edit a Header in WordPress?
Yes, you can create a custom WordPress header with a plugin. Several popular ones are WPCode, Ultimate Header Builder, and Header Footer Code Manager – for those wanting advanced features to edit the header’s custom code for Google Analytics or Facebook Pixel.
All of the tutorial content on this website is subject to Hostinger's rigorous editorial standards and values.

Larassatti Dharma is a content writer with 4+ years of experience in the web hosting industry. She has populated the internet with over 100 YouTube scripts and articles around web hosting, digital marketing, and email marketing. When she's not writing, Laras enjoys solo traveling around the globe or trying new recipes in her kitchen. Follow her on LinkedIn


