WordPress 6.5 “Regina” Is Here – Key Features and Changes
WordPress 6.5 “Regina” is finally here! After a week-long delay, the new version brought new features and other improvements to all WordPress users worldwide.
Since the release of the beta version back in February, there have been some changes to the features, including the number of Gutenberg versions that have merged.
Rest assured, the WordPress Core Team has worked hard to deliver a stable WordPress update. I was involved in the release as a Documentation co-lead, and I’m excited to guide you through the update and show you the changes we made.
What Have Changed Since the First Beta Version
When the beta version was launched, two main features got the spotlight – the font library and pattern override. Unfortunately, delivering these two features in a state that fulfills the WordPress standard and guidelines in the available timeframe was a challenge.
There were plenty of discussions and feedback circulating within the community about these features. This led to the decision to ship the font library in WordPress 6.5 but not the pattern override.
In addition, there was a last-minute decision to delay the release for a week. It gave contributors and developers much-needed time to ensure the updates were the best that they could be.
The added time also allowed more bug fixes and improvements to be merged with the release, resulting in a better update overall.
For example, the initial plan was to merge Gutenberg version 16.8 to 17.7. However, leading up to the release date, the Core team included six bug fixes that were initially scheduled for Gutenberg 18.0.
Inside the WordPress 6.5 Update
I have covered the highlights of the new features in our WordPress 6.5 preview post. Check out that post for a more in-depth look at these main features and how to use them. Here’s a recap:
- Font library – I would say this is the biggest highlight of the release. It’s a font management tool where you can upload custom fonts and import Google Fonts from the block editor. The tool is accessible from the global styles panel in the block editor.
- Enhanced view for the Site Editor library – browsing through templates and patterns in the Site Editor feels better with the options to use different display layouts and show different templates or pattern information. You can also use bulk actions for easier management.
- More classic theme compatibilities with block the environment – WordPress now supports appearance tools for classic themes via add_theme_support( ‘appearance-tools’ ); inside the functions.php file. This allows users to adjust border, margin, and block spacing settings on the page or post editor. Additionally, the pattern interface is now easily accessible for classic theme users as WordPress 6.5 adds the navigation link to Appearance → Patterns.
- Site icon settings in the General settings panel – WordPress 6.5 will ship with an easier way to add the site icon via Settings → General. So, you no longer have to go to the Site Editor or Customizer to make this change.
- Interactivity API – a new way to add interactions between blocks on the front end. For example, users can now add items to a shopping cart and favorite a post without reloading, making the experience more responsive. The WordPress team created a demo site so you can experience first-hand how the API works.
These features are what got me excited about WordPress 6.5 when it was first released as a beta. After a month or so of development, more features were added, tested, and set for the WordPress 6.5 release. Here are some noteworthy ones.
Block Binding API
WordPress 6.5 adds the Block Binding API feature, which allows core blocks to display data from various sources, like post metadata or custom fields.
What we see in WordPress 6.5 is the early stage of this feature. So, there’s still no UI to facilitate the use of block bindings from the block editor.
However, with simple code, we can put it to practical use. In the Block Binding API developer note, the WordPress Core team provides an example of binding a paragraph block to a custom field.
I’ll demonstrate here how to use it in the single post template to display a “genre” custom field.
First, add the paragraph block in the post template and bind it to the “book-genre” custom field. Use the code editor to add the block paragraph with the following code:
<!-- wp:paragraph {
	"metadata":{
		"bindings":{
			"content":{
				"source":"core/post-meta",
				"args":{
					"key":"book-genre"
				}
			}
		}
	}
} -->
<p></p>
<!-- /wp:paragraph -->
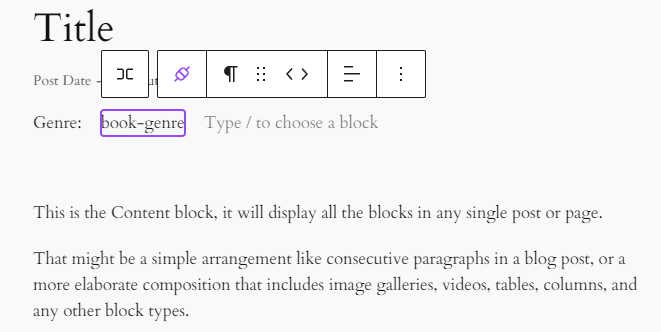
Then, it will appear in the visual editor as a bound block.
The next step is to go to the post editor and create a post with the book-genre custom field added. You need to enable the custom field for the post editor by going to Options or the ellipsis icon at the top-right corner → Preferences. In the General section, enable Custom fields.

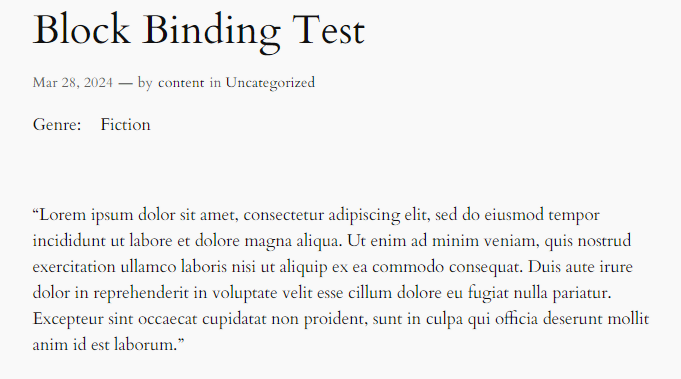
Refresh the editor, and you should see the Custom Fields section at the bottom of the post editor. Enter a new custom field with the “book-genre” field name and add the value you want. In this example, I used “Fiction” as the value.
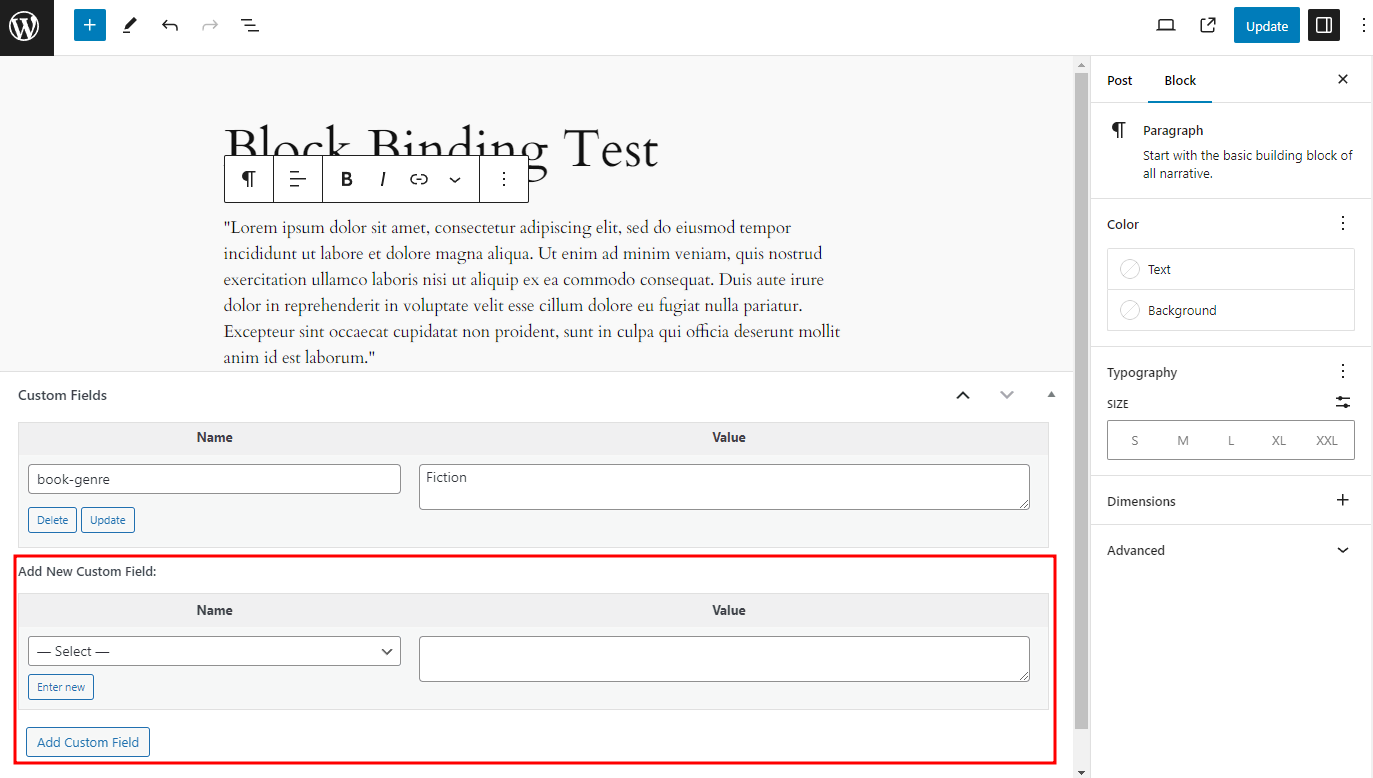
Save and publish the post. When you open it, you will see the bound paragraph we made earlier in the template, displaying the custom field value for the post.
Synchronized Post and Site Editor
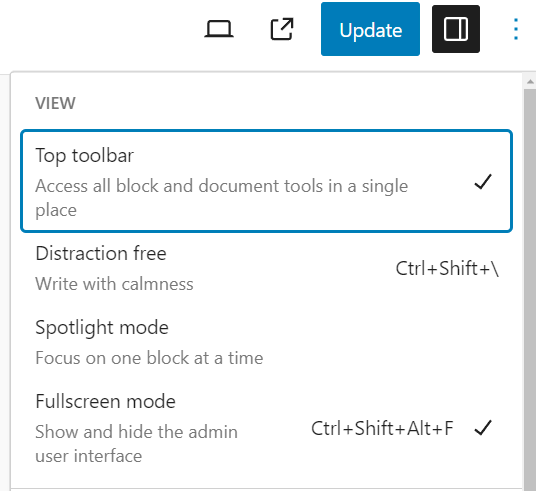
WordPress has some excellent options to improve your focus when creating content, including fixing the block toolbar at the top, enabling the distraction-free mode, and using the focus mode to highlight the active block.
However, one user experience issue remained for block theme users. If they set these options on the post editor, it wouldn’t be reflected in the Site Editor and vice versa.
I also experienced this issue when setting up my personal site with a block theme. I enjoyed the top toolbar feature on the Site Editor, but then the toolbar was back on the editor canvas when I started creating posts. This made it difficult to maintain a consistent editing environment and interrupted my flow.
Fortunately, WordPress 6.5 refactors the Site Editor to match the UI of the post editor, so you won’t experience the problem I had. Better still, it’s not just limited to the top toolbar but also other UI preferences, including:
- Distraction-free mode
- Editor mode
- Focus mode
- Hidden block types
- Block breadcrumbs
- Default list view mode
Applying this feature is pretty easy. Simply get into the post editor and set any interface preference. Then, go to the Site Editor. The UI should reflect the changes you made.
Renameable Blocks
One of the updates from WordPress 6.4 was the ability to rename container blocks, such as group, row, and stack, which allows easier navigation through the list view and better organization overall.
In WordPress 6.5, renaming is possible in almost all blocks, allowing even better content organization. There are two ways to rename a block.
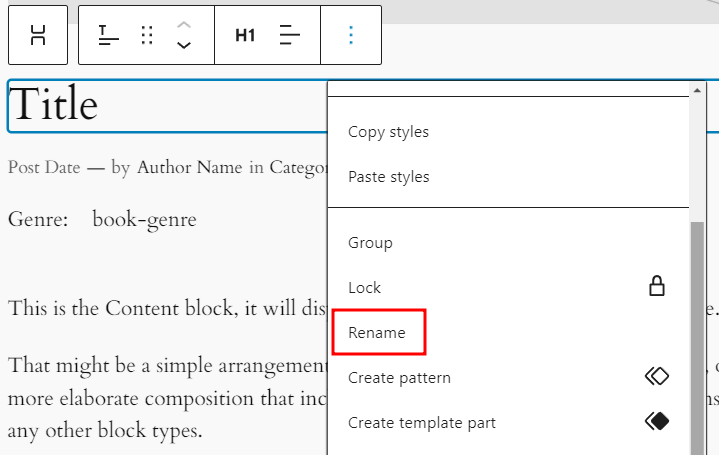
The first one is from the block toolbar. Simply select the block you want to rename and open the Options menu on the toolbar. Click Rename and enter your desired name on the pop-up panel.
I find this method more efficient when you’re still in the design or content creation process.
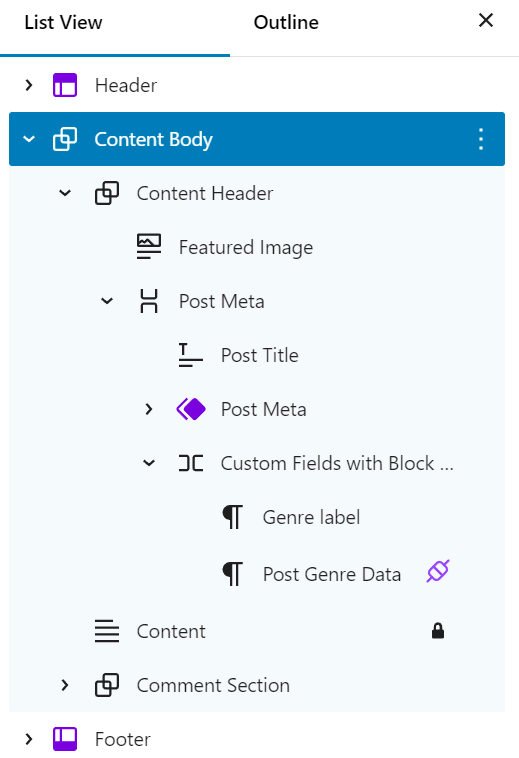
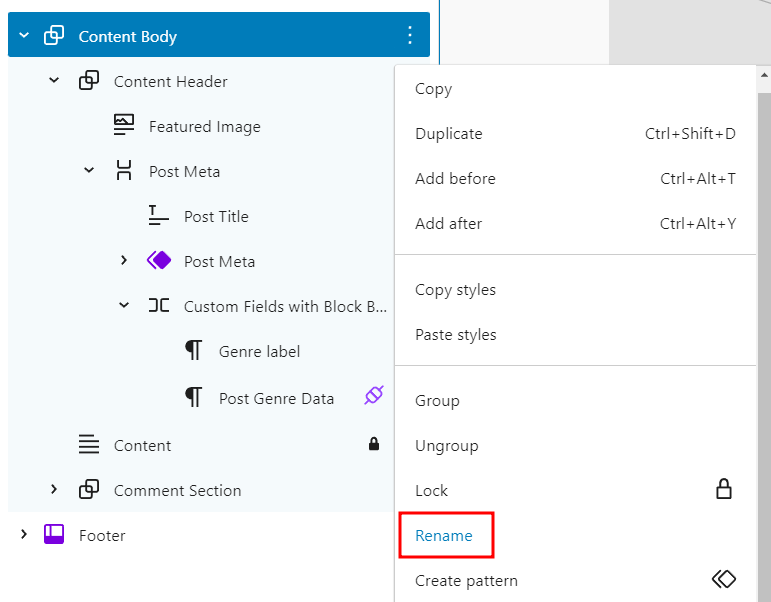
The second method is from the list view. To do it, open the list view on the editor and find the block you want to rename. Click the Options or ellipsis icon to open the drop-down menu and click Rename. You’ll see the same pop-up panel for adding the block name.
This is a better renaming method if you already have all the content laid out. It also makes it easier to have a better birds-eye view of the content structure.
As of WordPress 6.5, the following elements still don’t support the renaming feature:
- Template part
- Pattern
- Navigation block
- Navigation link block
If you’re creating a block-based WordPress site for a client and want to prevent them from renaming blocks, you can turn off this feature. All you have to do is set the support property to false in the block.json file using this code snippet from the developer note:
// block.json
{
	"supports": {
		"renaming": false // disables ability to rename block via the Editor UI
	},
}
AVIF Image Support
This new release also introduces AVIF image support, so uploading and displaying AVIF images on your WordPress site is now as easy as working with JPEG and PNG images.
If you’re not familiar with AVIF, it’s a new image format based on AV1 compression. It offers smaller file sizes yet the same, if not better, quality compared to JPEG images. With high dynamic range (HDR) capabilities, AVIF can be a better choice for image-heavy sites like photography portfolios.
From the browser side, AVIF is now supported in all major browsers. However, it’s still unsupported by a few mobile browsers, such as Opera Mini and KaiOS.
AVIF Limitation on Multisite
One caveat is that AVIF still doesn’t work on all sites within a WordPress multisite network. This is because the multisite sets the allowed file types when the site is created.
The developers are working on a solution to get around this issue. In the meantime, you can manually allow AVIF on all sites in the network by adding the site_option filter in a network must-use plugin.
// Ensure all network sites include AVIF support.
function filter_site_option_upload_filetypes( $filetypes ) {
	$filetypes = explode( ' ', $filetypes );
	if ( ! in_array( 'avif', $filetypes, true ) ) {
		$filetypes[] = 'avif';
	}
	return implode( ' ', $filetypes );
}
add_filter( 'site_option_upload_filetypes', 'filter_site_option_upload_filetypes' );
Minimum MySQL Version
In WordPress 6.5, the minimum required version for MySQL database is raised to 5.5.5. This is because MySQL 5.0 is no longer supported, and the minimum requirement for MySQL has been unchanged for over 12 years.
Only 0.4% of all WordPress sites currently run on MySQL 5.0 or 5.1, making it all the more reason to update the minimum supported version. That said, the recommended requirements for WordPress remain on MySQL 5.7.
If you host your WordPress site on Hostinger, don’t worry. Our managed WordPress hosting uses the MariaDB 10.11 database management system, a stable and compatible version to run WordPress.
Updating to WordPress 6.5
With the new version officially released, it’s time to update your WordPress site. It’s a simple process, but there are some precautionary steps you should take to ensure a safe and secure update.
First, back up your WordPress site. This will allow you to restore the website in case anything goes wrong during the update. If you’re not familiar with the steps, we have a comprehensive tutorial on how to create a WordPress backup.
Next, use a staging site to test the update. Updating directly on your live website can be risky, as visitors can experience errors or incompatibility issues.
By using a staging site, you can test the update and thoroughly inspect for issues. Once you’re sure there are no errors, update the live website.
With Hostinger, you can use our built-in staging feature that’s available on Business WordPress Hosting and all Cloud Hosting plans. Check out our WordPress staging tutorial to learn various methods to create a staging environment.


Leo is a Content SEO Specialist and WordPress contributor. Armed with his experience as a WordPress Release Co-Lead and Documentation Team Representative, he loves sharing his knowledge to help people build successful websites. Follow him on LinkedIn.