Create shipping labels for your Hostinger AI Builder manual mode online store orders using the Shippo integration, generating professional labels from 40+ global carriers without leaving your dashboard.
Step 1 – Install the Shippo app
Before creating labels, ensure your Shippo account is linked to your store:
- In Hostinger AI Builder, click Ellipsis more to navigate to Integrations and click Get started next to Shippo app.
- Select Get started.
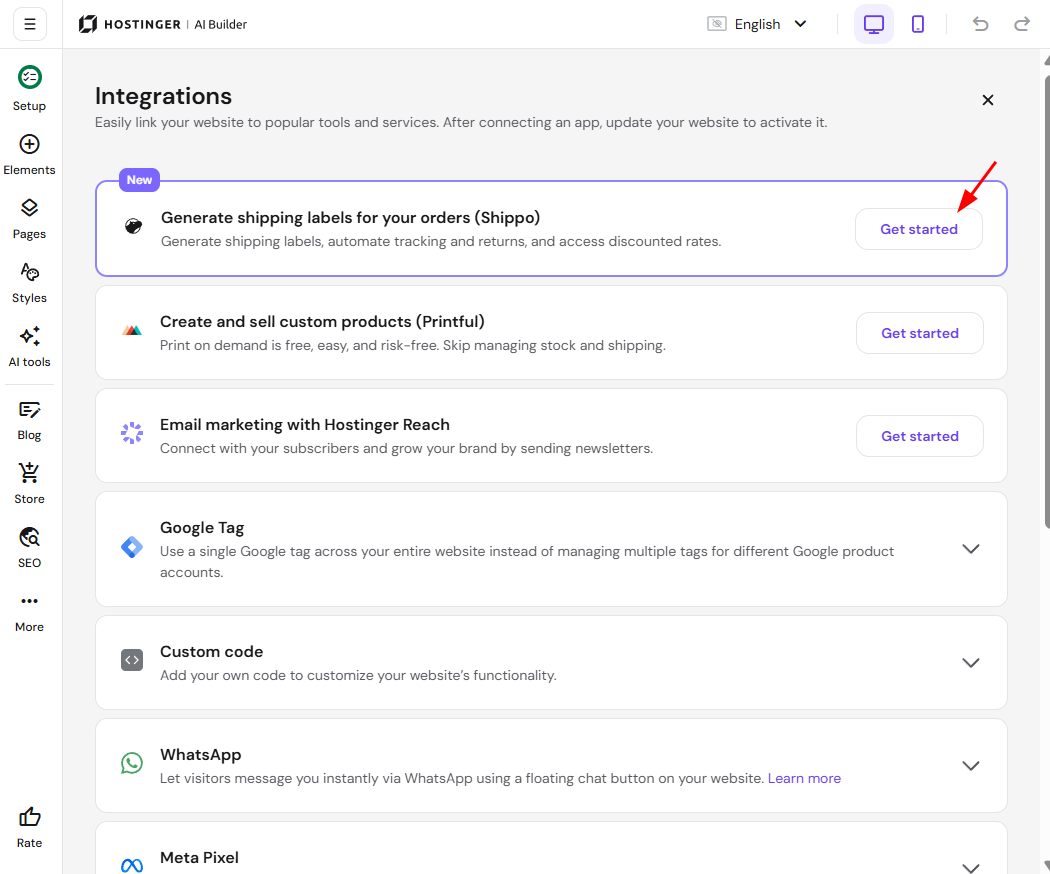
- Next, click Add Shippo and confirm app installation.
- After you install the app, you’ll be asked to log in or create a new Shippo account. Just follow the steps and connect the two together.
- Once the Shippo account is settled you’ll be redirected back to your Store Manager.
Step 2 – Create shipping labels
- From your Store Manager, go to the Orders page.
- Click on the Order that is ready for fulfillment.
- Inside the order details, look for the Shipping section and click the Create Shipping Label button. This will securely open the shipping label interface within your store.
- In the label creation window, you will need to confirm the package details:
- Shipping address: verify the customer’s address (this is pre-filled from the order).
- Package size & weight: enter the dimensions and weight of the box you are using.
- Carrier selection: Shippo will display a list of available carriers (e.g., UPS, DHL, FedEx) and their rates. Choose the option that best fits your budget and delivery speed.
- Once you’ve selected a rate, click Buy Label.
- The cost of the label will be charged to your Shippo account.
- Click Download Label to save it as a PDF.
- Print the label using a standard printer or a thermal label printer and attach it securely to your package.
Once the label is created, the order status will automatically update to Fulfilled, and the tracking number will be sent to your customer via email.