Connecting Google Calendar to your Hostinger AI Builder Appointments makes scheduling easier and ensures you never miss a booking. Once synced, all new appointments will automatically appear in your Google Calendar, keeping your schedule up-to-date across devices.
Before you begin
Make sure you have:
- A website with Appointments enabled
- A Google account
How to connect Google Calendar
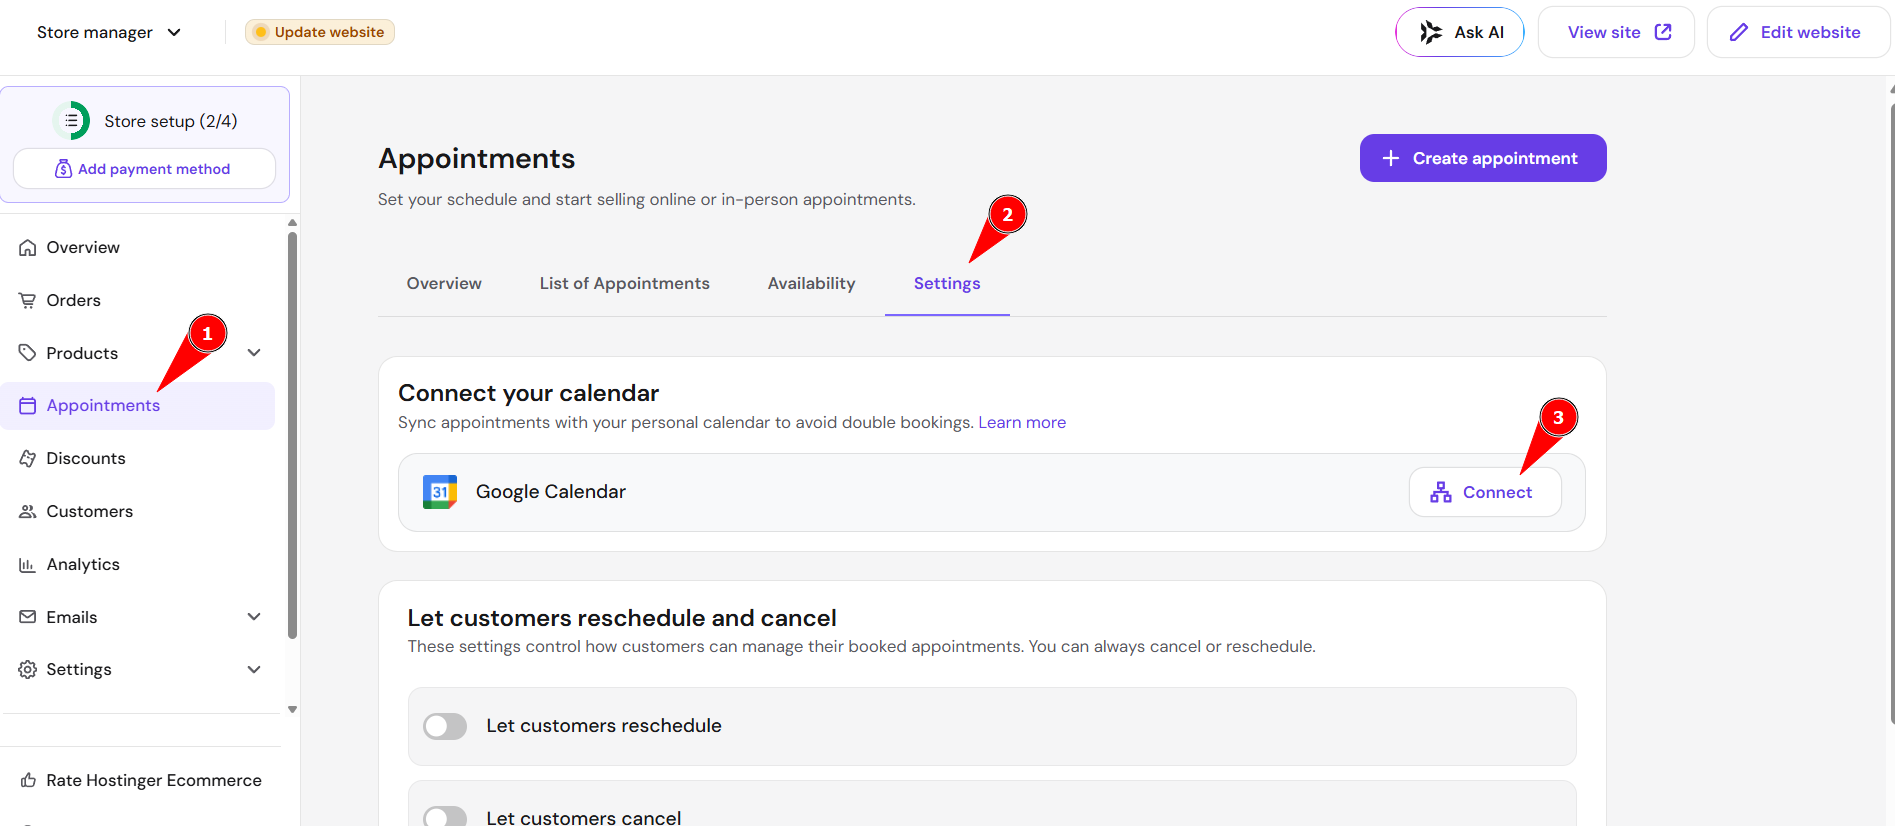
- Go to store management area
- Select Appointments
- Go to Settings
- Go to Google Calendar section and click Connect.

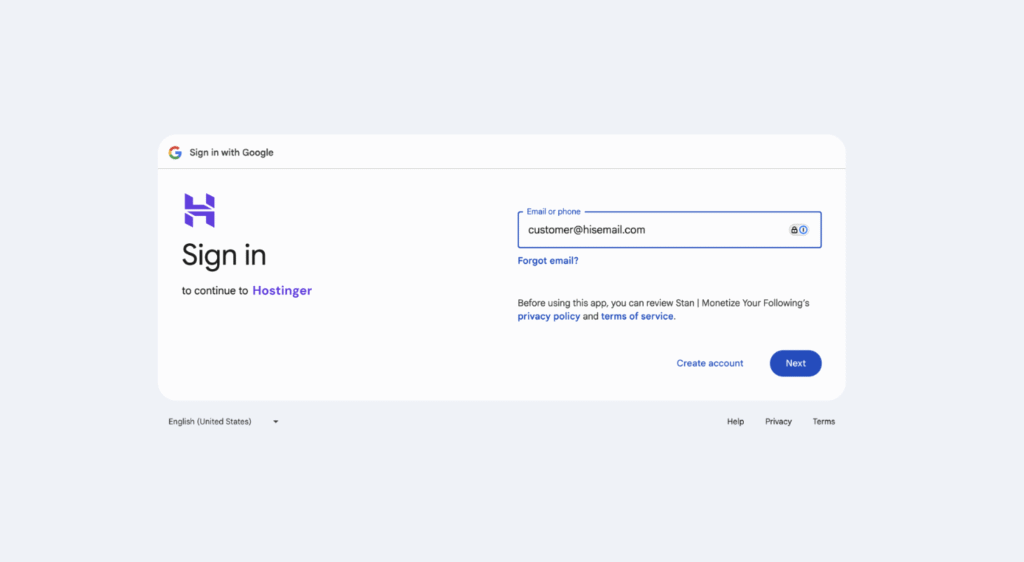
- You will be redirected to the Google authentication page. Select the Google account you want to sync with your appointments.

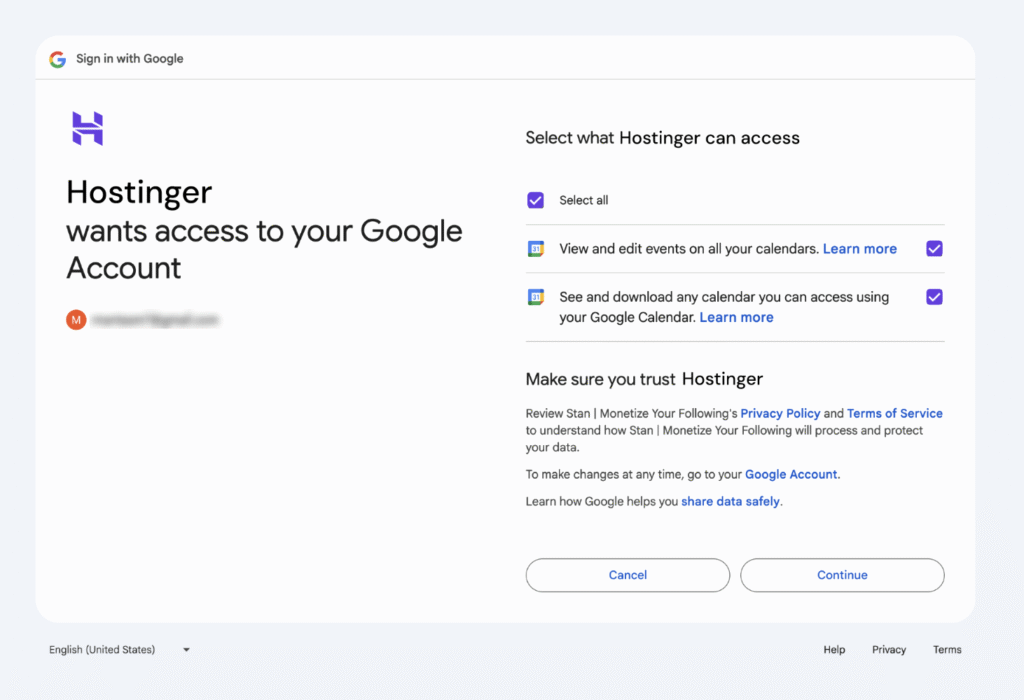
- Allow AI Builder access to view and add events to your calendar. This is required for your bookings to sync automatically.

- After granting access, you will be redirected back to the dashboard where you’ll see the integration marked as Connected.
What happens after connecting your Google Calendar
Once connected:
- New appointments are automatically added to your Google Calendar.
- You can see booking details (name, service, time, contact info) inside each calendar event.
- Edits made directly in Google Calendar won’t change the appointment inside Hostinger AI Builder.
- Canceled or rescheduled bookings will update automatically.
How to disconnect Google Calendar
If you want to stop syncing bookings:
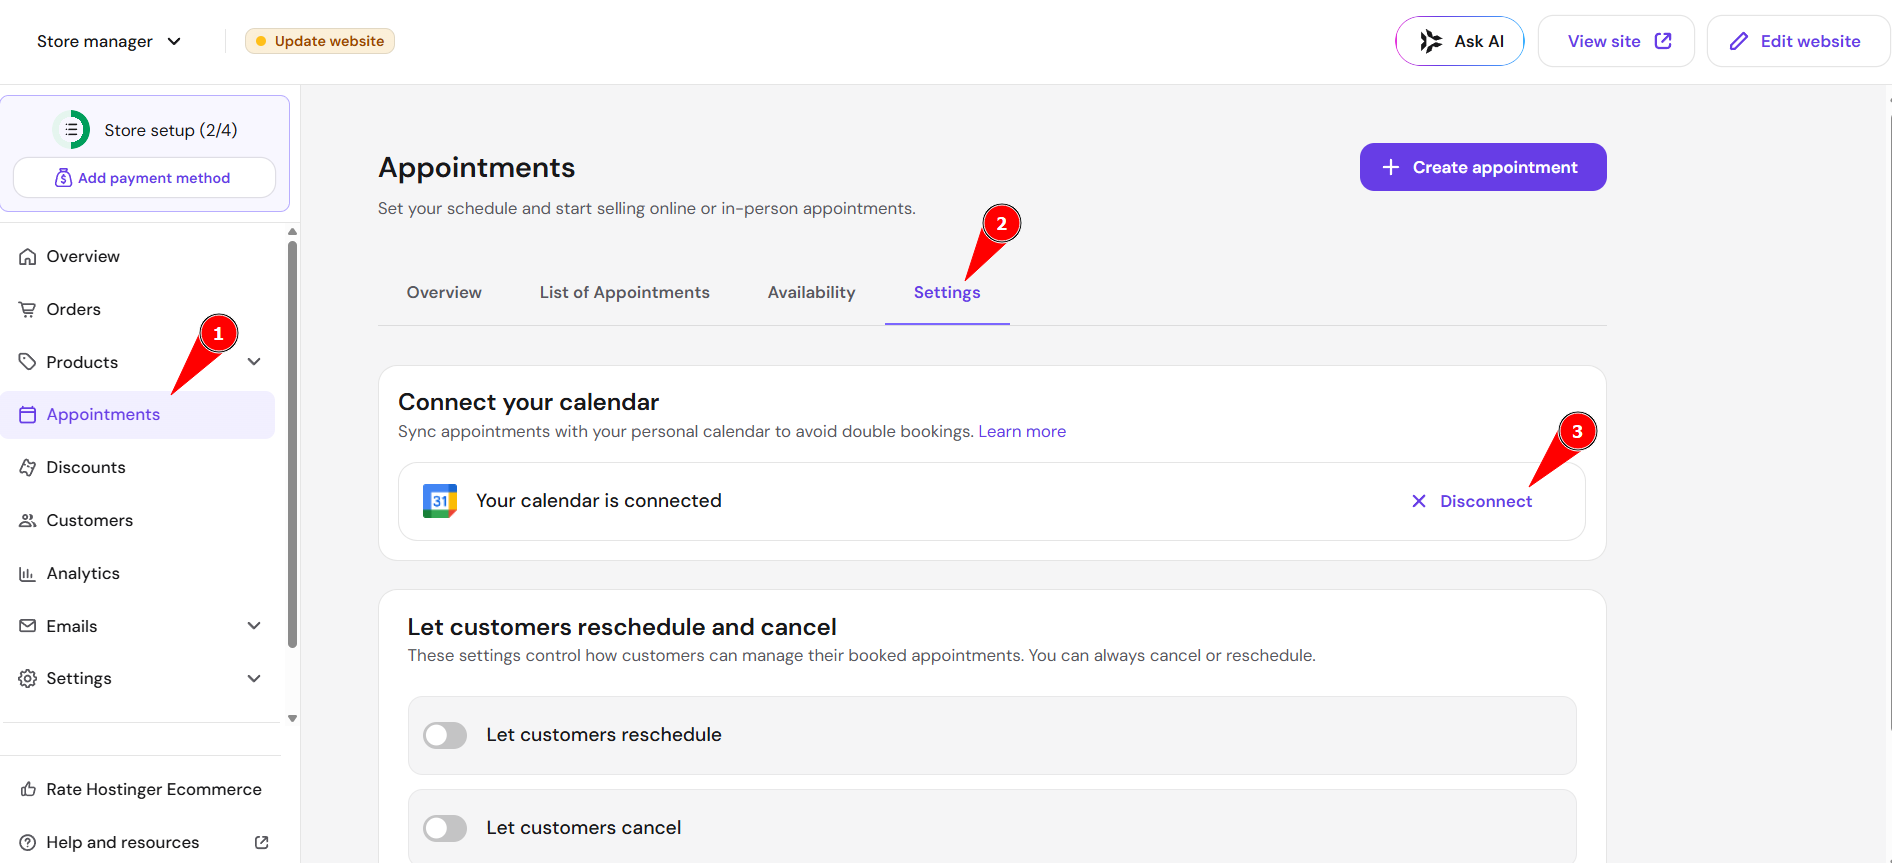
- Go to Store Manager → Appointments → Settings
- Find Google Calendar and click Disconnect.
- Confirm the action.
Your existing appointments remain, but new bookings won’t sync anymore.